
Using a back roller for self-massage—often called self-myofascial release—is a highly effective way to relieve muscle tightness, improve flexibility, and ease the daily physical strains of modern life. Whether you are recovering from an intense workout, dealing with the physical toll of a long commute, or sitting at a desk for hours in an air-conditioned office, a back roller offers targeted relief. To use a back roller safely and effectively, you must focus on slow, controlled movements, target the correct anatomical zones, and respect your body’s physical boundaries. Rolling out your back is not about rolling your entire spine from top to bottom; rather, it is a precise practice of releasing specific muscle groups while protecting vulnerable joints and bones.
Back Roller Benefits and Safety Boundaries to Know First
Myofascial release works by applying localized pressure to the myofascial system, which consists of the tough, flexible membranes that wrap and support your muscles. Over time, stress, repetitive movements, or poor posture can cause these tissues to become tight, dry, and adhered to one another, resulting in knots or trigger points. When you apply steady pressure with a back roller, you stimulate blood flow to the area, rehydrate the fascia, and encourage the muscle fibers to relax and lengthen. This process helps alleviate persistent muscle stiffness, increases your active range of motion, and accelerates recovery after physical exertion.
While myofascial release offers substantial benefits, it is not suitable for everyone, and understanding your safety boundaries is critical before you begin. Certain physical conditions make the deep pressure of a roller dangerous. You must consult a healthcare professional before using a back roller if you have acute spinal injuries, osteoporosis, severe herniated discs, or unexplained, chronic back pain. Pregnant individuals should also seek medical guidance, as structural changes and hormonal shifts affect ligament laxity and spinal alignment.
Products mentioned in this guide
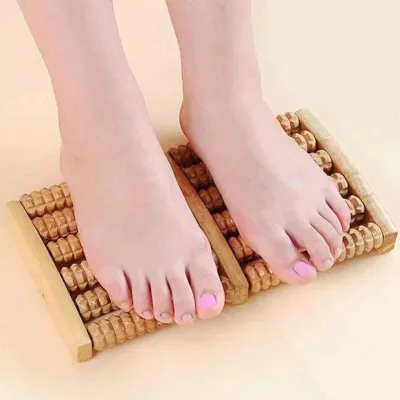
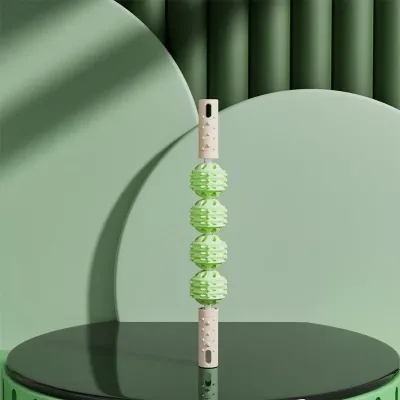
Prices are valid at publication and may change. Please refer to the product page for the latest price.
It is vital to remember that a back roller is designed as a preventative maintenance and recovery tool, not a medical cure. If you are experiencing structural spinal issues, nerve compression, or inflammatory joint diseases, a roller cannot correct the underlying pathology and may exacerbate the condition if used incorrectly. Always view self-massage as a supportive practice alongside professional medical care and structured physical therapy.
How to Choose the Right Back Roller and Set Up
Selecting the right back roller is the first step toward a safe and comfortable recovery routine, and your choice should align with your experience level and sensitivity. Foam rollers come in various densities, typically categorized as soft, medium, and firm. Beginners or individuals with high pain sensitivity should start with a soft roller, which provides gentle pressure without bruising delicate tissues. Medium-density rollers offer a balanced option for general use, while firm rollers—often made of high-density expanded polypropylene (EPP)—are best reserved for deep tissue work and experienced users who require intense pressure. In warm, humid tropical climates like the Philippines, high-density rollers tend to maintain their structural integrity better over time, whereas softer open-cell foam rollers may degrade faster under high humidity.

The surface texture of the roller also dictates the type of massage experience you will receive. Smooth rollers distribute your body weight evenly across a broad surface area, making them ideal for general flushing of the muscles and broad tension relief. In contrast, grid or bumpy rollers feature raised patterns designed to mimic a massage therapist’s fingers and palms. These textured surfaces penetrate deeper into the muscle tissue, allowing you to target specific, stubborn trigger points, though they require a higher tolerance for localized pressure.
Roller length is another practical consideration that affects both usability and storage. Long rollers, measuring approximately 36 inches, provide excellent stability and are long enough to support your entire spine horizontally or vertically, making them highly versatile for beginners. Short rollers, ranging from 12 to 18 inches, are highly portable, easy to pack for travel, and ideal for targeting localized areas like the upper back or latissimus dorsi. If you live in a compact urban apartment, a shorter roller is also much easier to store out of sight when not in use.
To set up a safe rolling environment, always place your roller on a high-quality, non-slip yoga mat rather than directly on a slick tile or wooden floor. A mat provides essential traction, preventing the roller from sliding out from under you mid-movement, and offers cushioning for your hands, elbows, and feet. Ensure you have a clear, open space free of furniture or obstacles so you can move your body freely without restriction or risk of bumping into sharp edges.
Step-by-Step Back Roller Techniques for Tension Relief
Upper Back and Thoracic Spine
The upper back and thoracic spine are the safest and most beneficial areas to target with a back roller, as this region is structurally supported by the rib cage. To begin, sit on your yoga mat with your knees bent and your feet flat on the floor, spaced about hip-width apart for optimal balance. Place the foam roller horizontally on the mat directly behind you, resting against your mid-back, just below your shoulder blades. Gently lean back so your weight is supported by the roller, and position your hands either crossed over your chest or cradling the back of your head. If you place your hands behind your head, ensure you are only supporting the weight of your head and not actively pulling or straining your neck forward.
Once you are securely positioned, press firmly through your feet and lift your hips slightly off the floor, keeping your core engaged to maintain a neutral spine. Slowly and mindfully push and pull with your legs to roll your body back and forth over the roller. Move the roller from the base of your neck down to the bottom of your ribcage, avoiding the lower back entirely. Keep your breathing slow and steady as you move, allowing your muscles to drape over the roller rather than tensing up against the pressure.
As you roll, you will likely encounter specific areas that feel exceptionally tight, tender, or knotted. When you find one of these tender spots, stop rolling and hold the position, letting the roller apply steady pressure directly to the knot. Keep your hips raised and take three to four deep, slow belly breaths, consciously relaxing the target muscle with each exhalation. Hold this trigger point pressure for 20 to 30 seconds before moving on, allowing the sustained compression to signal your nervous system to release the muscle tension.
Mid-Back and Latissimus Dorsi
To address tension along the sides of your torso and mid-back, you can shift your body weight to target the latissimus dorsi. The lats are large, broad muscles that run down the sides of your back and can become incredibly tight from overhead lifting, swimming, or sitting with rounded shoulders. To target this area, lie on your side with the roller positioned horizontally under your armpit, slightly behind your shoulder joint. Angle your chest slightly upward toward the ceiling, turning your body at roughly a 45-degree angle to ensure you are pressing into the muscle tissue rather than directly onto the ribs or armpit nerves.
Proper arm positioning is crucial for accessing the latissimus dorsi effectively without causing discomfort. Extend your bottom arm straight out along the floor, keeping your palm facing upward to open up the shoulder joint and expose the muscle belly. You can use your top hand to press into the floor in front of you for stability, and bend your top leg, placing your foot flat on the floor to help guide and control your movement. This setup allows you to precisely regulate how much of your body weight is transferred onto the roller.
With your body positioned, slowly roll a few inches down toward your mid-back and then back up toward the armpit, keeping the movements exceptionally slow and controlled. Because the lateral ribs and underarm areas are highly sensitive and contain superficial nerves, avoid rapid bouncing or aggressive rolling. If the pressure feels too intense, use your feet and supporting hand to lift more of your weight off the roller, keeping the pressure firm but manageable.
Lower Back (Lumbar) Safety and Alternatives
A fundamental safety rule of foam rolling is to avoid using a hard foam roller directly on your lower back, or lumbar spine. Unlike the thoracic spine, which is supported and stabilized by the rib cage, the lumbar spine lacks surrounding bony protection and is highly vulnerable. Rolling this area directly can force your lower back into hyperextension, placing excessive, concentrated pressure on the spinal vertebrae and compressing the delicate lumbar discs. Furthermore, the deep pressure can cause the surrounding lower back muscles to seize up in a protective spasm, achieving the exact opposite of the relaxation you desire.
Fortunately, you can safely relieve lower back tension by targeting the connected fascial lines in your glutes, hips, and hamstrings, which are often the true source of lumbar tightness. To do this, sit directly on top of the foam roller, cross one ankle over the opposite knee to open up the hip, and lean slightly toward the side of the crossed leg to roll out your gluteal muscles. Alternatively, you can use a smaller, targeted massage ball, such as a lacrosse or tennis ball, while standing against a wall. Place the ball against the wall and press it into your glutes or the outer muscles of your hips, rolling gently to release tension without putting any direct pressure on your spine.
Incorporating gentle, static stretches is another highly effective and risk-free alternative for relaxing a tight lower back. After rolling your glutes and upper back, transition into a classic child’s pose on your yoga mat. Kneel on the floor, touch your big toes together, sit back on your heels, and fold your torso forward, extending your arms along the mat in front of you. Hold this position for one to two minutes, breathing deeply into your lower back to stretch the lumbar muscles naturally without mechanical compression.
Common Rolling Mistakes and Clear Warning Signs
To get the most out of your recovery sessions and prevent self-inflicted injuries, you must recognize and correct common rolling mistakes. One of the most frequent errors is rolling too quickly, which triggers a protective stretch reflex that causes muscles to tighten rather than relax. Another common mistake is holding your breath or breathing shallowly, which deprives your tissues of oxygen and keeps your sympathetic nervous system in a tense, “fight-or-flight” state. Additionally, never roll directly over bony landmarks, such as your spinal vertebrae or the shoulder blades themselves, as this can cause painful bruising and inflammation of the periosteum.
It is essential to dismantle the “no pain, no gain” myth when it comes to myofascial release. Effective foam rolling should involve a level of discomfort, often described as a “good pain”—a deep, dull ache or a melting sensation that feels like a productive stretch or release. In contrast, “bad pain” is sharp, pinching, hot, or localized in a joint. If a movement feels intensely painful or causes you to grimace and tense up your entire body, the pressure is too high, and your muscles will fight the release.
You must establish strict stop conditions for your rolling sessions to protect your neurological and musculoskeletal health. Stop rolling immediately and seek professional medical advice if you experience sharp or shooting pain, numbness, tingling, or a “pins and needles” sensation. These symptoms indicate nerve compression or irritation. Similarly, if you experience dizziness, nausea, or pain that radiates down your arms or legs, cease the exercise immediately, as these are clear warning signs of a more serious underlying issue that requires clinical evaluation.
Post-Massage Care to Maximize Recovery
What you do after your back roller session is just as important as the massage itself for maximizing your recovery and maintaining muscle health. Hydration is a critical post-massage step; drinking plenty of clean water helps rehydrate the fascia and muscle tissues that were just compressed. Think of your muscles like a sponge: rolling squeezes out metabolic waste products, and drinking water allows the tissues to soak up fresh fluids, promoting cell repair and reducing post-rolling soreness.
Following your rolling session with gentle, dynamic stretching helps lock in the mobility gains you just achieved. Perform light movements, such as gentle torso twists or cat-cow stretches on your hands and knees, to move your joints through their newly freed range of motion. This active movement signals to your nervous system that this increased flexibility is safe to maintain, preventing the muscles from immediately tightening back up.
To verify the effectiveness of your session, perform a simple self-assessment by moving your back and shoulders through their normal ranges of motion. Note whether your chest feels more open, your shoulder blades move more smoothly, or the overall stiffness in your back has decreased. For sustainable results, aim to use your back roller three to four times a week for maintenance, rather than performing daily, high-intensity sessions that do not give your muscle tissues adequate time to rest and recover.
Frequently Asked Questions (FAQ)
How long should I use a back roller each day?
A complete back rolling session should generally last between 10 and 15 minutes to avoid overworking the tissues. Within that session, limit the time spent on any single muscle group or specific trigger point to 1 to 2 minutes. Applying deep pressure to one spot for too long can restrict blood flow, irritate nerves, and lead to bruising or localized tissue inflammation rather than relief.
Can I use a back roller if I have scoliosis or a herniated disc?
If you have scoliosis, a herniated disc, or any other structural spinal condition, you must consult your physical therapist or physician before using a back roller. Applying direct, unguided pressure to compromised, asymmetrical, or unstable spinal structures can worsen disc herniation or irritate surrounding nerves. A medical professional can provide customized guidelines or suggest safer, targeted alternatives tailored to your specific spinal alignment.
Community discussion
Share your experience or ask a question. Comments are reviewed before publication.