
Choosing between a balance bike and a pedal bike with training wheels for a three-to-five-year-old boy in the Philippines often comes down to matching his physical coordination with your local riding environment. While balance bikes excel at teaching core stability and steering on uneven neighborhood pavements, pedal bikes with training wheels offer immediate stability for children who might feel hesitant on two wheels. The right choice depends on your child’s current motor skills, confidence level, and where they will spend most of their riding time, whether that is a smooth subdivision driveway or a local barangay basketball court.
Balance Bikes vs. Pedal Bikes: How Each Teaches Riding Skills
Balance bikes are designed without pedals, chains, or training wheels, forcing a child to sit on the saddle and push themselves forward using their feet. This design isolates the two most challenging aspects of riding: balancing and steering. By removing the need to pedal, a young boy can focus entirely on how his body weight affects the bike’s lean. When the bike tilts, he naturally learns to steer into the turn to stay upright. This builds deep muscle memory and core stability that translates directly to a standard bicycle later on.
Pedal bikes with training wheels introduce pedaling immediately but rely on two small auxiliary wheels to keep the bike upright. While this provides instant gratification and allows a child to ride without falling, it changes the steering mechanics. On a bike with training wheels, the rider steers by turning the handlebars like a car, rather than leaning into the turn. If they lean, the training wheels prevent the bike from tilting, which can lead to a false sense of balance. When the training wheels eventually come off, the child must unlearn this steering habit and relearn how to balance from scratch.
Products mentioned in this guide
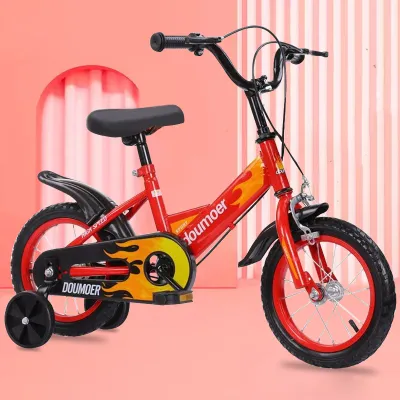
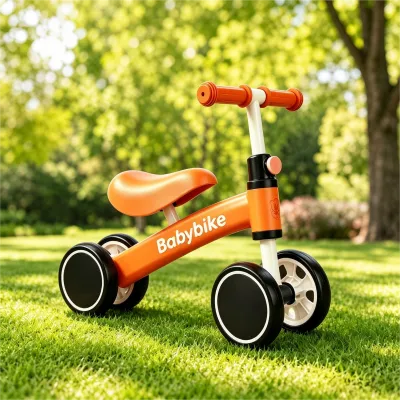
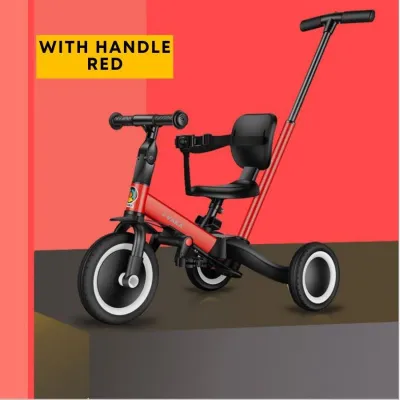
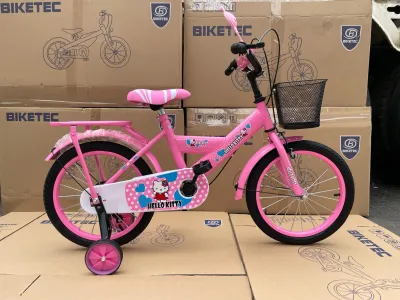
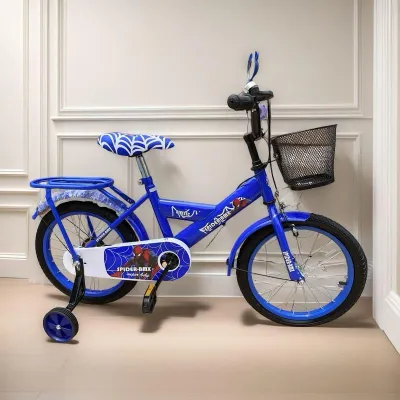
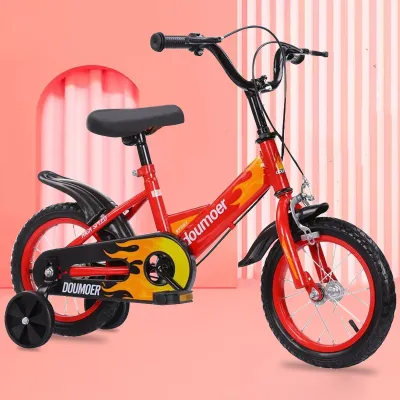
Prices are valid at publication and may change. Please refer to the product page for the latest price.
Between the ages of three and five, boys undergo rapid physical changes. Their gross motor skills are developing, but their bilateral coordination—using both sides of the body to perform different actions simultaneously—is still maturing. Pedaling requires one leg to push down while the other relaxes and moves up, all while the hands steer and the eyes look ahead. For many three-year-olds, this cognitive load is overwhelming. By age five, leg strength and spatial awareness have typically progressed to a point where managing both pedaling and balancing becomes more intuitive.
Sizing and Fit: How to Measure Your Child for the Perfect Bike
Do not rely on age alone when choosing a bike, as children grow at vastly different rates. The most accurate metric is your child’s inseam length. To measure this at home, have your boy stand against a flat wall wearing the shoes he will use for riding. Place a hardcover book between his thighs, snug against his crotch to simulate a bike saddle. Mark the wall at the top edge of the book, then measure from that mark down to the floor. This measurement is his actual inseam.

Compare this inseam measurement to the manufacturer’s specified minimum seat height. For a balance bike, the minimum seat height should be slightly lower than his inseam—ideally by about two to three centimeters. This gap ensures his feet can rest completely flat on the ground with a slight bend in his knees. A flat-footed stance is critical because it allows him to push off powerfully, run with the bike, and use his feet as brakes when stopping.
For a pedal bike, the fit requirements change slightly depending on whether training wheels are used. If your child is using training wheels, he can sit with only his tiptoes touching the ground because the auxiliary wheels keep the bike upright. However, if he is transitioning to riding without training wheels, he needs to be able to touch the ground with the balls of both feet to maintain control when stopping.
Have your child sit on the bike and grasp the handlebars to check his reach. His arms should be slightly bent at the elbows, allowing him to turn the wheel fully to both sides without overstretching his shoulders or losing his grip. If the bike features hand brakes, verify that his fingers can comfortably reach and squeeze the levers. Small hands often lack the grip strength or reach for adult-style levers, so look for child-specific, short-reach levers that can be adjusted closer to the handlebar grip.
Assessing Readiness: Matching the Bike to Your Child's Confidence
Look at how your child interacts with his environment to assess his readiness. If he runs confidently, jumps off small steps, and easily maneuvers foot-to-floor ride-on toys, he likely has the physical coordination needed for a balance bike. A child who shows curiosity about speed and enjoys physical challenges will often adapt to a balance bike within a few sessions, quickly progressing from walking the bike to gliding with his feet off the ground.
Some children are naturally more cautious or hesitant. If your boy prefers structured, predictable movements and dislikes the feeling of instability, a pedal bike with training wheels can offer a comforting sense of security. This setup is also beneficial for children with specific physical development needs or lower muscle tone, where the constant support of training wheels allows them to build leg strength through pedaling without the fear of falling over.
The riding surface in your neighborhood should also influence your choice of tires. Foam tires are puncture-proof, lightweight, and maintenance-free, making them excellent for smooth indoor floors, tiled patios, or flat concrete driveways. However, they offer less traction on loose gravel or wet surfaces. Air-filled pneumatic tires provide superior grip, shock absorption, and stability on rougher terrain, such as cracked asphalt, park grass, or gravel paths. If you plan to ride outdoors during the humid, wet conditions of the Philippine rainy season, air-filled tires with deep treads offer better slip resistance on damp concrete.
Building Your Shortlist: Key Features to Compare Before Buying
Frame weight is one of the most critical factors in how easily a young child can handle a bike. Aluminum frames are highly recommended because they are lightweight, rust-resistant, and easy for a three-year-old to lift and maneuver. Steel frames are incredibly durable and can withstand rough handling, but they are significantly heavier. A heavy bike can frustrate a small child, making it difficult for them to push uphill or pick up the bike after a fall. In the humid tropical climate of the Philippines, aluminum also holds up better against rust compared to steel if stored in a damp garage or outdoor patio.
Balance bikes are typically stopped using the rider’s feet, but some models include a rear hand brake to teach braking habits early. Pedal bikes usually feature either coaster brakes, which engage when the child pedals backward, or hand brakes. Coaster brakes are intuitive for beginners because they rely on leg strength, which is often more developed than hand strength. However, they can make it difficult for a child to position their pedals correctly when starting from a stop. If choosing hand brakes, verify that the levers are designed specifically for children’s small hands and require minimal force to operate.
As a general guideline, a child’s bike should not weigh more than thirty percent of their total body weight. If a four-year-old boy weighs sixteen kilograms, his bike should ideally weigh less than 4.8 kilograms. A bike that is too heavy will feel unwieldy, causing the child to lose balance more easily and making the learning process tiring and discouraging. Always check the product specifications for the exact weight of the bike before making a purchase.
Essential Safety Gear and Accessories for Young Riders
A helmet is the single most important piece of safety gear. To ensure a proper fit, the helmet should sit level on your child’s head, positioned about two finger-widths above his eyebrows. The side straps should form a clean “V” shape just beneath his earlobes, and the chin strap should be snug enough that only one or two fingers can fit between the strap and his chin. When purchasing a helmet in the Philippines, look for official safety certification markings, such as the Import Commodity Clearance (ICC) sticker or the Philippine Standard (PS) mark, which verify that the helmet has passed local safety evaluations.
Knee and elbow pads provide essential joint protection during the inevitable falls that occur while learning to ride. Beyond physical protection, wearing pads builds psychological confidence. A child who knows that a fall will not result in scraped knees is much more willing to take risks, push off harder, and practice balancing on uneven surfaces. Look for pads with adjustable hook-and-loop straps that can be tightened securely over tropical clothing without slipping.
Shared public spaces, such as subdivision roads, local parks, and barangay courts, often feature pedestrian and vehicular traffic. To keep your young rider visible, equip the bike with bright wheel reflectors and a loud, easy-to-operate handlebar bell. These accessories help alert pedestrians and other riders of his presence, especially during the late afternoon hours when the tropical sun begins to set and visibility decreases.
Frequently Asked Questions (FAQ)
Can I convert a balance bike into a pedal bike later?
Some specialized balance bikes are designed with modular frames that allow you to install a pedal kit, crankset, and chain once your child is ready to transition. Before purchasing, check the manufacturer’s specifications to see if they offer an official, compatible conversion kit for that specific model. However, for many standard balance bikes, conversion is not structurally possible or cost-effective. Buying a dedicated pedal bike later is often more practical, as it ensures the frame geometry, bottom bracket, and braking systems are engineered specifically for pedaling forces, providing a safer and more durable ride.
How do I know when my child is ready to remove the training wheels?
Observe how your child rides with the training wheels attached. If he constantly leans heavily to one side, relying on the outer wheels for support, he is not yet balancing independently. A key sign of readiness is when he can ride straight on flat ground with both training wheels remaining off the pavement, indicating he is maintaining balance using his core. To transition, try gradually raising the training wheels a few millimeters at a time over several days. This forces him to balance more on the main tires while keeping the training wheels close enough to catch him if he tilts too far, building his confidence before you remove them completely.
Community discussion
Share your experience or ask a question. Comments are reviewed before publication.