
Quick Answer: What to Look for in a Beginner Hand Grip Strengthener
To find a beginner-friendly hand grip strengthener that offers true hand grip ease, focus on three pillars: adjustable resistance, ergonomic non-slip handles, and a design that supports a natural range of motion.
Adjustable resistance is crucial because it allows you to start at a very low tension—often starting around 5 kilograms—and gradually increase the load as your hands adapt. This prevents early muscle fatigue and ensures you do not strain your joints before your tendons have built foundational strength.
Ergonomic, non-slip handles prevent painful blisters and reduce localized pressure points on your palms. Look for contoured shapes that distribute the squeezing force evenly across your fingers rather than concentrating it in one spot.
Products mentioned in this guide
![[Lixada Official ] Hand Gripper Adjustable Resistance Hand Grip Strength Trainer Fingers Wrist Forearm Exerciser Workout Gear Home Gym Exercise Equipment(local stock)](https://img.lazcdn.com/g/p/c271835b0d161cb2dc8f3f844d529175.jpg_400x400q80.jpg_.webp)
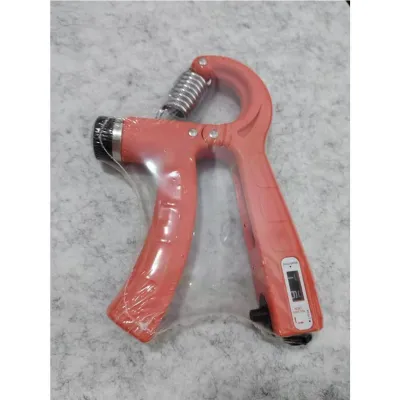
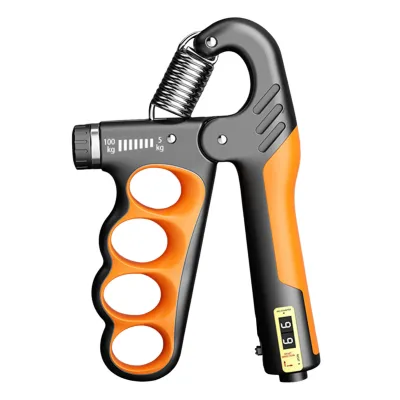
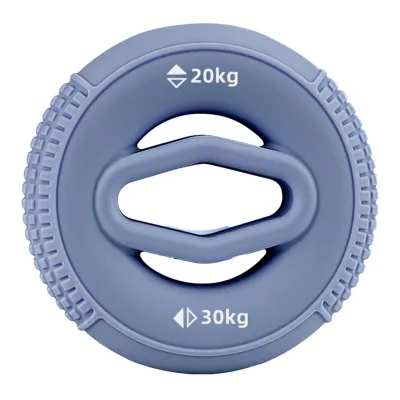
Prices are valid at publication and may change. Please refer to the product page for the latest price.
A design that allows a full range of motion ensures you can close the gripper completely without straining your finger joints or wrists. This complete movement pattern is essential for building functional strength throughout the entire hand and forearm.
Types of Hand Grip Strengtheners for Beginners
Hand grip tools generally fall into two main categories: rigid mechanical devices and flexible elastomeric tools. Each type targets different muscle groups in your hands, fingers, and forearms, and choosing the right design depends heavily on your hand size, comfort preferences, and specific training goals.

Adjustable Coil Grippers
These traditional tools use a steel tension spring connected to two handles. For beginners, the primary benefit of an adjustable coil gripper is its versatility; a single tool can adjust from a light resistance up to a heavy load via a simple dial. This wide range ensures that your starting level is highly manageable and allows you to progress without buying new equipment.
When evaluating these grippers, pay close attention to the handle width and materials. Beginners often struggle with handles that are spaced too far apart, which forces the hand into an awkward, weak position at the start of the squeeze. Look for models with a moderate handle spread that fits comfortably in your palm, allowing your fingers to wrap around securely.
In the humid, tropical climate of the Philippines, mechanical wear is a key consideration. Sweat and moisture can cause steel springs to squeak or rust over time, while plastic handles may loosen or crack under high tension. Choosing a model with a rust-resistant coating on the spring and a reinforced core will ensure long-term durability.
Silicone Grip Rings and Bands
If you prioritize portability, quiet operation, and joint comfort, flexible silicone tools are an excellent alternative to mechanical grippers. These tools typically come in two forms: solid silicone rings that you squeeze inward, and resistance bands that loop around your fingers to train outward extension.
Unlike coil grippers where you turn a dial, silicone rings require you to stack different rings or purchase a set with color-coded resistance levels. This makes progression slightly less granular, but the soft, yielding surface of silicone is highly forgiving on sensitive skin and smaller hands.
Silicone is also exceptionally durable, hygienic, and easy to clean. In warm weather, hands naturally sweat during workouts; silicone rings can be washed quickly with mild soap and water to prevent bacterial buildup and maintain a secure, non-slip texture.
Key Features That Define Hand Grip Ease and Comfort
Achieving true hand grip ease requires looking past basic aesthetic designs and analyzing the physical construction of the tool. The texture and contouring of the handles are the first line of defense against hand fatigue. Smooth, hard plastic handles can slip when your hands get sweaty, forcing you to squeeze harder just to maintain control, which can lead to blisters. Conversely, overly aggressive knurling can scrape sensitive skin. Look for handles with soft rubberized overlays or ergonomic finger grooves that distribute pressure evenly across your palm.
Another critical factor is how you interpret manufacturer resistance claims. Many budget-friendly grippers advertise high resistance levels, but these numbers are often uncalibrated or inconsistent. Instead of relying solely on the printed numbers on the dial, verify the actual feel by checking user feedback regarding the tension curve. A high-quality gripper should feel smooth throughout the entire squeeze, rather than starting extremely loose and suddenly becoming impossibly stiff at the end.
The quality of the spring mechanism also dictates your overall experience. Squeaky springs can be highly distracting, especially if you plan to use your gripper in quiet environments like an office, a classroom, or while watching television at home. Look for models that feature tightly wound, high-tensile steel springs that operate silently.
Finally, watch out for common design flaws that compromise comfort. Poorly aligned handles can cause the gripper to twist in your hand as you squeeze, putting lateral strain on your fingers. Sharp plastic seams along the edges of the handles are another frequent issue in low-cost manufacturing; these seams can dig into your skin and make training painful. Inspecting product photos closely for clean, rounded edges can save you from a frustrating purchase.
How to Start Training Safely and Track Progress
Starting a hand grip routine requires patience to avoid strain, as the tendons and ligaments in your hands take longer to adapt to resistance than larger skeletal muscles. Before you begin squeezing, always perform a brief warm-up. Gently flex and extend your fingers, rotate your wrists in both directions, and massage your forearms for a minute or two to promote blood flow and joint lubrication.
For beginners, a safe and effective starting routine consists of 2 to 3 sets of 10 to 15 controlled repetitions per hand. Focus on a slow, deliberate tempo: squeeze the gripper closed over a count of two seconds, hold the fully closed position for one second, and then release it slowly over another two seconds. Avoid rapid, bouncy movements, which reduce muscle engagement and increase the risk of joint strain. Rest for about 60 to 90 seconds between sets to allow your muscles to recover.
Tracking your progress should be based on how your hands feel rather than rushing to turn the resistance dial. If you can complete all 3 sets of 15 repetitions with perfect form and no joint discomfort, you can slightly increase the tension. However, if you experience lingering stiffness in your fingers, a dull ache in your wrists, or a sudden drop in your gripping power, these are clear signals that your hands need a rest day or that the resistance is set too high.
To maintain long-term joint health, it is vital to balance your training. Squeezing a gripper primarily works your hand flexors. To prevent muscle imbalances and conditions like tennis elbow, balance this work by training your hand extensors. You can do this easily by using silicone finger resistance bands to stretch your fingers outward against resistance, ensuring that both sides of your forearm develop evenly.
What to Verify Before Buying from Online Marketplaces
When shopping on local e-commerce platforms in the Philippines, a systematic approach will help you find a reliable hand grip strengthener. Start by checking seller ratings and reading recent customer reviews. Pay close attention to reviews that mention how the product holds up after several weeks of use, as well as comments on whether the actual resistance matches the product description.
Always verify the store’s return and replacement policy. Because hand sizes and starting strength levels vary greatly, you want the flexibility to return the item if the handle spread is too wide or if the minimum resistance feels too heavy for your current level.
Compare shipping costs and estimated delivery times. Many sellers ship from overseas, which can lead to longer wait times, while local sellers based in Metro Manila or regional hubs can often deliver within a few days. If you want to start training quickly, filtering for local inventory is a practical step.
Lastly, scrutinize the product images provided by both the seller and previous buyers in the review section. Look for clear close-ups of the handle thickness, the spring attachment points, and the adjustment dial. Avoid listings that only use highly edited stock photos, as these can mask poor material quality, rough plastic seams, or flimsy spring mechanisms. Budget-friendly options under ₱500 are widely available, but verifying these details ensures you get a durable tool.
Frequently Asked Questions (FAQ)
How often should beginners use a hand grip strengthener?
Beginners should aim to use a hand grip strengthener 2 to 3 times per week, allowing at least 48 hours of rest between sessions. Because the muscles and tendons in your hands are relatively small, they require adequate recovery time to repair and grow stronger. Overtraining can quickly lead to overuse injuries like tendinitis. If you experience persistent joint stiffness, a nagging ache in your palms, or a noticeable decrease in your daily grip strength, suspend your training and allow your hands to fully recover before resuming at a lower resistance.
Can hand grip training help with wrist pain?
Hand grip training can help manage mild wrist discomfort by strengthening the supporting muscles in your forearms, but it is crucial to distinguish between general weakness and acute medical conditions. If your wrist pain is caused by a lack of muscular support from repetitive typing or light daily activities, gradual grip training may offer relief over time. However, if you experience sharp, shooting pain, numbness, or swelling, you should stop training immediately and consult a healthcare professional. Never attempt to push through sharp pain, as this can worsen underlying joint or nerve issues.
Community discussion
Share your experience or ask a question. Comments are reviewed before publication.