
Flying a kite airplane in the Philippines is an excellent way to enjoy the country’s coastal breezes and open parks, but finding the right model requires balancing aerodynamic design with tropical durability. A successful flight depends on matching the kite’s wing structure and line configuration to the flyer’s age and the local wind conditions. By focusing on durable, moisture-resistant materials and stable frames, beginners can avoid the frustration of immediate crashes and enjoy consistent, stable flights.
Choosing the right kite airplane involves evaluating how easily the design launches, how well it resists high humidity, and whether a single-line or dual-line setup fits the user’s skill level. While experienced flyers might seek high-speed maneuverability, children and beginners benefit most from stable, self-launching designs that fly reliably in variable tropical winds.
Quick Guide: Choosing the Right Airplane Kite for Beginners
Selecting an ideal kite airplane requires understanding the relationship between wind behavior, material resilience, and user control. In the Philippines, where seasonal wind shifts like the Amihan (cool northeast wind) and Habagat (warm southwest monsoon) create distinct flying environments, your choice of gear must adapt to the local climate. A kite designed for light, inland park breezes will perform poorly in heavy coastal winds, while a heavy, high-wind model may fail to launch in sheltered urban areas.
Products mentioned in this guide
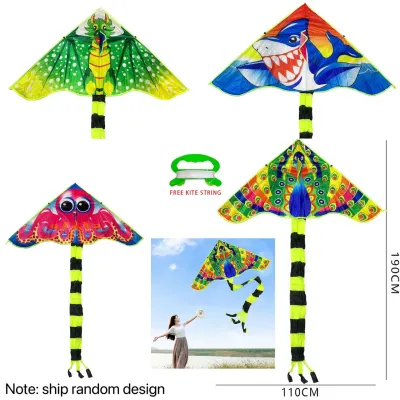
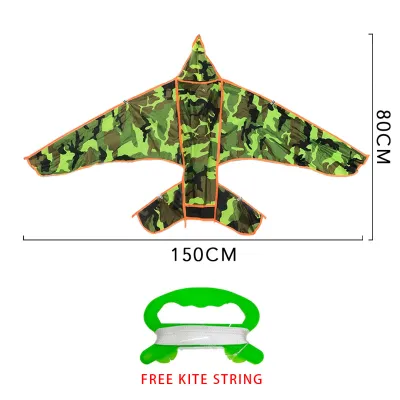
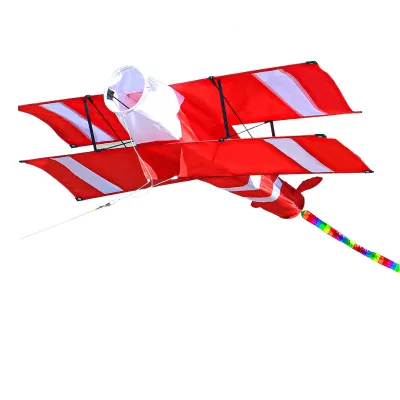
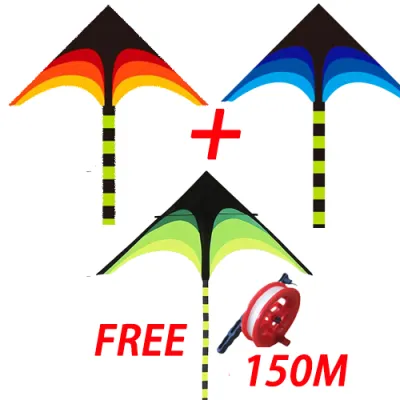
Prices are valid at publication and may change. Please refer to the product page for the latest price.
For novices, the primary decision factor is the control system. Single-line kites are highly recommended for young children and absolute beginners because they require no active steering; once launched, they fly automatically at a fixed angle. Dual-line kites, on the other hand, allow the pilot to steer, perform loops, and dive, but they demand active physical coordination and a higher wind threshold to remain airborne.
Durability is another non-negotiable factor. Tropical climates expose outdoor gear to intense ultraviolet (UV) radiation and high humidity, which can quickly degrade cheap plastics, paper, or low-grade adhesives. Beginners should look for designs that use synthetic fabrics and flexible, non-corrosive frames to ensure their investment survives repeated landings and salty sea air.
Essential Kite Features for Tropical Weather and Humidity
The materials used to construct a kite airplane directly determine its lifespan and flight stability in tropical environments. Standard materials that perform well in dry, temperate climates can warp, mold, or tear when exposed to the high humidity and intense sunlight typical of Philippine coastal regions.

Sail Material Selection
When evaluating sail fabrics, ripstop polyester and ripstop nylon are the premier choices, vastly outperforming cheap PVC plastic or paper. Ripstop fabrics are woven with a reinforcing grid pattern that prevents small punctures from spreading into large tears during a rough landing.
Between the two, ripstop polyester is highly advantageous for humid tropical environments. Polyester absorbs significantly less moisture than nylon, meaning it will not sag, stretch, or lose its aerodynamic shape when flown in damp, humid conditions. Furthermore, polyester offers superior UV resistance, protecting the kite’s bright colors and structural integrity from degrading under the intense Philippine sun.
Frame and Spars
The spars act as the skeleton of the kite airplane, maintaining the wing shape against the force of the wind. Beginners should prioritize flexible fiberglass or high-grade carbon fiber rods over traditional wooden dowels or brittle plastic frames.
Fiberglass is highly resilient and cost-effective; it bends easily to absorb the shock of sudden ground impacts without snapping, making it ideal for young children learning to fly. Carbon fiber is lighter and stiffer than fiberglass, providing excellent responsiveness and low-wind performance for larger or dual-line kites, though it generally carries a higher price tag.
Hardware and Seams
High humidity and salty coastal air can rapidly corrode metal components. Ensure all connectors, clips, and swivels are made from high-density plastics, brass, or marine-grade stainless steel to prevent rust.
Inspect the seams of the kite before purchase; high-quality models feature double-stitched or bound edges rather than heat-sealed plastic seams. Reinforced stitching at stress points, such as where the spars meet the sail and at the tow-point bridle, prevents the frame from tearing through the fabric during high-wind gusts.
Stability Aids
An airplane-shaped kite requires specific design elements to mimic the flight of a real aircraft while remaining stable on a string. Look for models equipped with built-in keels—triangular fabric sails under the body—which act like a boat’s keel to keep the nose pointed directly into the wind.
Some designs feature wind vents or mesh panels that allow excess wind pressure to pass through the sail safely, reducing the physical pull on the flyer’s hands. Additionally, long, detachable tails are essential for beginners, as they create drag at the rear of the kite, preventing it from spinning or diving uncontrollably when encountering turbulent air.
Recommended Airplane Kite Types by Age and Skill Level
Matching the complexity of a kite airplane to the physical capability and attention span of the flyer ensures a rewarding experience. Selecting a model that is too complex can lead to frustration, while a model that is too simple may fail to engage older users.
Toddlers and Young Children (Ages 3–6)
For very young children, the goal is instant gratification and physical safety. Kites for this age group must be lightweight, easy to hold, and capable of flying with almost no user intervention.
- Design and Stability: Look for small single-line delta or sled-style airplane designs with wingspans under 1 meter. These models should feature large, permanently attached ribbon tails or tube tails that provide automatic stability, keeping the kite upright even in light, uneven breezes.
- Frame and Assembly: Choose models with minimal assembly requirements—ideally, those with fixed frames or simple pop-up mechanisms that do not require inserting complicated spars. Lightweight fiberglass or flexible foam frames are perfect, as they minimize the risk of injury if the child accidentally collides with the kite.
- Line and Handle: Opt for short flying lines (around 15 to 30 meters) attached to wide, ergonomic hoop handles or padded wrist straps. Hoop handles are easier for small hands to grip and prevent the line from tangling or cutting into delicate skin.
Older Kids and Novice Flyers (Ages 7–12)
Children in this age range have developed better hand-eye coordination and can manage kites that require basic active piloting and wind-reading skills.
- Single-Line Delta Airplanes: Larger single-line models with wingspans between 1 and 1.5 meters offer a more realistic flight profile. These kites fly at higher angles and can handle stronger winds, allowing kids to learn how to tension the line and feel the lift of the wind.
- Introduction to Dual-Line Steering: For kids seeking a challenge, entry-level dual-line stunt kites shaped like jet fighters are excellent. These require two lines of equal length, allowing the pilot to pull the left line to turn left and the right line to turn right. Note that dual-line models require consistent winds of at least 12 to 20 kilometers per hour to stay aloft, demanding more patience during setup.
- Adjustable Bridles: Look for kites with adjustable tow points or bridle lines. This feature allows older kids to change the angle at which the kite meets the wind, tuning its performance for either light breezes or stronger coastal winds.
Teens and Adult Beginners
Older beginners can handle high-performance kites that generate significant lift and pull, requiring more physical strength and precise control.
- Large Wingspan Models: Kites with wingspans exceeding 1.5 meters capture more wind, offering stable, majestic flights. These models are typically made of heavy-duty ripstop polyester and feature reinforced carbon fiber frames to withstand high wind forces.
- Advanced Dual-Line Control: Teens and adults will find dual-line stunt airplanes highly engaging. These models allow for advanced maneuvers, including sharp turns, horizontal tracking, and controlled landings. Flying these requires active engagement, as the pilot must constantly adjust line tension to keep the kite in the wind window.
- Heavy-Duty Rigging: Because larger kites generate substantial pull, they must be paired with high-tensile-strength lines, such as 50-to-100-pound test Dacron lines. Comfortable padded strap handles or specialized dual-line reels are essential to prevent hand fatigue and protect against line burn.
Matching Your Kite to Local Wind and Flying Locations
The geography of the Philippines offers diverse flying environments, from wide-open coastal beaches to crowded urban parks. Understanding where you plan to fly your kite airplane is critical to selecting a compatible design.
Beach and Coastal Areas
Coastal sites, such as the beaches of Boracay, Zambales, or La Union, offer strong, steady, and predictable sea breezes. These conditions are ideal for flying, but the sheer force of coastal winds can easily overpower or damage lightweight, delicate kites.
If you plan to fly primarily on the coast, select a kite airplane with a robust fiberglass frame and a heavy-duty sail. Models with built-in wind vents or adjustable bridles are highly recommended, as they allow you to spill excess wind and reduce the physical pull on your arms. Avoid oversized, ultra-lightweight kites in these areas, as they can become unstable and difficult to control in high-velocity coastal winds.
Urban Parks and Open Fields
Inland locations, such as Luneta Park in Manila or the Quezon Memorial Circle, present a different challenge: light, turbulent, and highly shifting winds. Buildings, trees, and pavement create thermal updrafts and wind blocks, causing the air to swirl unpredictably.
For urban flying, choose a lightweight kite airplane with a large surface area relative to its weight. Kites with carbon fiber spars and light ripstop sails excel in these environments because they require very little wind speed to generate lift. Long, lightweight tails can help stabilize the kite when it encounters sudden pockets of turbulent air caused by nearby structures.
Wind Reading for Beginners
Before launching, practice estimating the wind speed using natural indicators. This simple step prevents you from damaging your equipment in excessive winds or wasting energy trying to launch in a dead calm.
- Light Breeze (6–11 km/h): Leaves rustle slightly, and wind is felt gently on the face. This is suitable only for ultra-lightweight single-line kites.
- Gentle to Moderate Breeze (12–28 km/h): Small branches move, and flags extend fully. This is the ideal wind range for most beginner single-line and dual-line airplane kites.
- Strong Wind (29+ km/h): Large tree branches sway, and umbrellas are difficult to use. Avoid flying beginner kites in these conditions, as the high tension can snap lines or break frames.
Setup, Safety, and Care Tips for First-Time Pilots
Proper assembly, safe flying practices, and routine maintenance will extend the lifespan of your kite airplane and ensure a safe experience for everyone at the flying site.
Pre-Flight Inspection
Always perform a quick structural check before launching your kite. Verify that all spars are pushed fully into their plastic connectors and that the cross-spars are secured tightly against the sail.
Inspect the flying line for any signs of fraying, knots, or wear, as a weakened line can easily snap under tension. Ensure the bridle lines are clear of tangles and that the metal or plastic swivel connector is locked securely to the kite’s tow point.
Launching Techniques
For solo flyers, the “toss and pull” method works well in moderate winds: hold the kite by its keel, face the wind, let out about 10 meters of line, and gently toss the kite upward while pulling back on the line to create lift.
If you have a helper, use the “long line” method. Have your helper stand approximately 20 to 30 meters downwind, holding the kite upright by the wingtips or frame. When you feel a steady breeze, signal your helper to release the kite while you take a few steps backward and pull smoothly on the line to guide it into the air.
Safety Boundaries
Safety must always be your top priority when operating any sport or outdoor gear. High-tension flying lines can cause severe cuts if pulled quickly through bare hands, and large kites can pose hazards to bystanders.
- Avoid Power Lines: Never fly a kite near overhead electrical wires. If your kite becomes tangled in a power line, do not attempt to retrieve it yourself; contact the local utility company immediately.
- Keep Distance from Roads and Airports: Avoid flying near busy highways, railways, or within the vicinity of airports to prevent distractions or safety hazards.
- Protect Your Hands and Eyes: When flying larger kites in strong winds, wear protective gloves to prevent line burns. Always wear sunglasses to protect your eyes from UV radiation and to maintain visibility when looking up at the sky.
Post-Flight Care and Storage
Tropical environments require diligent post-flight maintenance to prevent mold and material degradation. After flying at the beach, gently wipe down the sail and spars with a damp, fresh-water cloth to remove corrosive salt residue and sand.
Always allow the kite to air-dry completely in a shaded area before packing it into its storage bag. Storing a damp kite in a sealed bag in the hot, humid Philippine climate will quickly lead to mold growth and can weaken the fabric’s protective coatings. Finally, wind the flying line loosely onto its reel to prevent kinks and tangles from forming during storage.
Frequently Asked Questions (FAQ)
Can I fly an airplane kite without a tail?
While some highly balanced delta-wing kites can fly without a tail, most airplane-shaped kites require a tail to maintain stability. The tail creates drag at the rear of the kite, which acts as a stabilizing force to prevent the nose from pitching or rolling uncontrollably. If you are flying in turbulent or gusty wind conditions, it is highly recommended to keep the tail attached to ensure a smooth, stable flight.
What is the best line length for a beginner airplane kite?
For beginners, a line length of 30 to 50 meters is ideal. This length provides a great balance between altitude and control, keeping the kite high enough to catch steady wind while remaining close enough for easy steering and recovery. Avoid letting out too much line initially, as longer lines are heavier, sag more, and make it more difficult to quickly correct the kite’s flight path during sudden wind shifts.
How do I fix a broken kite spar in the field?
If a fiberglass spar cracks or snaps during a flight session, you can perform a temporary field repair using heavy-duty duct tape and a small, rigid splint, such as a sturdy twig or a piece of a broken plastic pen. Align the broken ends of the spar, place the splint along the break, and wrap it tightly with tape. While this temporary fix can save your afternoon, the damaged spar must be replaced with an identical manufacturer-approved rod before your next flight to restore the kite’s proper aerodynamic balance.
Community discussion
Share your experience or ask a question. Comments are reviewed before publication.