
Selecting the right football cones in the Philippines requires looking beyond simple aesthetics. The local environment—characterized by intense tropical heat, high humidity, and sudden heavy downpours—places unique demands on training equipment. If you choose the wrong materials or designs, your training tools can quickly degrade, fade, or fail to stay in place during critical drills.
To find the most suitable football training cones, you must match the equipment to your specific practice requirements. Soft, low-profile disc cones are the safest option for youth drills and tight-space technical work. Tall, flexible slalom cones excel at agility and stride development, while heavy-duty square cones are the premier choice for marking field boundaries and temporary goals. Balancing these choices with local pitch conditions ensures a productive and safe training session.
Key Features to Evaluate When Buying Football Cones
Selecting the right football cones requires a clear understanding of material science and design. The intense tropical climate of the Philippines places significant stress on plastics. If you purchase low-grade equipment, you will likely find yourself replacing cracked and faded markers within a single season of outdoor training.
Products mentioned in this guide
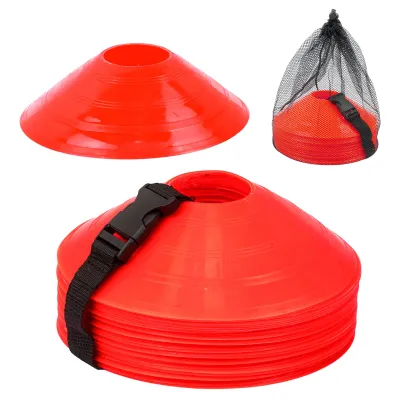
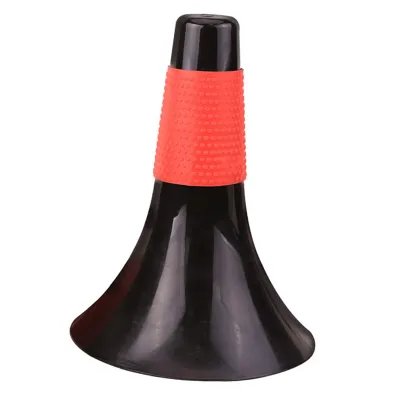
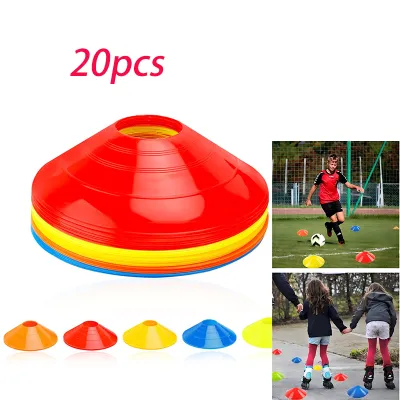
Prices are valid at publication and may change. Please refer to the product page for the latest price.
First, evaluate the plastic composition, which generally splits between Polyethylene (PE) and Polyvinyl Chloride (PVC). PE is highly flexible and lightweight, making it an excellent choice for cones that need to bend under pressure and return to their original shape. PVC is typically more rigid and heavier, offering excellent stability but becoming prone to cracking if the manufacturer does not include UV-resistant stabilizers. Under the intense sun, unprotected plastics degrade rapidly, losing their elasticity and becoming brittle within a few months of regular use. Prioritizing UV-treated materials ensures your equipment survives years of afternoon training sessions.
Color visibility is another critical factor when training on local pitches. Whether you are practicing on the lush green of natural grass, the uniform surface of artificial turf, or the muddy patches typical of the monsoon season, your cones must stand out clearly. High-visibility neon shades like bright orange, electric yellow, and hot pink offer the best contrast against dark green and brown backgrounds. These bright colors help players spot boundaries and transition points instantly, even during late afternoon sessions when natural light begins to fade.
The design of the base determines how well a cone performs on different surfaces. Standard hollow bases are lightweight and work well on natural grass because the blades of grass help anchor the edges. However, on hard court surfaces—such as local barangay covered courts—or synthetic turf, lightweight cones tend to slide or bounce away when struck by a ball or a player’s foot. For these harder surfaces, choosing cones with weighted or rubberized bases provides the friction and stability needed to keep your training grid intact.
Finally, you must balance the trade-off between portability and stability. Lightweight, stackable disc cones are incredibly easy to transport, fitting neatly into a backpack or a motorcycle compartment. However, they are easily displaced by strong winds or light kicks. Heavier, wider-base cones offer superior stability and wind resistance but require dedicated storage bags and more effort to carry to and from the pitch. Understanding your typical training venue and transport limitations will guide you toward the right balance.
Best Cone Types for Youth Safety, Agility, and Field Marking
Different training scenarios demand distinct cone designs to maximize safety and drill efficiency. Using a single type of cone for every exercise often leads to disrupted sessions, safety hazards, or poor technical execution. By matching the specific cone type to your training objectives, you can create a safer and more productive environment for your players.

Best for Youth Training: Soft, Low-Profile Disc Cones
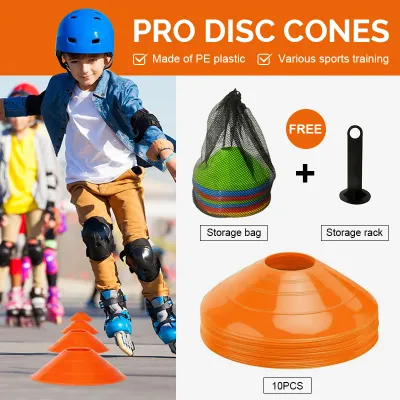
For younger players and tight-space technical drills, safety and flexibility are the primary concerns. Soft, low-profile disc cones, which typically stand between 1.5 and 2 inches tall, are the industry standard for these training environments. These cones are designed to collapse or flatten instantly when stepped on by a player. This crushable nature is vital for youth development, as it prevents ankle rolls, slips, and trips when children are focusing on the ball rather than their footing.
These low-profile discs are highly effective for setting up tight-space dribbling grids, passing triangles, and small-sided game zones. Because they sit low to the ground, they do not interfere with the path of a low-passing ball, allowing drills to flow naturally even if a pass goes slightly off course. Coaches can lay out intricate patterns without worrying that a stray ball will ricochet wildly off a tall barrier and disrupt the entire exercise.
From a logistical standpoint, disc cones are highly convenient for coaches and parents. They stack tightly together, allowing you to carry fifty or more cones on a single plastic or metal carrying strap. This space-saving design is a major benefit for coaches who travel to different fields with limited cargo space.
However, these low-profile cones do have specific limitations. Their low height makes them difficult to see from across a full-sized pitch, especially if the natural grass has grown tall or uneven. Additionally, because they are lightweight, a strong gust of tropical wind or a stray kick can easily blow them out of position, requiring frequent adjustments during the session.
Best for Agility Work: Tall, Flexible Slalom Cones
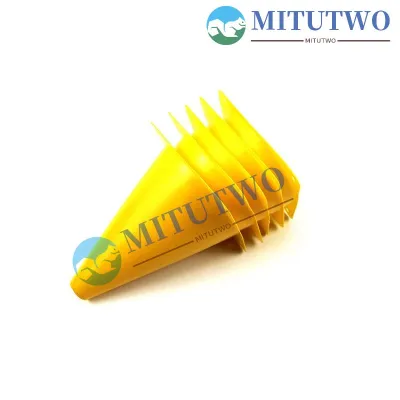
Agility training requires players to perform rapid changes of direction, acceleration, and deceleration. Tall, flexible slalom cones, usually measuring between 6 and 9 inches in height, are specifically designed to facilitate these dynamic movements. These cones serve as physical obstacles that force players to lift their feet, adjust their stride length, and focus on body control as they weave through the course.
The defining feature of a quality slalom cone is its spring-back flexibility. When a player accidentally clips the cone during a high-speed cut, the material should bend easily and immediately snap back to its upright position. This flexibility prevents the cone from sliding across the turf or causing a tripping hazard, allowing the athlete to maintain their momentum safely.
To support aggressive movements, slalom cones require a wide, sturdy base. Players cutting sharply around a cone exert force nearby, and the wind generated by fast-paced drills can easily tip over poorly balanced equipment. A stable base ensures the cone remains upright throughout the entire team’s rotation, preventing constant interruptions to reset the course.
While excellent for agility, these taller cones are less suitable for close-control dribbling drills. If a player attempts to navigate a tight grid with tall cones, the ball is highly likely to strike the side of the cone. Because of their height and relative rigidity compared to disc cones, such collisions will stop the ball completely, breaking the rhythm of the technical practice.
Best for Field Marking: Heavy-Duty Square Cones
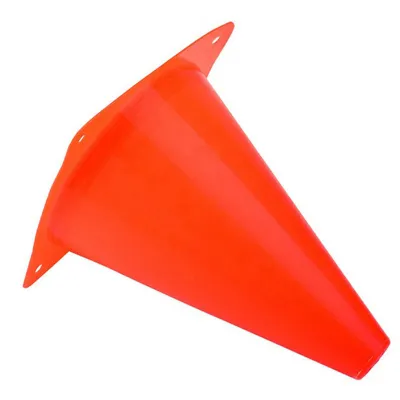
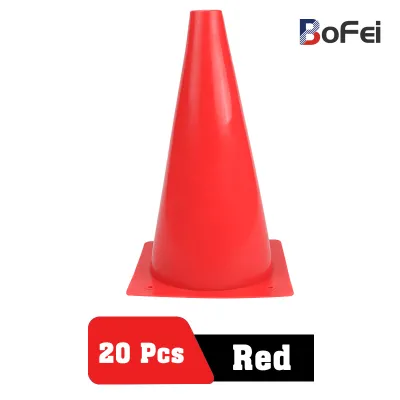
When setting up full-sized pitches, rondo grids, or temporary goalposts, visibility and stability become the top priorities. Heavy-duty square cones, standing between 9 and 12 inches tall, are the ideal choice for these structural tasks. Their larger profile ensures they are easily visible to players, coaches, and referees from the opposite side of the field, even in challenging weather conditions.
These cones feature a wide, square base that provides exceptional stability against wind and physical impact. Many heavy-duty models incorporate weighted bases or aerodynamic cutouts that allow wind to pass through, ensuring they stay anchored during stormy weather or on windy coastal pitches. This makes them the reliable choice for marking the outer boundaries of your training area.
The durability of these larger cones is essential for withstanding heavy foot traffic and high-velocity ball impacts. Positioned at the corners and sidelines, they are frequently struck by long passes or stepped on by players running out of bounds. A robust square cone resists cracking under these high-impact forces, protecting your investment over multiple seasons.
The primary trade-offs of heavy-duty square cones are their bulk and cost. They do not stack as compactly as disc cones, meaning a set of ten can occupy a significant portion of your car trunk or storage locker. They also carry a higher price tag per unit, making them a more substantial investment that is best reserved for defining boundaries rather than filling out individual dribbling grids.
Quick Comparison: Matching Cone Specs to Drills
To help you select the right equipment for your coaching bag, the following table summarizes how different cone types align with specific training needs.
| Cone Type | Ideal Use Case | Recommended Height | Key Features to Look For | Main Limitations |
|---|---|---|---|---|
| Soft Disc Cones | Youth dribbling, tight-space grids, passing triangles | 1.5 to 2 inches | Crushable PE plastic, high-visibility neon colors, lightweight stacking | Low visibility from a distance, easily moved by strong winds |
| Flexible Slalom Cones | Agility drills, weaving, stride adjustments, change of direction | 6 to 9 inches | Spring-back flexibility, wide stable base, impact resistance | Not suitable for tight ball control, bulkier than disc cones |
| Heavy-Duty Square Cones | Pitch boundaries, temporary goals, large training zones | 9 to 12 inches | Wide weighted base, high wind resistance, rigid structure | Bulky to transport, higher cost per unit, storage space required |
Using this comparison, you can easily plan your equipment purchases. For instance, a coach focusing on youth development will want to invest heavily in soft disc cones, while an agility trainer or physical coordinator will get more value from a set of flexible slalom cones. Combining these types allows you to run complex, multi-stage sessions without compromising on safety or drill quality.
Caring for Your Cones in Hot and Humid Weather
The tropical climate of the Philippines presents specific challenges for maintaining sports equipment. High humidity, intense UV radiation, and muddy field conditions can rapidly degrade plastic cones if they are not cared for properly. Implementing a simple maintenance routine will significantly extend the lifespan of your training gear.
After training on wet or muddy pitches, always clean your cones before storing them. Mud, grass stains, and field paint can dry into a crust that obscures the high-visibility colors, making the cones harder for players to see. Wipe the cones down with a damp cloth or rinse them with clean water and mild soap, then allow them to air dry completely. Avoid using harsh chemical cleaners, as these can strip the UV-protective coatings and accelerate plastic degradation.
Proper storage is crucial to prevent warping and brittleness. Never leave your cones in direct sunlight when they are not in use, and avoid storing them in the trunk of a car parked outdoors, where temperatures can climb high enough to soften and deform the plastic. Instead, keep your cones in a cool, dry, and well-ventilated storage area. This prevents moisture buildup, which can lead to mold and unpleasant odors on your carrying bags and straps.
Using a dedicated cone carrier, strap, or mesh bag is highly recommended for organized transport. A proper carrier keeps the cones tightly stacked, preventing them from bouncing around and getting scratched or bent during transit. It also makes it easy to count your inventory after a session, ensuring no cones are left behind on the pitch.
Finally, establish a habit of inspecting your cones periodically for signs of wear. Check for deep cracks, faded colors, or sharp edges that may have developed from accidental impacts. Damaged cones should be retired immediately, especially when training youth players, to prevent cuts or scrapes during active drills.
Frequently Asked Questions (FAQ)
How many cones do I need for a standard training session?
For a standard training session with a group of 12 to 15 players, a baseline of 20 to 30 soft disc cones is highly recommended. This quantity allows you to set up multiple individual dribbling grids, passing lanes, or small-sided game boundaries simultaneously. Having enough cones ensures that players spend less time waiting in line and more time active on the ball.
In addition to the disc cones, you should include 10 to 15 taller slalom or square cones in your gear bag. These larger cones are essential for marking the overall pitch boundaries, setting up agility courses, or serving as temporary goalposts. Purchasing your cones in bulk sets with contrasting colors (such as blue, yellow, and red) allows you to run complex drills where different colors represent specific actions or zones.
Can I use the same cones for both grass and artificial turf?
Yes, you can use the same cones on both surfaces, but you must pay close attention to the base design. On natural grass, standard hollow-base cones perform exceptionally well because the uneven surface and grass blades naturally grip the edges of the cone, preventing it from sliding. Even lightweight disc cones stay relatively stable on natural turf unless there are strong winds.
On artificial turf or hard indoor courts, standard lightweight cones tend to slide or bounce away easily when struck by a ball or brushed by a player. For these smoother, harder surfaces, cones with weighted bases or rubberized bottoms are highly recommended. These designs provide the necessary friction to keep the training grid intact, ensuring you do not have to constantly pause the session to reposition your markers.
Community discussion
Share your experience or ask a question. Comments are reviewed before publication.