
Building a powerful grip is one of the most underrated aspects of physical conditioning. Whether you are aiming to break through a deadlift plateau, secure a better hold on a climbing wall, or improve your functional hand strength for daily tasks, your hands serve as the primary point of contact with any weight. In the Philippines, where strength training and functional fitness communities are growing rapidly, finding the right grip hand strengthener requires understanding your personal training goals, your current physical capacity, and how local environmental factors like high humidity affect training equipment. Selecting the ideal tool is not about finding the heaviest spring; it is about choosing a device that allows for progressive overload, matches your hand size, and resists the corrosive effects of a tropical climate.
Why Grip Strength is Crucial for Lifting and Performance
When executing heavy compound movements such as deadlifts, barbell rows, pull-ups, or farmer’s walks, your grip is almost always the weakest link in the kinetic chain. The human body is highly efficient, but it is also self-limiting. A physiological phenomenon known as neural irradiation dictates that a stronger, tighter squeeze of the hands signals the central nervous system to recruit more motor units in the surrounding muscles, including the forearms, biceps, shoulders, and rotator cuff. Conversely, if your brain senses that your hands are slipping or that your grip is about to fail, it down-regulates muscle activation throughout the rest of your upper body to prevent injury. This means that weak hands can actively hold back your back, leg, and shoulder development, preventing you from fully stimulating the target muscle groups during heavy lifts.
Beyond maximizing raw lifting numbers, developing a dedicated grip hand routine builds structural integrity around the wrist and elbow joints. The muscles responsible for closing your hand—primarily the flexor digitorum superficialis and profundus—originate near the elbow and run down the forearm. Strengthening these muscles, along with the surrounding tendons, creates a supportive sleeve around the wrist joint, stabilizing it during heavy pressing movements like the bench press or overhead press. This stabilization reduces the risk of micro-tears and joint shearing that often occur when heavy weights force the wrists into hyperextension. Furthermore, by building forearm endurance, you ensure that your hands do not fatigue early during high-repetition workouts, allowing you to maintain perfect form from your first set to your last.
Products mentioned in this guide
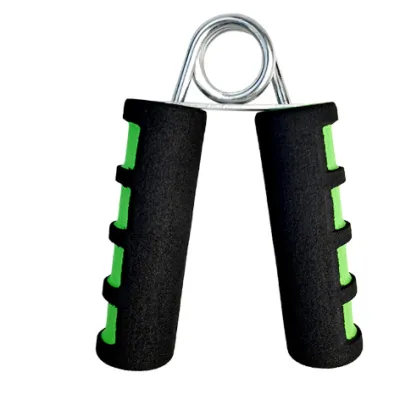
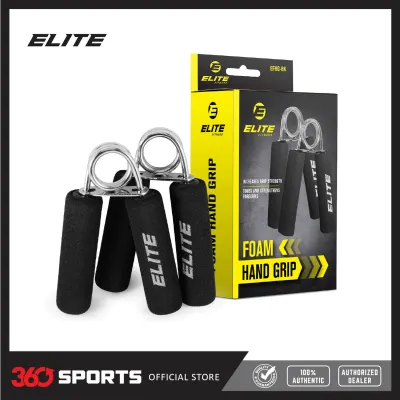
Prices are valid at publication and may change. Please refer to the product page for the latest price.
Types of Hand Grip Strengtheners to Match Your Training Goals
Grip training tools are not standardized; they are engineered to target different aspects of hand health, muscular endurance, and absolute crush strength. To build an effective training routine, you must first understand the mechanical differences between the primary types of grippers available. Each design applies resistance through a unique physical path, making certain models highly suited for rehabilitation and high-volume conditioning, while others are built strictly for testing and developing maximum neuromuscular force.

Adjustable Torsion Spring Grippers
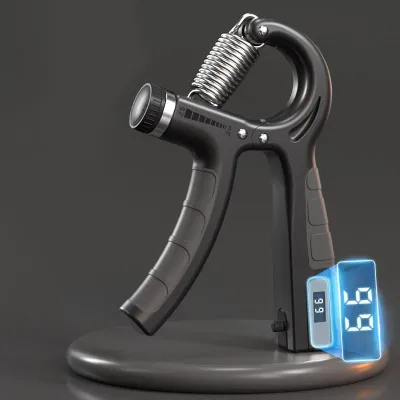
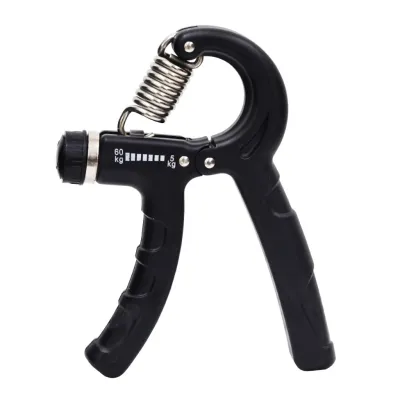
Adjustable torsion spring grippers are the most versatile entry point for individuals looking to systematically build hand strength. These devices typically feature a plastic or lightweight composite frame paired with a single steel spring, connected to an adjustable dial or knob at the front. By turning this knob, you alter the mechanical leverage of the spring, allowing you to seamlessly scale the resistance—typically within a range of 5 kg to 60 kg (approximately 11 lbs to 132 lbs).
This adaptability makes adjustable grippers exceptionally valuable for tracking incremental progress without requiring you to purchase multiple tools. They are ideal for beginners who need to build initial tendon thickness, as well as intermediate lifters who require a lighter tool for high-repetition warm-ups or active recovery sessions. The ability to dial down the resistance also makes these grippers highly useful for active recovery, where the goal is to pump oxygen-rich blood into the forearm tissues to accelerate healing without causing deep muscular fatigue.
Fixed-Resistance Heavy-Duty Grippers
For advanced lifters, powerlifters, and grip sport competitors, fixed-resistance heavy-duty grippers are the standard. These tools are built with zero adjustable parts, consisting instead of two solid metal handles—usually crafted from aircraft-grade anodized aluminum—connected by a thick, heavy-duty steel torsion spring. Because the geometry of the device is fixed, the resistance curve is incredibly consistent, demanding maximum force production to close the handles completely.
These grippers are calibrated to specific resistance ratings, often starting at 100 lbs (45 kg) and scaling up to an astonishing 350 lbs (158 kg) or more. Advanced trainees prefer fixed models because they provide a precise, unyielding benchmark for testing absolute crush strength. The rigid metal handles do not flex under extreme pressure, ensuring that all the force you exert is transferred directly into compressing the steel spring. This uncompromising build quality makes them indispensable for low-repetition, maximum-effort sets designed to build raw, explosive hand power.
Finger and Extensor Trainers
A common pitfall in hand training is focusing exclusively on the crushing motion, which heavily taxes the forearm flexor muscles while completely ignoring the opposing extensor muscles. Over time, this unilateral training can lead to severe muscular imbalances, causing the fingers to curl inward naturally and increasing the risk of chronic conditions like lateral epicondylitis (tennis elbow) or wrist impingement. Finger and extensor trainers are designed specifically to counteract this imbalance.
These tools generally consist of elastic silicone bands with individual finger loops, or small, spring-loaded piston devices that allow you to isolate each finger independently. By placing your fingers inside the silicone loops and expanding your hand outward against the resistance, you target the extensor digitorum and other muscles on the back of the forearm. Integrating extensor work into your routine balances the structural forces acting on your wrist joint, improves hand opening speed, and maintains healthy tendon tracking, ensuring your hands remain pain-free and fully functional.
How to Choose the Right Resistance Level for Progressive Overload
Applying the principle of progressive overload to your grip hand training is essential for long-term progress, but doing so requires a systematic approach to resistance selection. Unlike larger muscle groups like the quadriceps or chest, the small muscles and intricate tendons of the hand and wrist are highly susceptible to overuse injuries if subjected to excessive loads too quickly. To train safely and effectively, you must first understand how grip resistance is measured and how to program it.
When evaluating grip tools, be aware that manufacturer resistance ratings can vary widely. Some brands rate their grippers based on the force required to compress the spring at its center, while others measure the force at the very tips of the handles, where leverage is greatest. Because of these differences, a 150 lb gripper from one manufacturer may feel significantly heavier or lighter than a 150 lb gripper from another.
To find your personal baseline safely, perform a simple “repetition maximum” (RM) test using a moderate, adjustable gripper:
- Warm-up thoroughly with light finger movements and wrist circles.
- Select a resistance level that you estimate you can close completely.
- Perform a single set of maximum repetitions with perfect form, ensuring the handles touch on every single rep.
- Analyze your results: If you can easily complete more than 15 repetitions, this resistance level is suited for endurance and active recovery. If you struggle and fail between 8 and 12 repetitions, this is your moderate hypertrophy and general strength range. If you can only complete 1 to 5 repetitions with maximum effort, this level represents your maximum strength building zone.
Once you establish your baseline, structure your training based on your specific goals. If your primary objective is to support heavy lifting, prioritize the low-repetition, high-resistance range (1 to 5 reps) using fixed-resistance grippers, performing 3 to 5 sets with ample rest (2 to 3 minutes) between sets. If you are training for endurance-based activities like rock climbing or obstacle course racing, focus on the 12 to 20 repetition range.
You will know it is time to progress to the next resistance level when you can easily close your current gripper for 3 sets of 12 perfect repetitions with a controlled, slow release on every rep. Avoid the common mistake of buying a gripper that is too heavy to close completely. Attempting to train with a gripper you can only squeeze halfway through its range of motion fails to build strength at the end-range of the movement—which is precisely where your grip is most likely to fail during a heavy lift.
Key Features to Check When Buying in the Philippines
Purchasing fitness equipment in the Philippines presents unique challenges due to the tropical climate, where high relative humidity and elevated temperatures can accelerate the wear and tear of materials. When shopping on local online marketplaces or visiting physical sporting goods stores, you must carefully evaluate several critical design features to ensure your investment lasts.
Handle Materials and Textures The material of the handles is the most critical factor determining both comfort and durability in humid conditions:
- Knurled Aluminum: This is the preferred choice for serious strength training. The cross-hatched, diamond-patterned texture provides an incredibly secure, non-slip surface that bites into the skin, ensuring your hands do not slip even when heavily covered in sweat. While knurling can feel abrasive to beginners, it behaves exceptionally well when paired with lifting chalk. Anodized aluminum handles are also highly resistant to corrosion, making them perfect for hot, humid environments.
- Textured Rubber: Rubber offers a comfortable, cushioned grip that is gentler on the skin than knurled metal. However, in tropical climates, sweat can quickly turn rubber handles slick, requiring frequent wiping to maintain a secure hold. Over several years, cheap rubber formulations can also degrade or become sticky due to heat exposure.
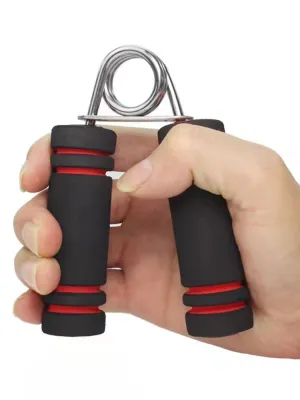
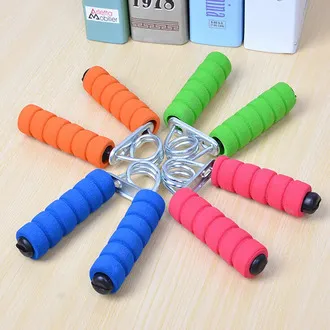
- Foam Sleeves: Foam handles are soft and inexpensive, making them popular on budget-friendly, adjustable grippers. However, foam is highly porous; it acts like a sponge, absorbing sweat, skin oils, and environmental moisture. In a humid climate, this creates a breeding ground for bacteria and unpleasant odors, and the foam itself will inevitably tear, crumble, and slide off the underlying frame over time.
Build Quality and Mechanical Alignment Examine the structural integrity of the gripper. In adjustable models, inspect the pivot points and the channel where the spring moves; these parts should be made of thick, reinforced plastic or steel rather than thin, brittle polymers. For fixed-resistance grippers, check the alignment of the torsion spring. The coil should sit perfectly centered between the handles, and there should be no lateral play or grinding when you compress the tool. Squeaking can often be resolved with lubrication, but a misaligned spring that rubs against the handles will wear down unevenly and eventually snap.
Market Verification and Brand Selection When navigating local e-commerce platforms, you will find a vast array of ultra-cheap, unbranded grip hand tools. While a ₱150 plastic gripper might seem like a bargain, these items often suffer from poor quality control, inaccurate resistance ratings, and weak springs that lose their tension within a few weeks of use. To avoid disappointment, read through verified buyer reviews carefully. Look for feedback that specifically mentions how the gripper holds up after months of consistent use, and look for photos showing the condition of the metal parts. Investing in a reputable, calibrated brand—which typically ranges from ₱1,200 to ₱2,500—ensures you receive a tool with an accurate resistance rating and a high-tensile steel spring that will maintain its tension for decades.
How to Use and Maintain Your Grip Trainer Safely
To reap the full benefits of grip training while keeping your hands, wrists, and elbows free from chronic injury, you must practice correct biomechanics and maintain your equipment properly. The small joints and tendons in your hands are highly sensitive to repetitive strain, making proper form and tool care non-negotiable.
Biomechanical Execution When using a grip hand tool, hand placement is everything. Position the stationary handle of the gripper diagonally across your palm, resting the upper end securely against the fleshy pad at the base of your thumb (the thenar eminence). Wrap your fingers around the active handle, ensuring your pinky finger is fully engaged on the lower portion of the handle. Keep your wrist in a neutral, straight position; do not allow your wrist to bend forward (flexion) or backward (extension) as you squeeze, as this places immense shear stress on the carpal tunnel and wrist ligaments. Squeeze the handles together in a smooth, controlled motion until they touch completely. Hold the closed position for a split second, then slowly resist the spring as it opens, taking 2 to 3 seconds to return to the starting position. This controlled eccentric phase is highly effective for building tendon strength and muscular hypertrophy.
Warm-Up and Recovery Protocols Never attempt maximum-effort squeezes with cold hands. Before your training session, spend two to three minutes warming up. Gently massage your forearms, perform dynamic finger extensions, and rotate your wrists clockwise and counterclockwise. Follow this with one or two high-repetition warm-up sets using a very light adjustable gripper.
Because the forearm muscles are active in almost every daily activity and lifting session, they require structured recovery. Avoid training your grip every day; instead, schedule your dedicated grip sessions two to three times per week, ideally at the very end of your regular strength workouts so your hands are not pre-fatigued for compound lifts. If you begin to feel a dull ache on the inside of your elbow (golfer’s elbow) or the outside of your elbow (tennis elbow), immediately cease grip training and allow the tendons to rest and recover.
Local Equipment Maintenance The high humidity and salt-laden air in many parts of the Philippines can quickly cause rust on steel springs. To protect your investment:
- Wipe down your gripper with a clean, dry microfiber cloth after every single training session to remove acidic sweat and skin oils.
- Apply a drop of light machine oil (such as sewing machine oil or multi-purpose lubricant) directly to the spring's coil once every few months to create a protective barrier against moisture and ensure silent, smooth operation.
- Store your grippers in a dry, well-ventilated drawer or bag, away from damp gym clothes or direct sunlight, which can dry out rubber components and cause them to crack.
Frequently Asked Questions (FAQ)
The following common queries address specific aspects of integrating grip training into your fitness regimen and managing hand health safely.
How often should I train my grip with a hand gripper?
For optimal strength development and recovery, you should train your grip two to three times per week. The forearm flexors and the intricate muscles of the hand require adequate rest to repair and grow stronger. Always allow at least 48 hours of recovery between intense grip sessions. To maximize your performance in the gym, schedule your grip training at the very end of your workouts. Training your grip before compound movements like deadlifts, pull-ups, or heavy rows will prematurely fatigue your hands, severely compromising your lifting form and overall safety during those primary exercises.
Can hand grip strengtheners help with carpal tunnel syndrome?
While hand grippers are highly effective for building muscle and tendon strength, they are not medical rehabilitation devices and should not be used as a primary treatment for carpal tunnel syndrome. Carpal tunnel syndrome is caused by the compression of the median nerve as it passes through the wrist. Squeezing heavy-resistance grippers can actually increase pressure within the carpal tunnel, potentially worsening nerve irritation, inflammation, and pain. If you suspect you have carpal tunnel syndrome or are experiencing wrist numbness and tingling, consult a qualified physical therapist or medical professional for a proper diagnosis and a targeted, low-impact rehabilitation program before using any resistance tools.
Community discussion
Share your experience or ask a question. Comments are reviewed before publication.