
The best kites for adult beginners are single-line delta, diamond, and parafoil kites. These designs offer the perfect balance of self-correcting aerodynamic stability, easy launching, and durable construction to ensure a frustration-free introduction to the sport. Unlike complex stunt kites that require rapid coordination, these single-line options allow you to focus on wind awareness and the pure joy of flight.
Flying a kite as an adult in the Philippines is a wonderful way to reconnect with nature, enjoy our beautiful coastal winds, and spend mindful hours outdoors. However, choosing the wrong gear—such as a fragile toy or an overly sensitive multi-line setup—often leads to immediate crashes and disappointment. By understanding what makes a kite beginner-friendly, you can select the perfect model for your skill level and local flying conditions.
Key Traits of a Beginner-Friendly Kite
To enjoy kite flying as an adult, the gear you choose must match your skill level and physical capabilities. Many beginners mistakenly purchase advanced stunt kites or cheap, poorly balanced toys, leading to immediate crashes and frustration. A true beginner-friendly kite relies on specific structural and aerodynamic principles that simplify the flying process, allowing you to build confidence and understand wind behavior without constant struggle.
Products mentioned in this guide
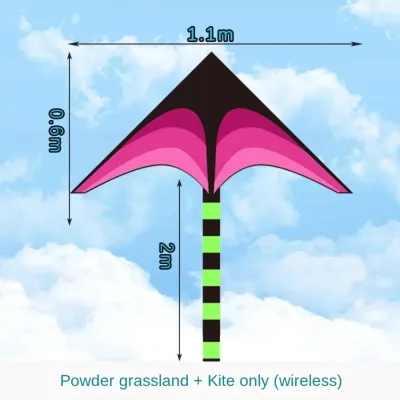
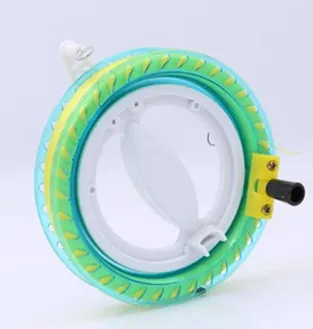
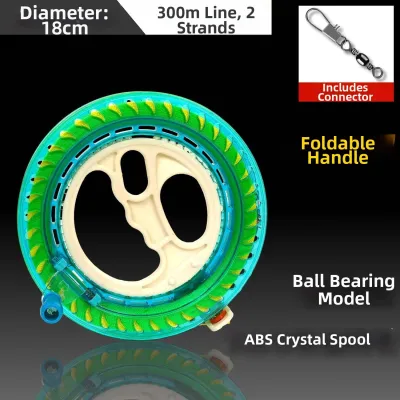
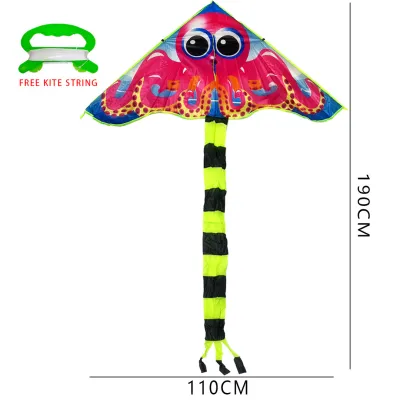
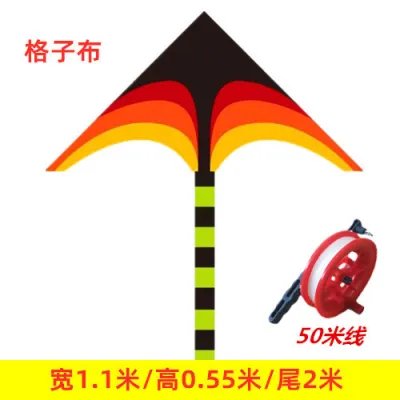

Prices are valid at publication and may change. Please refer to the product page for the latest price.
The first and most critical decision is choosing a single-line kite over dual-line or multi-line stunt models. Single-line kites require only one point of connection to the flyer, meaning they naturally find their own balance point in the sky. Dual-line kites, by contrast, require active, coordinated steering with both hands; a slight over-correction can send the kite plunging into the ground at high speeds. For an adult starting out, a single-line setup provides a relaxing, meditative experience where the kite essentially flies itself once launched, letting you focus on line management and wind observation.
Aerodynamic stability is another essential trait of beginner-friendly designs. High-quality beginner kites feature self-correcting geometry. When a sudden gust of wind hits the sail, the frame and fabric are designed to flex slightly, spilling excess wind and maintaining a stable position. This self-correcting nature minimizes the need for constant, frantic line adjustments. Instead of constantly fighting the kite, you can stand back and enjoy the steady lift, even in less-than-perfect, shifting wind conditions.
Durability is a non-negotiable factor for anyone learning the ropes. Every beginner will crash their kite at some point, often nose-first into hard ground, sand, or grass. Kites constructed with flexible fiberglass or carbon fiber spars can absorb these high-impact landings without breaking. In contrast, cheap wooden dowels or rigid plastic frames snap easily under pressure, ending your flying session instantly. Similarly, the sail material must be made of ripstop nylon or high-density polyester, which utilizes a reinforced grid pattern to prevent small punctures from turning into catastrophic tears.
Finally, we must consider the specific needs of an adult flyer. While children’s kites are small and lightweight, adults benefit significantly from larger kites with a wingspan of 1.2 to 1.8 meters. Larger kites catch steadier, higher-altitude winds that are free from ground-level turbulence. They also generate a more pronounced, satisfying physical pull, providing tactile feedback through the line that helps you feel how the kite is reacting to the wind. This physical connection makes it much easier to learn when to let out more line or when to reel it in, reducing the eye strain of watching a tiny, twitchy toy high in the clouds.
Best Kite Types for a Frustration-Free First Flight
Selecting the right kite design is the foundation of a successful first flight. Different shapes are engineered to perform in specific wind ranges and environments. By understanding how these designs interact with air currents, you can select a style that matches your local flying site, whether you are on a wide-open beach or in a spacious inland park.

Delta Kites: Best for Low Wind and High Stability
The delta kite is easily recognized by its triangular, bird-like shape with a wide leading edge and swept-back wings. This geometric profile is highly efficient, offering a large surface area relative to its overall weight. Because of this high-lift design, delta kites can launch and stay aloft in incredibly light breezes, sometimes requiring as little as 5 to 8 miles per hour of wind to fly beautifully.
One of the greatest advantages of the delta design is its built-in keel. The keel is a triangular piece of fabric extending beneath the center spine where the flying line attaches. This keel acts exactly like a ship’s rudder, keeping the nose of the kite pointed directly into the oncoming wind. If the wind shifts direction slightly, the keel naturally guides the kite to realign itself, making it one of the most stable and forgiving shapes available for adult beginners.
However, the very traits that make delta kites excellent in low winds can present challenges when the breeze picks up. Because of their large surface area, deltas can generate a substantial amount of pull in strong, gusty winds. In high-wind scenarios, the frame may distort, causing the kite to dive or pull so hard that reeling it back in becomes a strenuous physical workout. For this reason, deltas are best reserved for light to moderate breeze conditions.
Diamond Kites: The Classic Choice for Moderate Breezes
The diamond kite, often referred to as the Eddy design, is the quintessential shape that most people picture when they think of a kite. It features a simple cross-spar frame where a vertical spine intersects a curved horizontal spreader bar. This classic structure has stood the test of time because of its predictable flight path and reliable performance in steady, moderate winds ranging from 8 to 15 miles per hour.
A key characteristic of the diamond kite is its reliance on a tail for flight stability. Unlike delta kites with built-in keels, a diamond kite lacks lateral stability on its own. To compensate, a long tail—often several times the length of the kite itself—is attached to the bottom. The tail creates drag in the air, pulling the lower half of the kite downward and keeping the nose pointed skyward. Without a sufficiently long tail, a diamond kite will quickly spin, loop, and crash.
While diamond kites are incredibly easy to assemble and fly, they do require a more consistent, steady breeze than delta kites. If the wind drops below their minimum threshold, they lack the advanced aerodynamic lift of a delta and will begin to sink rapidly. However, in steady, predictable coastal winds, a well-balanced diamond kite with a long, colorful tail offers a classic, visually stunning flying experience.
Parafoil Kites: Frameless, Durable, and Travel-Ready
For adults seeking a modern, highly practical option, parafoil kites represent a major leap forward in design. These kites are entirely frameless, constructed entirely of soft fabric without any rigid fiberglass or carbon spars. They feature a series of open cells on the leading edge that inflate with air as the wind blows, forming a rigid, curved airfoil wing similar to a paraglider or parachute.
The primary benefit of a frameless design is absolute durability. Because there are no rigid spars to bend or break, a parafoil kite is virtually indestructible. If you lose control and the kite crashes nose-first onto hard ground, concrete, or sand, it simply deflates on impact without sustaining any structural damage. This makes parafoils the ultimate stress-free option for beginners who are worried about breaking their new gear during the learning phase.
In addition to durability, parafoil kites offer unmatched portability. When deflated, the entire kite, along with its tail and line, can be rolled up and stuffed into a small, lightweight pouch no larger than a water bottle. This makes them incredibly easy to pack for beach trips, hikes, or domestic travel across the Philippine islands. They require zero assembly; you simply unpack the kite, unwind the line, and let the wind inflate the cells.
The primary trade-off with parafoil kites is their wind requirement. Because they rely entirely on air pressure to maintain their shape, they require stronger, more consistent winds to fly successfully—typically between 9 and 20 miles per hour. If the wind drops suddenly or becomes highly turbulent, the cells will deflate, causing the kite to fold up and fall out of the sky. They are best suited for open, windy locations like coastal beaches where the breeze is steady and strong.
What to Check Before You Buy: Size, Materials, and Line
When shopping for an adult beginner kite online or at a local outdoor retailer in the Philippines, it is easy to get overwhelmed by various specifications. Knowing exactly what materials and dimensions to look for ensures you invest in a quality product that will last for years rather than a cheap toy that breaks on its first outing. Quality beginner kites typically range from ₱800 to ₱3,000, and paying attention to the following details will help you get the best value for your money.
First, evaluate the wingspan and overall size. For an adult, a wingspan of 40 to 70 inches (approximately 1 to 1.8 meters) is the sweet spot. Kites in this size range are large enough to catch stable air currents at higher altitudes, providing a smooth, steady flight. Avoid tiny kites designed for young children, as they lack the surface area to fly stably in variable winds and often require rapid, frustrating adjustments to stay aloft.
Next, examine the frame materials. If you are choosing a framed design like a delta or diamond, look for spars made of fiberglass or carbon fiber. Fiberglass is highly flexible, durable, and cost-effective, making it the ideal choice for beginners. Carbon fiber is lighter and stiffer, offering premium performance in low winds, though it comes at a higher price point. Absolutely avoid cheap kites that use rigid plastic, PVC, or thin bamboo sticks for their frames, as these materials will bend permanently or snap under the tension of a moderate breeze.
The sail fabric is another critical component. Check the product description for “ripstop nylon” or “ripstop polyester.” These fabrics are woven with a special reinforcing technique that makes them highly resistant to tearing. If a small puncture occurs from a sharp twig or shell, the grid pattern of stronger threads prevents the tear from expanding. Additionally, high-quality ripstop fabrics are treated to resist UV degradation, which is crucial given the intense, year-round tropical sun in the Philippines.
Do not overlook the quality of the line and the winder. A strong, reliable line is your only connection to the kite, and a break can result in your gear drifting away forever. Look for braided Dacron or polyester line with a tensile strength of at least 50 to 90 pounds, depending on the size of your kite. Avoid cheap, single-strand nylon monofilament (which resembles fishing line) or basic cotton string; these lines stretch excessively, tangle easily, and can cause painful friction burns on your hands. The winder should be an ergonomic hoop or a sturdy handle that allows you to pay out and reel in line smoothly without creating tangles.
Finaly, always check the manufacturer’s wind rating, which is usually listed on the packaging or product description. This rating indicates the minimum and maximum wind speeds (often in mph or km/h) in which the kite is designed to fly. Matching this rating to your local conditions is key: trying to fly a low-wind delta in a heavy beach gale, or a heavy parafoil in a light inland breeze, will only lead to frustration.
Where and When to Fly Safely in the Philippines
The Philippines offers some of the most beautiful and windy locations for kite flying, from sprawling coastal beaches to open mountain ridges. However, flying a kite safely requires a deep understanding of your surroundings, local weather patterns, and potential hazards. Prioritizing safety ensures a fun, injury-free experience for both you and those around you.
Choosing the right location is the first step. Look for wide, open spaces that are completely free of overhead obstructions. Coastal beaches are the absolute best locations because the wind blowing off the ocean is smooth, steady, and free of the turbulence caused by buildings, trees, and hills. Popular spots like the beaches of Zambales, Batangas, La Union, and Boracay offer perfect conditions. If you are inland, look for large public parks, open sports fields, or elevated grassy hills away from dense residential areas.
Hazard avoidance is a critical safety rule that must never be compromised. Never, under any circumstances, fly a kite near power lines, electrical substations, busy roads, or airports. Modern kite lines can conduct electricity, especially when damp from high tropical humidity or sea spray. If your line touches a power line, it can deliver a fatal electric shock directly to your hands. Always maintain a distance of at least three times the length of your line from any power lines or busy thoroughfares. Additionally, be mindful of people on the ground; keep your kite far away from crowded beach areas to avoid accidental collisions or line tangles with beachgoers.
Understanding local tropical weather shifts is also essential. The Philippines experiences two major seasonal wind patterns: the Amihan (northeast monsoon) from November to April, which brings cool, steady, and predictable winds, and the Habagat (southwest monsoon) from June to October, which brings warmer, more humid air. While both monsoons offer great flying opportunities, they can also bring sudden tropical squalls, thunderstorms, and heavy downpours. Never fly your kite when dark storm clouds are approaching or if you hear thunder. Lightning can strike a wet kite line, turning it into a dangerous lightning rod. If the wind suddenly becomes gusty and unpredictable, land your kite immediately.
Lastly, remember that kite flying is an active outdoor sport that involves standing in direct sunlight for long periods while looking up at the sky. The intense tropical sun in the Philippines can quickly cause sunburn and dehydration. Always apply a broad-spectrum sunscreen, wear UV-blocking sunglasses to protect your eyes while tracking your kite, and wear a wide-brimmed hat. Keep a bottle of fresh water nearby and take regular breaks in the shade to stay hydrated and fully enjoy your outdoor adventure.
How to Launch and Fly Your Kite on the First Try
Launching a kite for the first time can seem tricky, but by following a systematic, step-by-step approach, you can get your kite airborne on your very first try without any running or frantic movements. Kite flying is about working with the wind, not fighting against it, and proper technique makes all the difference.
Before you attempt to launch, perform a quick pre-flight check in a flat area. Ensure all the fiberglass spars are fully pushed into their rubber connectors and that the frame is rigid. Check the bridle—the short lines attached directly to the kite frame—to make sure they are completely untangled and centered. Securely attach your main flying line to the bridle loop using a reliable knot, such as a lark’s head knot, which tightens under tension but remains easy to undo later. Finally, if your kite uses a tail, shake it out completely to ensure there are no knots or tangles that could disrupt its balance.
The most reliable way to launch a kite is the two-person, long-line launch. Avoid the common, frustrating mistake of holding the kite in one hand, running as fast as you can, and tossing it into the air. Instead, have a friend hold the kite by its outer edges and walk directly downwind from you, letting out about 50 to 100 feet of line. Your friend should stand facing you, holding the kite upright with its nose pointing straight up toward the sky.
Once you are both in position and the line is straight, wait for a steady breeze to blow against your back. When you feel the wind pick up, signal your friend to release the kite. Your friend should simply let go of the kite, allowing the wind to lift it, rather than throwing it upward. As the kite is released, take a few deliberate steps backward while pulling gently and steadily on the line. This action creates the relative wind speed needed to lift the kite quickly into the air.
As the kite begins to climb, let the line slip smoothly through your hands, maintaining a steady, gentle tension. Do not yank or jerk the line, as this can cause the kite to stall or dive. Let the kite climb until it reaches a higher, smoother air layer, which is typically found above 100 feet. Once the kite reaches stable air, you can lock the line in place and enjoy the steady flight.
If your kite begins to dive or spin during flight, do not panic or pull harder on the line, as this will only accelerate the descent. Instead, take a step or two forward to momentarily slacken the line. This slack allows the kite’s natural aerodynamic design to self-correct and point its nose upward again. Once the nose is pointing up, gently pull the line to restore tension and lift. To land your kite safely, slowly wind the line back onto the spool while walking toward the kite, keeping steady control until you can safely retrieve it by hand.
Frequently Asked Questions (FAQ)
Do adult beginners need a larger kite than children?
Yes, adult beginners generally have a much better experience with larger kites. Smaller kites designed for children have less surface area, making them highly sensitive to micro-turbulences and requiring rapid, precise hand movements to keep aloft. A larger kite (with a wingspan of 1.2 to 1.8 meters) generates a steady, predictable pull, responds slower to sudden wind changes, and flies much higher into clean, non-turbulent air layers.
How can I prevent my kite from spinning out of control?
Spinning is almost always caused by unstable airflow or structural asymmetry. First, check if your kite has a tail; adding or lengthening a tail increases drag at the bottom, which naturally stabilizes the kite. Second, verify that the bridle is perfectly centered and that the left and right spars are seated evenly. Finally, avoid flying near obstructions like trees, buildings, or sea walls, which create turbulent wind shadows that cause kites to tumble.
Community discussion
Share your experience or ask a question. Comments are reviewed before publication.