
Upgrading your road bike’s cockpit to a carbon handlebar stem combo is one of the most effective ways to reduce front-end weight, dampen road vibrations, and improve aerodynamics, but finding the right setup requires balancing precise bike fit with strict mechanical compatibility. Choosing the ideal carbon cockpit for your rides in the Philippines depends on matching the handlebar’s geometry to your physical flexibility, verifying your frame’s cable routing and steerer tube dimensions, and deciding whether a fully integrated one-piece system or a highly adjustable two-piece carbon setup best serves your long-term maintenance preferences. Because a handlebar failure at high speed can cause severe injury, prioritizing structural integrity, verified safety standards, and authentic sourcing over cheap, unbranded alternatives is essential for safe riding on variable road surfaces.
What riding style and geometry should your carbon handlebar stem combo support?
Your carbon handlebar stem combo must support a geometry that matches your physical flexibility, riding distance, and typical terrain. The correct choice balances the handlebar’s reach, drop, and top-section profile with a stem length and angle that places your body in an efficient, pain-free position.
Aero geometry profiles feature flattened, wing-like top sections designed to slice through the wind, making them ideal for flat, fast group rides or solo breakaway efforts. While these profiles reduce aerodynamic drag, their wide tops can be difficult for riders with smaller hands to grip comfortably during long climbs, and they offer less compliance over rough, uneven asphalt.
Products mentioned in this guide
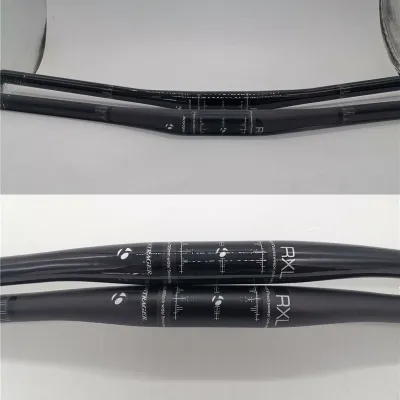
14 Lazada user ratings
Bontrager handle bar? Apaka pogi neto, since backsweep and upsweep nasiya at the same time na me-maintain nya ang comfort and looks, since T…Read full reviewShow less
Bontrager handle bar? Apaka pogi neto, since backsweep and upsweep nasiya at the same time na me-maintain nya ang comfort and looks, since T7000 carbon ang ginamit apaka tibay neto promise🙏 🔨Durability: 1million/10 🔌Compatibility: Need carbon paste kung ipa-pair mosya sa carbon stem.
🔨Durability:👍 🔌Compatibility:👍 🛠️Ease of Installation:👍 Well packed no damage wort it ang pag hihintay Thank you seller and Lazada ❤️❤️❤️ ♥️♥️♥️👍👍👍👍👍♥️♥️♥️⭐⭐⭐⭐⭐♥️♥️♥️
Prices are valid at publication and may change. Please refer to the product page for the latest price.
Climbing-focused profiles prioritize minimal weight and round or slightly ovalized tops, which provide a natural, secure handhold when riding upright. These bars typically feature a more traditional round bend that allows quick transitions from the hoods to the drops, making them highly suitable for tackling steep mountain passes where weight savings and varied hand positions are paramount.
Endurance geometry profiles focus on rider comfort over long distances by incorporating a shorter reach and a shallower drop. Reach, the horizontal distance from the stem clamp to the furthest forward curve of the bar, usually ranges from 70mm to 80mm in endurance setups, allowing you to ride without overextending your lower back. The drop, which is the vertical distance from the tops to the ends of the bars, is kept shallow (typically 120mm to 125mm) so that riding in the drops does not require extreme flexibility.
The stem portion of the combo dictates your overall reach and stack height, which directly influences neck and shoulder comfort. Stems with a steep negative angle (such as -10 to -17 degrees) lower your front end for an aggressive, aerodynamic posture, whereas a milder angle (such as -6 or -8 degrees) keeps the handlebars higher to reduce strain on your spine. You must evaluate your current bike fit measurements before purchasing, as integrated combos do not allow you to adjust the stem angle or swap stem lengths independently if you experience discomfort.
How do you verify compatibility between a carbon combo and your road bike?
Verifying compatibility requires matching the combo’s clamp dimensions to your fork’s steerer tube and ensuring the internal routing channels accommodate your specific shifting and braking systems. You must also check that the headset spacers and compression plug are designed to work with the integrated cockpit’s shape.

The first critical measurement is the outer diameter of your fork’s steerer tube, which is typically a standard 1-1/8 inches (28.6mm) but can be an oversized 1-1/4 inches (31.8mm) on certain modern endurance or aero frames. Attempting to force an incompatible stem size onto your steerer tube, or using improper shims, can compromise clamping force and lead to dangerous slippage while steering.
Cable routing compatibility is highly complex and depends on whether your road bike uses mechanical shifting, electronic shifting, or hydraulic disc brakes. Fully integrated carbon combos route cables and hoses completely inside the handlebar, through the stem, and down into the frame’s headtube, which requires specific entry ports and a compatible headset system. If your frame is designed for external cable entry on the downtube, running a fully integrated cockpit may require routing cables externally under the stem, which can look untidy and expose the housings to extra wear.
You must also verify the maximum allowable spacer stack height specified by your fork manufacturer, which typically limits spacers to 30mm or 40mm beneath the stem. Cutting your steerer tube to fit a low-profile integrated cockpit is an irreversible modification; if you cut it too short, you will not be able to raise your handlebars later if your flexibility decreases or if you decide to sell the bike.
Finally, ensure that the compression plug inside your carbon steerer tube is long enough to support the entire clamping area of the integrated stem. Carbon steerer tubes are highly sensitive to crushing forces, meaning you must use a high-quality torque wrench to tighten the stem bolts strictly to the manufacturer’s specified torque limits (usually 5 to 6 Newton-meters) while applying carbon assembly paste to prevent slippage at lower torque values.
Should you choose a fully integrated carbon cockpit or a traditional two-piece setup?
Choosing between a fully integrated one-piece carbon cockpit and a traditional two-piece setup depends on whether you prioritize maximum aerodynamic efficiency and clean aesthetics over adjustability and ease of maintenance. A one-piece combo offers high stiffness and lower weight, while a separate bar and stem allow you to fine-tune your fit and perform repairs with far less hassle.
One-piece integrated carbon cockpits merge the handlebar and stem into a single continuous structure, eliminating the heavy metal bolts and faceplates found in traditional setups. This design reduces aerodynamic drag by smoothing out the frontal profile of the bike and increases torsional stiffness, which provides a highly responsive feel when sprinting out of the saddle or cornering at high speeds.
The primary drawback of an integrated setup is the complete loss of adjustability once installed. You cannot rotate the handlebars to change the angle of the hoods, nor can you swap out a 100mm stem for a 90mm stem if you find your reach is slightly too long; correcting a fit issue requires purchasing an entirely new, expensive integrated unit.
Traditional two-piece setups, consisting of a separate carbon handlebar and a matching carbon or alloy stem, offer unmatched flexibility for riders who are still refining their bike fit. You can easily adjust the handlebar roll to relieve pressure on your wrists, try different stem lengths and angles at a fraction of the cost, and easily pack your bike into a travel case by simply detaching the handlebar from the stem faceplate.
Maintenance complexity is another critical factor to weigh, particularly regarding hydraulic brake lines. Replacing a headset bearing or swapping a stem on a fully integrated system often requires disconnecting and bleeding your hydraulic brakes, a time-consuming and technically demanding process that usually requires professional bike shop assistance. With a two-piece setup that routes cables externally or semi-internally, you can often perform basic cockpit adjustments and bearing replacements without disturbing the hydraulic lines.
How can you ensure safety and authenticity when buying carbon cockpits in the Philippines?
Ensuring safety and authenticity requires purchasing your carbon cockpit exclusively through authorized local distributors, official brand stores, or reputable local bike shops that offer valid manufacturer warranties. You must avoid unverified listings on general online marketplaces, as counterfeit carbon components carry a high risk of sudden, catastrophic structural failure.
Carbon fiber is an engineered material whose strength depends entirely on the quality of the carbon sheets, the specific resin used, and the precision of the manufacturing layup process. Counterfeit or unbranded carbon cockpits often look identical to premium models on the surface, but they frequently suffer from internal voids, uneven wall thickness, and substandard resin curing, which can cause the handlebars to snap unexpectedly when hitting a pothole or sprinting.
When shopping in the Philippines, look for physical bike shops that are listed as official dealers on the global websites of reputable cycling brands. Purchasing from an authorized dealer ensures that your cockpit has passed rigorous international safety certifications, such as ISO 4210 testing, and guarantees that you are covered by the manufacturer’s crash replacement policy or structural warranty.
Always inspect the product packaging and documentation for official serial numbers, hologram stickers, and user manuals that specify the maximum rider weight limit and recommended torque values. If a seller cannot provide proof of official distribution or offers a premium carbon cockpit at a price that seems too good to be true, it is highly likely a counterfeit product that should be avoided for your own safety.
Before taking a new carbon cockpit onto the road, perform a thorough visual inspection under bright light to check for any surface cracks, soft spots, or paint imperfections near the clamping zones. If you experience a crash or drop your bike, have the carbon components inspected by a professional mechanic, as internal structural damage to carbon fiber is often invisible to the naked eye but can lead to sudden failure during subsequent rides.
What budget should you prepare for a quality carbon handlebar stem combo?
You should prepare a budget ranging from ₱8,000 to over ₱40,000 depending on whether you choose a high-quality two-piece carbon setup, an aftermarket integrated cockpit, or a premium proprietary OEM replacement. Setting a realistic budget must also account for essential hidden costs like specialized computer mounts, custom spacers, and professional installation fees.
In the entry-to-mid tier, which ranges from ₱8,000 to ₱15,000, you can find highly reliable two-piece setups consisting of a carbon handlebar paired with a lightweight alloy stem from established, safety-certified brands. This tier offers excellent vibration dampening and weight savings while preserving full adjustability and keeping replacement costs manageable if your fit needs change.
The mid-to-high tier, spanning ₱18,000 to ₱35,000, covers reputable aftermarket integrated carbon cockpits that offer aerodynamic shaping and internal cable routing. These units are designed to fit a wide range of standard frames and provide a clean, modern look along with high stiffness, making them a popular upgrade for competitive amateur racers.
Premium and proprietary OEM cockpits occupy the top tier, often costing from ₱40,000 to well over ₱60,000. These high-end systems are typically engineered specifically for high-performance aero or climbing frames, utilizing advanced carbon layups to achieve exceptionally low weight and high stiffness, and are backed by extensive engineering research and comprehensive global warranties.
When planning your budget, you must factor in hidden expenses that are often required to complete the installation. Many integrated carbon cockpits feature proprietary shapes that require specialized out-front computer mounts costing between ₱2,000 and ₱5,000, as well as proprietary headset spacers to match the stem profile. Additionally, if your bike has fully internal hydraulic routing, expect to pay a professional bike shop for labor, new hydraulic hoses, olive and insert fittings, and a complete brake bleed, which can add significant cost to the overall upgrade.
Community discussion
Share your experience or ask a question. Comments are reviewed before publication.