
Selecting the ideal bike tent requires matching the shelter’s packed size, weight, and interior space to the duration and style of your cycling trip. A quick weekend ride over rolling hills demands a highly compact, lightweight setup that keeps your bicycle agile and easy to handle. Conversely, a multi-week journey through varying climates requires a spacious, durable shelter that offers a comfortable sanctuary to recover from daily physical exertion. Balancing these competing priorities ensures you stay dry, rested, and ready for the road ahead.
In tropical environments like the Philippines, choosing the right shelter also means accounting for high humidity, sudden heavy downpours, and warm overnight temperatures. A tent that performs beautifully in dry, cold climates might trap excessive moisture or fail during a tropical deluge. By understanding how different shelter designs interact with your bicycle’s carrying capacity and the local environment, you can make an informed decision that enhances your overall touring experience.
Understanding Shelter Types and Trip Durations
To choose the right shelter, you must first define your typical trip length and riding style. Quick overnight sprints and weekend trips focus on speed, simplicity, and minimal gear. These short outings allow you to sacrifice some interior comfort in exchange for a lighter, more aerodynamic bicycle. Multi-day touring and extended expeditions, however, shift the priority toward livability, weather protection, and long-term durability, as you will be living out of your shelter for consecutive weeks or months.
Products mentioned in this guide
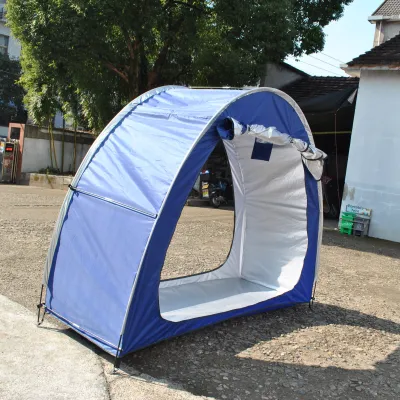
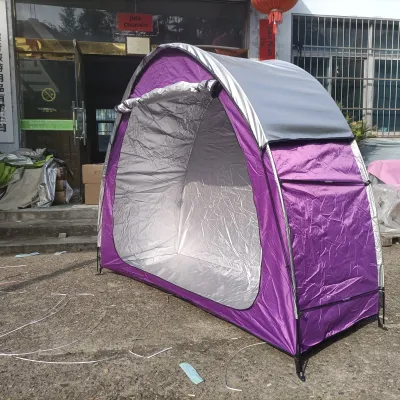
Prices are valid at publication and may change. Please refer to the product page for the latest price.
Outdoor enthusiasts generally choose from four primary shelter types for bicycle travel. Bivy sacks are ultra-compact, single-person sleeves that offer basic weather protection with minimal weight. Tarps provide excellent ventilation and customizable setups but require existing structures, trees, or trekking poles to pitch. Standard backpacking tents offer a familiar balance of comfort and weather protection, while specialized bike tents feature shorter pole segments designed specifically to fit within the tight constraints of bicycle luggage.
Every shelter choice involves a direct trade-off between packed volume, total weight, and interior living space. A larger, more comfortable tent requires more physical space on your bike and adds weight that you must carry up every climb. Conversely, an ultralight, minimalist shelter saves energy on the road but can feel cramped and restrictive during a prolonged rainstorm when you are forced to wait out the weather indoors.
Your bicycle’s luggage configuration directly influences the maximum allowable size of your packed tent. If you use a minimalist bikepacking setup with frame bags, handlebar rolls, and seat packs, you must select a highly compressible shelter with short pole segments. If your bike is equipped with traditional front and rear racks carrying spacious panniers, you have more flexibility to carry a slightly larger, heavier tent without compromising your packing system.
Matching Shelters to Quick Overnight and Weekend Trips
For short, fast-paced weekend trips, minimizing packed volume is critical to maintaining your bicycle’s handling and performance. Keeping your gear light and compact allows you to navigate technical trails, steep climbs, and narrow roads with greater ease. On these brief adventures, your primary goal is to carry just enough shelter to ensure a safe night’s sleep without overloading your bicycle.

To achieve this streamlined setup, prioritize shelters that fit easily inside handlebar rolls or small saddlebags. Keeping the weight centered and low on the bike prevents the swaying sensations that can make riding unstable, especially when standing up to pedal on climbs. A compact pack size also reduces aerodynamic drag, helping you conserve energy over long distances.
Bivy sacks and ultralight tarps are excellent choices for riders seeking maximum weight savings and stealth camping capabilities. A bivy sack can be deployed quickly in small, discreet locations where a traditional tent would not fit. Tarps offer incredible versatility, allowing you to adapt your pitch to the wind direction while maintaining maximum airflow in warm, humid conditions.
If you prefer complete protection from insects and wet ground, a minimalist one-person tent offers a practical compromise. These shelters provide a fully enclosed sleeping area with a integrated floor and bug mesh, keeping you safe from mosquitoes and crawling pests. While they offer less headroom than larger models, they provide reliable weather protection at a fraction of the weight of standard tents.
When using ultra-low-profile shelters in warm, humid regions, managing condensation is a constant challenge. Warm breath meeting cool night air can quickly coat the inside of a non-breathable bivy or tight tent with moisture. To prevent a damp sleeping bag, verify that your chosen shelter features generous mesh panels, adjustable vents, or the ability to pitch the rainfly high off the ground to promote continuous airflow.
Choosing Tents for Multi-Day Touring and Extended Adventures
Extended multi-day touring demands a shift in focus toward comfort, durability, and livability. When you spend weeks on the road, your tent is no longer just a place to sleep; it becomes your temporary home. Having enough space to rest comfortably, organize your gear, and escape the elements is essential for maintaining physical health and mental morale over a long journey.
For long-distance touring, freestanding or semi-freestanding two-person tents are highly recommended, even for solo riders. The extra interior space allows you to sit up fully, stretch your muscles, and bring valuable electronics or dry clothing inside the cabin. Freestanding designs are particularly valuable because they can be pitched easily on hard ground, concrete platforms, or wooden shelters where driving stakes is impossible.
Generous vestibules are an essential feature for extended trips. These covered outdoor areas, created by the tent’s rainfly, provide a secure space to store muddy panniers, wet shoes, and greasy cycling tools. Keeping dirty gear out of the main sleeping cabin helps maintain a clean, dry, and comfortable living space, which is especially important during consecutive days of wet weather.
Effective ventilation is crucial for managing humidity and preventing mold growth over long trips. Look for tents with double-wall construction, which separates the breathable inner mesh canopy from the waterproof outer rainfly. This design allows condensation to collect on the underside of the fly and run off to the ground, rather than dripping onto your sleeping gear.
Long-term durability requires careful inspection of the tent’s structural components. Verify that the poles are made from high-quality aluminum rather than fragile fiberglass, which can shatter under stress. Look for tear-resistant ripstop fabrics for the rainfly and floor, and ensure the tent includes sturdy, lightweight stakes that can hold secure in diverse soil types, from sandy coastal beaches to hard-packed clay.
Cross-Scenario Compatibility: Finding a Versatile Middle Ground
If you want a single shelter that can handle both quick weekend getaways and occasional multi-day tours, a lightweight two-person tent offers a highly practical compromise. While slightly heavier than a dedicated one-person shelter, a modern lightweight two-person tent packs down small enough for weekend use while providing the necessary interior space and comfort required for longer expeditions.
To maximize versatility, look for tents with modular features that allow you to adapt the setup to specific trip requirements. Some models offer a “fast-fly” configuration, which allows you to pitch just the rainfly, poles, and a footprint for an ultralight weekend setup, leaving the heavier inner tent body at home. Detachable gear lofts and adjustable vestibules also help you customize the space based on your daily storage needs.
If you regularly ride with a partner, sharing the gear load is an excellent way to manage weight and packed volume. One rider can carry the tent body and footprint, while the other carries the poles, stakes, and rainfly. This cooperative approach allows you to enjoy the comfort of a spacious two-person tent without any single bicycle bearing the entire weight penalty.
However, it is important to recognize the limitations of a single, versatile setup. A lightweight tent designed for general use may lack the heavy-duty fabric thickness needed to withstand months of continuous exposure to harsh UV rays and rough ground. Conversely, a highly durable, feature-rich touring tent might prove too bulky and heavy for fast-paced, minimalist bikepacking trips where every gram counts.
Essential Specs and Labels to Verify Before Purchase
Before purchasing any bike tent, you must carefully verify the manufacturer’s specifications to ensure the shelter is compatible with your specific bicycle and riding conditions. Do not rely solely on marketing descriptions; instead, analyze the technical details to make an objective decision.
First, measure the packed dimensions of the tent, paying close attention to the folded pole length. Standard backpacking tent poles are often folded into segments longer than 50 centimeters, which can be difficult to fit between drop handlebars or inside compact frame bags. Specialized bike tents typically feature shorter pole segments, often measuring between 30 and 35 centimeters, making them much easier to pack securely on a bicycle frame.
Next, check the hydrostatic head rating of both the rainfly and the tent floor, which is measured in millimeters. This rating indicates the amount of water pressure the fabric can withstand before leaking. For reliable protection against heavy tropical downpours, look for a rainfly rating of at least 1,500mm and a floor rating of 3,000mm or higher to prevent ground moisture from seeping through when you sit or lie down.
Always distinguish between the tent’s “trail weight” and its “packed weight” on the product label. The trail weight typically includes only the tent body, rainfly, and poles, while the packed weight includes all stakes, guylines, stuff sacks, and instruction manuals. Knowing the total packed weight gives you an accurate understanding of the actual load you will be pedaling over long distances.
Finally, inspect the quality of the construction details and hardware. Look for fully taped seams on the rainfly and floor, high-quality zippers that operate smoothly without catching, and robust attachment points for guylines. Verifying these small details, along with checking the manufacturer’s warranty terms, helps ensure your shelter will provide reliable protection and durability for many rides to come.
Frequently Asked Questions (FAQ)
Can I use a regular car-camping tent for bikepacking?
Standard car-camping tents are generally unsuitable for bikepacking due to their significant weight, large packed volume, and long, rigid pole segments. These bulky shelters are designed for transport in a vehicle trunk and do not fit within typical bicycle bags or handlebar setups. Attempting to strap a heavy car-camping tent to a bicycle rack adds substantial weight, increases aerodynamic drag, and negatively impacts the bike’s balance and handling, making climbs and technical terrain difficult and potentially unsafe.
How do I prevent my bike tent from getting damaged by the bicycle?
To protect your tent fabric from damage during transit, always pack it away from sharp bicycle components such as chainrings, pedals, brake levers, and tools. Use durable, dedicated stuff sacks or dry bags to shield the fabric from abrasion against the bike frame or racks. When setting up your campsite, clear the ground of sharp rocks, thorns, and twigs, and always use a dedicated footprint or groundsheet to protect the thin tent floor from punctures. Avoid leaning your bicycle directly against the tent mesh or rainfly, as a sudden slip can cause tears or broken poles.
Community discussion
Share your experience or ask a question. Comments are reviewed before publication.