
Selecting the right taekwondo kick pad is a foundational decision that directly influences your training safety, technical precision, and overall progression. Whether you are a beginner stepping onto the mats of a local dojang for the first time or an advanced competitor preparing for a high-stakes tournament, the equipment you use must align with your physical capabilities and training goals. In tropical climates like the Philippines, where high humidity and intense heat accelerate physical fatigue and wear on gear, choosing the correct pad style and size becomes even more critical. The right pad not only protects the striker’s feet and shins from injury but also safeguards the holder from repetitive joint strain, ensuring that both training partners can perform at their best.
To navigate the selection process, you must first understand the distinct styles of kick pads used in taekwondo, as each is engineered for specific training outcomes. By matching your current skill level with the appropriate pad dimensions, foam density, and ergonomic features, you can create a safe and effective training environment that supports your martial arts journey.
Understanding Taekwondo Kick Pad Styles and Their Uses
To build a versatile training regimen, you must first understand the distinct styles of kick pads used in taekwondo, as each is engineered for specific training outcomes.
Products mentioned in this guide
Prices are valid at publication and may change. Please refer to the product page for the latest price.
Kick shields are large, heavily padded targets designed primarily for power development and high-impact combination drills. These shields feature a broad surface area that allows strikers to unleash full-force techniques, such as the back kick or side kick, without the risk of missing the target. Because they are held against the body or braced with both arms, they are excellent for simulating the resistance of an opponent and building the core stability required for competitive sparring.
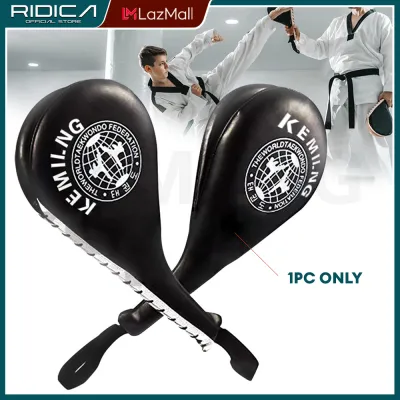
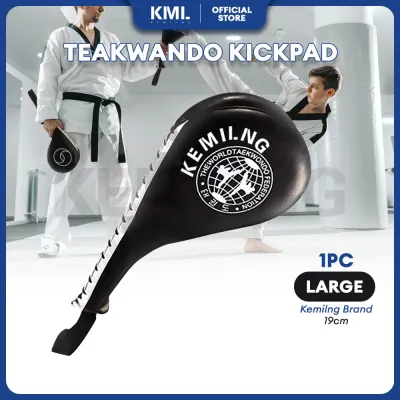
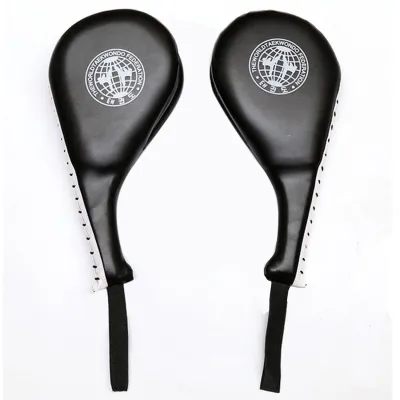
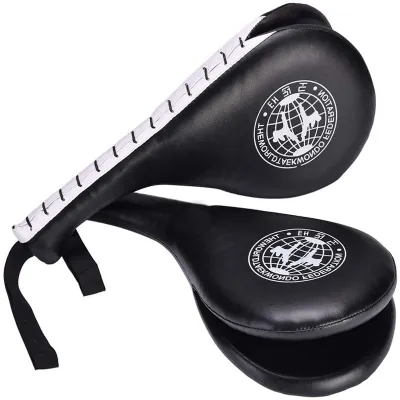
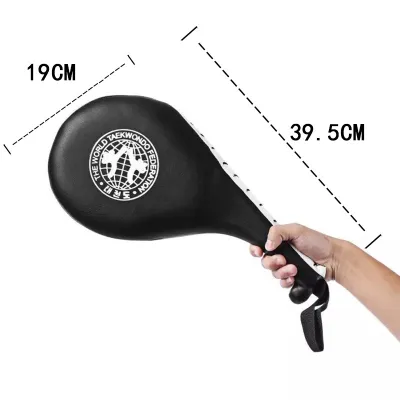
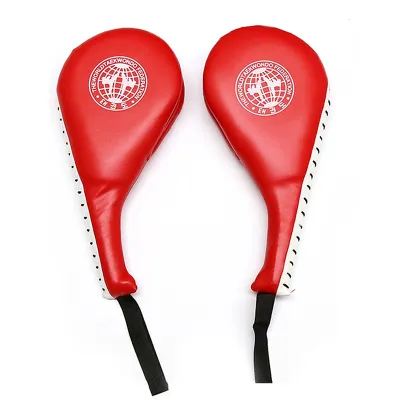
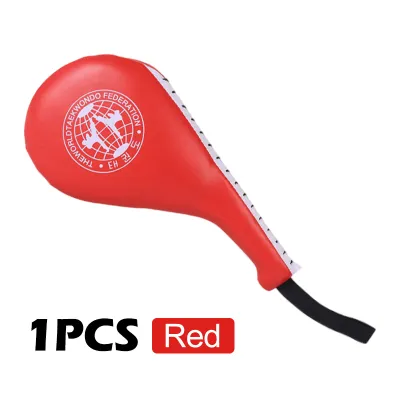
Paddle targets, often referred to as clapper targets, represent the opposite end of the training spectrum. These lightweight, teardrop-shaped pads are attached to a flexible handle, making them highly maneuverable for the holder. They are the go-to choice for speed, accuracy, and high-flying jumping kicks, such as the 360-degree turning kick. The design allows the holder to rapidly change target heights and angles, forcing the striker to develop quick reflexes and precise foot-eye coordination.
Round or donut targets offer a unique middle ground, featuring a circular shape with handles positioned on the back or sides. These targets provide a flat, stable striking surface that is ideal for precision straight kicks and specific angle training. They are particularly useful for practicing close-range techniques where a standard paddle might be too flimsy and a full-sized kick shield would be too bulky.
Clapper or reactive targets are a specialized variation of the paddle target, consisting of two parallel leaves that slap together upon impact. This design provides immediate, loud audible feedback when a kick is executed with the correct speed, angle, and point of contact. If the strike is sloppy or lands with the toes instead of the instep, the pad produces a dull thud rather than a sharp clap. This instant feedback is invaluable for self-correction, helping students refine their timing and technique without needing constant verbal cues from an instructor.
Matching Pad Dimensions and Density to Your Skill Level
Selecting the appropriate pad dimensions and foam density requires a careful assessment of your current skill level and physical power.

Beginners require equipment that prioritizes safety, confidence, and basic technique development. At this stage, strikers are still mastering their balance and spatial awareness, making larger target zones essential to prevent accidental misses that could injure the holder. A beginner-friendly pad should feature moderate thickness and a slightly softer foam density. This configuration provides sufficient shock absorption to protect unconditioned shins and insteps from bruising while ensuring the pad does not feel like a solid brick upon impact.
As you progress to an intermediate level, your training demands shift toward a balance of precision, speed, and repetitive drilling. Intermediate practitioners generate significantly more force than beginners, requiring pads with enhanced shock dispersion capabilities. The target zones on intermediate pads are typically smaller to encourage greater accuracy and tighter kicking form. The internal padding must be dense enough to withstand rapid, repetitive strikes during intense cardio and sparring drills without bottoming out or transferring excessive force to the holder’s joints.
Advanced practitioners, including black belts and active competitors, require high-density, thick padding specifications designed to withstand maximum power output. At this level, kicks are executed with explosive speed and full body weight, generating immense kinetic energy. Advanced pads utilize multi-layered, high-density EVA or polyurethane foam that absorbs and dissipates extreme impact forces. These pads are thicker and heavier, ensuring that the holder’s shoulders, elbows, and wrists are fully protected even during prolonged power-kicking sessions.
Before making a purchase, it is crucial to verify the manufacturer’s specifications regarding foam density and cover durability. Look for detailed product descriptions that specify “multi-layered foam” or “high-density EVA core,” as these indicators point to superior shock absorption. Avoid pads that do not list their internal materials, as low-grade single-layer foam will quickly degrade under regular use, compromising safety for both the striker and the holder.
Evaluating Ergonomics, Materials, and Holder Comfort
While much attention is paid to the striker, the comfort and safety of the pad holder are equally important to prevent fatigue and long-term joint strain.
The configuration of handles and straps plays a pivotal role in how impact forces are distributed through the holder’s body. Single-grip handles are common on lightweight paddles, but for larger kick shields, a multi-grip system is essential. Look for shields that feature a combination of a solid top handle, adjustable forearm straps, or arm-insert sleeves. These configurations allow the holder to secure the pad tightly against their forearm, reducing wrist torque and minimizing the strain placed on the shoulder and elbow joints during heavy impacts.
Cover materials and stitching quality are critical indicators of a pad’s longevity, especially in hot and humid training environments. Synthetic leathers, such as high-grade polyurethane (PU) or heavy-duty vinyl, are preferred for their moisture resistance and ease of cleaning. In tropical climates, sweat can quickly penetrate poor-quality covers, leading to material rot and unpleasant odors. Ensure the pad features double-stitched seams and reinforced metal rivets at high-stress connection points, such as where the handles attach to the main body of the pad, to prevent tearing under pressure.
Weight considerations must not be overlooked, particularly during extended training sessions or multi-student classes. A pad that is too heavy will rapidly fatigue the holder’s arms, leading to improper holding angles and an increased risk of injury for both partners. Conversely, a pad that is too light may not offer sufficient resistance, causing the holder to be pushed off balance. The ideal pad should feel balanced in hand, offering a manageable weight that allows the holder to remain agile and responsive.
Always check product labels and manufacturer guidelines to confirm the intended use and impact ratings of the equipment. Some pads are designed strictly for light-contact speed drills, while others are rated for heavy-duty power training. Using a light-contact pad for heavy power kicks will not only destroy the equipment prematurely but also expose the holder to unnecessary impact forces.
Condition-Based Equipment Setups for Every Training Phase
To optimize your training progression, it is beneficial to assemble a structured equipment setup tailored to your specific training phase.
A beginner starter kit should focus on foundational mechanics and accuracy. For this phase, a standard double-clapper paddle target is the most versatile and essential tool. It allows beginners to practice basic front kicks, roundhouse kicks, and side kicks with minimal risk of injury. Pair this with a medium-sized, lightweight kick shield (approximately 40 to 50 centimeters in height) to introduce basic power concepts and low-impact combination drills. This simple combination provides all the necessary tools to build coordination and confidence.
An intermediate sparring and drilling setup requires a more dynamic combination of gear to accommodate faster footwork and complex combinations. This setup should include at least two high-quality double-clapper paddles for rapid speed and reaction drills, allowing the holder to present multiple targets in quick succession. Additionally, integrate a standard curved kick shield with a multi-grip handle system. This allows the training partners to transition seamlessly from high-speed precision kicks to heavy power finishes, simulating the unpredictable nature of a real sparring match.
For the advanced power and conditioning phase, the equipment must be capable of handling maximum force output. This setup centers around a heavy-duty, extra-thick kick shield (typically 12 to 15 centimeters thick) constructed with high-density, multi-layered foam. Pair this shield with specialized reactive targets that offer high resistance and distinct auditory feedback. This combination is designed for full-contact training, allowing advanced martial artists to push their physical limits, develop explosive power, and condition their striking surfaces safely.
Knowing when to upgrade or replace your existing gear is vital for maintaining a safe training environment. Regularly inspect your pads for observable signs of wear, such as permanent foam compression where the pad no longer springs back to its original shape. If you notice that the internal foam feels mushy, or if the outer cover has developed deep cracks and tears, the pad’s ability to absorb shock has been severely compromised. Upgrading your gear as your striking power increases ensures that your equipment always matches your physical capabilities.
Safety Checks and Maintenance for Striker and Holder
Implementing a consistent routine for safety checks and maintenance is essential to protect both the striker and the holder from preventable injuries.
Before every training session, perform a quick visual and physical inspection of all kick pads. Check the seams for any signs of separation, inspect the handles and straps for fraying or loose stitching, and feel the striking surface to ensure there are no localized soft spots or collapsed foam sections. If any structural damage is detected, remove the pad from service immediately until it can be repaired or replaced.
Proper cleaning is especially important in humid climates to prevent the buildup of bacteria, mold, and unpleasant odors. After each use, wipe down the entire surface of the pad with a damp cloth and a mild, non-abrasive disinfectant solution. Avoid using harsh chemicals or soaking the pads, as excess moisture can seep into the seams and degrade the internal foam. Allow the pads to air dry completely in a well-ventilated, shaded area; never expose them to direct, intense sunlight for extended periods, as UV rays can dry out and crack synthetic leather covers.
Retiring a pad is a critical safety decision that should not be delayed. When a pad exhibits structural failures—such as a broken internal board, completely compressed foam that bottoms out under moderate pressure, or detached handles—it can no longer perform its primary function of shock absorption. Continuing to use a compromised pad puts the holder at risk of joint injuries and exposes the striker to hard, unpadded surfaces.
Finally, the holder must employ proper positioning and bracing techniques to minimize physical strain. Stand in a stable, balanced stance with your feet shoulder-width apart, keeping your core engaged and your knees slightly bent. When holding a kick shield, brace it against your body or forearm, using your skeletal structure and body weight to absorb the impact rather than relying solely on arm strength. Keep your eyes on the striker to anticipate the impact, and slightly push into the kick at the moment of contact to stabilize the pad and prevent it from flying backward.
Frequently Asked Questions (FAQ)
Can I use Muay Thai pads for taekwondo training?
While you can technically use Muay Thai pads (often called Thai pads) for taekwondo training, they are not the ideal choice for most drills. Thai pads are designed for heavy shin kicks, knees, and elbows, making them significantly denser, stiffer, and heavier than standard taekwondo pads. While this high density is excellent for raw power conditioning, it lacks the lightweight flexibility required for the rapid, high-angle speed combinations characteristic of taekwondo. Additionally, Thai pads do not provide the distinct auditory feedback of a clapper paddle, which is crucial for refining taekwondo striking technique.
How do I know if a kick pad is too heavy for the holder?
A kick pad is too heavy if the holder struggles to maintain the correct height and angle during drills, or if they experience rapid fatigue in their shoulders, wrists, or lower back within a few minutes of training. Other warning signs include the holder’s arms shaking or dropping significantly upon impact, or the holder needing to constantly adjust their grip to keep the pad stable. Using a pad that exceeds the holder’s physical capacity compromises the safety of both partners and increases the risk of chronic joint strain.
Community discussion
Share your experience or ask a question. Comments are reviewed before publication.