
Choosing your first road bike is an exciting step into the world of cycling, and TRINX offers accessible entry points for beginners. To find the right model, you must evaluate frame geometry, frame materials, and component tiers against your personal budget and physical dimensions. Rather than searching for a single “best” model, a beginner should focus on finding an endurance-oriented frame that prioritizes comfort, stability, and ease of handling over aggressive racing features. By understanding how to read spec sheets and measure your body correctly, you can select a bike that supports your fitness goals and keeps you riding safely.
Identifying Entry-Level TRINX Road Bike Categories
When browsing the TRINX lineup, you will encounter various frame designs tailored for different riding styles. For beginners, the most critical distinction lies between endurance geometry and aggressive race geometry. Endurance road bikes feature a taller head tube and a shorter top tube, which places the rider in a more upright position. This posture reduces strain on your lower back, neck, and shoulders, making it much easier to sustain longer rides as your core strength develops. In contrast, aggressive race geometries force you into a low, aerodynamic tuck that requires significant flexibility and can quickly cause fatigue if you are not accustomed to the position.
The frame material also plays a fundamental role in the bike’s weight, durability, and overall ride quality. Most entry-level TRINX road bikes utilize either aluminum alloy or high-tensile steel frames. Aluminum frames are highly popular because they are lightweight, stiff, and naturally resistant to rust—a crucial benefit in humid tropical climates like the Philippines. However, aluminum’s stiffness means it can transmit more road vibration directly to your hands and saddle. High-tensile steel frames are heavier but offer a more compliant, forgiving ride that absorbs road chatter well. If you choose a steel frame, you must be diligent about maintaining the paint finish, as exposed steel can rust quickly when subjected to high humidity or coastal air.
Products mentioned in this guide
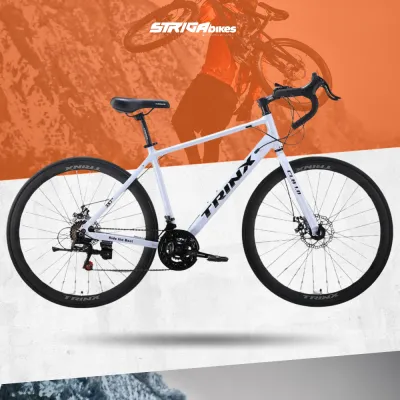
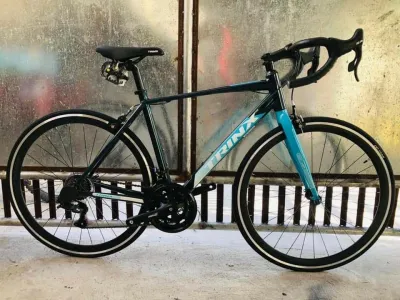
Prices are valid at publication and may change. Please refer to the product page for the latest price.
To identify true entry-level tiers within the brand’s catalog, you must learn to decode their naming conventions and spec sheets. TRINX typically organizes its road bikes into distinct series, often using numerical designations where lower numbers represent the entry-level configurations. For example, a model ending in a lower decimal or integer is generally equipped with simpler, more budget-friendly components designed for recreational riders. Always cross-reference the model name with the official specification sheet to verify the frame material and geometry classification before making a decision.
Setting a Realistic Budget for Your First Bike
Establishing a realistic budget framework is essential when purchasing your first road bike. If you set aside a total budget in Philippine Pesos (₱), do not spend the entire amount on the bicycle itself. A safe and practical approach is to allocate approximately 70% to 80% of your total budget to the bike, reserving the remaining 20% to 30% for essential safety gear, accessories, and initial maintenance. Buying a bike but having no funds left for a proper helmet or lights compromises your safety on the road.

Safety gear must be your top priority. A certified bicycle helmet is non-negotiable and should be fitted correctly to protect your head in the event of a fall. Additionally, high-visibility front and rear lights are critical for riding on busy roads, especially during sudden tropical downpours or late afternoon rides when visibility drops rapidly. Reflectors, a basic bell, and high-visibility clothing also help ensure that motorists can see you clearly from a distance.
The choice of groupset—the collective term for the gears, shifters, derailleurs, and brakes—significantly impacts both the upfront cost and long-term maintenance of the bike. Entry-level models often feature groupsets from brands like Shimano (such as Tourney or Claris) or L-Twoo. These systems are designed to be durable and cost-effective to repair or replace. While they may not shift as quickly or have as many gear steps as professional-grade groupsets, they offer reliable performance that is more than adequate for learning the basics of gear management.
Finally, you must plan for hidden costs that arise immediately after purchase. Many road bikes are sold with basic flat pedals, but you may eventually want to upgrade to toe clips or clipless pedal systems as your skills progress. You will also need a reliable floor pump with a pressure gauge to maintain correct tire pressure, a basic multi-tool for roadside adjustments, tire levers, and spare inner tubes. If you purchase your bike online, factor in the cost of taking it to a local bike shop for professional assembly and a safety check to ensure everything is tensioned correctly.
Finding the Correct Frame Size and Riding Position
Riding a road bike that is too large or too small can lead to discomfort, joint strain, and poor handling. To determine your correct frame size, do not rely solely on your overall height. You must measure your inseam—the distance from your crotch to the floor while standing barefoot—and compare both measurements against the official TRINX size chart. A frame that is too large will stretch you out too far, making it difficult to reach the brakes, while a frame that is too small will cramp your knees and throw off your balance.
Understanding basic stack and reach concepts will help you evaluate how a bike will feel before you ride it. Stack is the vertical distance from the center of the bottom bracket to the top of the head tube, while reach is the horizontal distance between those same two points. A higher stack-to-reach ratio indicates a more upright, beginner-friendly riding position. If you are between sizes, it is generally safer for a beginner to choose the smaller frame, as it is much easier to make a small bike feel larger by adjusting the seatpost and stem than it is to make a large bike feel smaller.
Once you have the correct frame size, you can make minor adjustments to customize the fit to your body. Adjusting the saddle height is the most critical step; when your foot is at the bottom of the pedal stroke, your knee should have a slight bend of about 80 to 90 percent extension. You can also slide the saddle forward or backward on its rails to align your knee over the pedal spindle. If you experience persistent neck, back, or knee pain after short rides, consult a professional bike fitter who can analyze your pedaling mechanics and swap out components like the stem or seatpost to match your anatomy.
Evaluating Components for Ease of Use and Control
The components on your road bike directly influence how confident you feel on the road. When comparing entry-level models, pay close attention to the braking system. Rim brakes are lightweight, simple to adjust, and cost-effective, but their stopping power can decrease in wet or muddy conditions. Mechanical disc brakes offer more consistent stopping power in tropical rain and wet road conditions, though they add slightly more weight and require specific maintenance procedures.
Tire clearance is another critical factor for beginners. Traditional road bikes used narrow 23mm or 25mm tires, which require high pressure and offer a harsh ride. Modern entry-level frames often accommodate wider tires, such as 28mm or 32mm. Wider tires can be run at lower pressures, providing a larger contact patch for better grip, increased comfort over uneven asphalt, and improved puncture resistance.
Beginners should look for a drivetrain that offers a wide gear range. A compact double chainring (typically 50/34T) paired with an 8-speed or 9-speed rear cassette (such as 11-32T) provides a versatile spread of gears. This setup allows you to maintain a comfortable pedaling cadence on flat roads while still having low enough gears to climb steep hills without excessive strain.
Pre-Purchase Inspection and After-Sales Checklist
Before finalizing your purchase, whether at a physical retail store or through an online marketplace, perform a thorough pre-purchase inspection. Examine the frame welds for any visible cracks, uneven beads, or paint defects. Spin both wheels to check for trueness; the rims should spin smoothly without wobbling or rubbing against the brake pads.
Verify the alignment of the derailleur hanger and the brake calipers. Misaligned components can cause skipping gears, noisy shifting, or uneven brake wear. If you are buying a boxed bike online, remember that improper self-assembly can void the manufacturer’s warranty and compromise your safety.
Inquire about the local distributor’s warranty terms. A reputable dealer should offer a clear warranty on the frame against manufacturing defects, along with a limited warranty on components. Confirm if the seller provides a free initial tuning service, as new gear cables naturally stretch during the first few weeks of riding and will require adjustment to maintain crisp shifting.
Frequently Asked Questions (FAQ)
Is a TRINX road bike suitable for daily commuting?
Yes, many entry-level TRINX road bikes can serve as daily commuters, provided you select a model with appropriate features. Look for frames that offer eyelets or mounting points for rear racks and fenders, which are essential for carrying work gear and blocking road spray during wet weather. Keep in mind that the drop-bar riding posture places your head lower than a flat-bar hybrid, which may slightly reduce your field of vision in heavy city traffic.
Should I choose a drop-bar or flat-bar model for my first bike?
The choice depends on your riding goals and comfort preferences. Drop-bar models offer multiple hand positions (the hoods, the drops, and the tops), which helps prevent hand numbness on longer rides and allows for a more aerodynamic posture. Flat-bar models provide a more upright riding position, simpler steering control, and easier access to brake levers, making them highly suitable for short urban commutes and riders who feel anxious about the forward-leaning stance of a traditional road bike.
What essential accessories do I need besides the bike?
To ensure a safe and self-sufficient ride, prioritize safety and maintenance gear. You must wear a certified bicycle helmet that fits snugly on your head. Equip your bike with a bright white front light and a red rear light, especially when riding in low-light conditions. Finally, carry a compact saddle bag containing a spare inner tube, tire levers, a mini-pump or CO2 inflator, and a multi-tool so you can repair a flat tire or make minor adjustments on the road.
Community discussion
Share your experience or ask a question. Comments are reviewed before publication.