
Setting up a dedicated home boxing corner is one of the most efficient ways to build cardiovascular endurance, improve coordination, and relieve stress without commuting to a commercial gym. You do not need an expansive room or commercial-grade equipment to establish a highly functional training space. A clear area of about 6 by 6 feet is sufficient to accommodate the essential gear required to practice your stance, footwork, and striking combinations.
While boxing is an incredibly rewarding workout, it places repetitive high-impact stress on your hands, wrists, and joints. Prioritizing safety by selecting the correct protective gear and structural mounts is vital before you throw your first punch. By focusing on a few foundational pieces of equipment, you can create a safe, durable, and highly effective training space tailored to your fitness level and home environment.
Core Protective Gear: Selecting Hand Wraps and Boxing Gloves
Hand Wraps: Length and Material
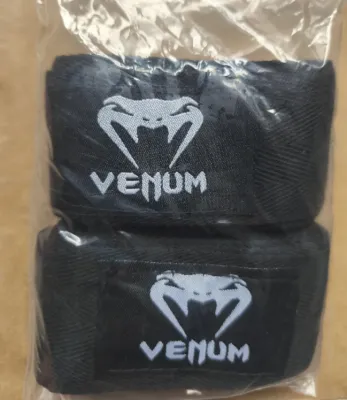
Hand wraps are the single most critical, non-negotiable safety layer in boxing. Many beginners mistakenly believe that wraps are simply meant to cushion the knuckles, but their primary function is to structurally secure the hand. Wrapping compresses and stabilizes the 27 small bones, ligaments, and joints in your hand, while firmly anchoring your wrist to prevent painful hyperextension upon impact.
Products mentioned in this guide
Prices are valid at publication and may change. Please refer to the product page for the latest price.
For most adults, standard 180-inch wraps are highly recommended over shorter 120-inch alternatives. The extra length ensures you have enough material to wrap securely between each finger, cover the knuckles multiple times, and provide several supportive layers around the wrist. Shorter wraps often force you to compromise on either knuckle padding or wrist stability, increasing the risk of injury.
When choosing materials, you will generally find traditional 100% cotton wraps and elasticized “Mexican-style” wraps. Traditional cotton wraps are highly durable and offer rigid support, but they do not stretch or contour easily to the hand. Elastic wraps, made from a cotton-spandex blend, stretch slightly to conform to the unique shape of your hand, providing comfortable compression and a more secure fit that is less likely to loosen during training.
In humid tropical climates, sweat management is a major consideration for your gear’s lifespan. Look for wraps that feature breathable, quick-drying weaves to prevent moisture retention. Always wash your wraps inside a mesh laundry bag to prevent them from tangling, and hang them to air-dry completely in a well-ventilated area away from direct, intense sunlight, which can degrade the elastic fibers over time.
Boxing Gloves: Weight, Closure, and Climate Considerations
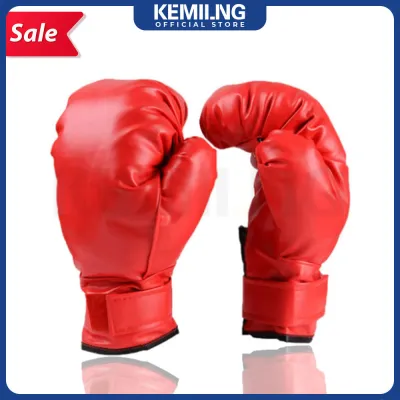
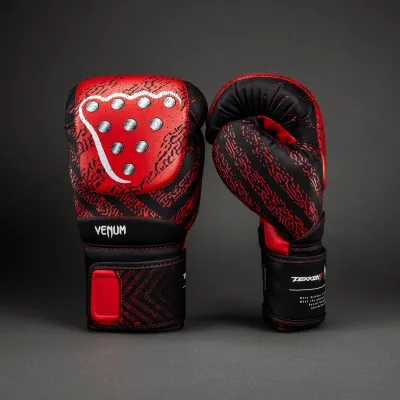
Selecting the right boxing gloves is essential for protecting your hands and getting the most out of your home workouts. Gloves are categorized by weight, measured in ounces (oz), ranging typically from 8 oz to 16 oz. For heavy bag training and general fitness, beginners should generally opt for gloves in the 12 oz to 16 oz range.
Heavier gloves, such as 14 oz or 16 oz, contain thicker layers of protective foam that absorb more impact energy, shielding your knuckles and wrists from the dense resistance of a heavy bag. Training with heavier gloves also builds shoulder endurance and cardiovascular conditioning. Lighter gloves, like 12 oz, are suitable for smaller hand sizes or speed-focused shadowboxing, but they offer less protection for heavy striking.
For a home setup, the closure system dictates how easily you can train independently. Hook-and-loop (Velcro) closures are the standard choice for home training because they allow you to put on and take off your gloves quickly without assistance. Lace-up gloves offer superior wrist alignment and a highly customized fit, but they are impractical for solo workouts because you cannot tie them yourself.
Material choices generally come down to genuine leather versus synthetic alternatives. Genuine leather gloves offer exceptional durability, breathability, and a natural fit that molds to your hand over time, though they require a higher initial investment. High-quality synthetic leathers, such as polyurethane (PU) or microfiber, are excellent, budget-friendly starter options that resist moisture well and are easy to clean.
To manage sweat and prevent odor buildup in warm, humid environments, prioritize gloves designed with climate-control features. Look for models with mesh palm panels to promote airflow, moisture-wicking inner linings, and antimicrobial treatments. After every session, wipe down the exterior, insert glove deodorizers or cedar chips, and use a standing fan to dry the interiors completely.
Before you begin training, perform a quick safety fit check. Insert your wrapped hand into the glove; your fingers should reach the end of the hand compartment without being painfully bent or cramped. Your thumb should rest comfortably in a naturally curved, fully attached position to prevent injury. Secure the wrist strap tightly, verifying that it keeps your wrist rigid and aligned with your forearm.
Striking Targets: Choosing Between Hanging and Freestanding Bags
Hanging Heavy Bags: Realism and Installation
Traditional hanging heavy bags are the gold standard for developing punching power, timing, and realistic movement. Because they hang from a single overhead point, they swing naturally when struck. This movement forces you to step, pivot, and maintain proper distance, allowing you to practice realistic footwork and angles around the target.

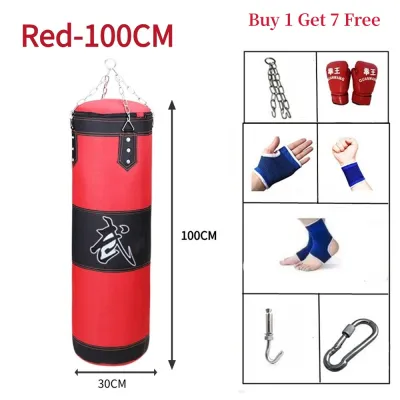
When selecting a hanging bag, aim for a weight that is roughly half of your body weight. A bag that is too light will swing wildly with every strike, disrupting your rhythm, while a bag that is too heavy will feel like hitting a concrete wall, placing excessive strain on your joints. Most adult beginners find that a bag weighing between 30 kg and 40 kg provides the ideal balance of resistance and movement.
The primary limitation of a hanging heavy bag is its strict installation requirements. A standard heavy bag must be anchored directly into a solid wooden ceiling joist, a concrete beam, or a heavy-duty structural wall bracket. It is highly unsafe to mount a heavy bag to drywall, plaster, or unsupported rafters, as the repetitive dynamic force can easily pull the mount down, causing severe property damage or personal injury.
Freestanding Punching Bags: Portability and Convenience
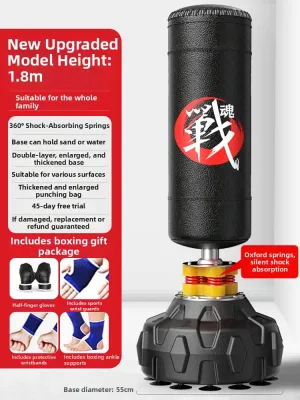
If you live in a rental property, have plaster ceilings, or need to share your training space with other household activities, a freestanding punching bag is a highly practical alternative. These units consist of a striking column attached to a heavy plastic base that sits directly on the floor, requiring absolutely no drilling or structural modifications.
To keep the unit stable, the base must be filled with either water or sand. Water is highly convenient to fill and empty, making the bag easier to relocate if you move houses. However, dry sand is significantly denser than water, providing superior stability and preventing the base from sliding or tipping over when you land heavy combinations or low kicks.
While freestanding bags offer unmatched convenience, they do have distinct training trade-offs. They do not swing like a traditional hanging bag; instead, they pivot or rebound on a spring mechanism. This can feel less realistic and may limit your ability to practice continuous head movement and circular footwork. Additionally, powerful strikes can cause the base to shift slightly on smooth tiled or hardwood floors.
Space-Saving Alternatives for Small Rooms
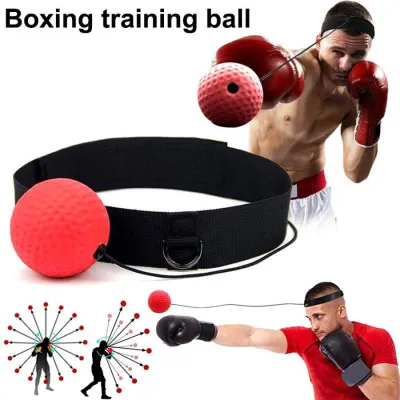
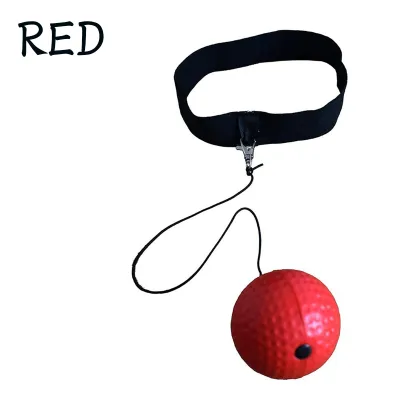
When floor space is exceptionally limited, you do not have to abandon your training goals. Compact alternatives like wall-mounted striking pads, doorway-mounted uppercut bags, or freestanding reflex bags (often called cobra bags) can easily fit into tight corners or narrow hallways.
These compact tools are not designed for raw power development, but they are highly effective for refining accuracy, hand-eye coordination, head movement, and punching speed. Integrating a reflex bag into your corner allows you to maintain a high-intensity cardiovascular workout while keeping your training area highly organized and unobtrusive.
Footwork and Foundation: Floor Mats and Jump Ropes
Floor Mats for Impact Absorption and Grip
Boxing footwork requires constant bouncing, pivoting, and lateral shifting on the balls of your feet. Training directly on hard surfaces like concrete, ceramic tiles, or polished hardwood can lead to joint fatigue, shin splints, and repetitive-strain injuries in your knees and ankles. Installing shock-absorbing flooring is a simple way to protect your body.
Interlocking EVA foam mats are a popular, budget-friendly choice for home setups. They are lightweight, easy to assemble, and provide excellent cushioning for your joints. However, very soft foam can compress too much underfoot, creating an unstable surface that makes pivoting difficult. Additionally, cheap foam can become slippery when wet with sweat.
For a more durable and stable foundation, consider heavy-duty rubber mats, similar to those used in commercial weightrooms. Rubber offers superior impact absorption, does not compress excessively, and provides excellent traction. Aim for a mat thickness of approximately 3/4 inch (19 mm) to strike the perfect balance between joint protection and a firm, stable surface for rapid footwork.
Regardless of the material you choose, ensure the mats feature a textured, non-slip surface. In warm, tropical environments, sweat will inevitably drip onto the floor during intense workouts. A textured mat prevents dangerous slips and slides, allowing you to pivot with confidence even during high-intensity combinations.
Jump Ropes for Conditioning and Rhythm
No boxing training corner is complete without a jump rope. Skipping is the ultimate conditioning tool for boxers, building cardiovascular endurance, calf stamina, and the footwork coordination needed to move effortlessly around an opponent. It teaches you to maintain a light, rhythmic bounce on the balls of your feet.
For beginners, a solid PVC speed rope is the ideal starting point. PVC ropes are inexpensive, durable, and turn smoothly, helping you learn the timing and coordination required for basic skipping and double-unders. Lightly weighted ropes, where the weight is distributed throughout the cable, are also excellent because they provide physical feedback, helping you feel the rope’s rotation while building shoulder endurance.
To find the correct rope length, stand on the center of the cable with one foot and pull the handles upward along the sides of your body. For beginners, the tips of the handles should align with your armpits. As your coordination and speed improve, you can shorten the rope slightly to encourage faster wrist turnover and tighter, more efficient movements.
Space Planning and Safety for Your Home Boxing Corner
Clearance Requirements
To train safely and effectively, you must establish a clear perimeter around your striking target. A minimum radius of 3 to 4 feet (approx. 1 to 1.2 meters) in all directions from the center of your bag is highly recommended. This clearance ensures you can throw full-extension punches, practice lateral footwork, and move dynamically without colliding with walls, furniture, or glass windows.
Before you begin a workout, scan the floor for any tripping hazards, such as loose cables, water bottles, or discarded gear. Keeping your training perimeter completely clear allows you to focus entirely on your form, balance, and combinations without the fear of accidental collisions or falls.
Mounting and Structural Safety
If you decide to install a hanging heavy bag, verifying the structural integrity of your mounting point is a critical safety step. Always locate a solid wooden ceiling joist or a concrete beam using a reliable stud finder or structural inspection. Never mount a heavy bag directly to drywall, plasterboard, or unsupported decorative rafters.
Use heavy-duty mounting hardware, such as steel lag bolts and a heavy-bag swivel hanger, to distribute the weight and reduce rotational friction. If you are renting your home or cannot confidently verify the structural strength of your ceiling, stop immediately. In these scenarios, consulting a professional contractor or switching to a freestanding punching bag is the only safe way to prevent structural damage.
Ventilation and Equipment Care
High humidity and poor ventilation create a breeding ground for mold, mildew, and bacteria in boxing gear. Position your home boxing corner near a window to encourage natural airflow, or use a standing fan to keep air circulating during and after your workouts. Keeping the air moving helps dry out damp gear quickly.
Establish a consistent maintenance routine to keep your equipment clean and hygienic. Wipe down your floor mats and the exterior of your punching bag with a mild disinfectant after every session. Never leave damp hand wraps or gloves sealed inside a dark gym bag; air them out immediately in a cool, dry place. Avoid exposing synthetic or leather gear to direct, intense sunlight, as UV rays can dry out and crack the materials.
Optional Upgrades to Add as Your Skills Progress
Focus Mitts
Once you have mastered the basic punches and footwork, focus mitts are an excellent upgrade if you have a training partner. Working with mitts allows you to practice dynamic combinations, defensive slips, and counter-punching in real-time. This interactive training style improves your accuracy, reaction time, and spatial awareness far more effectively than solo bag work.
Speed Bags
Speed bags are small, air-filled bags suspended from a circular wooden platform. They are designed to rebound rapidly, helping you develop hand-eye coordination, shoulder endurance, and a steady punching rhythm. Installing a speed bag requires a dedicated wall mount and platform, making it a more permanent structural addition to your home training corner.
Resistance Bands
Resistance bands are incredibly versatile, budget-friendly, and take up virtually no space. You can wrap a band around your upper back and hold the ends in your hands to add resistance to your shadowboxing, which helps build punching power and speed. They are also excellent for warming up your rotator cuffs and performing targeted shoulder-strengthening exercises.
Headgear and Sparring Gloves
It is important to note that protective headgear and specialized sparring gloves (typically 16 oz with extra-soft foam) are strictly designed for controlled partner sparring. They are entirely unnecessary for a solo home training corner focused on fitness, bag work, and shadowboxing. Focus on mastering your stance, guard, and basic punches with your core gear before considering sparring equipment.
Frequently Asked Questions (FAQ)
Can I use MMA gloves instead of boxing gloves for heavy bag training?
Using standard MMA grappling gloves for heavy bag training is highly discouraged. Grappling gloves feature minimal padding (typically 4 oz to 6 oz) and leave the fingers exposed, which offers virtually no protection against the dense impact of a heavy bag. This significantly increases your risk of wrist sprains, knuckle bruising, and skin tears. While specialized MMA striking gloves offer slightly more padding, traditional boxing gloves remain the safest and most effective choice for dedicated heavy bag workouts.
How much weight should a beginner's heavy bag be?
As a general rule, a beginner’s heavy bag should weigh approximately half of the user’s body weight. This ratio provides the ideal balance of resistance and movement. A bag that is too light will swing excessively when struck, disrupting your rhythm and footwork. Conversely, a bag that is too heavy will feel like hitting a solid wall, which can place excessive strain on your wrists, elbows, and shoulders, potentially leading to joint injuries.
Is it safe to hang a heavy bag from a standard apartment ceiling?
Hanging a heavy bag from a standard apartment drop ceiling or directly into drywall is highly unsafe and can cause severe structural damage. Heavy bags exert dynamic, repetitive forces that can easily pull down plaster or damage weak wooden frames. Safe installation requires anchoring the mount directly into solid concrete beams or load-bearing wooden joists using heavy-duty masonry anchors or lag bolts. If you are renting or cannot verify the ceiling’s structural strength, a freestanding punching bag is the only safe and practical alternative.
Community discussion
Share your experience or ask a question. Comments are reviewed before publication.