
A 6-tube yoga pedal puller offers a highly portable, versatile way to perform a full-body workout right in the comfort of your home. By utilizing your own body weight as an anchor against the resistance of six elastic tubes, you can effectively target your arms, legs, shoulders, and core without the need for bulky iron weights. This lightweight tool is particularly convenient for home workouts in the Philippines, where tropical humidity might make traveling to a crowded gym less appealing than exercising in a well-ventilated room. To get the most out of this equipment, you must understand how to properly anchor your feet, maintain tension throughout each movement, and execute each exercise with controlled form.
The key to a successful workout with a pedal puller lies in the relationship between the foot pedals and the foam-grip handles. The six latex or rubber tubes provide a progressive resistance curve, meaning the tension increases as you stretch the tubes further. This guide breaks down the essential safety checks, step-by-step exercises for every major muscle group, and progression strategies to help you build strength safely and effectively.
Pre-Workout Setup and Safety Checks
Before you begin stretching the resistance tubes, performing a thorough equipment inspection is vital to prevent sudden snaps or slips. Start by closely examining the six latex or rubber tubes along their entire length. Look for any signs of wear, such as micro-tears, small cracks, discoloration, or dry rot, which can develop more quickly in warm, humid tropical environments. Ensure that the tubes are firmly anchored inside both the foam handles and the plastic foot pedals, with no loose connections or visible fraying at the attachment points.
Products mentioned in this guide
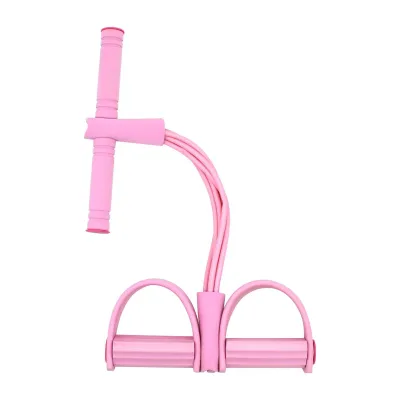
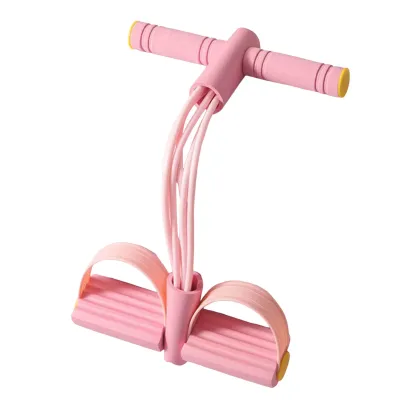
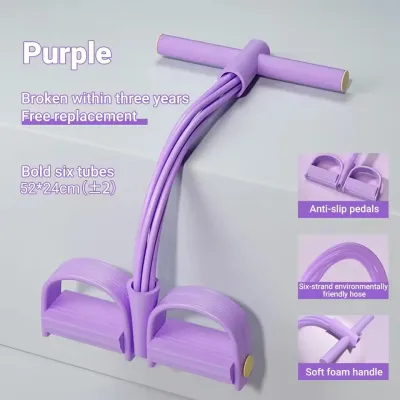
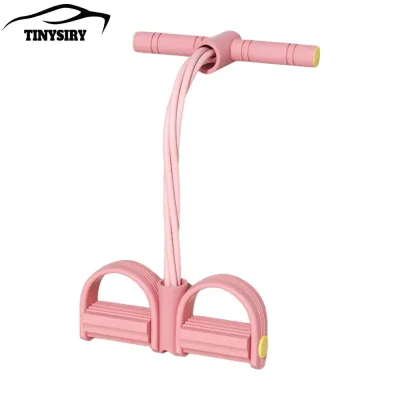
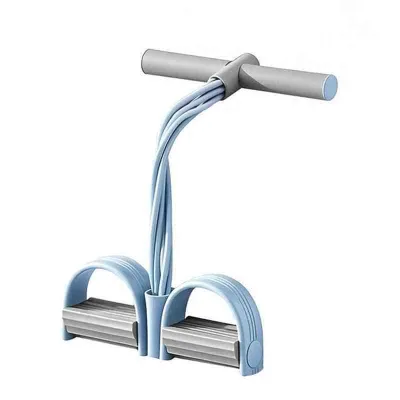
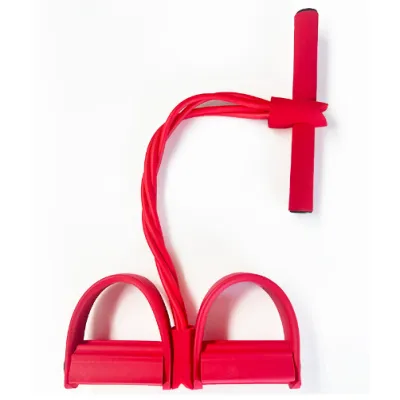
Prices are valid at publication and may change. Please refer to the product page for the latest price.
Next, evaluate your workout environment and the stability of your equipment. Place the foot pedal base on a flat, level, and dry floor. In many homes, smooth tiled or polished concrete floors can become incredibly slippery when exposed to sweat or high humidity. To ensure a secure grip, place a high-traction yoga mat underneath your workout area and wipe down the non-slip surface of the pedals before stepping on them. Always wear athletic shoes with rubber soles or workout bare-footed on a clean, dry surface to prevent your feet from slipping out of the pedal straps mid-exercise.
Finally, establish clear stopping conditions for your session. Resistance band training relies on material integrity, so you must halt your workout immediately if you hear any cracking or snapping sounds, or if you feel a sudden, unexpected drop in tension. On a physical level, stop the exercise immediately if you experience sharp, localized joint pain, dizziness, or extreme discomfort. Remember that equipment cannot replace personal judgment, and pushing through mechanical or physical warning signs increases the risk of injury.
Lower Body and Core Exercises
Targeting your lower body and core with a 6-tube pedal puller requires establishing a rock-solid foundation at the base. By sliding your feet securely into the pedal straps, you create a stable anchor point that allows you to isolate your legs and abdominal muscles. This anchoring system utilizes your lower body weight to counteract the upward pull of the elastic tubes, ensuring that the resistance is directed precisely at the muscles you want to train.

Seated Leg Extensions and Glute Kickbacks
To perform seated leg extensions, begin by sitting upright on your exercise mat with your spine tall and your shoulders relaxed. Place both feet securely inside the pedal straps, ensuring the arches of your feet are centered on the pedals. Grasp the foam handles with a neutral grip, palms facing each other, and pull the handles up toward your lower chest to create initial tension in the tubes. Slowly extend your legs straight out in front of you, engaging your quadriceps as you push against the resistance of the six tubes. Hold the fully extended position for a brief second, then slowly bend your knees to return to the starting position, resisting the pull of the tubes on the way back.
For glute kickbacks, transition to an all-fours position on your mat. Secure one foot inside a pedal strap while holding both handles firmly against the floor with your hands directly under your shoulders to anchor the unit. Slowly extend the strapped leg straight backward and upward, squeezing your glutes at the top of the movement. Lower your knee back toward the floor with control, maintaining constant tension on the tubes throughout the eccentric phase.
A common error during these movements is locking your knees at the peak of extension, which transfers the load from your muscles to your joints. Another frequent mistake is using momentum to swing your legs rather than relying on muscular control. To correct these errors, focus on a slow, deliberate tempo—taking two seconds to extend and three seconds to return—while keeping a slight, protective bend in your knees at the end of the movement.
Seated Core Crunches and Oblique Twists
To set up for seated core crunches, sit on your mat with your knees slightly bent and your feet firmly strapped into the pedals. Hold the handles close to your chest, keeping your elbows tucked in near your ribs. Begin the movement by engaging your deep core muscles and slowly leaning your torso backward at roughly a 45-degree angle, rounding your upper back slightly to isolate the abdominal wall. Exhale deeply as you contract your abs and pull your torso back up toward your knees, resisting the urge to pull the handles with your arms.
To target your obliques, transition into oblique twists from the same seated, angled posture. Hold the handles together at chest height and slowly rotate your torso from side to side. Ensure that the rotation originates entirely from your waist and upper torso, rather than simply swinging your arms back and forth. Keep your hips square and your feet firmly planted in the pedals to maintain a stable base.
Throughout both exercises, focus on breathing out during the exertion phase—which is the crunch or the twist—and inhaling as you return to the starting position. Keep your gaze focused forward rather than looking down at your lap, which helps prevent unnecessary neck strain and keeps your cervical spine in a neutral, safe alignment.
Upper Body and Arm Exercises
The 6-tube configuration of your pedal puller provides a robust level of resistance that is highly effective for upper body conditioning. When your feet are securely anchored in the pedals, either in a seated or standing position, you can redirect the tension of the tubes to target your biceps, shoulders, chest, and back. This setup allows you to perform classic gym movements without the need for heavy dumbbells.
Bicep Curls and Overhead Presses
To execute seated bicep curls, sit tall on your mat with your legs extended straight and your feet secured in the pedals. Hold the handles with an underhand grip, palms facing upward. Keep your elbows tucked tightly against your ribs and slowly curl the handles up toward your shoulders. Focus on keeping your wrists straight and avoid rocking your torso backward to cheat the weight up. Lower the handles back down slowly, fully extending your arms without letting the tubes go slack.
For overhead presses, you can perform the movement seated or standing, depending on your height and the length of the tubes. Sit upright with your feet in the pedals and bring the handles up to shoulder height, palms facing forward. Press the handles directly overhead until your arms are fully extended, keeping your core tight to prevent your lower back from arching. Lower the handles back to shoulder level with control.
If the resistance feels too heavy or too light, you can adjust your grip width or modify the tube tension if your specific model allows you to detach individual tubes. Always refer to the manufacturer’s guidelines before attempting to alter the tube configuration, and ensure any remaining tubes are locked securely in place before resuming your workout.
Chest Flyes and Seated Rows
To target your chest, you can perform chest flyes by anchoring the pedal base behind you or sitting with the tubes running under your glutes, depending on the specific design of your puller. Start with your arms extended out to the sides at shoulder height, with a slight bend in your elbows. Slowly pull the handles forward and inward, meeting in front of your chest as you squeeze your pectoral muscles. Return to the starting position slowly, feeling a gentle stretch in your chest.
For seated rows, sit on the floor with your legs extended straight ahead and your feet strapped into the pedals. Hold the handles with a neutral grip, palms facing each other, and lean your torso slightly forward from the hips. Pull the handles back toward your lower ribs, driving your elbows behind your body and squeezing your shoulder blades together at the peak of the movement. Slowly extend your arms back to the starting position.
During both exercises, it is crucial to keep your shoulders depressed—pulled down and away from your ears. Allowing your shoulders to shrug upward transfers the tension to your upper trapezius muscles, which can lead to neck strain and reduce the effectiveness of the workout on your chest and back.
Common Form Mistakes and When to Stop
Using a 6-tube pedal puller safely requires a high level of mindfulness regarding your movement mechanics. One of the most common mistakes is rushing through repetitions. When you perform exercises too quickly, you rely on momentum rather than muscle tension, which significantly reduces the workout’s effectiveness and increases the risk of the tubes snapping back uncontrollably. Always maintain a controlled, steady tempo, focusing on both the pulling and releasing phases of each movement.
Another frequent error is losing core engagement, which often manifests as an arched lower back during overhead presses or a slouched spine during seated rows. Keep your abdominal muscles lightly contracted throughout every exercise to support your spine. Additionally, never allow the resistance tubes to snap back to their starting position; you must actively resist the pull of the tubes during the eccentric (lowering) phase of every repetition.
You must also be highly sensitive to physical and equipment-related stop signals. Inspect your puller periodically during your workout for any signs of tube fraying, handle slippage, or pedal cracking. Stop immediately if you feel any sharp, sudden, or localized pain in your joints, tendons, or lower back. While a burning sensation in your muscles is a normal sign of fatigue, joint discomfort is a clear warning sign that requires you to stop the workout immediately and reassess your form.
Structuring Your Routine and Progressing Safely
To build a balanced physique and improve your fitness, structure your exercises into a cohesive full-body circuit. Begin with a brief five-minute warm-up of light stretching or joint mobility exercises. Then, perform each of the exercises detailed above in a sequential circuit: start with lower body movements, transition to core exercises, and finish with upper body pulls and presses. Aim for 3 sets of 10 to 15 repetitions for each exercise, resting for 45 to 60 seconds between sets to allow your muscles to recover.
As your strength improves, you can progress your workouts safely without needing heavier equipment. Try slowing down the tempo of your repetitions—such as taking four seconds to lower the handles—to increase the time under tension. Alternatively, you can increase the number of repetitions per set or decrease your rest intervals. If your manufacturer’s instructions permit, you may also adjust the tube configuration to increase the baseline resistance.
Keep a simple workout log to track your total sets, repetitions, and how your body feels after each session. Tracking your progress helps you ensure a steady, sustainable adaptation over time while preventing the risks of overtraining.
Frequently Asked Questions (FAQ)
Can I adjust the resistance on a 6-tube pedal puller?
The resistance on a 6-tube pedal puller is typically fixed, determined by the thickness and elasticity of the six pre-installed tubes. You should always consult the manufacturer’s instructions before attempting to detach, remove, or swap any tubes, as many models are designed as single, non-adjustable units. Never attempt to modify the equipment yourself by tying knots in the tubes, cutting them, or adding non-original parts. Doing so can compromise the structural integrity of the latex, leading to sudden snaps and potential injury during high-tension exercises.
How often should I use the pedal puller for visible results?
For consistent progress, aim to use your pedal puller three to four times a week, allowing at least one day of rest between intense sessions to let your muscles recover. Consistency and proper recovery are far more important than daily high-intensity workouts. Combine your resistance training with a balanced diet and adequate hydration, especially in warm climates where fluid loss is high. Avoid expecting immediate overnight changes; sustainable muscle toning and strength gains develop gradually over several weeks of regular, dedicated practice.
Community discussion
Share your experience or ask a question. Comments are reviewed before publication.