
Selecting the right front rack for your bike depends on your frame’s physical mounting points, your handlebar configuration, and how much weight you plan to carry. If your bike features a rigid fork with dedicated threaded eyelets, a fork-mounted rack offers excellent stability and weight distribution by keeping the load low and secured directly to the frame structure. Conversely, if you ride a bike with a suspension fork or lack integrated mounting points, a handlebar-mounted rack provides a highly adaptable alternative for carrying lighter, daily essentials. Evaluating these physical constraints and handling characteristics before purchasing ensures your cargo setup remains safe, stable, and compatible with your riding style.
Understanding Handlebar and Fork Mount Systems
To choose the correct front rack for your bike, you must first understand how these two primary mounting styles interact with your bicycle’s steering and frame geometry. A handlebar-mounted front rack relies on clamps that attach directly to the handlebar tube or the stem faceplate. Many of these systems also utilize support struts that extend downward to attach to the front wheel axle or the fork dropouts. Because the primary attachment point is high up on the cockpit, the weight of the rack and its cargo rests directly on your steering assembly. This means every turn of the handlebar requires you to physically pivot the weight of your gear, which directly influences how the bike responds to steering inputs.
In contrast, a fork-mounted front rack bypasses the handlebars entirely. These racks bolt directly into threaded eyelets positioned along the fork blades. Fork mounts generally fall into two categories: low-rider racks, which position panniers low to the ground on either side of the wheel, and platform fork racks, which mount a flat tray above the front tire using mid-blade and dropout eyelets. Because the rack is bolted directly to the fork structure, the weight is transferred lower down and closer to the steering axis. This structural difference changes the load path of the cargo, distributing the forces through the rigid fork blades rather than concentrating them on the rotating handlebar assembly.
Products mentioned in this guide
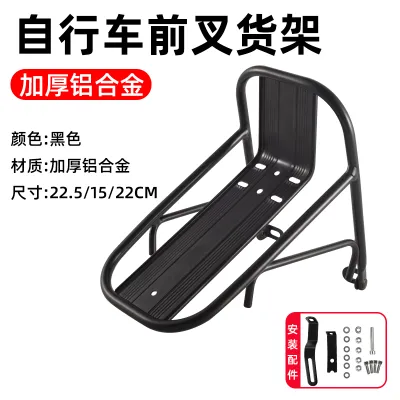
15 Lazada user ratings
Lightweight and durable, Fast shipping service, Secure mounting system, Sturdy aluminum frame, serves its purpose, hope it will last longer.…Read full reviewShow less
Lightweight and durable, Fast shipping service, Secure mounting system, Sturdy aluminum frame, serves its purpose, hope it will last longer. thank you.
The installation was pretty smooth and didn't take much effort.
Lightweight and durable, Perfect
Good quality material,
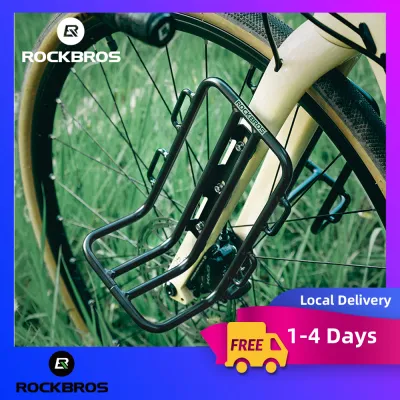
123 Lazada user ratings
Photo not related. Many times order here, they packed it well, very fast delivery. Very recommended, I will order again soon. Thankyou Sleek…Read full reviewShow less
Photo not related. Many times order here, they packed it well, very fast delivery. Very recommended, I will order again soon. Thankyou Sleek black color adds style, Great for long-distance biking trips, Excellent value for the price, One-year warranty for peace of mind,
Sleek black color adds style, Sturdy aluminum alloy material, Great for long-distance biking trips, Securely holds items in place, Provides …Read full reviewShow less
Sleek black color adds style, Sturdy aluminum alloy material, Great for long-distance biking trips, Securely holds items in place, Provides ample space for luggage, One-year warranty for peace of mind, Excellent value for the price, Convenient and easy to install,
late posting gayun pa man salamat parin at malaking baGay para sa ak8n ma6 Nagagamit akong Maasahan sa biyahe koh.
Received the item... quality is okay, it's beautiful, and delivery was fast despite it being right during Tet.
maganda at maayos.. bobili uli
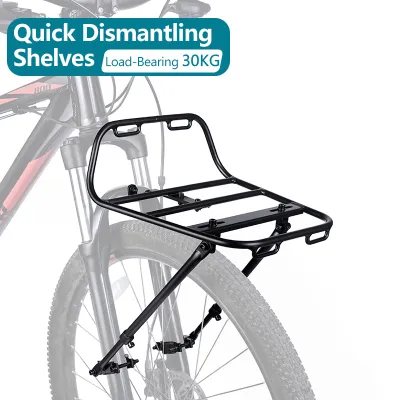
7 Lazada user ratings
Awesome, the product is really good, even better than I expected.
nice good quality
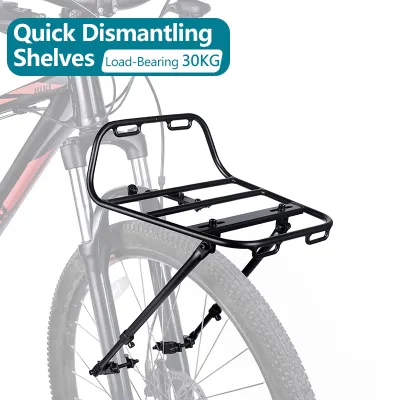
2 Lazada user ratings
The packaging is very good. The material of the items is durable quality.
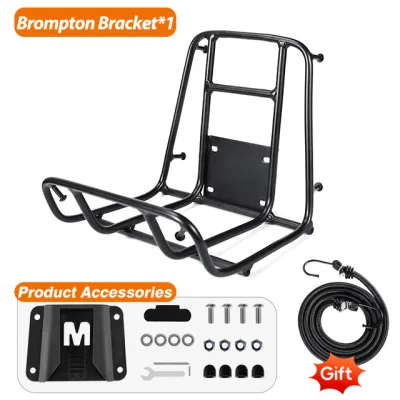
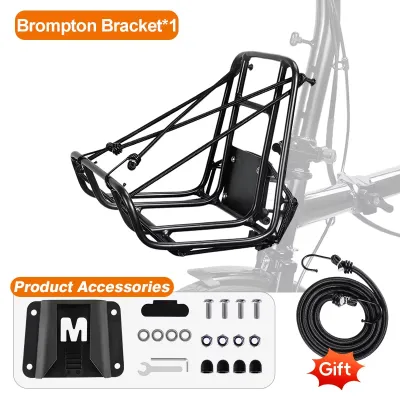
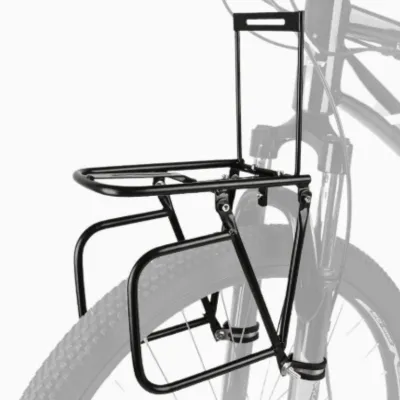
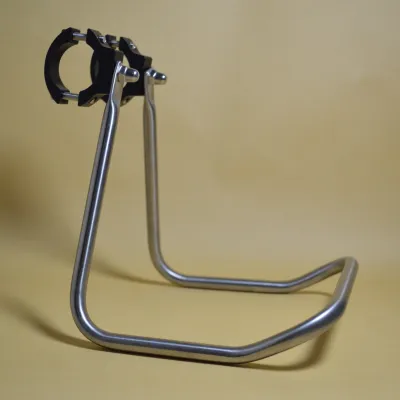
Prices are valid at publication and may change. Please refer to the product page for the latest price.
Checking Your Bike's Compatibility and Clearance
Before purchasing any front rack for your bike, you must conduct a thorough physical inspection of your bicycle to determine which mounting systems are physically possible. The most critical step is identifying the presence and location of fork eyelets. Inspect your front fork for small, threaded holes, which are typically designed for M5 or M6 bolts. Mid-blade eyelets are located halfway up the fork legs, either on the outside, inside, or passing completely through the blade. Dropout eyelets are located at the very bottom of the fork, just above where the wheel axle secures. If your fork lacks these threaded holes, a standard fork-mounted rack cannot be installed without specialized, manufacturer-approved adapter clamps.
Suspension forks present unique compatibility challenges that often rule out traditional fork-mounted racks. Because the lower legs of a suspension fork move independently of the upper stanchions to absorb road impacts, you cannot bridge a rack between these moving parts. Clamping hardware to the suspension stanchions can scratch the smooth surface, damage the internal seals, and cause suspension failure. Additionally, the movement of the fork can pinch hydraulic brake hoses or gear cables if they are routed near the rack’s mounting points. If your bike has front suspension, a handlebar-mounted rack that does not attach to the lower fork legs is usually the safest and most viable option.
Cockpit clearance is another vital factor when evaluating handlebar-mounted racks. You must measure your handlebar diameter at the clamping area, which commonly ranges from 22.2 millimeters on older or folding bikes to 31.8 millimeters or 35 millimeters on modern gravel and mountain bikes. Ensure there is enough flat space on either side of your stem for the rack clamps to grip securely. Furthermore, check the routing of your brake hoses and derailleur cables. Tight cable housing can be crushed or severely bent by a handlebar rack, which degrades shifting performance and can pinch hydraulic lines, leading to a dangerous loss of braking power.
Finally, check for potential clearance conflicts with your brake calipers and fenders. Disc brake calipers protrude from the lower left side of the fork and can physically block the straight path of a rack’s support struts. If your bike has disc brakes, you will need a rack specifically designed with offset struts or spacers to clear the caliper body. Similarly, if you run full-coverage fenders, verify that the rack’s mounting bolts and struts do not compress the fender against the tire, which could cause the wheel to lock up unexpectedly while riding.
Stability, Weight Limits, and Handling Differences
The structural differences between handlebar and fork mounts translate directly into how your bike handles when loaded with cargo. Weight distribution is the key factor here. Fork-mounted racks, particularly low-rider systems, keep the center of gravity low and close to the ground. This low placement minimizes the leverage the cargo has over your steering, allowing the bike to maintain a predictable line through corners. Handlebar-mounted racks, by contrast, position the cargo high above the front wheel. This elevated center of gravity makes the bike feel top-heavy, which can cause the steering to feel floppy or sluggish at low speeds and twitchy at high speeds.
This handling impact is most noticeable during a phenomenon known as wheel flop. When you park your bike or turn the handlebars at slow speeds, a heavy load mounted to the handlebars wants to fall to the side, causing the front wheel to swing sharply to the left or right. This can make the bike difficult to control when starting from a stop or navigating tight urban spaces. Additionally, carrying excessive weight on the handlebars can induce high-speed shimmy, a dangerous lateral oscillation of the frame that can lead to a loss of control. Keeping your front cargo light and centered is essential when using a handlebar-mounted system. This stability is particularly crucial when navigating uneven road surfaces, such as the varied pavement and sudden potholes often encountered on provincial roads in the Philippines.
To ensure safe operation, you must verify the manufacturer weight limits for both the rack and your bicycle components. A typical handlebar-mounted rack is designed for light daily carry, often rated for a maximum load of 5 to 10 kilograms. Exceeding this limit can bend your handlebars, slip the stem clamp, or snap the mounting brackets. Fork-mounted racks are generally much more robust, with some heavy-duty touring models rated to carry 15 to 25 kilograms. However, you must also check your bicycle manufacturer’s manual to confirm the weight capacity of the fork itself. Lightweight carbon fiber forks, even those with eyelets, often have strict weight limits and are highly sensitive to clamping forces.
Decision Framework: Which Mount Should You Choose?
To finalize your choice, evaluate your specific bicycle setup, riding environment, and cargo needs against this structured decision framework.
When to Choose a Fork Mount Rack
You should choose a fork-mounted front rack if your bicycle is equipped with a rigid steel, aluminum, or adventure-rated carbon fork that features dedicated mid-blade and dropout eyelets. This setup is ideal for long-distance touring, multi-day bikepacking, or heavy commuting where you need to carry loaded panniers or a heavy porteur bag. The low center of gravity and rigid attachment points provide the stable, predictable handling required when navigating rough gravel paths, steep descents, or long highway stretches.
When to Choose a Handlebar Mount Rack
A handlebar-mounted rack is the appropriate choice if your bike has a front suspension fork, lacks integrated eyelets, or if you only need to carry light, daily items like a small bag, a jacket, or a lock. This style is highly versatile for urban commuters riding hybrid or mountain bikes who want a simple, removable cargo solution. Because it does not rely on specific frame eyelets, it can be easily transferred between different bicycles in your fleet.
When Neither System Fits
There are scenarios where neither mounting style is safe or compatible. If your bicycle features an integrated carbon handlebar and stem cockpit, standard handlebar clamps cannot be used, as clamping metal brackets to shaped carbon tubes can crush the composite material and cause catastrophic failure. Similarly, if your bike has an ultra-lightweight carbon road fork without eyelets, you must not use aftermarket P-clamps or adapter brackets to force a fork rack onto the blades. Doing so voids your warranty and risks structural failure of the fork under load.
Critical Safety Verifications
Before riding with any front load, verify that your hydraulic brake hoses and mechanical cables have free movement throughout the entire steering range. If you are mounting a rack to carbon fiber handlebars or a carbon fork, always use a calibrated torque wrench to tighten all fasteners to the exact Newton-meter specifications provided by the manufacturer. Applying carbon assembly paste can help prevent slipping without requiring excessive torque.
Pre-Purchase Measurement and Installation Checklist
To guarantee a successful installation and avoid the hassle of returning incompatible gear, complete this practical measurement and safety checklist before making your purchase:
- Measure Handlebar Diameter: Use a vernier caliper or a flexible measuring tape to determine the exact diameter of your handlebar at the clamping area next to the stem (common sizes are 25.4mm, 31.8mm, or 35mm).
- Check Stem Clamp Width: Ensure there is at least 10 to 15 millimeters of exposed, straight handlebar tube on both sides of your stem faceplate to accommodate the rack's mounting brackets.
- Verify Axle Compatibility: If the rack's support struts mount to the wheel axle, check if your bike uses a standard quick-release skewer or a modern thru-axle. Thru-axle systems require specialized replacement axles with threaded ends to accept rack mounts.
- Measure Fork Width: Measure the distance between your fork's mid-blade eyelets to ensure the rack's mounting arms can align without being forced inward or outward, which stresses the mounting bolts.
- Check Platform Height and Knee Clearance: Ensure the rack platform sits high enough to clear your front tire and fender, but low enough that it does not interfere with your brake levers or hit your knees when you stand up to pedal.
- Plan Light Placement: A loaded front rack will block a headlight mounted to your handlebars. Verify if the rack has a dedicated mounting tab for relocating your front light to the front or side of the rack platform for safe night riding.
- Review Torque and Material Warnings: Always consult your bicycle's user manual to confirm if your fork and handlebars are rated for rack installation, and never exceed the recommended torque values during assembly.
Community discussion
Share your experience or ask a question. Comments are reviewed before publication.