
Adjusting the ride height and cant on an inside-the-waistband (IWB) holster clip involves relocating the mounting screws to different pre-drilled holes or rotating the clip along a curved adjustment slot. To achieve a comfortable draw, you must balance how high the firearm sits above your belt line (ride height) with the angle at which the grip tilts (cant). By systematically adjusting these two variables, you can align the holster with your body’s natural contours, prevent the grip from digging into your ribs, and ensure your hand can establish a clean, secure grip during the draw stroke. This customization is essential for daily carry, as a poorly adjusted holster can cause persistent discomfort, print through your clothing, or hinder your ability to draw safely and efficiently in an emergency.
Understanding Ride Height and Cant for IWB Carry
Ride height refers to the vertical position of the holster relative to your belt line. A high ride height exposes more of the firearm’s grip above the waistband, making it easier to wrap your fingers around the handle quickly. However, this high placement can cause the firearm to feel top-heavy, potentially causing the grip to tilt outward away from your body and print through thin clothing. A low ride height buries the gun deeper behind the waistband, maximizing concealment. The trade-off is that a low ride height restricts the space between your fingers and the belt, which can slow down or complicate your draw stroke because you cannot easily slide your fingers under the grip.
Cant is the angle or tilt of the holster relative to a vertical line. A zero-degree cant means the firearm sits perfectly vertical, which is often referred to as a straight drop. A positive or forward cant, commonly known as the FBI cant, tilts the grip of the firearm forward and the muzzle backward. This tilt helps align the grip with the natural angle of your hand when reaching behind your hip, while also preventing the butt of the gun from pushing outward against your shirt.
Products mentioned in this guide
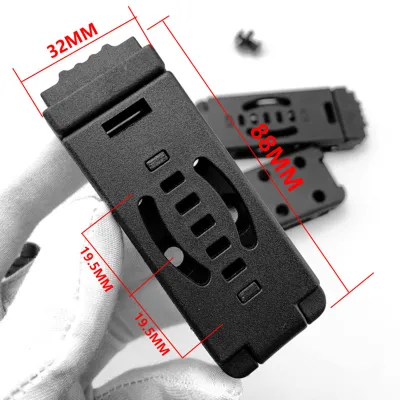
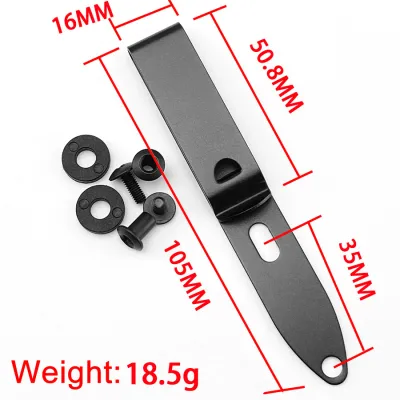
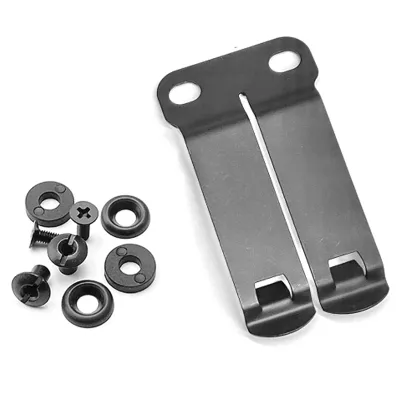
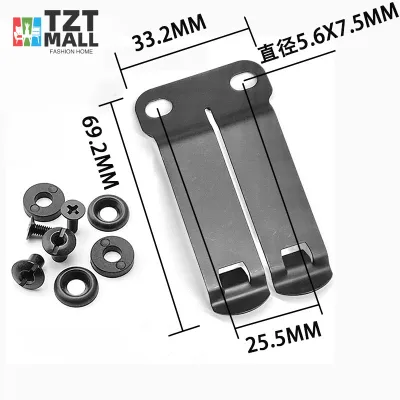
![[COD]🔥🔥🔥 Stainless Steel Kydex IWB Holsters Clip K Sheath Waist Clip Accessories Scabbard Back Clip Kydex Carrying Belt](https://img.lazcdn.com/g/p/c46f76ef87d72e1003313580f5d325d2.jpg_400x400q80.jpg_.webp)
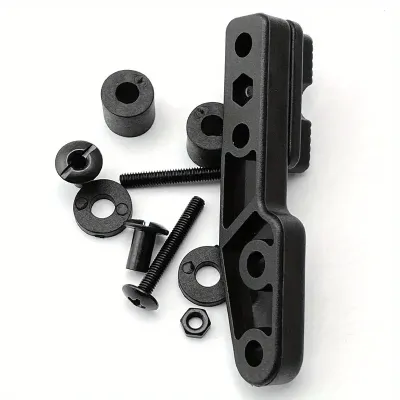
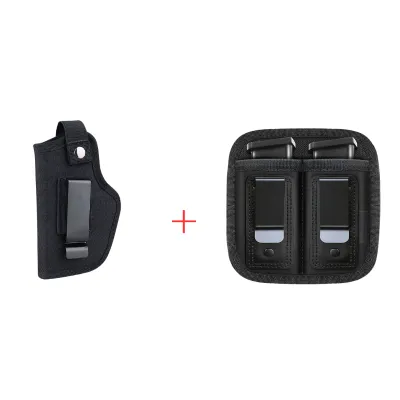
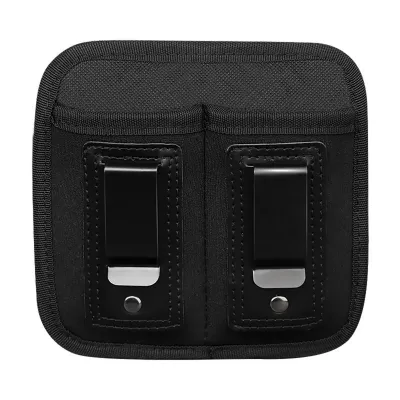
Prices are valid at publication and may change. Please refer to the product page for the latest price.
Your preferred carry position dictates your baseline settings for both height and angle. For appendix inside-the-waistband (AIWB) carry, which sits at the front of the body, a straight drop with zero cant is generally preferred to keep the muzzle pointing straight down the thigh and to facilitate a direct vertical draw. Conversely, strong-side hip carry or kidney carry benefits significantly from a forward cant. This angle tucks the grip along the curve of your lower back, preventing the firearm from printing when you bend forward or sit down.
Safety Protocols and Tools Needed Before Adjusting
Firearm handling and holster adjustments carry inherent risks if safety protocols are ignored. Before touching any hardware, you must establish a sterile workspace. Verify that the firearm is completely unloaded by removing the magazine, locking the slide back, and visually and physically inspecting the chamber. Place all live ammunition in a separate room to eliminate any possibility of an accidental discharge during the adjustment or testing phases. Equipment adjustments cannot replace proper safety habits and training.

Never attempt to adjust the holster clips while the firearm is inside the holster. Remove the gun entirely and set it aside in a safe direction. This prevents tools from slipping and striking the trigger, and it ensures you do not scratch the finish of your firearm or damage the internal retention features of the holster.
Gather the correct tools for your specific holster hardware. Most modern Kydex or polymer IWB holsters use standard fasteners such as Phillips-head screws, hex keys, or slotted Chicago screws paired with rubber spacers. Using a screwdriver or wrench that is too small or too large can easily strip the screw heads, making future adjustments incredibly difficult.
Inspect the hardware thoroughly before making changes. Look for worn rubber washers, stripped threads, or missing screws. In tropical climates where humidity is high, sweat can accelerate corrosion on metal fasteners; check for rust or oxidation. If any hardware is compromised, stop the process and obtain replacement parts directly from the manufacturer before wearing the holster.
Step-by-Step Guide to Adjusting the Ride Height
Identify the adjustment mechanism on your holster. Most high-quality IWB holsters feature a series of vertically aligned holes on the holster body or the clip itself. By moving the screws to a higher set of holes, you lower the holster’s ride height relative to your belt. Conversely, moving the screws to a lower set of holes raises the holster, exposing more of the grip above your waistband. Some designs use a sliding channel that allows continuous vertical adjustment once the screws are slightly loosened.
Weigh the trade-offs of your adjustments carefully. If you choose a low ride height, the gun sits deeply and securely, which is excellent for concealment under light tropical shirts. However, this deep placement means your thumb and fingers may scrape against your belt or waistband when attempting to draw, potentially disrupting your grip. A high ride height gives your hand ample clearance to wrap around the grip instantly, but the top-heavy distribution of weight can cause the holster to roll outward over your belt, reducing stability.
To adjust the height, loosen the mounting screws counterclockwise until the clip can be detached or slid freely. Reposition the clip to your desired set of holes, ensuring that any rubber spacers or washers remain aligned between the clip and the holster body. These spacers are critical; they provide tension that keeps the screws from backing out and protect the polymer from cracking under pressure.
Thread the screws back into the receiving T-nuts by hand first to avoid cross-threading. Once hand-tightened, use your tool to secure them. Tighten the screws evenly, alternating between them if your clip uses a two-screw system. Do not overtighten; excessive force can crush the rubber washers, strip the plastic threads, or crack the Kydex shell. The clip should sit completely flush against the holster body with zero wobble or play.
Step-by-Step Guide to Adjusting the Cant Angle
Examine how your holster clip facilitates angle adjustments. Many clips feature offset or curved mounting slots rather than simple round holes. By loosening one screw and pivoting the clip along this curved path, you can alter the angle of the holster. If your holster uses a single wide clip, it may have dual mounting points that can be staggered to create an angle. If your current clip does not support angling, you may need to swap it for an angled clip or a dual-clip system designed for cant adjustments.
Determine the appropriate cant for your carry style. If you carry at the 4 o’clock position, a forward cant of 10 to 15 degrees is highly effective. This angle rotates the grip upward and forward, aligning it with the natural reach of your arm and preventing the bottom of the grip from pushing against your shirt fabric. For appendix carry, keep the cant at zero degrees; an angled gun in the appendix position can push the muzzle into your groin or thigh, causing severe discomfort and altering the safety of your draw path.
Evaluate your wrist ergonomics during a simulated draw. When you reach for the grip, your wrist should remain relatively straight and neutral. If you have to bend your wrist at an awkward, extreme angle to get a solid purchase on the gun, the cant is incorrect. Adjusting the angle to match your natural reach reduces joint strain and ensures a faster, more consistent draw stroke.
To execute the adjustment, loosen the primary positioning screws. Rotate the clip to the desired angle, aligning the screw holes with the corresponding slots on the holster body. Hold the clip firmly at this angle while you tighten the screws back down. Double-check that the clip’s alignment matches the molded lines of the holster to ensure it sits flat against your belt when worn.
Testing and Fine-Tuning Your Holster Setup
Before wearing the adjusted holster out in public, you must conduct safe dry-fire practice in a controlled environment. Ensure the firearm remains completely unloaded, with no ammunition in the room. Put on your carry belt and mount the holster in your preferred position. Practice drawing the unloaded firearm slowly, focusing on how your hand contacts the grip. Check if your fingers clear the belt easily and if the gun releases smoothly from the holster without catching on your clothing.
Perform a comprehensive walk-around test inside your home to evaluate real-world comfort. Spend at least fifteen to thirty minutes wearing the holster while performing common daily movements. Sit down in a chair, bend over to tie your shoes, reach for an item on a high shelf, and walk up and down stairs. Note any areas where the holster or the clip digs into your skin, pinches your hip, or presses uncomfortably against your ribs.
When fine-tuning, make only one adjustment at a time. If you change both the ride height and the cant simultaneously, it becomes difficult to isolate which change resolved a comfort issue or which one caused a new draw obstruction. If you experience a minor pinch, adjust the height slightly, test it, and only then adjust the cant if the angle still feels unnatural.
Establish clear stopping conditions for your adjustments. If you cannot find a configuration that allows for a safe, unhindered draw, or if the holster continues to cause sharp pain or compromises your ability to safely reholster the firearm, stop using the setup. Do not force a poor fit. Consult the holster manufacturer’s customer support or seek guidance from a certified firearms instructor to identify if you need a different style of holster, a different clip type, or a different carry position entirely.
Troubleshooting Common IWB Comfort and Draw Issues
Grip printing is one of the most common challenges for beginners, especially when wearing light, breathable clothing suitable for warm, humid climates. If the butt of your firearm stands out against your shirt, try increasing the forward cant slightly if carrying on the hip. This rotates the grip upward, aligning it with the natural curve of your waist. Alternatively, lowering the ride height slightly can bring the bulk of the frame below the belt line, though you must ensure you still have enough clearance for a clean grip.
If the entire holster pulls upward or shifts out of place when you attempt to draw, the issue usually stems from a lack of belt support or insufficient clip tension. First, verify that you are using a rigid, dedicated gun belt rather than a soft fashion belt. A proper gun belt resists twisting and holds the clip firmly in place. If the belt is correct, check the clip itself; some metal clips can be gently bent inward to increase their clamping force, while plastic clips may need to be replaced if they have stretched out and lost their tension.
Persistent pressure or pain against your hip bone or ribs can often be mitigated by micro-adjusting the ride height. Raising the holster slightly can lift the hard bottom edge of the Kydex shell away from your hip bone when sitting. If the top of the slide or the holster’s sweat guard is poking into your ribs, lowering the ride height or adding a slight forward cant can tilt the offending edge away from your torso, distributing the pressure more evenly across your body.
Frequently Asked Questions (FAQ)
Do I need a specific gun belt for my IWB holster clips?
Yes, a dedicated gun belt is highly recommended for safe and comfortable IWB carry. Standard fashion or dress belts are typically made of soft, single-layer leather or nylon that easily twists, sags, and deforms under the weight of a loaded firearm. A proper gun belt features a reinforced core (often made of polymer or heavy-duty webbing) that resists twisting. This rigidity keeps the holster clip securely anchored at your chosen ride height and prevents the holster from shifting or tilting outward throughout the day.
Can I adjust the ride height and cant on a soft-sided IWB holster?
Most soft-sided IWB holsters made of simple nylon, neoprene, or basic leather feature fixed, sewn-in metal or plastic clips that do not allow for any adjustments. If you want to change the ride height or cant on these models, you are generally limited to how you position the holster along your waistline. However, some hybrid holsters—which combine a leather or padded backing with a rigid Kydex shell—do feature adjustable clips mounted to the backing plate. If your soft holster does not have adjustable mounting holes, you will need to upgrade to a rigid polymer or hybrid holster to customize these settings.
How tight should the holster clip screws be?
Holster clip screws should be tightened until they are snug and the clip cannot wiggle or shift, but you must avoid using excessive force. Overtightening can easily strip the threads of the receiving T-nuts, crush the rubber dampening washers, or even crack the polymer or Kydex shell of the holster. To prevent screws from backing out due to the vibrations of daily movement and walking, check the hardware periodically. If your manufacturer recommends it, you can apply a small drop of medium-strength (blue) thread-locking compound to the screw threads once you have finalized your perfect ride height and cant settings.
Community discussion
Share your experience or ask a question. Comments are reviewed before publication.