
Applying new decals to a bicycle frame can be incredibly frustrating when dust, complex tube shapes, and trapped air turn a sleek upgrade into a bubbly, wrinkled mess. Achieving a flawless, factory-like finish requires meticulous surface preparation, precise dry-alignment using a temporary tape hinge, and a slow, outward-sweeping application technique that coaxes the vinyl onto the frame’s contours. By taking your time and using the correct tools, you can successfully install custom graphics, frame protection wraps, or replacement brand decals on your first attempt without ruining the adhesive or creasing the material.
What tools and materials do you need before applying bike decals?
To apply bike decals successfully, you need a clean workspace and a set of basic tools: a soft felt-tipped squeegee, lint-free microfiber cloths, low-tack masking tape, isopropyl alcohol, and a source of mild heat like a household hair dryer. Having these items organized beforehand prevents you from scrambling mid-application when the adhesive is already exposed and vulnerable to dust.
Using the correct squeegee is critical to avoid scratching the delicate vinyl surface. A dedicated felt-tipped squeegee is ideal, but if you do not have one, you can wrap a clean microfiber cloth tightly around the edge of a plastic credit card or library card. Avoid using bare plastic edges, as they can easily tear the vinyl or leave permanent scuff marks on your new graphics.
Products mentioned in this guide
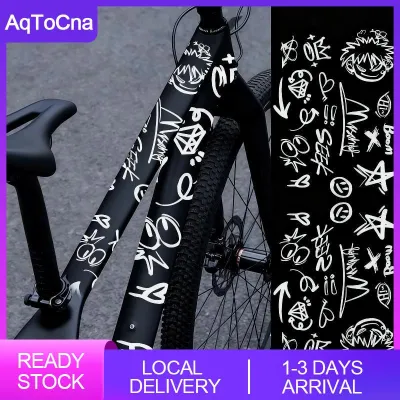

2,576 Lazada user ratings
Cleans very well my drive trains becomes new again and sparkling clean,thanks seller for the sticker, thanks to couriers and delivery guy, t…Read full reviewShow less
Cleans very well my drive trains becomes new again and sparkling clean,thanks seller for the sticker, thanks to couriers and delivery guy, thanks too Lazada, Recommended, God bless
madikit naman kaso anliit pala masyado haha medyo naka slant din kala ko straight yung design, hindi rin nagiiwan ng residue kapag tinanggal…Read full reviewShow less
madikit naman kaso anliit pala masyado haha medyo naka slant din kala ko straight yung design, hindi rin nagiiwan ng residue kapag tinanggal.
napagbigyan sa request.thank you so much seller sa fast delivery.until next transaction po ulit!more power to your business
maraming salamat sa maagang pagdating! kumpleto at may 1 pang free na sticker palage mula kay seller. salamat
Quality:good Appearance:maganda Performance:ok syaPerfect for both mountain and road bikes,
2,015 Lazada user ratings
🔌Compatibility:very good quality of degreaser..been using it for 3 years now. especially the foam 🛠️Ease of Installation:foam degreaser saves…Read full reviewShow less
🔌Compatibility:very good quality of degreaser..been using it for 3 years now. especially the foam 🛠️Ease of Installation:foam degreaser saves a lot of the degreasee volume 🔨Durability:matibay yun bote at handled with care
Great quality stickers!, Perfect for my mountain bike!, Ang cute Ng mga stickers natuwa ung anak ko sa dami di na nya dinikit ung iba sa bik…Read full reviewShow less
Great quality stickers!, Perfect for my mountain bike!, Ang cute Ng mga stickers natuwa ung anak ko sa dami di na nya dinikit ung iba sa bike nya
Got this item for free from their degreaser product. Not yet used this sticker bcs i don't have bike but surely this will have someday.
🛠️Ease of Installation:High-quality materials used for these stickers!, These stickers are waterproof and durable!,Maganda talaga
fast delivery at maganda ang pag ka package. . lilinis nnmn mga maduduming pyesa nito hehe. . salamat po at sa uulitin

1,220 Lazada user ratings
Great design, love it!, Great addition to personalize my bike., Waterproof stickers, perfect for outdoor use., Love the variety of designs a…Read full reviewShow less
Great design, love it!, Great addition to personalize my bike., Waterproof stickers, perfect for outdoor use., Love the variety of designs available.,
High quality stickers, very durable., Love the variety of designs available., Awesome bike brand options to choose from.,
Sorry at ngayon lang nag-review. ok naman yung mga stickers na natanggap ko. wala namang tupi at maayos ang packaging
Thank you for the freebies... as it i wish to be given to me as free..,. thank you GEAR CYCLES
Ganda ng stickers mabilis pa yung deliver, mabait pa si rider, oorder ulit ako, nice nice. 😊
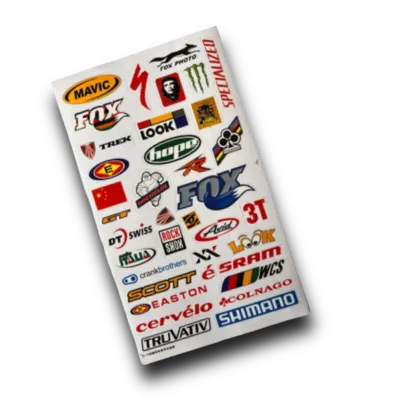
204 Lazada user ratings
salamat seller 🔨Durability:Easy to apply and looks great!, 🔌Compatibility:Easy to apply and looks great!, 🛠️Ease of Installation:Easy to appl…Read full reviewShow less
salamat seller 🔨Durability:Easy to apply and looks great!, 🔌Compatibility:Easy to apply and looks great!, 🛠️Ease of Installation:Easy to apply and looks great!, salamat seller good items...
Beautiful designs for my bike!, Adds personality to my bike, Adds a unique touch to my bike, High-quality decals that last long,
High-quality decals that last long, 🔨Durability:I 🛠️Ease of Installation:Easy to apply and looks great!,
Beautiful designs for my bike!, Easy to apply and looks great!,
nice 🔨Durability:goods
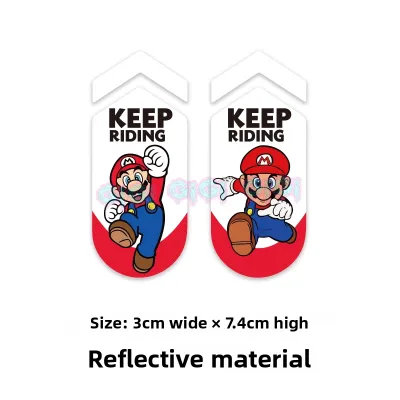
44 Lazada user ratings
Got two different Mario designs instead of the same one, and it was a nice surprise! The printing is great, really detailed, and has a good …Read full reviewShow less
Got two different Mario designs instead of the same one, and it was a nice surprise! The printing is great, really detailed, and has a good reflective effect.
Lightweight and flexible, Great for cycling, Perfect for mountain bikes, Easy to apply, Good visibility at night, Fast shipping service,
The design is great, and it's the perfect size to fit on the bike frame; you could even place it at the front if you want.
It's good, but a bit thick.
Reflective design, nice
74 Lazada user ratings
High-quality stickers that won't fade or peel., Durable and long-lasting stickers for your bike., Great gift idea for bike enthusiasts.
🔨Durability: High-quality stickers that won't fade or peel., Great gift idea for bike enthusiasts.,
Durable and long-lasting stickers for your bike., High-quality stickers that won't fade or peel.,
Great gift idea for bike enthusiasts.,

22 Lazada user ratings
TRUYOU 130 BCD Fixed Gear Bicycle Chainring Track Bike Chainwheel Chain Ring Fixie Single Speed 44T 46T 48T 50T 52T 53T 1/8"
additional looks for my bike,easy to install thank you seller and lazada
It really stands out after applying, and I quite like it.
Eye-catching design, Creative stickers,
Prices are valid at publication and may change. Please refer to the product page for the latest price.
For cleaning, keep a bottle of 70% isopropyl alcohol and several clean microfiber cloths nearby. Standard paper towels should be avoided because they shed tiny fibers that can get trapped under the adhesive, creating permanent bumps. Low-tack painter’s masking tape is also essential for holding the decal in place during the alignment phase without leaving a sticky residue or lifting the existing paint on your frame.
A household hair dryer is highly recommended over an industrial heat gun. A heat gun can quickly reach temperatures that melt vinyl, warp carbon fiber, or damage the frame’s clear coat. A standard hair dryer on a low-to-medium setting provides gentle, controllable heat that makes the vinyl pliable enough to conform to curved tubes without risking structural damage to your bicycle.
How should you prepare the bike frame surface for the best adhesion?
Preparing the bike frame requires a thorough two-step cleaning process to remove both visible dirt and invisible chemical residues that prevent the adhesive from bonding. Even a microscopic layer of chain grease, road grime, or frame polish will cause the edges of your new decal to peel up over time.

Start by washing the entire frame, focusing heavily on the application zone, with warm water and a few drops of mild dish soap. This initial wash removes heavy mud, grit, and grease. Rinse the area thoroughly with clean water to ensure no soapy residue remains, then dry the frame completely with a clean microfiber towel.
Next, perform a chemical decontamination by wiping the application zone with isopropyl alcohol. This step is crucial because it strips away invisible oils from your fingers, wax residues from frame polishes, and leftover chain lubricants that standard dish soap might leave behind. Pour the alcohol onto a clean microfiber cloth rather than spraying it directly onto the frame, and wipe the surface until the cloth comes away completely clean.
Once the frame is clean, verify that the workspace environment is suitable. The frame must be completely dry and at a moderate room temperature, ideally between 18°C and 25°C. If the frame is too cold, the adhesive will not bond properly and the vinyl will feel stiff; if it is too hot, the vinyl will become overly stretchy and difficult to control. Avoid working in drafty areas, outdoors, or near fans where airborne dust can settle on the freshly cleaned frame.
What is the best positioning technique before removing the backing?
The most reliable positioning technique is the “hinge method,” which uses low-tack masking tape to secure the decal in its exact location before any of the adhesive backing paper is peeled away. This dry-run alignment ensures you do not place the decal crookedly, which is incredibly difficult to correct once the adhesive touches the frame.
To set up the hinge, place the decal—with its backing paper and top transfer tape still fully intact—against the frame. Adjust its position until it sits exactly where you want it. Once satisfied, place a strip of masking tape vertically across the center of the decal, securing it firmly to the frame on both sides. This tape acts as a physical hinge, allowing you to flip one half of the decal back to peel the backing while the other half remains locked in perfect alignment.
Before proceeding to the application, check the alignment from multiple angles. Step back and look at the bike from the side, the top, and the front. Bicycle tubes are tapered, ovalized, or curved, which can create optical illusions; a decal that looks straight when you are standing directly over it might appear tilted when the bike is viewed from a distance.
Additionally, check the surrounding area for frame obstacles. Ensure the decal does not cover bottle cage mounts, cable stops, internal routing ports, or weld seams. If the decal must cross a weld seam or a sharp frame transition, plan how the vinyl will lay over these areas, and ensure you have enough clearance so the graphic does not get pinched or distorted by moving cables.
How do you apply the decal smoothly without creating wrinkles?
To apply the decal without wrinkles, peel the backing paper in small, controlled sections and use firm, overlapping squeegee strokes starting from the center hinge and working outward toward the edges. This systematic approach prevents air from becoming trapped under the vinyl as it makes contact with the frame.
Begin by flipping one side of the decal over along your masking tape hinge. Carefully peel away the backing paper from this exposed half, exposing the sticky adhesive. Use a clean pair of scissors to cut away the peeled backing paper close to the center hinge, taking care not to touch the exposed adhesive with your fingers or let it touch the frame prematurely.
Hold the exposed half of the decal slightly taut, keeping it hovering just a millimeter above the frame surface. Using your felt-tipped squeegee, make smooth, overlapping strokes starting from the center tape hinge and sweeping outward toward the edges. The motion should be deliberate and firm, pushing any air ahead of the squeegee. Never press the entire decal down at once; let the squeegee guide the vinyl down gradually.
When working on curved tubes, the vinyl must stretch slightly to conform to the shape without creasing. If you encounter a curve, use your hair dryer on a low setting for two to three seconds to gently warm the vinyl. This makes the material pliable. Gently pull the vinyl in the direction of the curve while squeegeeing it down. If you are applying a decal over a recessed area or a sharp bend, work the vinyl into the deepest part of the recess first before adhering it to the surrounding flat areas to prevent the material from bridging and lifting later.
Once the first half is fully adhered, remove the center masking tape hinge. Flip the remaining half of the decal back, peel away the rest of the backing paper, and repeat the squeegeeing process from the center outward. After the entire decal is down, leave the clear transfer tape on top for a few minutes to let the adhesive settle. Then, peel the transfer tape back slowly at a sharp 180-degree angle, keeping it flat against the frame rather than pulling it straight up, which minimizes the risk of lifting the newly applied vinyl edges.
How can you remove trapped air bubbles and ensure the decal sets properly?
You can eliminate small trapped air bubbles by puncturing them with a fine sewing needle and pressing the air out, followed by a low-heat treatment to cure the adhesive and secure the edges. This final troubleshooting and finishing step ensures the decal looks professional and remains durable over time.
If you notice air bubbles after removing the transfer tape, first try to gently push them toward the nearest edge using your squeegee or a thumb wrapped in a clean microfiber cloth. If a bubble is stubborn and located far from the edge, do not force it down, as this will crease the vinyl. Instead, take a very fine, clean sewing needle and gently prick the edge of the bubble at a slight angle. Use your finger to press the trapped air out through the tiny hole; the vinyl will self-seal around the microscopic puncture.
Once all bubbles are addressed, apply post-heat to the entire decal. Sweep your hair dryer over the graphic on a low-to-medium setting for a few seconds. This mild heat softens the vinyl, allowing it to conform perfectly to the micro-texture of the frame’s paint, and activates the pressure-sensitive adhesive. While the vinyl is still warm, use a clean microfiber cloth to firmly rub down the entire decal, paying extra attention to the edges and sharp corners to ensure they are completely sealed.
Finally, allow the adhesive to cure properly before exposing the bike to harsh conditions. Keep the bicycle in a dry, room-temperature environment for at least 24 to 48 hours before riding, exposing it to rain, or washing the frame. When washing your bike in the future, avoid using high-pressure power washers directly on or near the edges of the decals, as the concentrated water stream can easily lift the vinyl and ruin your hard work.
Community discussion
Share your experience or ask a question. Comments are reviewed before publication.