
Applying surf wax correctly is the foundation of every successful session on the water. Without proper traction, your feet will slip during the pop-up, making it nearly impossible to maintain balance, carve, or execute turns. To achieve maximum grip, you must build a textured surface of distinct, hard wax bumps using a two-step process: a firm, temperature-resistant base coat followed by a softer, tacky top coat.
While high-quality traction is essential, remember that equipment cannot replace physical preparation, ocean awareness, and proper surfing technique. Before heading into the lineup, always assess your physical limits, local weather conditions, and water safety guidelines. If you are a beginner, practicing your pop-up on the sand before paddling out can help you verify your foot placement and build muscle memory.
Preparation: Stripping Old Wax and Cleaning the Deck
Before applying a fresh coat of wax, you must completely strip the old, dirty layer from your surfboard deck. Over time, wax absorbs sand, salt, and skin oils, which degrades its gripping properties and adds unnecessary weight to your board. Applying new wax over an old, flattened layer prevents the new wax from adhering properly, leading to premature peeling and slick spots.
Products mentioned in this guide


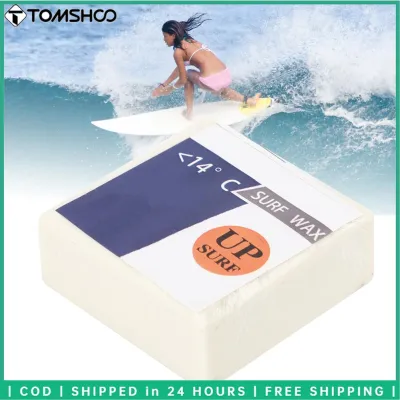
![[COD]ZMONH Surfboard Wax Water Wax for Skimboard Longboard Non Slip Grip Skateboard Wax for Extreme Sports 85g Bar](https://img.lazcdn.com/g/p/05f917fb64093505dcb5e3996f45e0a5.jpg_400x400q80.jpg_.webp)
![[COD] SAjeNH SPORT Long Lasting Skateboard Wax 85g Water Surfboard Wax Non Slip Grip for Surf Adventure Skimboard Use](https://img.lazcdn.com/g/p/66e0f4127bbb87c2fded7eaa382be68e.jpg_400x400q80.jpg_.webp)
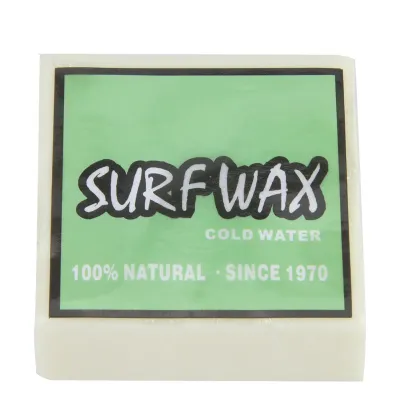
![[COD] SHPYHT SPORTS Surf Wax 85g for Water Sports Non Slip Surfboard Wax Skateboard Wax Skimboard Protection](https://img.lazcdn.com/g/p/e018ccc74598c01dcba3831a3070ec32.jpg_400x400q80.jpg_.webp)
Prices are valid at publication and may change. Please refer to the product page for the latest price.
To begin, gather the necessary tools for safe removal. A plastic wax comb is the standard tool for this job, featuring a flat scraping edge and a serrated combing edge. You can also use a stiff plastic scraper or a specialized wax-remover card. Avoid using metal putty knives, screwdrivers, or abrasive kitchen sponges, as these can easily scratch, gouge, or delaminate the fiberglass, epoxy, or soft-top outer skin of your board.
To make the scraping process easier, you need to soften the old wax. Place your board deck-side up in the gentle sun for no more than five to ten minutes. In tropical climates like the Philippines, the intense heat can quickly soften wax, but leaving a board in direct sunlight for too long can cause the core to expand, leading to permanent delamination or bubbling. If sun is not available, pour warm water over the deck or use a hairdryer on a low heat setting, keeping it moving constantly to avoid overheating one spot.
Once the wax is soft and pliable, use the flat edge of your plastic wax comb to scrape the wax off. Work in long, systematic strokes from the nose to the tail, collecting the scraped wax into a ball for proper disposal. Be gentle around the rails and any curved contours of the board to prevent digging the scraper into the resin.
After removing the bulk of the wax, a thin, oily residue will remain on the deck. To eliminate this residue and prepare a bare, dry surface, apply a specialized citrus-based wax remover or a small amount of mineral oil to a clean microfiber cloth. Wipe the deck firmly in circular motions until the surface feels completely clean and squeaky to the touch. Let the board dry completely in the shade before starting the new application.
Selecting the Right Base and Top Coat for Your Water Temperature
Surf wax is formulated with specific melting points to match different water temperatures. If you use a wax that is too soft for the water, it will melt, smear, and wash away, leaving you with a slippery board. If you use a wax that is too hard, it will not soften enough to provide the necessary tackiness for your feet to grip.

Standard surf wax packaging categorizes products into temperature ranges:
- Cold: For water temperatures below 15°C (59°F). This wax is extremely soft and sticky.
- Cool: For water temperatures between 15°C and 20°C (59°F to 68°F).
- Warm: For water temperatures between 20°C and 24°C (68°F to 75°F).
- Tropical: For water temperatures above 24°C (75°F). This wax is highly temperature-resistant and hard.
The secret to a long-lasting wax job is using a dual-coat system: a hard base coat and a temperature-specific top coat. The base coat is made of a very hard formula (often rated for tropical water or specifically labeled as “Base Coat”) that remains solid and stable under pressure. It bonds directly to the fiberglass deck, creating a permanent texture that prevents the softer top coat from sliding off under the friction of your feet.
When surfing in tropical destinations like the Philippines, where water temperatures consistently hover around 26°C to 30°C, you must select your wax carefully. Always use a dedicated base coat first, followed by a tropical top coat. If you attempt to use a cool or warm wax in these conditions, it will quickly turn into a greasy, useless smear on your deck. Always check the temperature rating printed on the wax packaging before purchasing.
Applying the Base Coat: Building a Durable Foundation
The base coat is the most critical step of the waxing process because it determines the structure of your grip. Your goal is not to paint a smooth layer of wax onto the board, but to build a dense network of small, hard bumps.
To apply the base coat, use firm, consistent pressure. Hold the wax block on its edge rather than flat against the board to concentrate the pressure. Start by drawing diagonal lines across the deck from one rail to the other, spaced about two to three centimeters apart. Once you have covered the entire riding area, draw diagonal lines in the opposite direction to create a crosshatch or diamond pattern.
Next, run the wax block in straight lines from nose to tail, and then from rail to rail over the crosshatch pattern. Finally, transition to small, tight circular motions over the entire area. As you rub the wax, the friction will cause the wax to rub off on the intersections of your crosshatch lines, naturally building up small, distinct bumps.
You can verify a successful base coat application through visual and tactile cues. The deck should feature a dense pattern of small, hard, white bumps with a cloudy, matte texture. If the wax looks flat or smeared, you may have applied too much pressure or used a wax that is too soft for the ambient air temperature.
Be strategic with your wax placement. For a shortboard, apply wax from the front of your traction pad up to about a foot above your front foot placement, extending fully from rail to rail where your hands grip during a pop-up. For a longboard or funboard, apply wax along the entire length of the deck to allow for cross-stepping and nose riding.
Adding the Top Coat: Creating the Final Grip Texture
Once your base coat is established, you are ready to apply the top coat. The top coat provides the soft, sticky outer layer that grips your skin, booties, or clothing.
Unlike the base coat, the top coat requires very light pressure. If you press too hard, you will rub away or flatten the hard bumps you just built with your base coat. Hold the top coat wax block lightly and rub it in small, quick circular motions over the existing base coat bumps.
As you rub, you will see the soft top coat wax naturally cling to the tops of the base coat bumps, making them larger, softer, and tackier. Continue this process until the entire waxed area is covered in a uniform layer of grippy, distinct bumps.
Watch out for signs of over-application. If you apply too much top coat, or if you rub too hard, the individual bumps will begin to merge into large, flat clumps. This creates a smooth, slippery surface that offers very little traction. If this happens, you will need to use the serrated edge of your wax comb to rough up the surface, or scrape the area clean and start over.
Adjust your top coat application based on your riding conditions. If you surf in warm tropical waters with bare feet, a moderately tacky top coat is ideal; excessively aggressive bumps can cause painful wax rash on your chest and thighs during long paddling sessions. If you are surfing in colder waters wearing neoprene booties, you can apply a slightly thicker, softer top coat, as the rubber soles of booties require deep, sticky bumps to lock into place.
Board Maintenance: Touch-Ups, Rewaxing, and Sun Protection
A great wax job can last for several weeks or even months, but it requires regular maintenance to remain effective. You must monitor the condition of your wax and know when it is time for a quick touch-up versus a complete strip and rebuild.
Inspect your board before every session. Over time, the wax bumps will flatten out from the pressure of your body while paddling. The wax will also collect sand, dirt, and salt, which reduces its stickiness and turns the wax a dull grey or brown color. If the wax feels smooth, looks dirty, or has large patches of exposed fiberglass, it is losing its effectiveness.
For quick touch-ups between sessions, use the serrated edge of your wax comb. Drag the comb diagonally across the wax in a crisscross pattern, using light pressure. This cuts shallow grooves into the flattened wax, exposing fresh, sticky layers underneath and restoring temporary grip. After combing, you can rub a very light layer of fresh top coat over the surface.
However, touch-ups are only a temporary fix. If the wax is heavily contaminated with sand, has turned completely grey, or has begun to peel and flake off, a full strip and rewax is necessary. As a general rule, recreational surfers should completely strip and rewax their boards every two to three months, or immediately when traveling between regions with different water temperatures.
Proper storage and transport are vital for preserving your wax job, especially in hot, humid climates. Never leave your surfboard inside a parked car, as interior temperatures can easily exceed 50°C, causing your wax to melt completely and pool onto your car seats. When hanging out at the beach, always store your board in the shade, or place it deck-down in the sand with a towel or board sock covering it. Using a reflective, heat-resistant board bag during transport will protect your wax from melting and prevent messy transfers onto your gear.
Frequently Asked Questions (FAQ)
Can I use the same surf wax for both the base and top coat?
Using only one type of wax is not recommended for optimal performance. If you use only a soft top coat, the wax will quickly slide off the slick fiberglass deck under the pressure of your feet, leading to bare patches. Conversely, if you use only a hard base coat, the surface will remain too slick and will lack the necessary tackiness to keep your feet locked in place during sharp turns.
How do I fix a wax job that has become smooth and slippery?
If your wax has flattened out mid-session, you can quickly restore grip by using the serrated edge of a plastic wax comb. Scrape diagonal, crisscrossing lines into the wax to rough up the surface and expose fresh, sticky layers. If the wax is heavily embedded with sand or dirt, combing is only a temporary fix; you should plan to strip the deck completely and apply a fresh base and top coat before your next trip to the water.
Community discussion
Share your experience or ask a question. Comments are reviewed before publication.