
Choosing the right dumbbell rack requires balancing your current and future dumbbell collection with the physical limits of your workout space. To make the correct choice, you must evaluate the weight, shape, and quantity of your weights alongside your floor’s structural capacity, active workout clearance, and room layout. Selecting an incompatible rack can lead to damaged floors, cluttered workout areas, and serious physical safety hazards.
By taking precise measurements and matching your dumbbell types to the correct tier geometries, you can build a safe, organized, and highly functional home gym. This guide details how to audit your fitness equipment, calculate your spatial limits, and select a storage system that will support your strength training journey for years to come.
Measure Your Available Floor Space and Room Constraints
Before purchasing any fitness equipment, you must establish the boundary between static storage space and your active workout zone. A dumbbell rack may have a physical footprint of only 120 centimeters in width and 50 centimeters in depth, but its actual spatial requirement is much larger. You must maintain at least 90 to 120 centimeters of unobstructed clearance directly in front of the rack. This active zone ensures you can safely bend, lift, and return heavy weights using proper biomechanical form without striking nearby walls, furniture, or other exercise machines.
Products mentioned in this guide
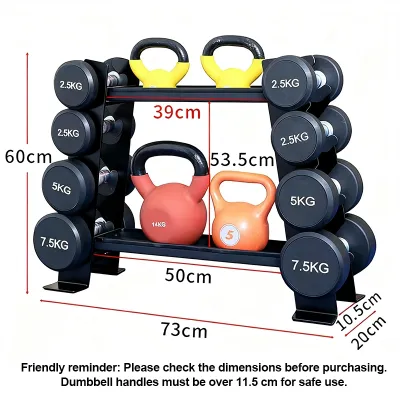
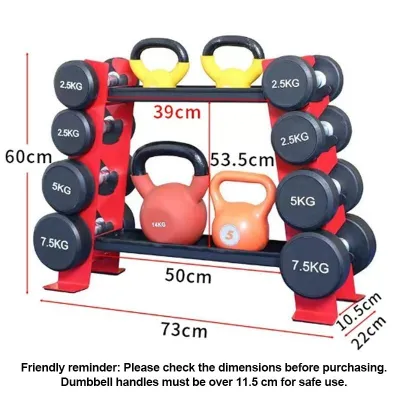
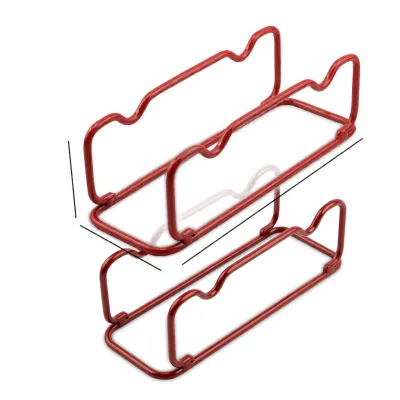
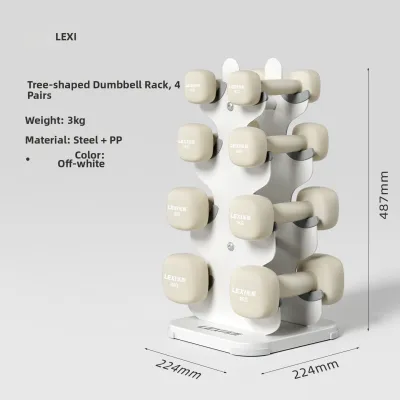

Prices are valid at publication and may change. Please refer to the product page for the latest price.
Delivery access is another frequently overlooked constraint. Many heavy-duty commercial racks ship fully welded or in large, heavy sub-assemblies. You must measure the width of your doorways, the turning radius of narrow hallways, and the clearance of staircases to guarantee the packaging can reach its designated room. If you live in a multi-story home or a condominium, verify whether the shipping boxes can fit inside the building’s elevator or if they must be carried up the stairs.
In the Philippines, structural floor capacity is a critical consideration, particularly for upper-floor condominiums and multi-level residential structures. Standard residential building codes typically design residential floors for a uniform live load of approximately 1.5 to 2.0 kiloNewtons per square meter, which translates to roughly 150 to 200 kilograms per square meter. A fully loaded three-tier dumbbell rack containing pairs from 2.5 kilograms up to 30 kilograms can easily exceed 250 kilograms. Because this weight is concentrated on four small, high-pressure metal feet, you must verify your floor’s load-bearing limits. For upper-floor installations, place the rack directly over structural floor joists or concrete beams, and consult your building administration or a structural engineer if you plan to store heavy lifting sets.
Environmental factors also dictate material choices. In tropical climates with high relative humidity, non-airconditioned spaces like garages or open-air balconies expose steel equipment to rapid oxidation. When selecting a rack, prioritize frames treated with electrostatic powder coatings or rust-resistant zinc plating. Regularly inspect the frame for paint chips or scratches, and wipe down the metal surface after sweaty training sessions to prevent moisture from compromising the structural integrity of the steel welds.
Audit Your Dumbbell Collection and Expansion Plans
The physical shape of your dumbbells directly dictates the tray style and depth your rack must feature. Hexagonal dumbbells, whether made of cast iron or rubber-encased steel, feature flat edges that naturally prevent rolling. They sit securely on flat, angled steel trays. Round dumbbells, however, will roll freely and present a severe safety hazard if placed on a flat shelf. They require specialized trays with curved cradles, deep retaining lips, or dedicated saddle slots to lock each weight securely in place.

To determine the necessary load capacity and tier count, you must calculate the total weight of your current collection and measure the physical dimensions of each pair. Use the following steps to perform a precise inventory audit:
- Count and Weigh: List every pair of dumbbells you currently own and calculate their combined weight. This total must not exceed the rack's maximum rated weight capacity.
- Measure Bell Diameters: Measure the widest part of each dumbbell's weight head. For example, a typical 15-kilogram rubber hex dumbbell has a bell diameter of approximately 15 to 16 centimeters.
- Calculate Total Linear Width: Add the diameters of all your dumbbells together, leaving a 2-to-3-centimeter buffer between each dumbbell to accommodate your hands when grabbing the handles. If you have five pairs of dumbbells with an average bell diameter of 15 centimeters, you will need at least 165 centimeters of total linear shelf space.
- Check Tier Limits: Compare your calculated linear width and total weight against the manufacturer's per-tier weight specifications. Never assume a rack can hold your entire collection on a single shelf just because the total weight falls under the rack's overall limit.
If you utilize adjustable dumbbells or heavy kettlebells, standard angled dumbbell racks may not be suitable. Adjustable dial-up dumbbells feature wide, bulky base cradles that require flat, extra-deep shelving. Ensure the rack you select features flat utility shelves or adjustable tray angles that can accommodate these specialized dimensions without causing the adjustable mechanisms to slide or fall.
Finally, factor your long-term fitness goals into your purchase decision. If you are actively progressing in strength, you will likely purchase heavier weights within the next year. Buying a rack that only fits your current inventory will force you to purchase a second storage unit later. Choose a modular rack system that allows you to add a third tier, or select a model that leaves at least 25% to 30% of empty shelf space for future expansion.
Match Rack Footprint and Tier Design to Your Setup
Translating your spatial measurements and dumbbell inventory into a specific rack design requires choosing between horizontal, vertical, and A-frame configurations. Each geometry offers distinct trade-offs regarding stability, floor space consumption, and ergonomic accessibility.
Horizontal Racks
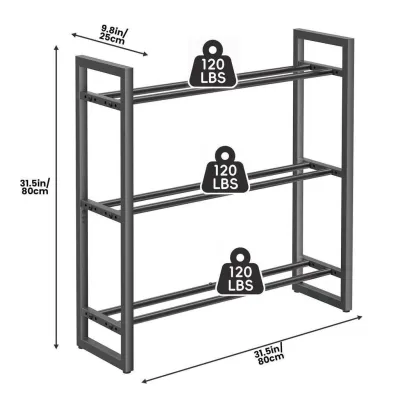
Horizontal racks are the standard configuration found in commercial gyms. They typically feature two or three long, angled tiers running parallel to the floor. This design is highly stable because it distributes the weight over a wide surface area and maintains a low center of gravity. Horizontal racks offer excellent visibility, making it easy to identify and grab the correct weight during high-intensity training. However, they require a substantial linear footprint, making them less suitable for tight studio apartments or small bedrooms.
Vertical and A-Frame Racks
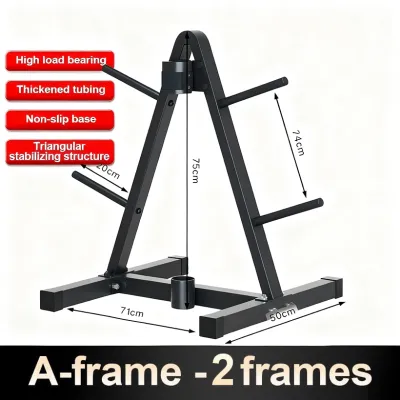
Vertical and A-Frame racks utilize vertical clearance to minimize floor space. Vertical tower racks hold dumbbells in a stacked column, while A-frame racks feature a triangular profile where weights hang on external pegs. These designs are ideal for small spaces, often requiring a footprint of less than 0.5 square meters. The primary trade-off is capacity and stability. Because they stack weight vertically, they have a higher center of gravity. You must verify that the base of a vertical rack is wide and heavy enough to prevent tipping, and you should always place the heaviest weights at the absolute bottom of the frame.
Tier Spacing and Tray Depth
When evaluating multi-tier horizontal racks, pay close attention to the vertical clearance between the tiers. If the space between the bottom tier and the middle tier is too narrow, returning heavy, bulky dumbbells becomes difficult and dangerous. You risk pinching your fingers or scraping your knuckles against the steel frame. Look for racks that feature offset tiers, where the upper tiers are positioned slightly further back than the lower ones. This offset design provides an unobstructed vertical path for lifting and returning heavy weights.
To help you decide which configuration fits your specific environment, use the comparison matrix below to evaluate each rack type against key performance criteria:
| Rack Type | Average Floor Footprint | Best Suited Dumbbell Types | Maximum Weight Capacity | Ergonomic Access & Safety |
|---|---|---|---|---|
| Horizontal (2-Tier / 3-Tier) | Large (1.2m to 1.8m wide) | Hexagonal, Round, and Adjustable | Very High (up to 450+ kg) | Excellent; low center of gravity; easy to lift heavy weights safely. |
| Vertical Tower | Very Compact (under 0.5m wide) | Light to Medium Hexagonal | Low to Moderate (up to 120 kg) | Moderate; requires careful vertical lifting; prone to tipping if top-heavy. |
| A-Frame | Compact (0.5m to 0.8m wide) | Cast Iron Hexagonal | Moderate (up to 150 kg) | Good; easy side access, but pegs can restrict handle sizes and knurling. |
| Flat Utility Shelf | Medium (1.0m to 1.2m wide) | Adjustable, Kettlebells, Med Balls | High (up to 300 kg) | Excellent for non-standard weights; requires manual lifting without angled help. |
Evaluate Space-Saving and Wall-Mounted Alternatives
When floor space is severely restricted, alternative storage configurations can help keep your workout area organized. However, these space-saving designs introduce unique structural requirements and safety boundaries that you must verify before installation.
Wall-Mounted Racks
Wall-mounted dumbbell storage systems completely eliminate the floor footprint by transferring the weight of the dumbbells to your home’s vertical structure. In the Philippines, residential walls are commonly constructed from either solid concrete, concrete hollow blocks (CHB), or lightweight drywall over metal studs.
Never attempt to mount a dumbbell rack on drywall or hollow plasterboard. The concentrated weight of even a light dumbbell set will tear the anchors out of the wall, causing catastrophic damage and potential injury. If mounting to a solid concrete wall, you must use heavy-duty steel sleeve anchors or expansion bolts rather than standard plastic wall plugs. Always use a masonry drill bit of the correct diameter and verify that the concrete is structurally sound and free of moisture damage. If you are unsure of your wall’s composition or load limits, consult a professional contractor.
Foldable and Modular Racks
Some modern home gym systems feature foldable storage frames that hinge against the wall when not in use. While highly convenient, these systems rely heavily on the durability of their locking pins, hinges, and wall connections. Before buying a foldable rack, verify the manufacturer’s maximum load limits in both the open and closed positions. Inspect the locking mechanisms regularly to ensure they have not warped or fatigued over time. Avoid these options if your total dumbbell collection exceeds 100 kilograms, as the constant pivoting motion can stress the wall anchors.
Integrated Bench Racks
Another space-saving alternative is an adjustable weight bench with built-in dumbbell storage underneath the seat or chassis. This design utilizes a single footprint for both your seating and storage needs. While highly efficient, these integrated systems typically hold only a limited number of weights (usually two to three pairs) and can make the bench incredibly heavy to move around your room. Ensure the bench remains stable and balanced when the storage trays are empty.
Common Sizing and Placement Mistakes to Avoid
To ensure your home gym remains a safe and productive environment, avoid these common mistakes when selecting and placing your dumbbell rack:
- Ignoring the Drop Zone: Never place your dumbbell rack directly adjacent to your primary lifting area. If you lose your balance or need to drop weights at the end of a fatiguing set, you must have a clear "drop zone" free of metal frames and other dumbbells. Maintain a safe distance of at least 1.5 meters between your active lifting space and the rack.
- Unbalanced Weight Distribution: Loading your heaviest dumbbells on the top tier of a horizontal or vertical rack raises the overall center of gravity, making the entire unit unstable. Always place your heaviest weights on the bottom tier and work your way up to the lightest pairs at the top. This distribution keeps the rack anchored and reduces the physical effort required to lift heavy weights from an elevated position.
- Overcrowded Tiers: Buying a rack that perfectly matches your dumbbell widths without accounting for handle and knuckle clearance is a major safety hazard. If the dumbbells are packed too tightly together, you will pinch your fingers or scrape your knuckles against the adjacent weights when trying to extract or return a pair. Always leave at least 2 to 3 centimeters of open space between each dumbbell.
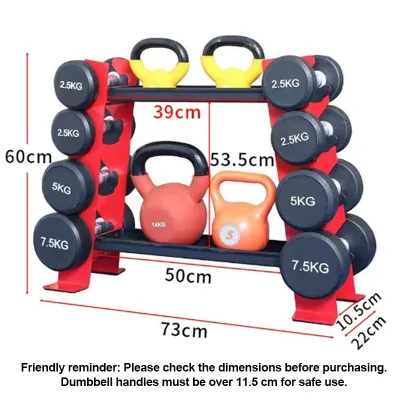
- Disregarding Handle Length and Knurling: Dumbbell handles vary in length and thickness depending on the brand and weight class. Some compact A-frame racks feature narrow peg spacings that may not accommodate dumbbells with extra-wide handles or thick rubber grips. Measure your dumbbell's inner handle clearance (the distance between the two weight heads) and verify that it matches the rack's support cradles before purchasing.
- Skipping Structural Inspections: Never load a newly assembled rack to its maximum capacity immediately. Assemble the frame on a flat, level surface, tighten all bolts using proper hand tools, and check for any wobbling. Place a few light weights on the rack first to verify stability, checking for any frame deflection or weld stress before loading your entire collection.
Frequently Asked Questions (FAQ)
Can I place a fully loaded dumbbell rack on standard rubber mats?
Yes, placing a dumbbell rack on high-density rubber gym mats is highly recommended to protect your underlying floor from scratches, dents, and minor impacts. However, rubber mats only distribute surface pressure; they do not increase the structural load-bearing capacity of your floor. Before assembly, verify that your rubber mats are dense enough (ideally vulcanized rubber or high-density EVA foam at least 10 to 15 millimeters thick) so that the heavy metal feet of the rack do not sink unevenly, which can cause the rack to tilt and become unstable.
How much clearance do I need around the rack for safe workouts?
You should maintain a minimum of 90 centimeters of clear, unobstructed space in front of and on both sides of your dumbbell rack. This clearance allows you to approach the rack, stand with a wide, stable stance, and lift or return the weights using proper squatting mechanics without striking your knees or elbows against nearby objects. Always ensure that the pathways leading to and from the rack are completely free of loose equipment, cables, or domestic hazards to prevent tripping while carrying heavy weights.
Community discussion
Share your experience or ask a question. Comments are reviewed before publication.