
Selecting a foldable shooting form trainer requires balancing a collapsed footprint with deployed stability. To find the right model, prioritize checking the frame material rating, the height adjustment range, and the folding mechanism type. Your skill level and practice space will ultimately dictate the level of adjustability and resistance features you need.
Evaluating Space, Footprint, and Folding Mechanisms
Folding mechanisms generally fall into two categories: hinge-based and telescopic. Hinge-based systems fold down quickly but can experience joint wear at pivot points over time, while telescopic frames slide into themselves, offering a more compact collapsed profile but sometimes requiring more effort to lock securely.
Before purchasing, measure your intended practice area. You need to account for both the active footprint (including your shooting stance and follow-through space) and the vertical ceiling clearance, especially if you plan to practice indoors or in a garage with low rafters.
Products mentioned in this guide
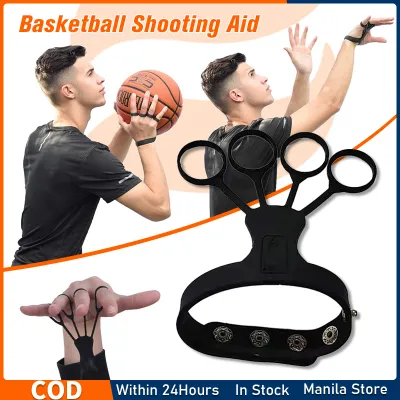
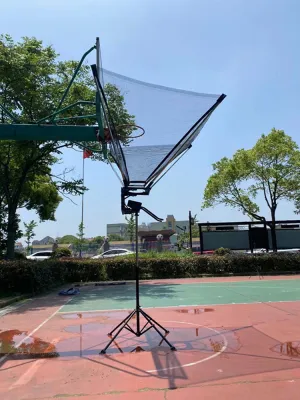
Prices are valid at publication and may change. Please refer to the product page for the latest price.
Do not forget to calculate the clearance needed for the ball’s trajectory. A trainer that guides your release at a high angle requires several feet of open vertical space above the unit to prevent the ball from striking the ceiling or overhead light fixtures.
Storage space is equally critical. Check the collapsed dimensions against your closet, trunk, or storage nook to ensure it fits when not in use.
In humid tropical environments, telescopic joints require extra attention. Moisture can trap itself inside sliding metal tubes, leading to internal corrosion or binding if the materials are not properly treated or maintained.
If you plan to transport the trainer between your home and a local outdoor court, evaluate the unit’s weight and handle design. A model that is too heavy without dedicated transport wheels or ergonomic handles can quickly become a chore to move, discouraging regular practice.
Consider the floor surface of your training venue. Smooth indoor wooden courts require non-marking rubber feet to prevent sliding and floor damage, while rough outdoor concrete demands a more rugged, abrasion-resistant base.
Setup time is another practical factor to consider. A mechanism that requires multiple tools or complex pin configurations for every session can hinder your motivation to practice, making tool-free quick-release clamps highly desirable.
Matching Adjustability to Your Skill Level and Mechanics
A trainer must adapt to your physical height and shooting arc. Youth players developing foundational form require lower height settings and closer guide paths to prevent them from throwing the ball with improper mechanics.

Adults and advanced shooters refining a high-release arc need a frame that extends higher and guides the ball at a steeper angle. Look for models that offer clear height markings on the adjustment poles.
To find your ideal height setting, measure your release point while standing in your natural shooting posture. The trainer’s guide rails should align with your release hand at its peak extension without forcing you to alter your natural jump or set point.
Verify whether the trainer’s frame supports add-on accessories. Some players require off-hand guides to eliminate thumb-flicks, while others need arc-feedback attachments or resistance bands to build muscle memory.
Micro-adjustments are vital as your skills progress. Instead of fixed, wide-interval pin holes, look for continuous tension knobs or fine-threaded adjustment systems that let you tweak the release angle by fractions of an inch over a training season.
Proper alignment of the elbow and wrist is the foundation of a consistent shot. Ensure the trainer’s guide rails can be adjusted laterally to match your natural shooting pocket without forcing your shoulder into an unnatural position.
The angle of the guide rail directly influences the entry angle of the ball into the rim. Adjusting the trainer to encourage a higher arc increases the target area of the hoop, which is a key focus for players transitioning from mid-range to three-point shooting.
Using a physical guide is an excellent way to build muscle memory, but the ultimate goal is transitioning to a natural shot. Choose a trainer that allows you to gradually back away or reduce the physical guidance, helping you internalize the form without becoming dependent on the equipment.
Inspecting Build Quality, Stability, and Safety Limits
Repetitive shooting drills put continuous stress on training equipment. Inspect the manufacturer’s specifications for frame material ratings, looking for powder-coated steel or heavy-duty aluminum that resists bending.
Examine the base design and joint reinforcements. A wider base with gusseted joints distributes energy better than a narrow, unreinforced frame, reducing the risk of tipping during high-energy drills.
Pay close attention to the locking pins themselves. Threaded screw knobs generally offer a tighter, more secure lock than simple spring-loaded pull pins, which can develop play over months of repetitive use.
Once assembled, perform a manual stability test. Simulate your follow-through and gently push against the guide rails to check for wobble or frame deflection; any significant swaying indicates insufficient base weight or loose connections.
Always respect the safety boundaries outlined in the product manual. Stop using the trainer immediately if you observe loose hinges, cracked base plates, or worn locking pins, as these compromises can lead to sudden structural failure during a workout.
Inspect the quality of the welds at critical stress points. Clean, continuous welds indicate a stronger joint than spot welds, which are more prone to cracking under the repeated impact of basketballs.
The netting material is another key durability factor. Look for high-ply nylon or polyester netting that can absorb the impact of off-target shots without tearing or stretching out of shape over time.
Be mindful of potential pinch points during the folding and unfolding process. Always keep your fingers clear of pivoting joints and locking sleeves, and ensure the frame is fully locked in its open position before beginning any drills.
Building Your Shortlist: A Pre-Purchase Verification Guide
When comparing options on online marketplaces, do not rely solely on promotional images. Download the official user manuals from the manufacturer’s website to verify the actual usable dimensions and clearance requirements.
Carefully review the warranty terms and return policies. Pay close attention to the coverage duration for moving parts, folding joints, and fabric netting, as these components experience the highest wear and tear.
To help prioritize your options, use this conditional selection matrix based on your primary training environment:
- Indoor Form Correction: Prioritize micro-adjustments, non-marking rubber feet, and a compact collapsed footprint for easy closet storage.
- Outdoor Durability: Prioritize powder-coated steel frames, UV-resistant netting, and a base design that accommodates external weights or sandbags.
Additionally, check the availability of replacement parts. A manufacturer that sells individual replacement nets, straps, or locking pins ensures your investment remains usable even if a single component wears out.
Analyze user reviews specifically for feedback on long-term joint integrity. Look for patterns where buyers mention joints loosening or telescoping poles slipping after several weeks of intense daily use.
Finally, verify the shipping weight and package dimensions before ordering. Bulky sports equipment can incur high shipping fees, so understanding the packaged size helps you avoid unexpected delivery costs.
Frequently Asked Questions (FAQ)
Can I use a foldable shooting form trainer outdoors?
Yes, but you must verify the manufacturer’s weather-resistance ratings first. Look for UV-protection labels on the netting and rust-resistant coatings on the metal frame to prevent degradation from sun and tropical humidity.
Outdoor surfaces like concrete driveways or local courts are often uneven. Always secure the base with sandbags, dedicated anchor pegs, or built-in weight bags to prevent wind or off-target shots from tipping the unit over.
How do I maintain the folding joints over time?
Regularly inspect all pivot points, hinges, and locking pins for signs of wear, rust, or debris accumulation. Wipe down the joints after outdoor sessions to remove dust and moisture that can cause binding.
If a joint becomes stiff, loose, or fails to lock securely into place, stop using the trainer immediately. Consult the manufacturer’s guide for approved lubricants or replacement parts rather than attempting unsafe temporary fixes.
Community discussion
Share your experience or ask a question. Comments are reviewed before publication.