
Finding a reliable cheap bike under ₱10,000 in the Philippines is entirely possible, provided you know what specifications to prioritize and where to make sensible compromises. At this price point, the market is filled with options ranging from basic commuter models to entry-level mountain bikes. However, navigating these choices requires a sharp eye for structural safety, component durability, and assembly quality rather than chasing flashy designs or unnecessary features.
To get the most value out of your budget, you must focus on the core essentials: a sturdy frame, reliable brakes, and a simple drivetrain. By understanding how to evaluate these components and factoring in the total cost of ownership, you can secure a safe, durable ride that handles daily commutes, weekend recreation, and local errands without breaking the bank.
Setting Realistic Expectations for a ₱10,000 Bike Budget
When shopping for a bicycle within a strict ₱10,000 limit, managing your expectations is the first step toward making a smart purchase. Bicycles in this price range generally fall into two categories: entry-level models from established, budget-friendly brands and unbranded options sold through various online marketplaces. Established budget brands typically offer better quality control, standardized frame geometry, and basic warranty support through local dealers. Unbranded options, while often looking more modern or complex, frequently cut corners on material quality and assembly standards to keep prices low.
Products mentioned in this guide
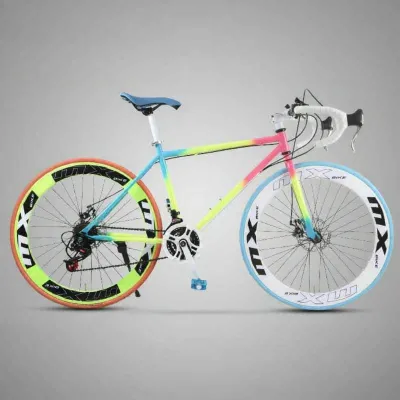
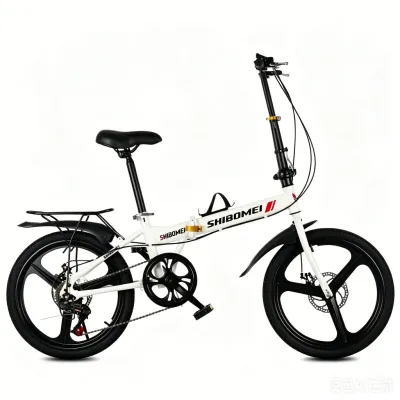
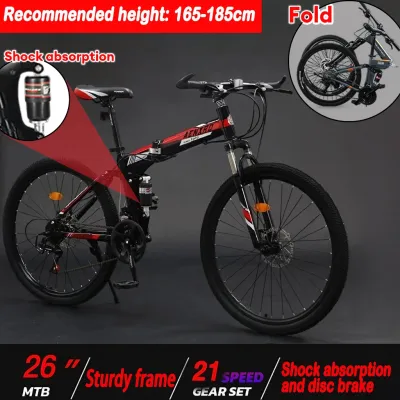
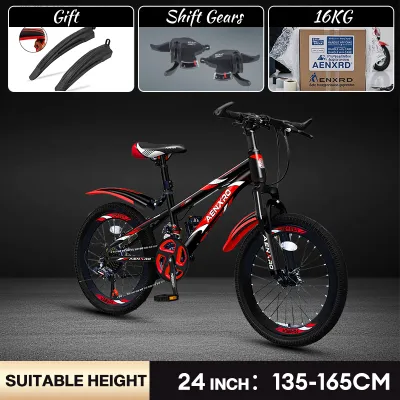
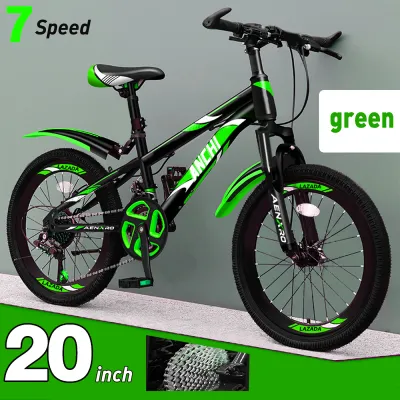
Prices are valid at publication and may change. Please refer to the product page for the latest price.
At this price point, certain compromises are inevitable, and understanding which ones are acceptable will save you from future frustration. You should expect a heavier ride, as manufacturers primarily use high-tensile steel or basic aluminum alloys rather than lightweight, double-butted tubing. The components, such as shifters and derailleurs, will be entry-level plastic or basic stamped metal, which require more frequent adjustments but are inexpensive to replace. Simpler drivetrains with fewer gear options are also standard, which is actually a benefit because fewer moving parts mean fewer points of potential failure.
However, safety and structural integrity must never be compromised, regardless of how attractive a low price tag might seem. A reliable budget bike must feature clean, consistent welds along the frame joints, secure clamping mechanisms at the handlebars and seat post, and functional braking systems. Avoid bikes that attempt to mimic high-end full-suspension mountain bikes with cheap rear shock absorbers; at this price level, these suspension systems add excessive weight, sap your pedaling energy, and are highly prone to developing dangerous play or seizing up entirely. A rigid frame or a simple front suspension fork is always a safer and more durable choice.
Key Specifications to Evaluate in Budget Bicycles
Evaluating the technical specifications of a budget bicycle allows you to filter out poorly constructed models and select a ride built to last. The frame material is the foundation of the bicycle and significantly influences its weight, ride quality, and longevity. High-tensile steel is incredibly robust and offers a compliant, forgiving ride over rough roads, but it is heavy and highly susceptible to rust if the paint is chipped. In the humid, tropical climate of the Philippines, where heavy downpours and coastal salt air are common, an entry-level aluminum alloy frame is often preferred because it is lighter, stiffer, and naturally resistant to corrosion.

Evaluating the drivetrain and gearing setup is equally critical for matching the bike to your daily routes. A single-speed setup is the ultimate choice for flat city streets and short commutes; it is lightweight, highly durable, and requires virtually no maintenance. If your route involves moderate hills or bridges, a multi-speed setup becomes necessary. Look for a simple 7-speed or a basic 3×7 (21-speed) drivetrain utilizing reputable entry-level components. Avoid overly complex 24-speed or 27-speed configurations on ultra-cheap bikes, as these often use low-grade imitation parts that struggle to stay in alignment and wear out rapidly under load.
Your choice of braking system directly impacts your safety on busy roads and during sudden tropical downpours. Traditional caliper or V-brakes (rim brakes) are lightweight, highly affordable, and exceptionally easy to adjust or repair with basic hand tools. However, their stopping power decreases when the rims get wet or muddy. Basic mechanical disc brakes offer more consistent stopping power in wet conditions, making them highly practical for monsoon riding. The trade-off is that cheap mechanical disc brakes require precise initial setup, can be prone to annoying squealing, and use pads that may be harder to source in remote local shops compared to standard rim brake pads.
Navigating Purchase Channels and Hidden Costs
Where you choose to buy your bicycle plays a major role in your overall satisfaction and the actual total cost of your investment. Purchasing from a local bike shop offers distinct advantages, including the ability to physically test-ride the bike for proper sizing, immediate quality verification, and professional assembly. Most local shops also provide a short warranty period and a free initial tune-up after the bike’s break-in period. Conversely, buying from online marketplaces or ecommerce platforms often yields lower upfront sticker prices, but you lose the ability to inspect the bike beforehand, and returning a damaged or defective frame can be incredibly difficult and expensive.
When calculating your budget, you must look beyond the initial sticker price of the bicycle to avoid exceeding your ₱10,000 limit. If you buy online, you must factor in shipping fees, which can be substantial for a large, heavy box. Furthermore, bikes shipped in a box are typically only 85% assembled. Unless you possess the specific tools and mechanical knowledge to properly install the front wheel, handlebars, pedals, and adjust the brakes and derailleurs, you will need to pay a local mechanic for professional assembly and tuning. Riding a poorly assembled bike straight out of the box can lead to immediate component damage or severe accidents.
To protect yourself from making a poor purchase online, learn to identify common red flags in product listings. Be highly skeptical of listings that use vague, generic descriptions such as “professional racing gears” or “imported high-speed brakes” instead of naming the actual component manufacturers. Watch out for listings that lack detailed geometry charts or fail to specify the frame material clearly. Finally, be wary of unrealistically low weight claims; a steel-framed mountain bike under ₱10,000 will rarely weigh less than 14 to 15 kilograms, so any claim of an ultra-lightweight build is a clear sign of misleading advertising.
Essential Assembly and Pre-Ride Safety Inspections
Before taking your new budget bicycle out onto public roads, performing a thorough assembly check and safety inspection is non-negotiable. Even if the bike was assembled by a shop, components can settle or loosen during transport. Begin by verifying the tightness and torque of all critical bolts. Use a hex key to check the stem bolts holding the handlebars in place, the seat post clamp, and the pedal threads. Ensure that the wheel axles are fully seated in the frame dropouts and that the axle nuts or quick-release skewers are clamped down securely to prevent a wheel from detaching while riding.
Next, focus your attention on the braking system to ensure reliable stopping power. Spin each wheel and observe the brake pads; they must be perfectly aligned with the braking surface (the rim for V-brakes, or the rotor for disc brakes) and must not rub when the brake levers are released. Squeeze the brake levers firmly; they should feel firm and stop well before touching the handlebar grips. If the levers pull all the way to the handlebars, you must adjust the cable tension immediately. Test the brakes at a very slow speed in a safe, flat area like a driveway or quiet alley before heading into traffic.
Finally, inspect the tires and wheels to ensure a smooth, safe ride. Check the tire sidewalls for the recommended inflation pressure, which is measured in PSI, and use a floor pump equipped with a pressure gauge to inflate them correctly. Under-inflated tires increase the risk of pinch flats when hitting potholes, while over-inflated tires can blow off the rim. Spin the wheels and look closely at the gap between the tire and the frame; if the wheel wobbles side-to-side, it is out of round (untrue) and needs its spokes adjusted. Riding on an untrue wheel can cause uneven brake wear and unpredictable handling.
Maintenance Habits to Extend the Life of an Affordable Bike
Developing consistent, low-cost maintenance habits is the single best way to keep a budget bicycle running smoothly and prevent premature wear on inexpensive components. The tropical climate of the Philippines presents unique challenges, including high humidity, heavy rain, mud, and road dust. After riding through rain or muddy streets, make it a habit to wipe down your frame and drivetrain with a clean, dry cloth. Allowing water and road grime to sit on steel bolts, chains, and cables will lead to rapid rusting, which stiffens the controls and ruins shifting performance.
Keeping your drivetrain clean and lubricated is essential for smooth pedaling and gear transitions. Use a basic biodegradable degreaser and an old toothbrush to clean accumulated grime off the chain, chainrings, and rear cassette. Once clean and dry, apply a high-quality bicycle chain lubricant. During the dry summer season, a dry lube is ideal because it does not attract dust; during the wet monsoon season, a wet lube is necessary because it resists being washed away by puddles, though it requires more frequent cleaning. Never use household oils like sewing machine oil or cooking oil, as they attract dirt and turn into a thick, abrasive paste.
Regularly monitor your bike for early signs of wear so you can address issues before they cause major damage. Listen for unusual squeaks, clicks, or grinding noises while pedaling, which often indicate loose bearings or dry threads. Check your brake pads periodically; if the grooves in the rubber pads are worn flat, or if the disc brake pads have less than a millimeter of friction material left, replace them immediately. If you experience persistent gear slipping, loose bottom brackets, or wheels that wobble significantly, stop attempting DIY adjustments and take your bike to a qualified local mechanic who has the specialized tools to resolve the issue safely.
Frequently Asked Questions (FAQ)
Is it safer to buy a second-hand bike to get better specs for ₱10,000?
Buying a second-hand bicycle can be an excellent way to get a lighter aluminum frame and higher-tier components within a ₱10,000 budget, but it comes with significant risks. When exploring the used market, you must carefully inspect the frame for hairline cracks, deep dents, and signs of crash damage, particularly around the weld joints and the front fork. Steel frames must be checked internally for hidden rust, which can compromise structural integrity over time. You must also evaluate the wear on the drivetrain; if the chain and gear teeth are heavily worn, replacing them can easily cost several thousand pesos, quickly pushing you past your budget. Because used bikes do not come with a manufacturer warranty or return policy, only choose this route if you are confident in your ability to thoroughly inspect the bike or have an experienced friend accompany you.
What essential accessories must be factored into the total budget?
When planning your purchase, you must not spend your entire ₱10,000 budget on the bicycle alone, as riding without basic safety and security gear is highly risky. First and foremost, allocate funds for a properly fitted, certified bicycle helmet to protect yourself in the event of a fall. Next, invest in front and rear visibility lights; these are essential for being seen by motorists during sudden afternoon downpours, early morning commutes, or evening rides. A sturdy lock, such as a heavy-duty U-lock or a thick chain lock, is also mandatory to secure your investment when parking in public areas. Finally, a basic hand pump and a simple patch kit will save you from being stranded by a flat tire, allowing you to handle minor roadside repairs independently.
Community discussion
Share your experience or ask a question. Comments are reviewed before publication.