
Staying hydrated is a daily necessity, especially when navigating the tropical heat of the Philippines. Whether you are commuting through Manila, hiking in Rizal, or working in an air-conditioned office, a reliable insulated bottle is a constant companion. However, carrying a heavy, fluid-filled container can quickly become awkward without the right accessory.
Investing in a high-quality handler for tumbler bottles is the most practical way to improve portability and prevent accidental drops. The key to a successful purchase lies in understanding that there is no one-size-fits-all solution. To find a handler that fits securely, you must evaluate your bottle’s unique physical dimensions, its overall shape, and the specific environments where you plan to use it.
Choosing the wrong handler can lead to annoying slips, scratched paint, or even a damaged vacuum seal. By taking a few precise measurements and matching them to the correct handler style, you can ensure your bottle remains safe, accessible, and comfortable to carry.
Products mentioned in this guide
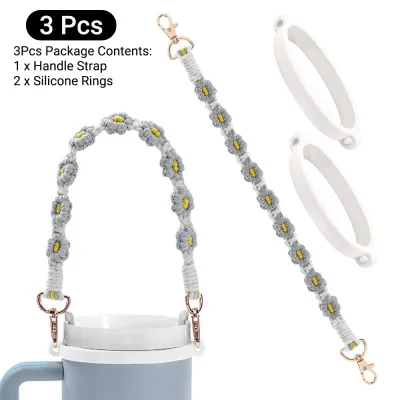
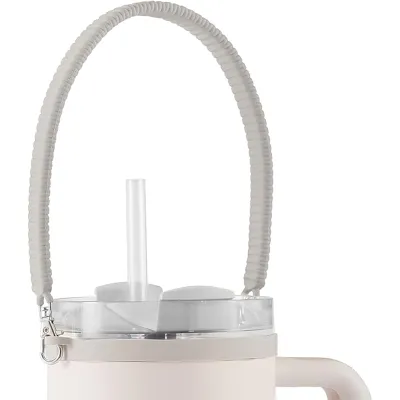
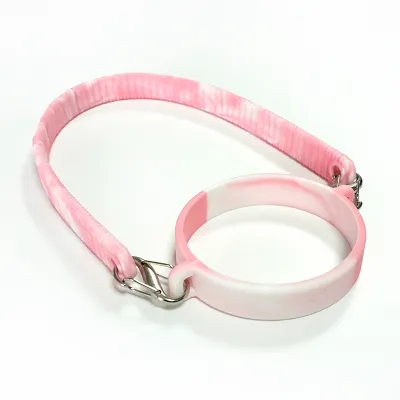
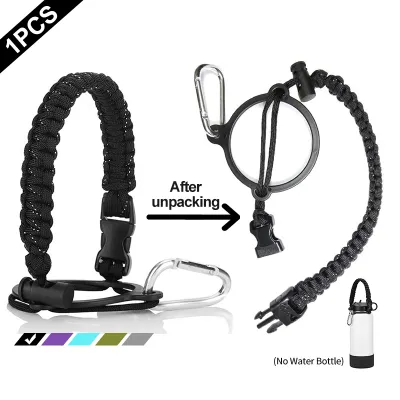
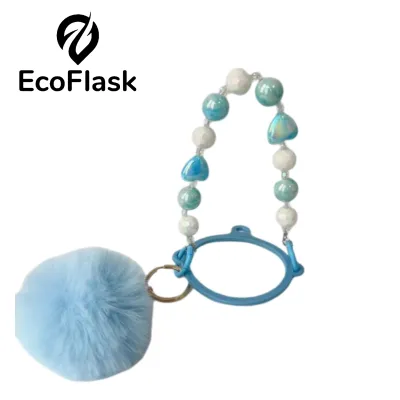
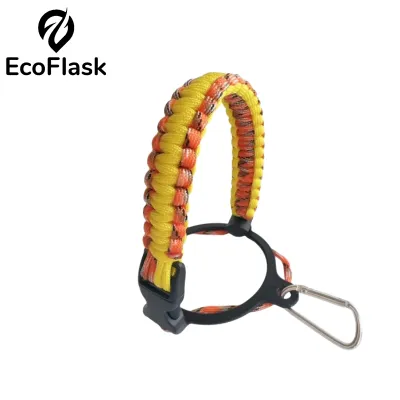
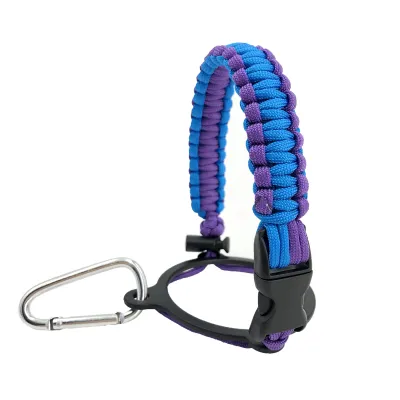
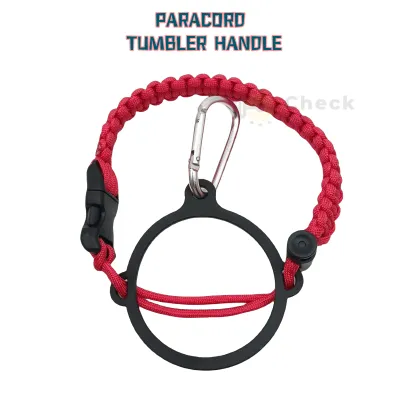
Prices are valid at publication and may change. Please refer to the product page for the latest price.
Measure Your Tumbler's Exact Dimensions
Before browsing online marketplaces or local sports shops, you need to establish a reliable baseline of your bottle’s physical dimensions. Guessing the size based on fluid capacity (such as 32 ounces or 40 ounces) often leads to compatibility issues, as different brands utilize distinct wall thicknesses and shapes.
To get started, gather a flexible sewing tape measure or a piece of non-stretch string and a standard ruler. If you require absolute precision, a set of digital calipers is highly effective for measuring outer diameter. Avoid using rigid metal tape measures, as they cannot wrap smoothly around curved surfaces and will likely yield inaccurate results.
Begin by measuring the base diameter of your tumbler. Place the bottle flat on a level surface and measure straight across the bottom from one outer edge to the other. Next, measure the widest part of the bottle’s body, which is often near the middle or top section. If your bottle features a tapered or hourglass design, note down the diameter at multiple points along the curve.
Do not forget to measure the neck circumference, right below the lip or lid collar. Many strap-style handlers rely on a secure anchor point at the neck to support the weight of a full bottle. Finally, measure the overall height of the container from the base to the bottom of the lid opening to ensure a sleeve-style handler won’t cover crucial features.
In the humid climate of the Philippines, cold drinks generate significant condensation, commonly referred to as bottle sweating. This moisture can cause handlers to slide out of position if the fit is not perfectly snug. Knowing your exact dimensions allows you to choose a handler that fits tightly enough to displace moisture and maintain a reliable grip.
Identify the Right Type of Handler for Tumbler Styles
Once you have recorded your bottle’s dimensions, you can explore the primary categories of handlers available on the market. Each design serves a different carrying style, venue, and activity level.

Silicone Handle Grips and Sleeves
Silicone sleeves feature an integrated side handle that slides directly onto the body of your bottle. These are highly popular for everyday office use, gym sessions, and casual travel because they provide a comfortable, ergonomic grip. They work best on straight-sided cylinders or slightly tapered tumblers where the sleeve can slide upward until it wedges tightly.
- Pros: Comfortable, easy to wash, provides thermal insulation, and cushions against minor dings.
- Cons: Can stretch out over time with heavy use, gradually losing its grip. In hot, humid environments, moisture can easily get trapped between the silicone and the bottle wall, creating a breeding ground for mold if you do not remove and dry the sleeve regularly.
Paracord Straps and Carriers
Paracord handlers consist of tightly woven nylon utility cords equipped with a durable plastic ring or a flexible loop that cinches tightly around the neck of the bottle. Many models include adjustable shoulder straps, quick-release buckles, and integrated survival tools like compasses or whistles.
- Pros: Highly adjustable, durable, hands-free (often with shoulder straps), and ideal for tapered bases that would otherwise slip through standard rigid holders.
- Cons: Nylon fabric absorbs sweat and rain, requiring periodic washing and ample drying time to prevent unpleasant odors.
Hard Mounts and Adapters
Hard mounts are rigid plastic or metal assemblies designed to clamp your tumbler onto specific structures, such as bicycle handlebars, baby strollers, or oversized car cup holders. These handlers are engineered to keep your drink upright and stable during high-movement activities.
- Pros: Extremely secure, prevents tipping during bumpy rides, and keeps your hands completely free.
- Cons: Sizing must be exact because these materials do not stretch. Without a protective barrier like silicone pads or rubber teeth, a rigid plastic mount will quickly scratch or scrape your bottle's exterior finish when subjected to vibrations.
Match the Handler to Your Bottle's Shape and Material
A common mistake is assuming that a handler designed for a specific volume will automatically fit any bottle of that same capacity. The physical profile and surface finish of your tumbler play a massive role in how securely a handler will perform.
Straight cylindrical bottles are the easiest to match, as they provide a uniform surface area for silicone sleeves and rigid clamps to grip. Tapered bottles, which narrow significantly toward the base, require careful consideration. A rigid, non-adjustable handler designed for a straight cylinder will fail to secure a tapered bottle, causing it to slide downward and eventually fall out. For tapered shapes, look for adjustable paracord loops or multi-piece strap systems that can be cinched at different widths.
The outer surface material of your tumbler also dictates the type of handler you should use. Smooth, high-gloss painted finishes are highly susceptible to scratches and require soft, non-abrasive materials like silicone or fabric. Powder-coated or textured finishes offer natural traction, which helps handlers stay in place, but they can still wear down over time if subjected to constant friction from hard plastic parts.
To protect your investment, avoid using cheap, rigid plastic clamps directly on delicate painted finishes without a protective buffer. Always check the manufacturer’s care instructions for both your tumbler and the handler. Some low-grade rubbers or chemical adhesives can react with specialized external coatings, leading to peeling, discoloration, or sticky residues that ruin the appearance of your bottle.
Check Adjustability and Fit Specifications
When shopping for a handler, you must carefully read the product specifications rather than relying on promotional photos. Pay close attention to the difference between the handler’s inner diameter and your bottle’s outer diameter.
For silicone and rubber grips, look for the manufacturer’s stated stretch limits or maximum expansion range. A quality silicone sleeve should have an un-stretched inner diameter slightly smaller than your bottle’s outer diameter to ensure a tight, slip-free tension fit. However, this stretch capacity has limits, and attempting to force a sleeve onto a bottle that exceeds the maximum recommended diameter will cause premature tearing.
For fabric, webbing, or paracord carriers, evaluate the toggle ranges and strap adjustability limits. Ensure the neck loop can contract tightly enough to prevent the bottle’s collar from slipping through, while still allowing enough slack to be removed easily for cleaning. If you are purchasing a hard mount, verify that the clamp’s adjustable range matches both your bottle’s diameter and the mounting bar’s thickness.
Never attempt to force a handler that is visibly too small for your bottle. High-quality insulated tumblers rely on a thin vacuum gap between two stainless steel walls to maintain temperature. Applying extreme inward compression or using tools to force a tight ring over the body can dent the outer steel wall. If this outer wall deforms even slightly, it can bridge the vacuum gap, permanently destroying the thermal performance of your expensive bottle. If the product specifications do not explicitly cover your measurements, look for an alternative model.
Install and Test the Fit
Once you have selected a compatible handler, proper installation is key to ensuring long-term performance and safety. Taking your time during this step prevents damage to both the accessory and the bottle.
If you are struggling to slide a tight silicone grip or sleeve onto your tumbler, do not use brute force or sharp tools. Instead, apply a very mild soap solution—just a single drop of dish soap mixed with water—to the inside of the sleeve. This acts as a temporary lubricant, allowing the silicone to slide smoothly into place. Once the handler is positioned correctly, rinse the bottle thoroughly with clean water and allow it to dry completely. Skipping the drying step will leave a slippery soap residue that causes the handler to slide off during use, and it can trap moisture that leads to mold.
Before heading out on your daily commute or outdoor adventure, perform a quick “shake test” and “lift test” to verify the security of the setup. Hold the handler firmly and lift the bottle a few inches above a soft, cushioned surface like a bed or a couch. Gently shake the handler in various directions. The bottle should remain firmly locked in place without shifting, sliding, or tilting precariously.
Always pay attention to clear stop conditions during installation and testing. If you notice the bottle’s metal walls deforming, hear a faint hissing sound (which indicates a breached vacuum seal), or observe the bottle slipping during the lift test, stop immediately. Remove the handler and seek a better-fitting alternative. It is far better to return an inexpensive accessory than to ruin an expensive insulated tumbler.
Frequently Asked Questions (FAQ)
Will a tight silicone handler damage my tumbler's vacuum insulation?
While high-quality stainless steel tumblers are designed to be highly durable, excessive inward pressure from an undersized handler can pose a risk. If you force an extremely tight, rigid, or undersized ring over the body, the localized compression can dent the thin outer steel wall. If the outer wall touches the inner wall, the vacuum seal is broken, and the bottle will lose its ability to keep drinks cold or hot. Always choose a handler that fits snugly without requiring extreme physical force to install, and monitor your bottle’s temperature retention if you suspect any structural damage.
How do I clean a tumbler handler that gets sticky in humid weather?
In the humid climate of the Philippines, silicone and rubber handlers can accumulate sweat, skin oils, and dust, eventually developing a sticky or tacky texture. To clean them safely, remove the handler from the bottle and wash it thoroughly with warm water and a mild dish soap. Avoid using harsh chemical solvents, alcohol, or abrasive scrubbing pads, as these substances will break down the polymer structure of the silicone, permanently ruining the material and making the stickiness worse. Allow the handler to air-dry completely in a well-ventilated area before sliding it back onto your tumbler.
Community discussion
Share your experience or ask a question. Comments are reviewed before publication.