
Selecting the right Alexander kite thread requires balancing the physical size of your kite with the velocity of the wind in your flying environment. Using a line that is too thin leads to sudden snap-offs and lost kites, while a line that is too thick adds unnecessary weight and drag, preventing your kite from launching or staying aloft. By understanding how thread materials, thicknesses, and environmental conditions interact, you can ensure a stable, high-reaching flight and a safe experience for everyone at the flying site.
In the Philippines, where kite flying is a beloved seasonal activity, local wind patterns and tropical humidity play a massive role in how your equipment performs. Whether you are flying a compact diamond kite on a calm afternoon or anchoring a large traditional guryon during the breezy Amihan season, matching your Alexander kite thread to your specific setup is the key to a successful flight.
Understanding the Basics of Alexander Kite Thread
Alexander kite thread is a staple for outdoor enthusiasts due to its reliable tensile strength and consistent winding quality. These threads are typically constructed from cotton, nylon, or synthetic blended fibers, each offering distinct physical characteristics that affect how your kite behaves in the sky.
Products mentioned in this guide
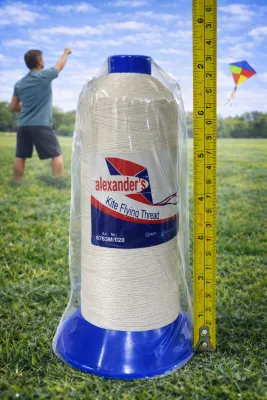
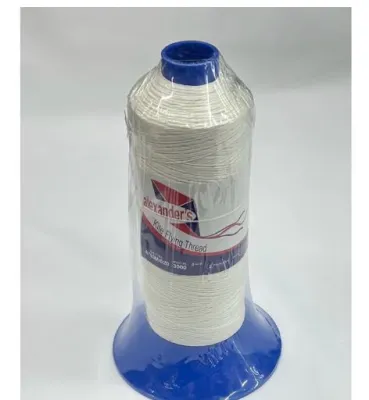
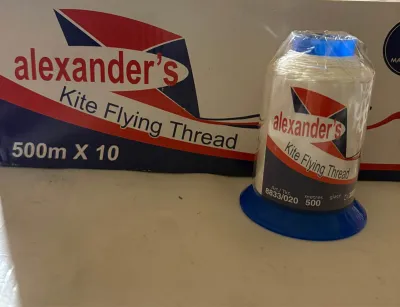
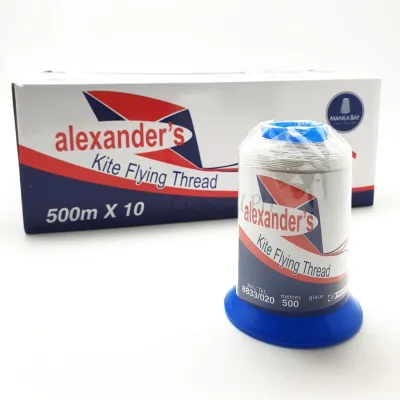
Prices are valid at publication and may change. Please refer to the product page for the latest price.
Cotton threads are highly favored for their natural, high-friction grip, making them exceptionally easy to handle on traditional wooden winders. They exhibit minimal stretch, which provides direct, tactile feedback from the kite to your hands. However, cotton is more susceptible to moisture absorption and has lower overall tensile strength compared to synthetics of the same thickness. Nylon and blended synthetic threads, on the other hand, offer superior strength-to-weight ratios and high elasticity, allowing them to absorb sudden wind shocks without snapping immediately.
Before heading to the field, always check the manufacturer’s packaging or spool label for the rated tensile strength and line diameter. Tensile strength, often marked in pounds or kilograms, indicates the maximum load the line can bear before breaking. If the label does not explicitly state the weight rating, you can often verify the thread’s suitability by checking the ply count or consulting product specifications from authorized local distributors.
Tropical humidity and frequent rain showers in the Philippines can significantly affect different thread materials over time. Natural cotton fibers absorb moisture from the humid air, which increases line weight and weakens the overall structure if stored damp. Synthetic fibers resist rot and mold, but they are highly sensitive to prolonged exposure to intense tropical UV rays, which gradually degrades the polymer chains. Proper drying, routine inspections, and climate-controlled storage are essential to preserve the integrity of any thread material.
Matching Thread Thickness to Your Kite Size
To achieve stable flight, the thickness and weight of your Alexander kite thread must correspond directly to the surface area and weight of your kite. A balanced setup ensures that the line is strong enough to hold the kite without acting as a heavy anchor that drags it back to the ground.

Small to Medium Kites
Small to medium kites, such as standard plastic diamond kites, small nylon delta kites, or lightweight traditional saranggola, require thin, lightweight threads. Because these kites have a limited surface area, they generate relatively low lifting force.
Using a thin thread minimizes aerodynamic drag and keeps the overall line weight low. This allows the kite to climb quickly into higher air currents where winds are steadier, even during light breezes. A heavy line on a small kite will sag, creating a large U-shaped bend in the air that pulls the nose of the kite downward and prevents it from reaching its maximum altitude.
Large or Heavy-Lift Kites
Large kites, heavy-framed box kites, or traditional bamboo-and-paper guryons with wide wingspans generate massive amounts of lift and drag. These setups require thicker, high-tensile Alexander kite threads to withstand the intense, continuous pull.
When a large kite catches a strong gust, a thin line will instantly reach its breaking point, resulting in a sudden snap-off. Thicker lines provide the necessary structural safety margin to handle both the static weight of the kite and the dynamic forces generated by wind resistance. Always verify that your thread’s rated capacity comfortably exceeds the estimated maximum pull of your kite under active flight conditions.
Balancing the Setup
To find the right balance, look at the physical dimensions of your kite and match them against common thread ratings:
- Kites under 60 cm (wingspan or height): Opt for lightweight cotton threads or low-ply synthetic lines (typically rated under 15 to 20 pounds of tensile strength).
- Kites between 60 cm and 120 cm: Step up to medium-weight threads (rated between 20 to 50 pounds) to handle the moderate pull without adding excessive drag.
- Kites over 120 cm or heavy specialty shapes: Utilize heavy-duty, high-tensile synthetic threads (rated 50 pounds and above) to ensure the kite remains securely anchored.
Using a thread that is too heavy for a small kite prevents it from lifting, while using a thread that is too thin for a large kite risks sudden breakage, which can damage your kite or cause it to drift into dangerous areas like power lines or busy roads.
Adapting Your Choice to Wind Conditions and Environments
Wind speed and local geography dictate how much tension your kite line will experience during flight. A thread that works perfectly on a calm day can easily fail when conditions change, making it crucial to adapt your gear to the environment.
On light wind days, your primary goal is to minimize weight. Choose the thinnest, smoothest Alexander kite thread suitable for your kite’s size. Smoother synthetic lines glide through the air with minimal friction, reducing line sag and allowing your kite to stay aloft in marginal wind conditions.
In strong or gusty winds, the tension on your line can spike instantly. Under these conditions, opt for a thicker, more abrasion-resistant thread. Synthetic blends with a slight amount of stretch can act as a shock absorber, dampening the impact of sudden gusts on the kite’s frame. If you prefer cotton, ensure you are using a higher-ply variant to handle the increased load safely.
Environmental factors also play a massive role in line degradation. If you are flying near coastal areas, sandy beaches, or urban parks with nearby trees and buildings, your line is exposed to harsh elements. Salt air and fine sand particles can wedge themselves between the fibers of your thread, acting as microscopic abrasives that wear down the line from the inside out. Furthermore, flying near trees or rough structures increases the risk of the line rubbing against branches or concrete, which can quickly fray a thin thread.
In the Philippines, wind conditions shift dramatically between seasons. The Amihan season (typically from October to March) brings cool, strong, and steady northeast winds that are ideal for larger kites and require heavy-duty, robust threads. Conversely, the hotter summer months and the Habagat season (southwest monsoon) often feature lighter, highly turbulent, or unpredictable wind patterns. Adjusting your thread inventory to match these seasonal shifts ensures you are always prepared for the prevailing weather.
Step-by-Step Guide to Spooling and Tying Your Thread
Properly preparing and securing your Alexander kite thread is just as important as choosing the right thickness. Incorrect spooling leads to frustrating tangles, while a poorly tied knot can slip or cut through itself under tension.
Tools Needed
Before you begin, gather a sturdy kite winder or spool (wooden, plastic, or ergonomic hoop style), your chosen spool of Alexander kite thread, your kite, and a pair of blunt-tip scissors.
Step 1: Pre-Spool Inspection
Before winding the thread onto your flying spool, pull out the first few meters of line and inspect it closely. Check for any factory knots, uneven twisting, fraying, or thin spots. If you detect any structural imperfections, cut that section away immediately. It is always better to discard a few meters of compromised thread at home than to experience a line break in mid-air.
Step 2: Even Spooling
Attach the end of the thread to the core of your winder using a secure anchor knot. Begin winding the thread onto the spool evenly, guiding it back and forth across the width of the winder. Keep moderate, consistent tension on the line as you wind. Avoid winding too tightly, as excessive tension can crush plastic spools or warp wooden winders. Conversely, winding too loosely will cause the thread to slip, overlap, and jam when you try to let the line out quickly during flight.
Step 3: Securing the Knot
When attaching the thread to your kite’s bridle or tow point, use a reliable, non-slip knot that preserves the line’s tensile strength.
- The Bowline Knot: This knot creates a secure, fixed loop that will not slip or tighten under load, making it easy to undo after your flight. It is highly recommended for synthetic lines.
- The Double Clinch Knot: Excellent for securing cotton or blended threads directly to a metal or plastic connector ring on the kite's bridle.
Ensure that the knot sits snugly against the bridle and does not rub directly against sharp bamboo edges or rough frame components, which can slice through the thread under tension.
Warning: Never wrap the kite thread tightly around your fingers, palms, or wrists while the kite is in the air. A sudden gust of wind can pull the line with immense force, causing deep friction cuts, rope burns, or severe circulation loss. Always hold the winder by its designated handles or grips, and wear protective gloves if you need to handle the active line directly.
Pre-Flight Safety Checks and Routine Maintenance
To prolong the lifespan of your Alexander kite thread and ensure a safe flying experience, establish a regular routine of pre-flight inspections and post-flight care.
Before launching your kite, perform a quick tactile inspection. Gently run the first several meters of the line through your fingers as you prepare the launch. Feel for any changes in texture, such as fuzziness, small bumps, or sudden thinning, which indicate fraying or internal fiber damage. Inspect the area near the bridle knot closely, as this section experiences the highest amount of stress and movement during flight.
If you discover visible frays, deep nicks, or sections where the fibers have begun to unspool, stop immediately. Do not attempt to fly the kite with compromised thread. Cut out the damaged section and re-tie the line using a secure knot, or replace the entire spool if the wear is widespread.
After a day of flying, especially near sandy beaches or in humid conditions, take a few minutes to clean your line. Wipe the thread with a clean, dry cloth as you wind it back onto the spool to remove salt, sand, and moisture. If the line got wet from rain or heavy dew, do not store it tightly wound on the spool. Instead, loop it loosely in a well-ventilated indoor area and let it dry completely before packing it away. This prevents natural cotton threads from rotting and stops mold or mildew from degrading synthetic fibers.
Store your spooled thread in a cool, dark, and dry place. Keep it away from direct sunlight, high-heat areas like car trunks, and harsh household chemicals, as these factors rapidly degrade the tensile strength of both natural and synthetic fibers.
Finally, always observe public safety boundaries. Avoid using heavily coated, abrasive, or glass-treated lines in public parks, crowded beaches, or residential areas. These lines pose an extreme hazard to bystanders, cyclists, and local wildlife. Stick to standard, untreated Alexander kite thread, and always fly in open spaces far away from overhead power lines, busy roads, and airports.
Frequently Asked Questions (FAQ)
Can I use regular fishing line instead of dedicated kite thread?
While regular monofilament fishing line might seem like a convenient substitute, it is generally not recommended for kite flying. Monofilament fishing line has a high amount of stretch, which makes your kite’s controls feel sluggish and unresponsive.
Additionally, fishing line is designed to be highly invisible in water, making it extremely difficult for bystanders, joggers, or cyclists to see in the air. This invisibility poses a severe safety hazard in public parks and beaches. Dedicated kite threads, like those from Alexander, are designed to be visible, offer a much better grip on winders, and do not suffer from the aggressive memory coiling that makes fishing line prone to tangles on land.
How do I safely untangle a severely knotted kite line?
If your kite line becomes tangled, the most important step is to remain patient and avoid pulling the line tight. Pulling on a loose tangle will lock the knots into place, making them incredibly difficult to undo and putting severe stress on the individual fibers.
Lay the tangled section flat on a clean surface. Use your fingers or a blunt tool, such as a plastic winder edge or a smooth wooden dowel, to gently push and loosen the core of the knots. Work from the outside of the tangle inward, slowly feeding the free end of the line back through the loops. If a knot has been pulled extremely tight under a heavy wind load, the fibers in that section are likely crushed and permanently weakened. In such cases, it is safer to cut out the knotted section entirely and join the clean ends with a strong fisherman’s knot or replace the line.
Community discussion
Share your experience or ask a question. Comments are reviewed before publication.