
To find the right badminton rebound board for solo practice, you must evaluate its rebound angle adjustability, net tension, frame stability, and portability. These features dictate how realistically the shuttlecock returns to you and whether the equipment can withstand the humid, tropical conditions of local training spaces. Whether you are practicing in a high-ceiling garage, a local covered court, or an open backyard, selecting a board that aligns with your skill level ensures your drills translate directly to real-match performance.
Evaluating Rebound Angle, Tension, and Frame Stability
The core value of a badminton rebound board lies in its ability to mimic the unpredictable pace of a real opponent. To achieve this, the board’s mechanical specifications must allow for precise adjustments. A fixed-angle board limits you to a single type of return, which quickly leads to repetitive, unrealistic practice sessions.
Look for a rebound board that offers adjustable angles, typically ranging from 15 to 45 degrees. A steeper, near-vertical angle is ideal for practicing flat, fast-paced drives and mid-court defensive blocks. Conversely, tilting the board backward creates a lofted return, allowing you to practice high clears, drops, and smash recoveries. When evaluating these boards, inspect the adjustment mechanism; heavy-duty locking pins, multi-position brackets, or secure gear teeth are far more reliable than simple plastic tension dials, which can slip under the repeated impact of high-velocity shots.
Products mentioned in this guide
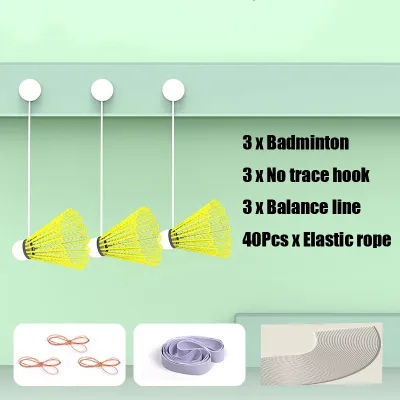
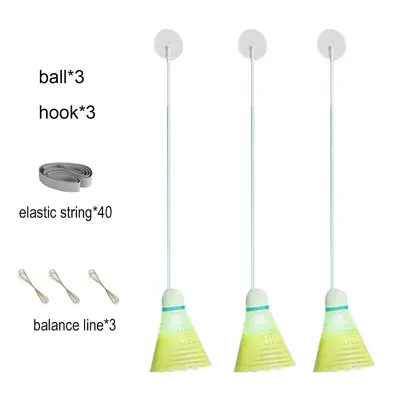
Prices are valid at publication and may change. Please refer to the product page for the latest price.
Net tension is the primary driver of return speed and physical feedback. High-tension nets, which are usually tensioned with heavy-duty elastic bungees or steel springs, return the shuttlecock with minimal energy loss. This rapid return forces you to shorten your backswing, speed up your racket preparation, and focus on quick wrist movements. Low-tension setups absorb more of the shuttlecock’s momentum, resulting in slower, loftier returns that give you more time to reset your stance. Verify if the board allows you to adjust the tension, either by tightening individual elastic straps or by adding and removing modular bungee cords.
Frame stability is critical for safety and training consistency. A lightweight or poorly balanced frame will slide backward or tip over when struck by a powerful smash. Look for a wide, deep base footprint that distributes the impact forces evenly. Many high-quality boards feature dedicated weight pegs or base frames designed to hold sandbags, water weights, or iron plates to keep the unit anchored. Additionally, check for thick, anti-slip rubber feet on the base; these are essential for preventing the frame from creeping across smooth tiled carports, polished wooden indoor courts, or painted concrete courts during intense, continuous rallies.
Matching the Board to Your Skill Level and Practice Goals
Your current playing level and specific training objectives should dictate the complexity and responsiveness of the rebound board you choose. Buying a highly sensitive, high-tension board when you are still mastering basic racket skills can lead to frustration, as the rapid returns will outpace your reaction time.

For beginners, the primary goal of solo practice is to build rhythm, hand-eye coordination, and consistent footwork. Beginners should look for a rebound board with a larger surface area and a slightly looser net tension. This combination provides a wider margin of error, absorbing off-center hits and returning the shuttlecock at a manageable pace. This slower tempo gives you the necessary time to practice correct grip transitions—such as switching from a forehand to a backhand grip—and to execute a proper split-step before each stroke.
Intermediate and advanced players require a setup that challenges their reflexes and muscle memory. If you are training for competitive club play, prioritize a high-tension, highly responsive net that can replicate the blistering pace of a fast-drive rally. The target area can be smaller, but the frame must be exceptionally rigid to handle high-velocity impacts without vibrating excessively. This type of setup is excellent for developing short, explosive forearm power and training your eyes to track fast-moving objects.
Your primary drill focus should also guide your feature selection. If your training routine centers on defensive defense, such as lifting smashes, you need a board that can tilt backward significantly to loft the shuttlecock high into the air. If you want to master flat, mid-court drives, a near-vertical board with maximum tension is necessary to keep the shuttlecock traveling low and fast over an imaginary net. Identifying these goals early prevents you from overpaying for adjustable features you may never use.
Assessing Portability, Storage, and Space Requirements
Before finalizing your purchase, you must consider where you will store the rebound board and how you will transport it to your practice venues. Many players share court space, practice in multi-purpose community centers, or set up temporary training zones in their driveways.
Evaluate the folded dimensions and overall weight of the board to ensure it fits comfortably into your lifestyle. If you plan to travel to local parks or indoor sports complexes, look for a model that folds flat and features integrated carrying handles or a dedicated storage bag. A board that weighs between 8 to 12 kilograms strikes a good balance between structural stability and portable convenience, allowing you to carry it short distances without excessive physical strain.
Indoor practice requires careful spatial planning to prevent property damage and personal injury. For safe swing clearance, you need a minimum radius of about 2 to 2.5 meters of open space around your body. This prevents your racket from striking walls, furniture, or low-hanging light fixtures during a full follow-through. Ceiling height is another critical factor; simulating defensive clears or high serves indoors requires at least 3.5 to 4 meters of vertical clearance to avoid damaging the ceiling or bending your racket on a low beam.
Setup and teardown times are often overlooked but highly influential in how often you will actually use the equipment. If a board requires complex tools, loose bolts, and 30 minutes of assembly before every session, it will likely end up gathering dust in a closet. Prioritize designs that feature quick-release pins, snap-button joints, or pre-threaded nets that allow for a tool-free setup in under five minutes, maximizing your actual training time.
Checking Durability, Materials, and Maintenance Needs
A badminton rebound board is a significant investment, and its materials must be robust enough to withstand both high-impact shuttlecock strikes and environmental exposure. The tropical climate in the Philippines, characterized by high humidity, intense summer heat, and seasonal rains, can quickly degrade poorly protected equipment.
Inspect the frame material and joint reinforcements carefully. Look for powder-coated steel or heavy-duty anodized aluminum frames, as these materials offer excellent resistance to rust and corrosion. Pay close attention to the weld points and corner joints; double-welded corners or gusset plates provide superior structural integrity, ensuring the frame does not warp or crack under the repeated stress of powerful smashes.
The net and its tensioning components are the most vulnerable parts of the assembly. High-density polyethylene (HDPE) or weather-treated nylon nets offer the best resistance to fraying, tearing, and UV degradation. Because elastic components naturally lose their elasticity over time, verify whether the manufacturer sells replacement nets, individual bungee cords, or tension springs separately. Being able to replace a worn-out bungee cord rather than the entire unit will save you significant money in the long run.
Proper maintenance and storage limits are essential for preserving the board’s performance. Even weather-resistant frames should not be left outdoors permanently. High humidity can encourage mold growth on nylon nets, and prolonged exposure to direct sunlight can make elastic bungees brittle. To prevent degradation, wipe down the frame after outdoor sessions to remove sweat and moisture, and store the board in a dry, shaded indoor area when not in use.
Building Your Shortlist and Pre-Purchase Checklist
When you are ready to buy, navigate online marketplaces or local specialty shops with a clear verification process. Do not rely solely on promotional images or vague marketing claims of “professional quality.”
Start by downloading the manufacturer’s user manual or detailed specification sheet. Cross-reference the listed dimensions, weight limits, and adjustable angle ranges with your actual practice space and training goals. Verify that the package includes all necessary assembly hardware, tension cords, and safety anchors.
Next, evaluate the seller’s warranty terms and return policies. A reputable brand or distributor should offer at least a six-month warranty on the metal frame and structural joints, protecting you against manufacturing defects. Check customer reviews specifically for feedback on how easily the seller provides replacement parts, such as extra bungees or nets, should they wear out.
Finally, set a realistic budget in Philippine Pesos. Entry-level, fixed-angle rebound nets typically range from ₱2,500 to ₱4,500, which are suitable for casual backyard play and basic footwork drills. High-end, fully adjustable, heavy-duty steel frames designed for intense club-level training can range from ₱6,000 to ₱12,000 or more. Weigh this cost against how often you plan to practice and whether you require advanced features like micro-adjustable angles and high-tension springs to achieve your training goals.
Frequently Asked Questions (FAQ)
Can I use a regular feather shuttlecock with a rebound board?
Yes, but expect accelerated wear. Feather shuttlecocks are delicate; hitting a high-tension rebound net repeatedly will break the feathers much faster than hitting a standard racket string bed. For solo practice on a rebound board, synthetic nylon shuttlecocks are highly recommended. They offer superior durability, maintain their shape under repeated high-impact rebounds, and significantly reduce your ongoing replacement costs. If you must use feathers, check the manufacturer’s guidelines to ensure the net tension is compatible and won’t instantly crush the shuttlecock’s skirt.
How much space do I need to set up a rebound board safely?
To practice safely, you need a clear, flat area of at least 4 meters in length and 3 meters in width. This space allows you to stand at a realistic distance from the board while maintaining a safe swing radius of 2 meters in all directions. For indoor setups, ensure your ceiling height is at least 3.5 meters if you plan to practice high clears or defensive lifts. Always clear the area of any tripping hazards, loose rugs, or low-hanging obstacles before beginning your session to prevent injury during rapid footwork drills.
Community discussion
Share your experience or ask a question. Comments are reviewed before publication.