
When setting up your first boxing protective gear kit, the most critical piece of equipment you will select is a high-quality, custom-moldable mouthpiece. While beginners often focus on choosing flashy gloves or premium hand wraps, oral protection is the true foundation of your safety in the ring. A proper guard does far more than protect your teeth; it stabilizes your entire jaw and helps mitigate the force of impact during training.
In the Philippines, where local boxing gyms range from modern air-conditioned fitness centers to intense, high-humidity sweatboxes, selecting the right protective gear requires a balance of safety, comfort, and cost-effectiveness. Investing in a reliable guard from day one protects you from painful injuries and expensive dental procedures. This guide will help you navigate the essential features of boxing mouthguards so you can complete your starter gear set with confidence.
Why Your First Boxing Mouthpiece is Your Most Important Gear
Many beginners make the mistake of allocating their entire budget to gloves while treating oral protection as an afterthought. While 16-ounce sparring gloves and hand wraps are highly visible, a mouthpiece is the only piece of gear that directly protects against irreversible dental trauma. A direct punch to an unprotected mouth can chip, loosen, or completely knock out teeth, leading to immediate pain and long-term dental complications.
Products mentioned in this guide
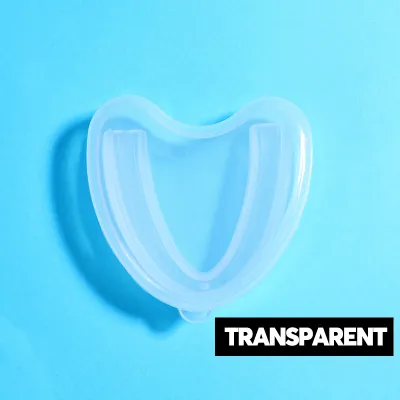
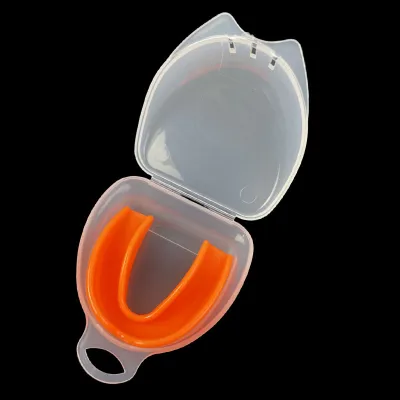
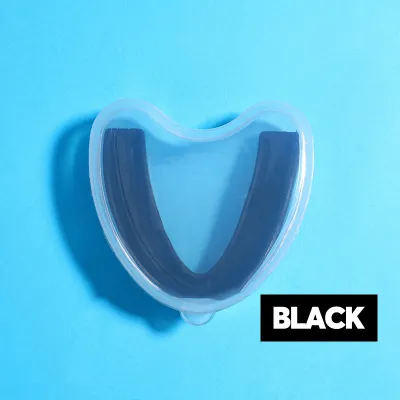
Prices are valid at publication and may change. Please refer to the product page for the latest price.
Beyond protecting your teeth and preventing you from biting your tongue or lips, a mouthguard plays a vital role in stabilizing the jaw. When you clench down on a properly fitted guard, you lock your upper and lower jaws together. This structural stabilization helps distribute the force of a frontal impact across the entire skull, reducing the risk of jaw fractures and helping to cushion the joint against forces that contribute to concussions.
For a beginner, there is no need to spend a fortune on a professional-grade, custom-made dental guard. However, you must absolutely avoid the cheapest, un-moldable plastic options sold in toy stores or generic department stores. A guard that does not mold to your teeth offers virtually no shock absorption and will constantly fall out, forcing you to focus on holding it in place rather than learning basic boxing techniques.
4 Key Features to Evaluate Before Buying
Evaluating a mouthguard requires looking past marketing jargon and focusing on practical design elements. For a beginner, the right balance of features will ensure safety without causing unnecessary discomfort during long training sessions.

Protection Level vs. Bulkiness
There is a direct trade-off between the thickness of a guard and the comfort of your jaw. While thicker material generally offers better shock absorption, an overly bulky guard will force your jaw open too wide, leading to rapid jaw fatigue and difficulty breathing. Beginners should look for dual-layer designs that combine a rigid outer shield for impact dispersion with a soft, moldable inner gel liner that cushions the gums without adding excessive volume.
Fit and Lip Coverage
A high-quality guard must feature an adequate outer flange, often referred to as a lip shield. This raised vertical wall of material sits between your teeth and the inside of your lips. Without this coverage, a direct blow to the mouth will press your inner lips directly against the hard edges of your teeth, causing painful lacerations. The guard should cover your teeth completely up to the gum line without pressing uncomfortably into the roof of your mouth.
Breathability and Communication
During intense pad work or conditioning drills in a warm environment, your oxygen demand will skyrocket. A poorly designed guard will block your airway, forcing you to spit it out to catch your breath. Look for models featuring integrated airflow channels or a slim front profile. A well-fitted guard should remain securely attached to your upper teeth even when you open your mouth to speak to your coach or take a deep breath.
Material Safety
Because this piece of equipment sits inside your mouth in direct contact with your mucous membranes for hours, material safety is paramount. Always check the packaging to verify that the product is made from medical-grade, non-toxic materials. Ensure it is explicitly certified as BPA-free, latex-free, and phthalate-free. Avoid generic, unbranded imports that do not clearly state their material composition on the label.
Mouthpiece Types: Why Boil-and-Bite is Best for Beginners
Understanding the three primary categories of mouthguards will help you see why the boil-and-bite design is universally recommended for those starting their boxing journey.
Stock (Pre-formed) Guards
Stock guards are pre-molded, ready-to-wear plastic trays available at very low prices, often under ₱150. They come in generic sizes and cannot be adjusted to fit your unique dental structure. To keep a stock guard in place, you must constantly clench your teeth together, which severely restricts your breathing, causes rapid jaw fatigue, and offers minimal protection. These should be avoided entirely for combat sports.
Boil-and-Bite (Thermoplastic) Guards
Boil-and-Bite guards represent the ideal middle ground for beginners, typically priced between ₱400 and ₱1,500. Made from thermoplastic materials, these guards soften when submerged in hot water, allowing you to mold them precisely to the contours of your teeth and gums. This customized fit provides excellent retention, comfort, and shock absorption at an accessible price point, making it the perfect choice to complete your first gear set.
Custom (Dentist-made) Guards
Custom-made guards are fabricated by a dental professional using a physical or digital impression of your teeth. They offer the absolute best fit, protection, and breathability, but they come with a high price tag, often ranging from ₱5,000 to ₱15,000 or more in local clinics. While highly recommended for active competitors, this level of investment is unnecessary for a beginner who is still mastering basic footwork and light bag drills.
Top Mouthpiece Profiles to Complete Your Beginner Set
When shopping in local sporting goods stores or browsing online marketplaces, you will find several distinct product profiles. Choosing the right profile depends on your specific training focus and dental needs.
Best Overall Profile: Dual-Layer Boil-and-Bite with Lip Shield
This is the standard, most versatile profile for general boxing training, including partner drills and light sparring. It features a rigid outer frame (often made of high-impact rubber or hard plastic) to disperse the force of frontal impacts, paired with a soft thermoplastic gel inner liner that molds closely to your teeth for a secure, comfortable fit.
Most reputable combat sports brands offer this profile within their entry-to-mid-tier lineups. It provides excellent protection against direct impact and helps stabilize the jaw during unexpected contact. The only notable limitation is that the dual-layer construction can feel slightly bulky for individuals with smaller jaw structures, though this sensation typically fades after a few training sessions.
Best for Braces: Orthodontic-Friendly Silicone Guards
If you wear braces or have active orthodontic work, you must never use a standard boil-and-bite guard. The warm thermoplastic material of a standard guard will flow into the spaces around your brackets and wires. Once it cools and hardens, the guard will lock onto your braces, and attempting to remove it can tear the brackets off your teeth, causing severe dental damage and breaking your orthodontic hardware.
Instead, look for specialized guards made from medical-grade silicone. These orthodontic-friendly models require no boiling; they are designed with a built-in channel that fits comfortably over your brackets. The silicone material acts as a protective barrier between your brackets and your inner lips, adapting dynamically as your teeth shift over time. Always verify that the product packaging explicitly states it is compatible with braces before purchasing.
Best Budget Option: Single-Layer Gel Boil-and-Bite
For those on a strict budget or those who plan to focus primarily on fitness boxing, heavy bag workouts, and non-contact pad work, a single-layer gel guard is a practical and cost-effective choice. These guards are thinner and lighter than their dual-layer counterparts, making them incredibly comfortable to wear and very easy to breathe through.
Because they lack a rigid outer chassis, they are much less restrictive, allowing you to communicate clearly with your trainer. However, the trade-off is a lower level of shock absorption. While perfect for cardio-focused boxing classes, a single-layer guard is not recommended for hard sparring or competitive amateur bouts where heavy, direct head impacts are expected.
How to Mold Your Boil-and-Bite Mouthpiece for a Secure Fit
Molding your thermoplastic guard correctly is essential to ensure it provides the intended level of protection. A poorly molded guard will slide around, distract you during training, and fail to cushion impacts properly. Follow these steps carefully to achieve a secure, custom fit.
Step 1: Preparation and Safety Checks
Before you begin, read the manufacturer’s instructions included with your specific product. Boiling times vary significantly by brand and material thickness, ranging anywhere from 30 to 90 seconds. Gather your tools: a pot of water, a heat-resistant slotted spoon, a bowl of ice-cold water, and a mirror.
Step 2: Heating the Guard
Bring a small pot of water to a rolling boil, then remove it completely from the heat source. Never place the guard into a pot that is still boiling on an active stove burner, as the direct heat from the bottom of the pot can melt the thermoplastic entirely. Use your slotted spoon to submerge the guard into the hot water for the exact number of seconds specified by the manufacturer.
Step 3: Molding to Your Teeth
Carefully remove the guard from the hot water using the spoon. Let it cool for one to two seconds, or quickly dip it in room-temperature water for a split second so you do not burn your gums. Place the guard into your mouth, aligning it centrally with your upper teeth. Use your mirror to ensure it is centered.
Bite down firmly but evenly on the guard. Do not bite all the way through the soft material. While biting, use your fingers to press the outer walls of the guard firmly against your gums and lips. At the same time, press your tongue against the roof of your mouth and suck out all air and water to create a tight vacuum seal. Continue this pressing and sucking action for about 30 to 45 seconds.
Step 4: Setting the Shape
Carefully remove the guard from your mouth and submerge it in the bowl of ice-cold water for at least one minute. This rapid cooling locks the thermoplastic material into its new molded shape. Once cooled, place the guard back into your mouth to verify the fit. It should stay securely on your upper teeth without sliding off when you open your mouth. If the fit is loose or uncomfortable, most high-quality guards allow you to repeat the boiling and molding process once or twice.
Daily Care and Clear Signs It Is Time to Replace
Maintaining proper hygiene is critical, especially in warm, humid climates where bacteria and mold can thrive on damp athletic gear. Proper daily care will extend the lifespan of your guard and protect your oral health.
Cleaning Routine
Immediately after every training session, rinse your guard thoroughly under cool, clean tap water. Use a soft-bristled toothbrush and a small amount of mild, non-abrasive soap to gently clean the surface. Never use hot water to clean your guard, as this can soften the thermoplastic and ruin your custom mold. Avoid using harsh, alcohol-based mouthwashes, which can degrade the synthetic materials over time.
Proper Storage
After washing, dry the guard completely with a clean towel. Store it in a dedicated, heavy-duty plastic guard case that features ventilation holes. Placing a wet guard inside a sealed, unventilated case or tossing it directly into a damp gym bag creates a perfect breeding ground for mold and unpleasant odors. Keep the storage case in a cool, dry place away from direct sunlight.
Replacement Indicators
Even with meticulous care, synthetic materials will eventually break down under the stress of regular impact and exposure to saliva. Inspect your guard weekly for signs of wear. You must replace your mouthpiece immediately if you notice any of the following:
- Deep bite marks that have worn completely through the inner gel layer.
- Visible tears, cracks, or peeling layers in the outer protective chassis.
- A loose fit where the guard no longer stays suctioned to your upper teeth.
- Persistent, unpleasant odors or discoloration that cannot be removed by cleaning.
- Sharp edges that irritate or cut the inside of your cheeks or gums.
As a general rule, active boxers should replace their boil-and-bite guards every six to twelve months to ensure optimal shock absorption and hygiene.
Frequently Asked Questions (FAQ)
Do I need a mouthpiece if I only hit the heavy bag?
Yes, wearing a guard is highly beneficial even during non-contact bag work. When you throw powerful punches, your body naturally tenses, and you will instinctively clench your jaw to generate power. Wearing a guard cushions this clenching, preventing your teeth from grinding against each other and reducing repetitive impact stress on your jaw joint.
Can I use a football or basketball mouthguard for boxing?
It is highly discouraged. Guards designed for field sports like football or basketball prioritize verbal communication and are built to protect against occasional, accidental impacts. Boxing guards are engineered specifically to handle direct, high-velocity frontal punches to the face, featuring thicker front walls and specialized lip shields that field sport guards lack.
Should I get a single or double mouthguard for boxing?
A single, upper-only guard is strongly recommended for almost all beginners. It provides excellent protection for your most vulnerable upper teeth and stabilizes the jaw when you bite down. Double guards, which cover both upper and lower teeth, make breathing extremely difficult because they force you to inhale through small built-in vents, which can be highly restrictive during intense cardiovascular training.
Community discussion
Share your experience or ask a question. Comments are reviewed before publication.