
Selecting a grip strengthener that matches your hand size and current strength level is the most critical step in building a resilient, powerful grip. If you choose a device with too much resistance, you risk straining the delicate tendons in your fingers and wrists before you can even complete a single clean repetition. Conversely, a gripper that is too small or lacks sufficient tension will fail to stimulate muscle growth and forearm development. By understanding how hand dimensions interact with mechanical resistance, you can select a tool that ensures safe, progressive training.
To find the perfect fit, you must evaluate the physical design of the gripper alongside your personal fitness goals. Whether you are looking to improve your deadlift hold, enhance your climbing endurance, or recover from a wrist injury, the right tool must accommodate your natural finger span and provide a manageable starting tension. This guide breaks down the essential factors of mechanism, sizing, and resistance to help you make an informed decision.
Understanding Grip Strengthener Types and Mechanisms
Grip strengtheners come in several distinct mechanical designs, each offering a unique force curve and training experience. The most common types you will encounter are coil spring grippers, torsion spring grippers, and adjustable dial models. Understanding how these mechanisms distribute force throughout the squeeze will help you align your purchase with your specific training objectives.
Products mentioned in this guide
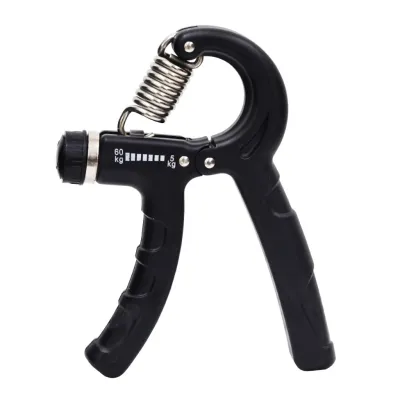
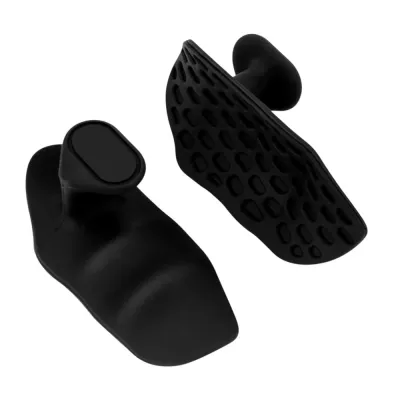
Prices are valid at publication and may change. Please refer to the product page for the latest price.
Coil spring grippers typically feature a plastic or composite frame with a spring situated at the pivot point. These are highly common in entry-level fitness gear and often feature an adjustable dial that compresses the spring to increase resistance. The force curve on these models is usually linear, meaning the squeeze starts relatively easy and becomes progressively harder as you reach full closure. They are excellent for high-rep endurance training and active recovery, but the plastic components may limit their maximum resistance capacity.
Torsion spring grippers, often referred to as classic metal grippers, utilize a heavy-duty steel spring shaped like a coil at the top, with two straight metal handles extending downward. These devices are generally fixed-resistance models, meaning you must purchase a new gripper each time you outgrow your current weight level. The force curve of a torsion spring is exceptionally steep; it requires significant effort to initiate the squeeze, and the resistance intensifies dramatically as the handles near closure. This design is favored by advanced lifters and athletes who require extreme crushing power.
Adjustable dial mechanisms offer a highly versatile middle ground, allowing you to turn a knob to shift the spring position along a tension track. This adjustment changes the leverage of the device, effectively altering the resistance level without requiring you to buy multiple tools. While highly convenient for households with multiple users or for progressive warm-ups, these models contain more moving parts, which can introduce potential failure points over years of heavy use.
Handle configurations also play a vital role in how your hand engages with the device. Straight handles distribute pressure evenly across all fingers, making them ideal for developing uniform crushing strength. Contoured handles, which feature molded grooves for your fingers, guide your hand into a specific position to maximize leverage. However, if the molded grooves do not align perfectly with your natural finger spacing, they can cause uncomfortable pressure points and uneven muscle engagement.
How to Determine Your Ideal Resistance Level
Finding your starting resistance level requires a careful self-assessment to avoid tendon strain and joint inflammation. Forearm tendons adapt to physical stress much slower than larger muscle groups like the chest or back, making gradual progression essential. Before purchasing a gripper, you can estimate your current grip capacity using standard gym equipment or simple household items.

A practical way to estimate your grip capacity is through a timed hang or a dumbbell carry test. If you can hang from a standard pull-up bar for at least thirty seconds using a double-overhand grip, your hands already possess a solid baseline of supporting strength. Alternatively, try holding a pair of moderately heavy dumbbells at your sides for forty-five seconds; if your fingers begin to slip before the time is up, your crushing grip is likely the limiting factor. These tests help establish whether you should start with a light, high-repetition gripper or a more challenging, low-repetition model.
It is also important to distinguish between the three primary types of grip strength: crushing, supporting, and pinching. Crushing grip is the power of your fingers closing against resistance, which is the primary movement trained by standard grip strengtheners. Supporting grip is the ability to hold onto an object for an extended duration, such as carrying heavy grocery bags or holding a barbell during a deadlift. Pinching grip involves holding an object between your thumb and fingers without letting it slip. While a standard gripper primarily builds crushing strength, the endurance gained from it can positively influence your supporting grip capacity.
When selecting a gripper, you should identify both a working weight and a maximum effort weight. Your working weight is a resistance level that allows you to complete three to four sets of eight to twelve controlled repetitions with perfect form. The handles should touch completely on every single rep. A maximum effort weight, on the other hand, is a resistance that you can only close fully once or twice, or a level that you can only squeeze halfway for isometric holds. Beginners should focus entirely on mastering their working weight before attempting maximum effort training.
Matching the Grip Strengthener to Your Hand Size and Ergonomics
A grip strengthener must fit your hand size to ensure proper leverage and prevent joint stress. If the handle span is too wide, your fingers will be forced to pull from an mechanically disadvantaged angle, which can place excessive shear force on your finger joints. Measuring your hand and checking the physical dimensions of the device before buying will prevent these ergonomic issues.
To categorize your hand size, measure from the first crease of your wrist to the tip of your middle finger. A measurement under 17 centimeters generally indicates a small hand, 17 to 19 centimeters represents a medium hand, and anything over 19 centimeters is considered a large hand. If you have smaller hands, look for grippers with a narrower handle span, typically around 5 to 6 centimeters at the widest point. Larger hands can comfortably manage a wider span of 7 to 8 centimeters, which allows for a full range of motion during the squeeze.
Handle diameter and length also dictate how much control you have over the device. Thinner handles are easier to wrap your fingers around, but they can dig painfully into your palm if the resistance is high. Thicker handles distribute the pressure more evenly across your palm but require greater hand size to grip securely. The length of the handle should be sufficient to accommodate all four of your fingers; if your pinky finger hangs off the bottom, you lose a significant portion of your crushing leverage and risk uneven forearm development.
Before finalizing your purchase, use a quick checklist to verify the closure distance of the device. Ensure that the minimum distance between the handles when fully closed allows your fingers to make a complete fist without pinching the skin of your palm. Additionally, check that the maximum opening distance does not require you to overextend your fingers to initiate the squeeze. A comfortable, natural starting position is key to maintaining consistent training form.
Essential Build Quality and Ergonomic Features to Check
Evaluating the build quality of a grip strengthener ensures that your investment remains safe and functional over long-term use. Because grip training involves high-repetition squeezing, the materials must withstand constant friction, sweat, and mechanical stress. This is especially true in humid, tropical environments like the Philippines, where moisture can accelerate rust and material degradation.
Handle materials should be selected based on their sweat resistance and durability. Anodized aluminum handles are highly durable, rust-resistant, and often feature knurled textures that prevent slipping even when your hands are sweaty. However, knurled metal can be abrasive on soft skin, sometimes requiring a break-in period for your calluses. Plastic or nylon handles are lighter and gentler on the hands, but they can become incredibly slippery when wet and may crack under high resistance levels. If you choose a plastic model, ensure it uses high-density composite materials.
The spring housing and pivot points require close inspection to prevent painful accidents. Look for designs where the spring is securely anchored into the handles without any loose play or wobbling. Avoid models with exposed, sharp metal edges near the pivot points, as these can easily pinch your skin during a high-effort squeeze. A high-quality gripper will have smooth, rounded transitions where the metal spring meets the handle body.
When browsing online marketplaces, compare the price-to-durability ratio of different models. While basic plastic grippers can often be found for under ₱150, they may need frequent replacement if you train consistently. Investing ₱500 to ₱1,200 in a high-quality aluminum or heavy-duty adjustable gripper often proves more economical over time. Always check the seller’s return policy and customer reviews regarding spring longevity to ensure you are protected against manufacturing defects.
Structuring Your Grip Training for Progressive Overload
To see consistent gains in your forearm strength, you must structure your grip training with the same discipline you apply to larger muscle groups. Simply squeezing a gripper mindlessly while watching television will quickly lead to a training plateau. Implementing a structured routine based on progressive overload is the key to building lasting strength.
For general strength and muscle hypertrophy, aim for three sets of eight to twelve repetitions, twice a week. Focus on a slow, controlled squeeze, holding the handles closed for one full second before releasing them under control over a two-second count. If your goal is endurance, increase the repetition range to fifteen to twenty reps per set. For maximum crushing power, perform lower-volume sets of three to five repetitions using a highly challenging resistance, ensuring you rest fully between sets to allow your nervous system to recover.
Knowing when to transition to a higher resistance level is crucial for avoiding plateaus. If you are using an adjustable model, increase the tension dial by a small increment once you can easily complete all your scheduled sets and reps with perfect form. If you are using fixed-resistance grippers, you can bridge the gap to a heavier model by performing partial reps, negative-only reps (using two hands to close the gripper and one hand to slowly resist the opening), or extended isometric holds with your current gripper.
Because the muscles and tendons of the hand and wrist are used constantly in daily life, recovery is paramount. Avoid training your grip on consecutive days, and always schedule your grip workouts after your main lifting sessions so your hands are not fatigued for heavy exercises like deadlifts or rows. Watch closely for warning signs of overuse, such as persistent aching in the elbow, stiffness in the finger joints, or a sudden drop in your gripping power. If you experience these symptoms, rest immediately and allow the tissues to heal completely before resuming training.
Frequently Asked Questions (FAQ)
Can I use a grip strengthener every day?
Using a grip strengthener every day is generally not recommended, especially if you are training with high resistance. While the forearm muscles are resilient, the tendons in your fingers and wrists require adequate recovery time to repair and strengthen. Training daily without rest can quickly lead to overuse injuries like tendonitis or joint stiffness.
If you prefer to train daily, limit your daily sessions to very light, high-repetition active recovery work that promotes blood flow without causing muscle fatigue. For intense strength-building sessions, limit your training to two or three times per week. Always listen to your body and take a rest day if you feel persistent soreness or joint discomfort.
Do grip strengtheners help with weightlifting performance?
Yes, grip strengtheners can significantly improve your weightlifting performance by building a stronger foundation of crushing strength. A stronger grip prevents the barbell or dumbbell from slipping out of your hands during heavy pulling movements, allowing you to focus entirely on targeting your back and leg muscles.
However, keep in mind that grip strengtheners primarily target crushing grip, whereas heavy lifts like deadlifts and pull-ups require supporting grip. While the two types of strength overlap, you should complement your gripper training with specific supporting grip exercises, such as heavy carries or timed bar hangs, to maximize your gym performance.
How do I maintain and clean my grip strengthener?
To extend the lifespan of your grip strengthener, keep it clean and dry, especially in humid climates. After each training session, wipe down the handles with a clean, dry cloth to remove sweat, skin oils, and chalk residue. For metal handles, you can occasionally use a soft brush with mild soapy water to clean the knurling, making sure to dry the device completely afterward.
Avoid exposing the steel spring to prolonged moisture to prevent rust. If the spring begins to squeak or feel stiff, apply a single drop of lightweight machine oil or silicone lubricant to the pivot point and wipe away any excess. Regularly inspect the connection points between the spring and the handles to ensure everything remains securely aligned.
Community discussion
Share your experience or ask a question. Comments are reviewed before publication.