
Restoring a beloved baseball glove often comes down to a single, critical component: the leather lace. Choosing the right leather lace for baseball gloves requires matching the material’s thickness, width, and tanning method to your glove’s specific position, structural needs, and local playing conditions. Using the wrong lace can ruin the glove’s pocket, warp its shape, or cause premature snapping during a game.
Quick Guide: Matching Leather Lace to Your Glove's Repair Needs
When selecting replacement laces, your primary goal is to match the physical demands of each glove zone with the appropriate lace profile. High-stress areas require robust, thick laces to maintain structural integrity, while low-stress areas benefit from thinner, more pliable laces that preserve the glove’s natural flexibility.
Before purchasing any replacement material, always check your glove manufacturer’s original specifications or measure the width of your existing laces. There is no single “universal” lace that fits every glove, position, or player. For example, a catcher’s mitt demands highly durable, thick rawhide laces to withstand high-velocity pitches, whereas an infielder’s glove requires lighter, more flexible laces for rapid ball transfers. Always frame your purchase around the specific zone of the glove you need to repair.
Products mentioned in this guide
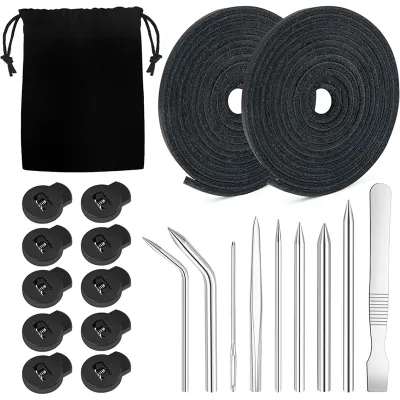
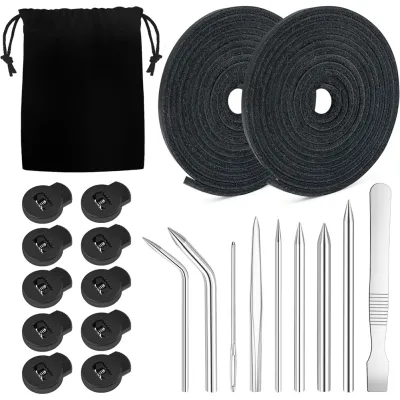
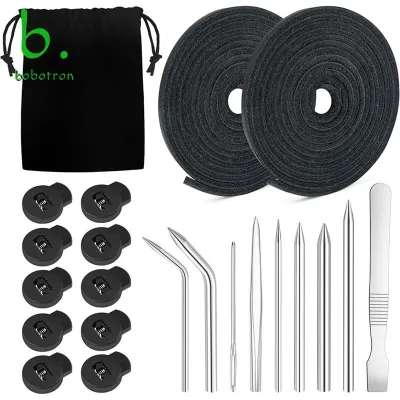
![[LA19REA]Baseball Glove Lace Kit Baseball Glove Repair Lacing Kit Include 2 Leather Laces 10 Lace Locks 9 Glove Lacing with Bag](https://img.lazcdn.com/g/p/d2709357861c285615567fb628901efc.jpg_400x400q80.jpg_.webp)
Prices are valid at publication and may change. Please refer to the product page for the latest price.
If you are unsure of the exact specifications, a safe approach is to purchase a dedicated glove re-lacing kit that includes pre-measured laces of varying thicknesses. These kits often come with a specialized lacing needle, which is essential for threading the stiff leather through the tight eyelets of the glove.
Understanding Leather Types and Tanning Processes
The durability, stretch, and weather resistance of your glove laces depend heavily on the type of leather and how it was tanned. In tropical climates like the Philippines, high humidity, intense heat, and sweat can rapidly degrade poor-quality leather, making your choice of material even more critical.

Rawhide vs. Tanned Leather
Rawhide is minimally processed, retaining its natural fiber density and structural strength. This makes it incredibly stiff, strong, and highly resistant to stretching under high tension. Rawhide is the traditional choice for structural integrity in professional-grade gloves, especially in areas that undergo constant impact.
Tanned leather, by contrast, undergoes chemical or organic processing to make it softer and more pliable right out of the package. While easier to thread, tanned leather laces tend to stretch more over time, which can cause your glove’s pocket to become loose or floppy.
Material labels alone do not guarantee performance. Always verify the manufacturer’s structural rating and intended use on the product packaging before buying, as some decorative leather laces are not rated for athletic use.
Chrome-Tanned vs. Vegetable-Tanned
The chemical tanning process directly influences how the lace handles moisture, sweat, and heat. Chrome-tanned leather uses chromium salts, resulting in a highly moisture-resistant lace that requires very little break-in time. This makes it highly practical for players in humid or tropical environments where sudden downpours or heavy sweat are common.
Vegetable-tanned leather relies on natural plant tannins. It is a traditional, premium option that molds beautifully to your hand’s shape over time but is highly susceptible to moisture damage. Without regular conditioning, vegetable-tanned laces can dry out, crack, and snap in humid climates.
Always verify the specific tanning method in the product description rather than assuming quality based on color, price, or brand name alone.
Choosing the Right Lace Thickness and Width
Physical dimensions dictate how your glove holds its shape and responds to impact. Using the wrong thickness can either make your glove too rigid to close or too weak to catch a ball safely.
High-Stress Areas (Webbing, Hinge, and Heel)
The web, top of the web, and active hinge areas absorb the direct impact of caught balls. These zones require thicker laces, typically 1/4-inch (approximately 6.35 mm) wide, to provide the necessary structural support.
Using a thin lace in these high-stress zones is a safety and performance risk. The high tension and repeated impact will quickly stretch and snap thin laces, causing the web to collapse mid-play.
Before buying, measure your glove’s existing holes. Some modern gloves feature slightly smaller holes that may require you to widen them or use a specialized lacing needle, so always verify compatibility.
Low-Stress Areas (Fingers and Welting)
The fingers, palm, and heel welting require flexibility so you can close the glove smoothly. For these areas, thinner laces—usually 3/16-inch (4.76 mm) or 5/32-inch (3.97 mm)—are ideal.
Thinner laces allow the finger stalls to flex naturally without forcing you to fight against stiff leather.
If you mistakenly use 1/4-inch laces throughout the entire glove, the fingers will become excessively rigid. This warps the glove’s natural shape, ruins the pocket, and makes the break-in process incredibly difficult and tiring.
Safe Preparation and Re-Lacing Best Practices
Re-lacing is a precise, step-by-step process. Take your time to avoid damaging the glove’s main shell.
Required Tools
- A specialized lacing needle (screw-on or split-prong style)
- Sharp leather shears or a utility knife
- Needle-nose pliers for pulling tight laces
- A leather awl to clear blocked eyelets
- A high-quality leather conditioner
Safe Removal
- Never pull or rip old laces out forcefully, as this can tear the eyelets.
- Use a sharp pair of shears or a dedicated leather cutter to snip the old laces section by section.
- Work slowly and keep the blade flat against the lace to avoid scoring, cutting, or puncturing the glove's base leather.
- Take photos of the original lacing pattern before cutting anything. This provides a visual reference that is invaluable when threading the new laces.
Inspection
- Once the old lace is removed, thoroughly clean the exposed leather channels.
- Inspect each lace hole for signs of tearing, elongation, or dry rot.
- If you notice that the leather around the eyelets is severely cracked, crumbling, or torn, stop the DIY process immediately. New laces cannot fix a structurally compromised glove shell; in this case, consult a professional glove repair specialist.
Lace Preparation
- New leather laces can be stiff and brittle.
- If recommended by the lace manufacturer, apply a very light coat of glove conditioner to the lace before threading.
- This lubrication helps the lace slide smoothly through the eyelets and prevents it from snapping under tension during the pulling process.
Lacing Technique
- Use a specialized lacing needle (either a screw-on or split-prong style) to guide the lace.
- Maintain consistent, moderate tension as you thread.
- Avoid pulling the laces too tight, as over-tightening will warp the glove's shape, restrict its natural closing motion, and put unnecessary stress on the eyelets. Always follow the specific lacing pattern recommended by your glove's manufacturer to preserve its original design.
Post-Lacing Care and Break-In in Humid Climates
Once re-laced, your glove will feel significantly stiffer. You must break it in safely to avoid damaging the new leather.
Avoid shortcuts like soaking the glove in water, baking it in an oven, or microwaving it. These extreme methods dry out the natural oils, weaken the leather fibers, and ruin the structural integrity of both the glove and the new laces. Instead, break in the new laces naturally by playing catch or gently shaping the pocket with a specialized wooden glove mallet.
In humid climates like the Philippines, moisture control is vital. Store your glove in a cool, dry, well-ventilated indoor space. Never leave it in a damp gear bag, car trunk, or enclosed plastic container, as this creates a breeding ground for mold, mildew, and dry rot.
Keep a few silica gel packs inside your glove compartment or gear bag to absorb excess moisture. Establish a regular conditioning schedule using a high-quality, manufacturer-approved leather conditioner. Apply it sparingly; over-oiling makes the laces heavy, overly stretchy, and prone to slipping out of their knots.
If mold does appear on your laces, wipe it off immediately with a dry cloth, then clean the area with a mild, pH-balanced leather cleaner. Allow it to air dry completely in a shaded, well-ventilated area before applying a light layer of conditioner.
Frequently Asked Questions (FAQ)
Can I use synthetic or paracord laces instead of leather?
While synthetic materials or paracord are highly durable and resist moisture, they lack the natural friction and stretch of leather. Synthetic laces can slip out of knots, alter the glove’s weight and balance, and fail to mold to your hand. Additionally, using non-leather alternatives may void your glove manufacturer’s warranty. Stick to high-quality leather laces unless the manufacturer explicitly specifies otherwise.
How do I know if my glove needs re-lacing or just conditioning?
Diagnose the issue by checking the glove’s structure. If the web is collapsing, the hinge feels floppy, or the laces are visibly frayed, cracked, or snapped, the glove requires re-lacing. If the glove is simply stiff, dry, or squeaky but retains its shape and has intact laces, a deep conditioning treatment is usually sufficient to restore its flexibility.
Community discussion
Share your experience or ask a question. Comments are reviewed before publication.