
Selecting a life raft requires balancing the physical limits of your vessel with the worst-case scenarios you might encounter on the water. Your choice determines whether your crew can safely abandon ship and survive until rescue teams arrive. To find the right life raft, you must evaluate three primary dimensions: the maximum number of passengers you will carry, the typical distance from shore where you operate, and the physical storage constraints of your boat. An incorrect choice can leave you under-equipped in open waters or overburdened on a smaller vessel.
How to Calculate the Right Life Raft Capacity for Your Boat
To determine the correct capacity, start with your boat’s maximum rated passenger capacity rather than your typical crew size. If your vessel is certified to carry up to eight people, your life raft must be rated for at least eight people. Operating with a six-person raft on an eight-passenger boat means you are legally under-equipped and physically unable to protect everyone on board if you ever carry a full load.
Manufacturer capacity ratings are calculated using standardized occupant weights, which typically assume an average weight of 75 to 82.5 kilograms per person with minimal personal gear. In real-world emergencies, passengers may wear heavy clothing, life jackets, or carry personal survival bags that add bulk and weight. If your typical passenger count sits right on the borderline of a raft’s rated limit—such as carrying six people on a raft rated for exactly six—rounding up to an eight-person model provides critical physical space and buoyancy margins. This extra space helps prevent overcrowding, which can cause severe discomfort and increase the risk of seasickness.
Products mentioned in this guide
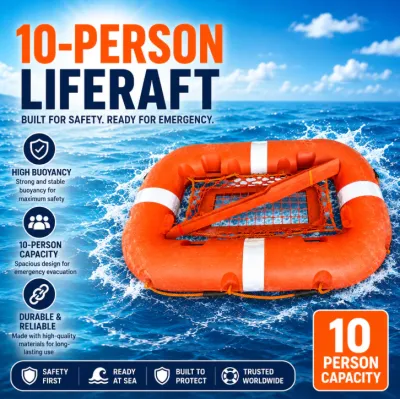
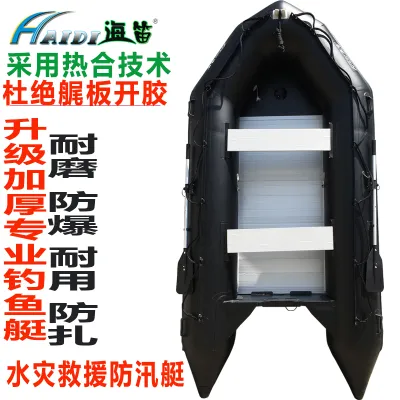
Prices are valid at publication and may change. Please refer to the product page for the latest price.
However, larger rafts require more physical space and weigh significantly more. You must measure your available deck space or storage lockers before purchasing. A hard canister raft requires a dedicated deck cradle with clear launch paths, while a soft valise must fit into an easily accessible locker without being blocked by other gear. If your boat’s layout cannot accommodate the physical footprint of a larger canister, you may need to split your capacity across two smaller rafts or opt for a valise model stored in a dedicated, unobstructed compartment.
Choosing the Right Life Raft Type for Your Boating Scenario
The environment where you sail dictates the survival features your life raft must possess. A raft designed for calm, protected waters will quickly fail in open-ocean swells, while an offshore raft may be unnecessarily heavy and expensive for short coastal trips. Matching the raft type to your specific boating scenario ensures you have the correct level of protection without carrying excessive weight.

Nearshore and Protected Water Boating
Nearshore and protected water scenarios include day trips, inland lake fishing, and coastal cruising within a few miles of the shoreline. In these environments, such as the calm waters of Manila Bay, the Cebu Strait, or Puerto Galera, rescue times are typically expected to be within hours rather than days, and sea conditions are generally moderate.
For these trips, look for a nearshore life raft. These models feature basic buoyancy chambers, open designs, or simple, single-layer canopies designed to keep wind and light spray away. They prioritize low weight and a compact storage footprint, making them easier to handle and stow on smaller vessels.
The primary trade-off of a nearshore raft is its limited protection against extreme elements. These models generally lack insulated floors, heavy-duty sea anchors, and extensive survival packs. If you are caught in a sudden storm or experience a delayed rescue, a nearshore raft will not provide the thermal insulation or long-term survival gear necessary to prevent hypothermia and dehydration.
Offshore and Open Ocean Cruising
Offshore and open ocean cruising involves traveling far beyond coastal waters, such as deep-sea fishing trips or multi-day passages where rescue response times can extend to several days. In isolated areas like the Luzon Strait or the open Pacific side of the Philippines, sea states can be severe, and survival depends entirely on the raft’s structural integrity.
An offshore life raft must feature a double-insulated floor to prevent hypothermia from cold water contact, a fully enclosed double-canopy to shield occupants from wind and waves, and high-volume buoyancy tubes to maintain stability in rough seas. These rafts also include comprehensive survival packs equipped with drinking water, rations, signaling devices, and thermal protective aids.
While an offshore raft provides the highest level of protection and can safely be used for nearshore trips, you must consider the practical drawbacks. These rafts are significantly heavier, require larger storage spaces, and carry a much higher purchase price and servicing cost. Weigh these factors against your typical cruising routes to decide if the added protection justifies the physical and financial investment.
Understanding Inflation Mechanisms and Deployment Options
A life raft is useless if it cannot be deployed quickly and reliably during an emergency. Understanding how different inflation mechanisms function allows you to choose the best setup for your boat and ensures you can operate the system under high-stress conditions.
Manual Painter Line Activation
Most life rafts rely on a manual painter line to trigger the inflation mechanism. The painter line is a long lanyard wrapped around the raft inside its casing, typically extending 10 to 15 meters. To deploy the raft, you must throw the container overboard and pull the painter line until it tautens, which triggers the internal CO2 cylinder to inflate the chambers.
Before throwing the raft overboard, you must secure the painter line to a strong, load-bearing point on your vessel, such as a heavy cleat or U-bolt. If you fail to secure the line, the raft may drift away from your boat before it inflates, leaving you without a survival craft. When throwing the raft, aim for the leeward side of the vessel to prevent the boat from drifting over the inflating raft.
Hydrostatic Release Units (HRU)
For offshore vessels and larger boats, a Hydrostatic Release Unit (HRU) provides an essential automatic backup. If your vessel sinks rapidly before you can manually launch the raft, the water pressure triggers the HRU at a depth specified by the manufacturer, typically between 1.5 and 4 meters.
The HRU cuts the securing strap, allowing the raft container to float free. As the vessel continues to sink, the tension on the secured painter line triggers the inflation mechanism, and the line eventually breaks at a weak link, leaving the inflated raft floating on the surface for survivors to board.
Pre-Deployment Checks
Regular visual inspections are critical to ensure your inflation system remains functional. Check the pressure gauge on the inflation cylinder if it is visible, and inspect the outer seals of the canister or valise for signs of cracking, wear, or water intrusion. Ensure the painter line is routed clearly without tangles and that the HRU is within its marked expiration date, which is typically two years from installation.
Essential Features and Survival Gear to Verify Before Buying
When comparing different life raft models, you must look beyond the basic capacity rating and verify the specific safety features and survival gear included with the unit. These components directly impact your visibility to rescue teams and your physical comfort while waiting for help.
Canopy and Visibility
A high-visibility canopy, typically in bright orange or yellow, is essential for search and rescue operations. Look for rafts equipped with retro-reflective tape on both the canopy and the underside of the floor to assist searchlights at night. Additionally, verify that the raft includes a heavy-duty sea anchor and large ballast pockets, which deploy automatically to stabilize the raft, reduce drift, and keep the bow pointed into the waves to prevent capsizing.
Floor Type and Thermal Protection
The temperature of the water beneath your raft will rapidly draw heat from your body if the floor is not insulated. Inflatable double-layer floors trap a layer of air that acts as a thermal barrier, which is crucial for preventing hypothermia. If you operate in cooler waters or expect long rescue wait times, verify that the raft features an insulated floor rather than a single-layer fabric bottom.
Survival Pack Contents
Life rafts are equipped with survival packs categorized by regulatory standards, such as ISO or SOLAS packs. You must check the manufacturer’s inventory sheet to verify what is included. Basic packs contain minimal items like a hand pump and a repair kit, while advanced packs include drinking water, food rations, first aid kits, signaling mirrors, flares, and seasickness tablets. Ensure all dated items, such as flares and water rations, are within their expiration dates, and consider supplementing the pack with personal emergency items like prescription medications.
Storage and Maintenance Considerations for Tropical Climates
Operating a boat in the tropical climate of the Philippines introduces specific environmental challenges that can accelerate the degradation of your safety equipment. High heat, intense UV radiation, salt spray, and extreme humidity require careful storage and maintenance planning.
Hard Canister versus Soft Valise
If you plan to store your life raft on deck, a hard fiberglass canister is necessary to protect the raft from UV damage, physical impacts, and sea spray. For boats with limited deck space, a soft valise made of heavy-duty fabric is more suitable for storage in an interior cabin or a dry cockpit locker. However, a valise must never be left exposed to the elements, as moisture can easily penetrate the zipper and damage the vacuum-sealed raft inside.
Climate Impact on Materials
The intense tropical heat in the Philippines can degrade the adhesive bonds and fabrics of your life raft over time. Avoid storing your raft in areas close to engine compartments, exhaust pipes, or unventilated lockers that trap extreme heat. High humidity can also cause condensation inside storage compartments, leading to mold growth and corrosion on metal inflation valves.
Servicing and Inspections
To guarantee your life raft will inflate when needed, you must adhere strictly to the manufacturer’s mandated servicing schedule, which typically requires professional inspection every three to five years. These inspections must be performed at an authorized service station where technicians can pressure-test the chambers, check the inflation cylinder, and replace expired survival gear. Professional servicing can range from ₱15,000 to ₱40,000 depending on the raft size and required replacement parts, which you must verify with local service centers in major ports like Manila, Cebu, or Subic Bay. Never attempt to open, inspect, or repack a life raft yourself, as DIY repacking can damage the vacuum seal, void the warranty, and lead to deployment failure in an emergency.
Frequently Asked Questions (FAQ)
Can I use a recreational inflatable dinghy as a life raft?
No, you cannot use a recreational inflatable dinghy as a substitute for a certified life raft. Recreational dinghies lack the critical safety designs of life rafts, such as automatic inflation systems, self-righting capabilities, and protective canopies to shield you from exposure. They are also made of thinner materials that are highly susceptible to punctures and UV degradation. Maritime authorities, including the Philippine Coast Guard, do not recognize recreational dinghies as approved life-saving appliances for emergency abandonment.
Community discussion
Share your experience or ask a question. Comments are reviewed before publication.