
Selecting the right pistol grip for your M4 is one of the most immediate ways to improve your shooting comfort, control, and overall accuracy. While many beginners focus their attention on high-profile upgrades like optics, handguards, or triggers, the pistol grip remains one of the few constant contact points between your body and the rifle. A poorly chosen grip can lead to persistent wrist fatigue, inconsistent trigger pulls, and difficulty managing recoil during extended range sessions. Finding the ideal match depends on your hand size, shooting posture, and the specific environments where you train.
For new shooters entering the sport, upgrading from a standard factory grip to an aftermarket model is a highly accessible and reversible modification. The stock “A2” grip found on many standard M4 rifles was designed decades ago as a general-use component, but it rarely fits the diverse hand shapes and modern shooting stances of today’s marksmen. By understanding how subtle changes in grip angle, thickness, and texture affect your shooting mechanics, you can customize your rifle to feel like a natural extension of your arm.
Why the Right Pistol Grip Matters for Your M4
The pistol grip serves as the primary anchor point for your firing hand, directing how you support the weight of the rifle and pull the trigger. When you shoulder your M4, this component dictates the angle of your wrist and the orientation of your hand relative to the lower receiver. If the grip does not match your hand anatomy, your muscles must constantly work to correct your alignment, which quickly translates to physical fatigue during long days at the range.
Products mentioned in this guide
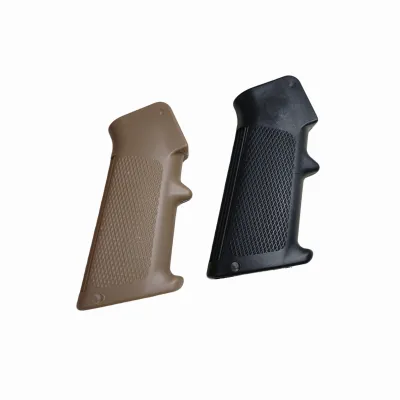
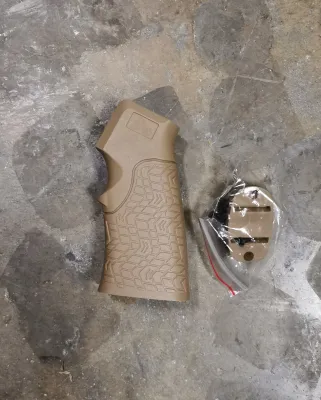
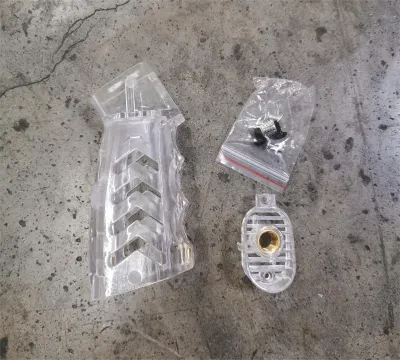
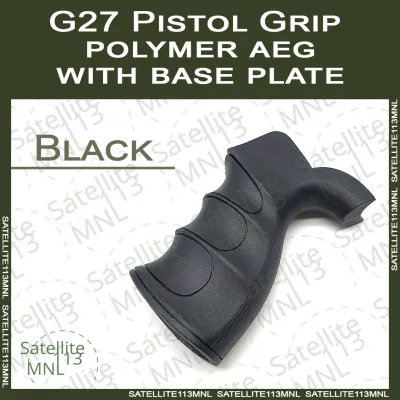
Prices are valid at publication and may change. Please refer to the product page for the latest price.
Inconsistent trigger control is a direct consequence of an ill-fitting grip. If your hand is forced into an unnatural position, your index finger will struggle to achieve a clean, straight-back press on the trigger shoe. This misalignment often causes lateral movement, pulling your shots off-target to the left or right. A grip that properly positions your hand ensures that only the pad of your index finger moves when firing, preserving the mechanical accuracy of your platform.
Recoil management also relies heavily on the quality of your interface with the rifle. Under rapid fire or dynamic movement, a secure, ergonomic grip prevents the rifle from shifting or sliding within your palm. By distributing the pressure evenly across your hand, a well-designed pistol grip for m4 allows you to maintain control, track your sights through the recoil cycle, and deliver faster, more accurate follow-up shots.
Key Factors to Consider When Choosing an M4 Pistol Grip
Choosing a grip requires balancing several ergonomic and physical design choices. Because everyone’s physical build, finger length, and shooting preferences differ, there is no single “best” grip on the market. Instead, you should evaluate candidates across four primary dimensions: angle, size, material, and utility features.

Grip Angle and Wrist Ergonomics
Traditional M4 grips feature a pronounced slope, typically angled at approximately 25 degrees from the vertical plane. This design was optimized for classic shooting stances where the shooter blades their body to the target and keeps their elbow flared outward. However, modern shooting techniques favor a squared-up, athletic stance with the stock collapsed shorter, which brings the rifle closer to the chest.
When using a modern stance or shooting with a high-mounted optic, a traditional, sloped grip forces your wrist into an unnatural, upward bend. To alleviate this strain, many manufacturers offer vertical-angle grips, which sit at a steeper 15-degree or even 12-degree angle. This steeper orientation allows your wrist to remain straight and relaxed when your elbow is tucked close to your body, reducing joint fatigue and improving overall weapon control.
Your primary shooting posture should dictate your choice of angle. If you spend most of your time shooting from a prone position or off a benchrest where your elbow naturally drops, a traditional sloped angle may still feel highly intuitive. Conversely, if you focus on close-quarters drills, dynamic movement, or tactical shooting while standing, a more vertical grip angle will generally provide superior comfort and wrist alignment.
Grip Size and Trigger Reach
The physical size, or girth, of the grip directly influences how securely you can wrap your fingers around the handle. If a grip is too small, your fingers will overlap excessively, leading to hand cramping and a compromised hold. If the grip is too large, you will struggle to maintain a firm wrap, reducing your control over the rifle during rapid movement.
This relationship directly affects your “trigger reach,” which is the distance from the backstrap of the grip to the face of the trigger. A grip that is too thick forces your hand backward, requiring you to stretch your index finger to reach the trigger, which often results in pulling the rifle to the side during a shot. A grip that is too thin causes your finger to wrap too far through the trigger guard, leading to a hooked finger and pushed shots.
If you are unsure of your ideal grip size, look for modular grip systems that feature interchangeable front straps and backstraps. These systems allow you to experiment with different thicknesses and beaver-tail extensions until you find the exact combination that places your index finger in a natural, relaxed position on the trigger.
Material, Texture, and Climate Considerations
Most aftermarket grips are constructed from high-strength polymer, rubberized overmolds, or a hybrid of both. Hard polymer grips are exceptionally durable, lightweight, and resistant to chemical solvents, allowing for highly defined, molded-in textures. Rubberized overmolded grips offer built-in shock absorption and a softer, slightly compliant feel that many shooters find comfortable during long training sessions.
Environmental conditions play a massive role in how these materials perform. In hot, humid, and tropical climates—such as outdoor shooting ranges in the Philippines—sweat, rain, and humidity can quickly turn a smooth grip into a slippery liability. For these conditions, look for grips with aggressive stippling, deep horizontal grooves, or pronounced checkering that channels moisture away from your skin and ensures a non-slip hold.
However, you must balance slip resistance with comfort. Extremely aggressive, sandpaper-like textures can abrade bare skin during high-volume training sessions or snag on loose clothing and tactical gear. If you prefer dynamic movement drills or carry your rifle close to your body, a moderately textured polymer or a textured rubberized grip may offer the best compromise between a secure hold and skin comfort.
Storage Capabilities
Many modern pistol grips utilize their hollow interior space by incorporating a storage compartment sealed with a trapdoor or a rubber plug. This space is highly practical for carrying essential field gear, such as spare batteries for your red dot sight or weapon light, a small bottle of lubricating oil to keep your action running smoothly, or a compact cleaning cloth.
Solid-core grips, by contrast, lack internal storage but offer maximum structural rigidity and a slightly lighter overall weight. If you prioritize absolute simplicity, minimal weight, and a highly rigid frame, a solid grip is an excellent choice. If you prefer to carry backup parts or power sources directly on your rifle to handle unexpected gear failures in the field, a grip with a secure, watertight storage compartment is highly recommended.
How to Measure and Test for the Best Fit
Before purchasing or installing a new grip, it is highly beneficial to physically test different shapes and sizes. You can perform a simple, structured evaluation at a local pro shop or with an unloaded training rifle to determine which geometry matches your hand.
- Step 1: Safety First. Before handling any firearm for testing or adjustment, point the muzzle in a safe direction, completely remove the magazine, lock the bolt to the rear, and visually and physically inspect the chamber to verify that the weapon is entirely unloaded. Keep all live ammunition in a separate room.
- Step 2: Establish a Natural Posture. Shoulder your rifle and assume your typical shooting stance. Close your eyes to eliminate visual bias, relax your neck, and establish a comfortable, natural cheek weld on the stock.
- Step 3: Check Wrist Alignment. With your eyes still closed, let your firing hand fall naturally onto the pistol grip. Open your eyes and look at your wrist. Your wrist should be relatively straight and in line with your forearm; if you notice a sharp upward bend or feel immediate tension in your forearm tendon, the grip angle is likely too sloped for your stance.
- Step 4: Verify Trigger Reach. Place your index finger on the trigger shoe. The pad of your finger should rest flat and centered on the trigger face without requiring you to shift your palm or stretch your hand. Your finger should be able to move independently without rubbing against the side of the receiver.
- Step 5: Assess Texture and Comfort. Squeeze the grip firmly as if controlling recoil. Check for painful hot spots, sharp mold lines, or finger grooves that do not line up with your natural finger spacing. If the grip features finger grooves that force your hand into an awkward position, opt for a smooth-faced grip instead.
Installation Basics and Safety Checks
Installing a new pistol grip is a straightforward process, but it requires care to avoid damaging your rifle’s lower receiver. Most grips are secured by a single screw located inside the grip body, which requires a long flathead screwdriver or a specific hex key (commonly 3/16-inch or 4mm). Always use high-quality, properly fitting tools to avoid stripping the screw head.
Before beginning, consult the manufacturer’s instructions for both your new grip and your specific rifle receiver. A critical step during installation is managing the safety selector detent and spring, which are housed in a small channel on the right side of the lower receiver and held in place by the top of the pistol grip. When sliding your old grip off, go slowly to prevent this spring from shooting out, bending, or becoming lost. When installing the new grip, carefully align the spring into its recess so it compresses straight without kinking.
Avoid over-tightening the grip screw. Because many lower receivers are made of aluminum or polymer, applying excessive force can easily strip the threads in the receiver or crack the mounting flange of your new grip. Hand-thread the screw first to ensure it is not cross-threaded, then tighten it until snug. If recommended by the manufacturer, apply a single drop of medium (blue) thread-locking compound to the screw threads to prevent them from backing out under recoil; never use high-strength (red) thread-locker, which requires extreme heat to remove.
Once the grip is fully installed, perform a thorough safety and function check on your unloaded firearm. Verify that there is absolutely no wobble or play between the grip and the receiver. Cycle the safety selector back and forth to ensure it clicks crisply into the “safe” and “fire” positions. Finally, pull the trigger to confirm that the grip’s internal geometry does not interfere with the movement of the fire control group, ensuring your rifle remains completely safe and reliable.
Frequently Asked Questions (FAQ)
Can I use any standard AR-15/M4 pistol grip on my specific rifle?
Most M4 and AR-15 rifles utilize a standardized mil-spec mounting interface, meaning the vast majority of aftermarket grips are interchangeable across different brands. However, some specialized billet lower receivers, polymer models, or proprietary designs feature unique dimensions near the safety selector detent channel or the rear tang. Always check the compatibility guidelines provided by your rifle’s manufacturer before purchasing a new grip.
Does a pistol grip affect the mechanical accuracy of my M4?
A pistol grip has no physical effect on the mechanical accuracy of your rifle’s barrel, bolt, or ammunition. However, it significantly improves your practical accuracy by optimizing your hand alignment, reducing muscle fatigue, and enabling a clean, consistent trigger pull. By making the rifle easier and more comfortable to control, a proper grip directly translates to tighter groups on your target.
How do I clean and maintain my polymer or rubberized grip?
To clean your grip, wipe it down with a soft cloth, warm water, and mild dish soap to remove accumulated sweat, skin oils, and dirt from the textured surfaces. Avoid using harsh automotive degreasers, chlorinated solvents, or high heat, as these chemicals can degrade rubberized overmolds, strip away protective coatings, or weaken certain polymer blends over time. Always refer to the manufacturer’s care instructions for material-specific warnings.
Community discussion
Share your experience or ask a question. Comments are reviewed before publication.