
Selecting the right push up board for your home gym in the Philippines is an effective way to elevate your upper-body strength training without investing in bulky, expensive machines. These fitness tools offer a structured, portable, and highly versatile platform that allows you to target different muscle groups simply by adjusting the angle of the handles. However, with numerous options available on the market, finding a board that balances durability, safety, and ergonomic comfort requires a clear understanding of what makes a high-quality fitness tool.
In a tropical climate where humidity and heat can affect both the materials of your equipment and your physical grip, choosing a board with reliable non-slip features and sweat-resistant handles is essential. By focusing on key structural elements, material compositions, and safety indicators, you can select a push up board that supports your fitness progression while keeping your joints protected. This guide outlines the essential factors to evaluate so you can make an informed decision for your home workouts.
Why Use a Push Up Board for Home Workouts?
Traditional floor push-ups are a staple of bodyweight training, but they place a significant amount of stress on your wrists. When you perform a standard push-up on a flat floor, your wrists are forced into an extreme ninety-degree angle while supporting a large portion of your body weight. A push up board solves this issue by utilizing elevated handles that allow you to maintain a neutral, straight wrist alignment throughout the entire movement. This neutral position distributes the load more evenly through your forearms and reduces joint strain, allowing you to train more comfortably and consistently.
Products mentioned in this guide
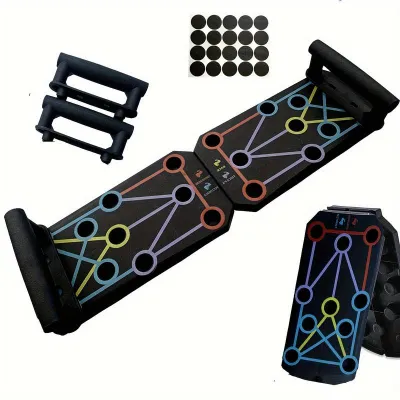
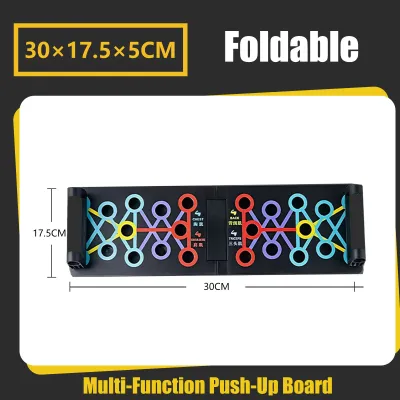
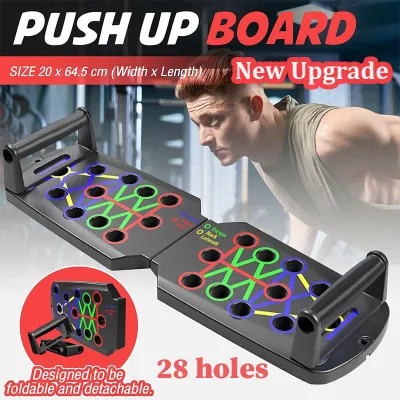
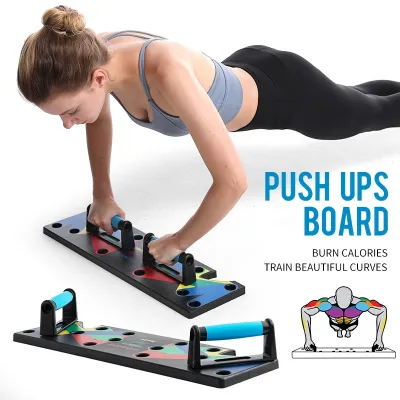
Prices are valid at publication and may change. Please refer to the product page for the latest price.
Beyond joint protection, these boards offer a highly efficient way to vary your muscle activation. By changing the angle and width of the handles, you can shift the primary focus of the exercise to different parts of your upper body. For example, a wide grip targets the outer chest fibers, while a narrow, parallel grip places a greater demand on your triceps and front shoulders. This versatility allows you to perform a complete upper-body workout using a single piece of equipment, mimicking the variety of a professional gym setup.
Furthermore, structured push up boards help you track your workout variety and prevent routine stagnation. Instead of guessing your hand placements or relying on inconsistent floor markings, the board provides fixed, repeatable positions. This consistency makes it easier to track your progress over time, ensuring that you are balanced in your training and targeting all muscle groups equally. The visual guidance of a structured board keeps your home workouts organized, engaging, and highly focused.
Key Features to Evaluate Before Buying
When shopping for a push up board, it is easy to get distracted by colorful designs and bold marketing claims. To find a tool that will safely support your fitness journey, you must focus on three core dimensions: material durability, grip ergonomics, and base stability. Evaluating these physical attributes before making a purchase ensures that your equipment remains safe and functional over hundreds of workout sessions.

One of the first specifications to verify is the manufacturer’s stated weight capacity limit. This rating indicates the maximum load the board can safely support without bending, cracking, or collapsing under pressure. Always look for this information on the official product label or user manual, and ensure the limit comfortably exceeds your current body weight. If you plan to progress to weighted push-ups using a vest or resistance bands, factor in that additional weight when checking the capacity.
Another critical feature is the quality of the non-slip rubber feet located on the underside of the board. Home flooring in the Philippines often consists of smooth ceramic tiles, polished wood, or slick concrete, all of which can be highly slippery. Without high-quality rubber pads to grip the floor, the board can slide forward or sideways mid-rep, leading to sudden falls and potential wrist or shoulder injuries. Ensuring the board has robust, well-distributed rubber feet is a non-negotiable safety requirement.
Board Material and Build Quality
The structural integrity of a push up board depends heavily on the materials used in its construction. Most budget-friendly options on the market are made from high-density ABS plastic, which is lightweight, affordable, and sufficiently durable for light to moderate use. However, premium models often utilize reinforced polymers or composite plastics that offer greater rigidity and resistance to wear. Understanding these material differences helps you choose a board that matches your body weight and training intensity.
When inspecting a board, look closely for visible manufacturing seams, thin plastic walls, or any signs of flexing when you apply downward pressure. A high-quality board should feel solid and rigid, with no noticeable bending or bowing in the center when you place your weight on the handles. Seams that appear weak or plastic that feels brittle are clear indicators of low-quality manufacturing, which can lead to sudden structural failure during a workout.
To ensure you are getting a durable product, verify the material claims against official product labels rather than relying on vague online descriptions. Reputable manufacturers will clearly state the type of plastic used and provide a certified weight rating. If a product listing lacks these technical specifications or uses overly generic terms, it is best to proceed with caution and look for a more transparent brand.
Grip Design and Handle Ergonomics
The handles of your push up board are your primary point of contact, making their design crucial for both comfort and safety. Handles generally feature foam, textured rubber, or bare molded plastic grips. In warm and humid tropical environments, foam grips tend to absorb sweat quickly, which can make them slippery, difficult to clean, and prone to harboring bacteria over time. Textured rubber grips are highly recommended because they offer excellent slip resistance, are easy to sanitize, and maintain their traction even when your hands are wet.
Handle diameter is another ergonomic factor that directly impacts your grip strength and wrist comfort. Handles that are too thin can dig into the palms of your hands, causing localized pain and distracting you from your form. Conversely, handles that are too thick can strain your forearm muscles prematurely, limiting the number of repetitions you can perform. Look for a moderate, contoured handle diameter that allows your fingers to wrap comfortably and securely around the grip.
Because hand sizes and comfort preferences are highly individual, it is wise to check the seller’s return or exchange policies before purchasing. This precaution allows you to physically test the handles in your hands and ensure they do not cause discomfort or joint strain. If the ergonomic fit does not feel right, having a clear return path ensures you can find a more suitable alternative without financial loss.
Color-Coded Systems vs. Fixed Positions
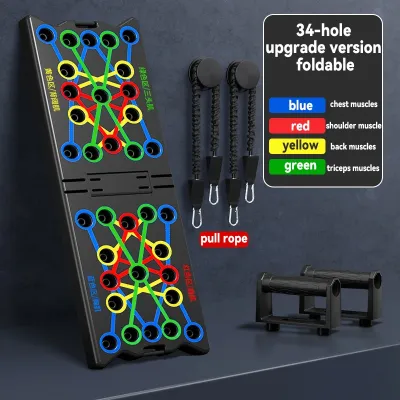
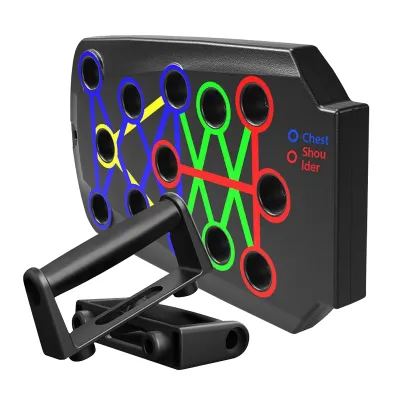
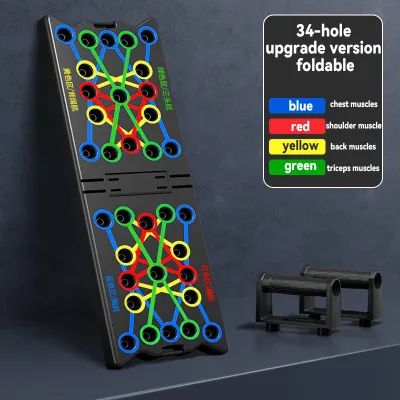
Most modern push up boards feature a color-coded system where different colored lines guide your handle placement to target specific muscle groups. Typically, red lines indicate shoulder exercises, blue lines target the chest, and green lines focus on the triceps. This visual system is highly beneficial for beginners and intermediate users, as it takes the guesswork out of workout planning and ensures you are targeting the correct muscles with precision.
However, you must also consider the stability trade-offs between adjustable plug-in systems and fixed-position boards. Plug-in systems allow you to move a single pair of handles into various slots across the board, offering incredible variety but introducing potential points of wear at the connection joints. Fixed-position boards have molded, non-removable grips that offer absolute stability with zero risk of handle movement, but they limit your workouts to a few pre-determined angles.
If you choose a plug-in variant, pay close attention to the security of the locking mechanism. The pegs on the bottom of the handles should fit snugly into the board’s slots without any excessive play or wobbling. A loose connection can cause the handles to tilt slightly during an exercise, which destabilizes your wrist and increases the risk of injury. Ensure the locking system is robust and holds the handles firmly perpendicular to the board.
Matching the Board to Your Fitness Level and Goals
Your choice of a push up board should align closely with your current strength baseline, joint health, and long-term training objectives. A board that is perfect for an experienced athlete might be overly challenging or unstable for someone recovering from an injury. By matching the equipment’s features to your specific needs, you can ensure a safe, effective, and progressive training experience.
It is important to avoid the temptation of buying the most complex board available if you are still building foundational strength. Boards with dozens of extreme angles and narrow placements require excellent core stability and shoulder mobility to use safely. Mastering the basic, standard push-up mechanics on a simple, highly stable platform is a crucial prerequisite before attempting advanced variations that place higher demands on your joints.
Additionally, consider how the board will integrate with your existing home gym equipment. Some boards are designed with dedicated attachment points for resistance bands, allowing you to perform a wider variety of exercises beyond standard push-ups. If you want a versatile, full-body workout tool, looking for a board that supports these multi-functional attachments is an excellent way to maximize your investment.
Beginners and Rehabilitation
For beginners or individuals recovering from minor upper-body strains, stability and safety are the absolute priorities. If you fall into this category, look for boards that emphasize wide, highly stable base designs and fixed or deeply recessed handle slots. These features minimize the risk of the board tipping or the handles shifting, allowing you to focus entirely on learning correct form and building baseline muscular endurance.
Clear, easy-to-read instructional guides are also incredibly valuable for those starting their fitness journey. A high-quality board should come with a detailed workout chart or manual that explains the correct body alignment for each handle position. Following these professional guidelines helps prevent common form mistakes, such as flaring your elbows too wide, which can lead to shoulder impingement over time.
If you are using a push up board as part of a rehabilitation program for a past wrist, elbow, or shoulder injury, always consult a physical therapist before starting. A professional can help you identify which handle angles are safe for your specific recovery stage and which positions you should avoid. Equipment is a helpful tool, but it must be used in conjunction with professional medical advice to ensure a safe recovery.
Intermediate to Advanced Users
Intermediate and advanced fitness enthusiasts require equipment that supports progressive overload and more challenging movement patterns. If you have already mastered standard push-ups, look for boards that offer advanced, narrow-grip slots and staggered configurations. These challenging angles allow you to isolate specific muscle fibers, such as the inner chest or the long head of the triceps, helping you break through strength plateaus.
To continue progressing, advanced users should seek out boards that are compatible with heavy-duty resistance bands. By anchoring the bands to the board and looping them over your back, you can add variable resistance to your push-ups, making the exercise significantly harder at the top of the movement. This setup provides a highly effective way to stimulate muscle growth without needing heavy iron weights.
However, even highly experienced athletes must respect the manufacturer’s maximum weight and dynamic load limits. Advanced variations, such as explosive plyometric push-ups where your hands temporarily leave the handles, place immense dynamic force on the board upon landing. Ensure your board is rated for these high-impact forces, and inspect the equipment regularly to confirm it remains structurally sound.
Space and Portability Constraints
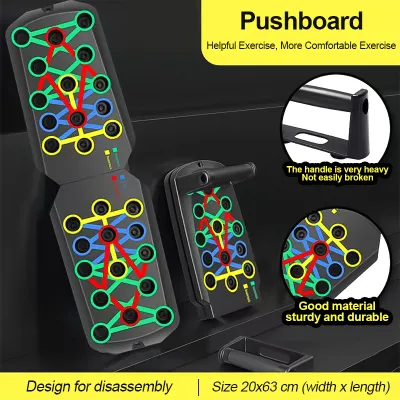
For many people living in compact homes or shared apartments, storage space is a major consideration when buying fitness gear. Foldable push up boards are highly popular because they fold in half, significantly reducing their footprint when not in use. This design allows you to easily slide the board under a bed, place it in a closet, or pack it into a suitcase for travel, making it an excellent option for mobile lifestyles.
While foldable boards offer unmatched portability, solid single-piece boards provide a completely flat, seamless workout surface with no central hinge. If you have a dedicated workout space at home and do not need to travel with your gear, a solid board offers maximum structural rigidity. Consider your daily living arrangements and storage availability to decide which design best fits your lifestyle.
Additionally, check if the board features built-in storage compartments for the handles or comes with a dedicated carrying bag. Keeping the handles and non-slip rubber pads organized in one place prevents them from getting lost or damaged. A well-designed storage system ensures your home workout area remains tidy and your equipment is always ready for your next session.
Safety Checks and Proper Usage Guidelines
To prevent injuries and ensure the longevity of your equipment, establishing a consistent safety routine is essential. Before starting any workout, perform a quick pre-use inspection of your push up board. Verify that both handles are fully inserted and locked into their designated slots, and check that the non-slip rubber pads on the bottom are clean and securely attached. Inspect the plastic body of the board for any hairline cracks, stress discoloration, or warping, especially around the handle holes.
Your workout environment also plays a critical role in your safety. Always set up your push up board on a flat, level, and dry surface. Clear a safety zone of at least one meter around the board in all directions, ensuring there are no water bottles, furniture corners, or other hazards nearby. This clear space ensures that if you experience sudden muscle failure or lose your balance, you can safely step away from the board without colliding with surrounding objects.
Finally, understand and respect the stop conditions during your training. If you hear unusual creaking or cracking sounds from the plastic, if a handle begins to wobble or slip out of its slot, or if you feel sharp, sudden pain in your joints, stop the exercise immediately. Do not attempt to push through joint pain or ignore signs of equipment wear. Inspect the board thoroughly, and if you suspect any structural damage, discontinue use and contact the manufacturer or a qualified professional.
Where to Buy and What to Verify Upon Delivery
When you are ready to purchase a push up board, it is highly recommended to buy from authorized sports retailers, official brand stores, or reputable online marketplaces. Purchasing through these legitimate channels ensures that you receive an authentic product made from certified, high-quality materials rather than a cheap counterfeit. It also guarantees that you have access to customer support and valid warranty coverage if the product arrives damaged or fails prematurely.
As you compare different options, look at the total cost in Philippine Pesos (₱) and remember to factor in shipping fees. Because push up boards are relatively bulky and heavy, shipping costs can vary significantly depending on your location. Choosing a local distributor or an official store with a warehouse in the Philippines can help reduce shipping times and lower overall delivery costs, making your purchase more economical.
Once your package arrives, perform a thorough unboxing checklist before using the equipment. Verify that all components listed in the manual are present, including the board, both handles, all non-slip rubber pads, and any included accessories like resistance bands or workout guides. Inspect each item carefully for any signs of shipping damage, such as cracked plastic, torn rubber, or missing parts, and contact the seller immediately if you notice any defects.
Before performing your first full-weight workout, conduct a quick stability test on a soft surface, such as a yoga mat or carpet. Insert the handles into various slots to ensure they lock in smoothly and securely without excessive play. Apply gradual, moderate downward pressure with your hands to confirm that the board sits flat on the floor and does not wobble or slide. Taking these simple precautions ensures your new push up board is safe, functional, and ready to support your home fitness goals.
Frequently Asked Questions (FAQ)
Can a push up board replace dumbbells for chest workouts?
A push up board is an exceptionally effective tool for bodyweight training, but it cannot completely replace dumbbells. While the board allows you to target different angles of your chest, shoulders, and triceps using your body weight, it relies on leverage rather than adjustable external resistance. Dumbbells allow you to isolate specific muscles and easily increase or decrease the load by changing weights. For the best results, use the push up board as a complementary tool to build endurance, core stability, and joint strength alongside your free-weight exercises.
How do I clean and maintain the non-slip base?
To maintain the grip of your board’s non-slip rubber feet, wipe them down regularly with a damp cloth and a small amount of mild dish soap. This removes accumulated dust, sweat, and floor oils that can cause the rubber to lose its traction over time. Avoid using harsh chemical solvents, bleach, or alcohol-based cleaners, as these substances can dry out and degrade the rubber, causing it to crack or peel off. Always allow the board and rubber pads to air-dry completely in a shaded area before folding or storing them away to prevent mold growth.
Community discussion
Share your experience or ask a question. Comments are reviewed before publication.