
Improving your putting stroke is the fastest way to lower your golf scores, yet it is often the most neglected part of practice. While driving range sessions are excellent for your long game, the delicate touch required on the green can only be mastered through consistent, repetitive practice. A well-constructed home putting green mat allows you to build this muscle memory without leaving your house, turning idle minutes into productive training sessions.
Choosing the right mat, however, involves more than simply picking a green strip of carpet. The market offers a wide variety of materials, speeds, and sizes, each designed to target different aspects of your stroke. To make an informed decision, you must evaluate how a mat’s physical characteristics align with your personal skill level, your available living space, and the specific putting drills you need to practice.
Quick Answer: Aligning Mat Features With Your Skill Level
Your current golfing ability and practice goals should dictate the type of putting mat you select. Beginners, intermediate players, and advanced golfers all require different levels of feedback and difficulty to maximize their training time.
Products mentioned in this guide
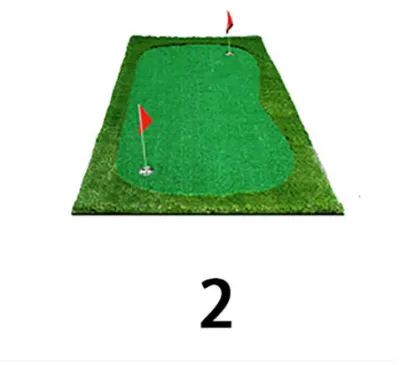
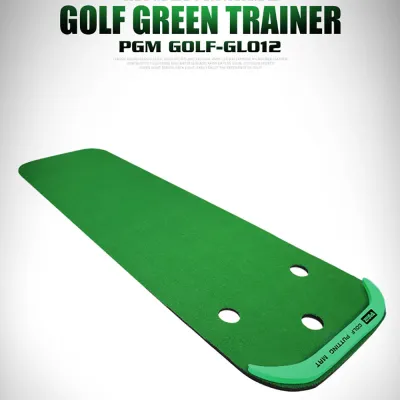
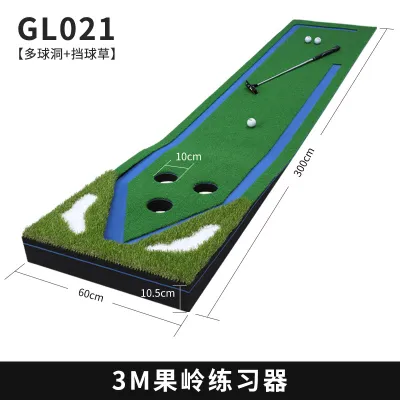
Prices are valid at publication and may change. Please refer to the product page for the latest price.
- Beginner Golfers: If you are new to the game, your primary goal is to develop a consistent, square stroke and build basic confidence. Look for mats that feature prominent alignment lines, target grids, and automatic ball return systems. These features provide immediate visual feedback and keep practice engaging by eliminating the need to retrieve balls constantly.
- Intermediate Golfers: At this stage, you want to transition from mechanical guidance to feel and distance control. Opt for mats with minimal visual aids or those that offer removable alignment guides. This forces you to rely on your own visualization and muscle memory, mimicking the transition to a real golf course where helper lines do not exist.
- Advanced Golfers: Experienced players need a surface that behaves exactly like a well-maintained tournament green. Prioritize mats that offer high roll consistency, realistic green speeds, and the ability to practice on a completely flat plane. Advanced setups often feature premium woven turf that allows you to practice delicate, high-precision strokes where even a minor misalignment is punished.
The core trade-off when choosing a mat is between forgiveness and realism. Highly guided, slower mats are excellent for building a repeatable stroke path but may not prepare you for the fast, breaking putts you will face on the course. Conversely, ultra-fast, unmarked mats can be frustrating for beginners but are essential for advanced players looking to fine-tune their touch. To find your ideal match, follow a logical decision sequence: first assess your physical space, then evaluate surface speed, select the appropriate dimensions, and verify the material durability.
Assessing Your Space and Portability Requirements
Before browsing product catalogs, you must carefully measure the physical space where you plan to practice. In the Philippines, residential layouts vary significantly, from compact high-rise condominiums in metropolitan areas to spacious suburban homes with covered outdoor spaces.

Start by measuring the length and width of your designated floor area. While a longer mat offers more versatile practice, it must fit comfortably without blocking high-traffic hallways or doorways. Additionally, consider the ceiling height if you plan to use the mat in a multi-purpose simulator setup, though a dedicated putting practice area only requires enough clearance for your standard putting posture.
Next, decide between a permanent setup and a portable, temporary solution.
- Roll-Up Mats: These are the most common portable options. They typically feature a thin fabric or synthetic turf surface attached to a flexible rubber backing. They are easy to roll up and store in a closet or under a bed, making them ideal for smaller homes or shared spaces. However, they can develop temporary creases if left rolled up for long periods.
- Foldable and Modular Mats: These systems often use interlocking foam tiles or rigid plastic panels covered with synthetic turf. They provide a highly stable, flat surface that feels solid underfoot. While they offer excellent roll quality, they require more storage space and take longer to assemble and disassemble.
If you plan to transport your mat between your home, office, or local golf club, pay close attention to the product’s weight and carrying features. Look for mats that include dedicated carrying bags, secure straps, or integrated handles. A lightweight mat with a flexible backing is much easier to transport, but ensure it still has enough weight to lie flat when unrolled on a hard surface.
Evaluating Surface Speed and Roll Consistency
The realism of your practice depends heavily on how the ball rolls across the mat’s surface. Manufacturers often describe this characteristic using green speed ratings, which are typically measured using a stimp meter.
A stimp meter rating indicates how far a golf ball rolls under standardized conditions. When evaluating putting mats, you will generally encounter speed descriptions ranging from slow to tournament-fast.
- Medium Speeds (Stimp 8 to 9): These surfaces mimic the average public or resort course greens. They are highly forgiving and excellent for practicing basic stroke mechanics and short-distance control.
- Fast Speeds (Stimp 10 to 11): This range represents well-maintained, private club greens. It requires a delicate touch and precise speed control, making it ideal for intermediate to advanced players.
- Tournament Speeds (Stimp 12 and above): These ultra-fast surfaces simulate championship conditions. They are highly unforgiving and demand absolute precision in both face angle and tempo.
It is important to note that these ratings are not universal guarantees. The actual speed of your mat will be heavily influenced by the subfloor on which it is placed. In many Philippine homes, hard flooring materials like ceramic tile, polished concrete, or hardwood are standard. Placing a thin putting mat directly on these hard surfaces will naturally increase the roll speed and firmness of the putt. Conversely, placing the same mat on a carpeted floor will absorb energy, slowing the ball down and potentially introducing unwanted wobble.
To ensure a true, consistent roll, examine the turf pile height and density. High-quality mats utilize low-pile, high-density synthetic fibers that are tightly woven to prevent the ball from bouncing or veering off course. Avoid mats with sparse, uneven fibers, as they cannot provide the consistent feedback necessary to improve your distance control.
Selecting the Right Dimensions and Alignment Aids
The physical dimensions of your putting mat directly influence the types of drills you can perform and the habits you will develop. Choosing the wrong size can limit your practice variety or, worse, introduce posture errors into your stroke.
- Mat Length: Match the length of the mat to your primary practice objectives. If you struggle with short-range confidence, an 8-foot mat is highly effective for mastering the critical three-to-six-foot putts that save par. If you want to work on distance control and lag putting, look for mats that are 12 to 15 feet long. Keep in mind that longer mats require a larger, unobstructed floor space to lay completely flat.
- Mat Width: The width of the mat is a critical but often overlooked factor. Narrow mats, which are typically 1 to 1.5 feet wide, are highly portable but force you to stand off the mat while putting. Standing on a different level than the ball—even a difference of half an inch—can alter your eye alignment, posture, and stroke plane. To maintain proper mechanics, choose a mat that is wide enough (at least 2 to 3 feet) to accommodate both your stance and the ball path on the same level.
- Alignment Aids and Targets: Built-in visual aids can accelerate your learning curve. Look for mats that feature start-line indicators, parallel alignment tracks, and distance markers. These tools help you verify that your putter face is square at impact and that you are starting the ball on your intended line. However, to prevent becoming dependent on these visual cues, consider a mat that offers a dual-design: one side with detailed alignment markings for technical drills, and a clean, unmarked side to test your visualization skills.
Verifying Durability and Material Construction
A putting mat is a long-term investment in your game, so it must withstand thousands of strokes and repeated rolling without losing its shape or roll quality. Verifying the materials and construction methods before purchasing is essential.
Start by checking the specifications of the backing material. The backing provides the weight and friction necessary to keep the mat flat and secure on your floor. High-quality thermoplastic rubber (TPR) or heavy, high-density foam backings are excellent because they resist slipping on smooth tile or polished wood floors. They also help absorb the impact of the ball, reducing noise if you practice in an apartment or condominium.
The tropical climate of the Philippines presents unique challenges for synthetic materials. High humidity, ambient heat, and intense sunlight can cause low-grade plastics and adhesives to degrade, dry out, or become brittle. If you plan to set up your practice area on a covered balcony, patio, or lanai, check the manufacturer’s care instructions for explicit mentions of UV resistance and weatherproofing. A mat designed to withstand outdoor conditions will resist fading and structural breakdown far better than an indoor-only model.
Additionally, inspect the edges of the mat. Premium mats feature reinforced, stitched, or bound borders that prevent the synthetic fibers from fraying over time. Unreinforced edges are prone to curling upward, which not only ruins the aesthetic but also creates a lip that interferes with the ball’s roll along the outer edges of the mat.
Setting Up and Maintaining Your Practice Surface
Proper setup and regular maintenance are crucial to preserving the roll quality of your putting mat and extending its lifespan. Even the highest-quality mat will perform poorly if it is not cared for correctly.
When you first unbox a new roll-up mat, it is common for the ends to curl slightly due to being tightly packed. To flatten the mat safely, unroll it on a flat, hard floor in a warm room. The ambient warmth helps relax the backing material. If the ends still curl upward, gently roll the mat in the opposite direction (reverse-rolling) and let it sit for a few minutes. Avoid placing heavy, sharp, or hot objects on the mat to force it flat, as these can permanently damage or melt the synthetic fibers.
Routine cleaning is essential because dust, dirt, and pet hair act as tiny obstacles that can alter the path of your ball.
- Brushing: Use a soft-bristled broom or a dedicated turf brush to gently sweep the surface. This removes loose debris and helps keep the synthetic fibers standing upright.
- Vacuuming: You can vacuum the mat to remove deep-seated dust, but ensure your vacuum is set to a low-suction, brush-free mode. A spinning brush bar can pull and damage the woven fibers.
- Spill Clean-up: If liquid spills on the mat, blot it immediately with a clean, dry towel. Avoid using harsh chemical solvents or bleach, which can dissolve the backing adhesives or discolor the turf.
When storing your mat, always roll it with the putting surface facing outward. This simple habit ensures that any natural curl in the material will bend downward toward the floor when you next unroll it, allowing the mat to lay flat instantly. Store the rolled mat in a cool, dry closet or its original carrying bag, away from direct sunlight and moisture.
Frequently Asked Questions (FAQ)
Can I use a putting green mat outdoors in the Philippines?
You can use a putting green mat outdoors, but you must verify that the product is explicitly rated for outdoor use. The high humidity, heavy rainfall, and intense UV exposure in the Philippines can quickly degrade indoor-only mats, causing the backing to crumble and the turf to fade. Always check the manufacturer’s label for weatherproofing and UV resistance. To maximize the lifespan of your mat, store it indoors in a dry place after each outdoor practice session rather than leaving it permanently exposed to the elements.
Do I need a special base or underlay for my putting mat?
Whether you need an underlay depends on your existing flooring. If you are placing a thick, heavy-backed mat on a flat, hard surface like ceramic tile or polished concrete, an additional underlay is generally unnecessary. However, if your floor is uneven, or if you are placing a thin mat over a plush carpet, the mat may sag or wobble. In these cases, using a manufacturer-recommended underlay or placing the mat on a rigid plywood platform will help ensure a flat, stable surface and a consistent ball roll. Avoid using improvised soft padding, as it can create artificial breaks and ruin your practice.
How do I fix creases or bumps in a new roll-up mat?
To safely remove creases or bumps, lay the mat flat in a warm room or under mild, indirect sunlight to allow the backing material to soften and relax. You can place flat, heavy, non-sharp objects—such as large books—directly on the creased areas for a few hours. If the creases persist, consult the manufacturer’s user manual for approved flattening techniques. Never use a household clothes iron or high-heat blow dryers directly on the mat, as excessive heat will melt the synthetic turf fibers and permanently ruin the putting surface.
Community discussion
Share your experience or ask a question. Comments are reviewed before publication.