
Choosing the right resistance band for swimming training requires balancing your physical fitness level, your specific training environment, and the mechanical design of the gear. Unlike dry-land fitness bands, swimming tethers must withstand constant exposure to chemically treated pool water or harsh saltwater while providing consistent tension that matches your stroke mechanics. Selecting the wrong band can lead to poor stroke form, inadequate resistance, or premature equipment failure. By evaluating your training goals, understanding key material specifications, and verifying safety features, you can find a swimming resistance band that safely and effectively elevates your aquatic workouts.
Understand Your Swimming Training Goals
Before browsing online marketplaces or visiting local sporting goods stores, you must define what you want to achieve with a swimming resistance band. Swimmers typically use these tools for two distinct purposes: stationary swimming to build aerobic endurance, or high-intensity resistance training to develop explosive power and sprint speed. Identifying your primary training objective directly dictates the length, tension, and attachment style of the band you need.
If your goal is stationary swimming—often referred to as swimming in place—you are likely looking to replicate the experience of a long lap pool in a smaller backyard pool, a plunge pool, or a hotel pool. For this setup, you need a longer, highly elastic cord that provides a gentle, consistent pull. This allows you to maintain a natural horizontal body position and focus on stroke mechanics, breathing rhythm, and sustained cardiovascular conditioning without hitting the pool walls.
Products mentioned in this guide
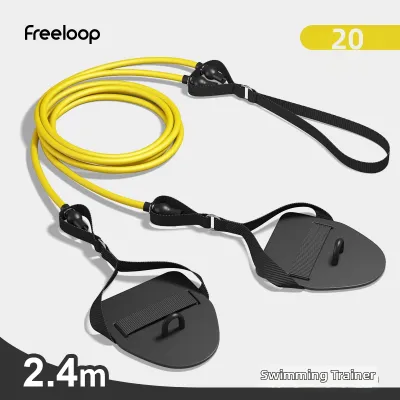

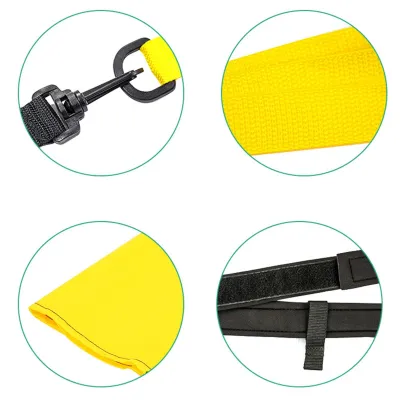
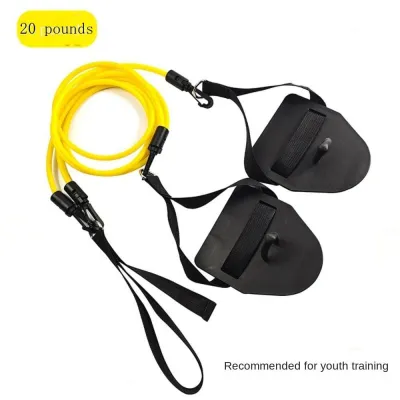
Prices are valid at publication and may change. Please refer to the product page for the latest price.
Conversely, if you are training for competitive speed and power, your focus shifts to short, high-tension bursts. Power training requires a heavy-duty resistance band that challenges your kick and pull strength over short distances. These bands are often shorter and designed to stretch to a strict limit, forcing your muscles to work harder against a progressive load. This type of training simulates the resistance of starting blocks and turns, helping sprinters build explosive power in their initial strokes.
For individuals recovering from injuries or participating in low-impact water aerobics, the requirements are entirely different. Rehabilitation and gentle water therapy demand low-tension bands that prioritize joint safety and smooth, predictable resistance. In these scenarios, high-tension cords can cause sudden snap-backs that strain recovering muscles or joints. Your training environment also plays a critical role; a standard 25-meter public lap pool offers different anchoring opportunities and clearance zones compared to a compact backyard pool or an open-water setting.
Key Features to Evaluate in a Swimming Resistance Band
Selecting a swimming resistance band involves analyzing three primary physical dimensions: tension levels, cord length, and attachment mechanisms. Each of these features directly influences how the band behaves in the water, how comfortable it feels during long training sessions, and how safely it connects to both your body and the pool infrastructure.

Tension Levels and Resistance Progression
When evaluating tension, look closely at the manufacturer’s labeling and product specifications. Because there is no universal industry standard for swimming resistance levels, different brands use their own color-coding systems or numerical scales to indicate tension. Always check the product manual or packaging to understand what each color represents, as a medium band from one manufacturer might feel like a heavy band from another.
If you plan to use the band for progressive training, consider purchasing a system with interchangeable cords or adjustable tension settings. Progressive overload is just as important in water sports as it is in weightlifting. Having the ability to swap out cords or adjust the active length of the band allows you to gradually increase resistance as your swimming strength and endurance improve over time.
You will also need to choose between flat latex bands and tubular surgical cords. Flat bands are lightweight and often used for light resistance or ankle-only drills, but they can create more water drag and are more prone to tearing if nicked. Tubular surgical cords, typically made of thick latex or rubber, are the standard for stationary swimming. They offer a smoother stretch, better durability in water, and are often encased in a protective fabric sleeve to minimize the risk of a sudden snap-back if the inner tube fails.
Length, Cord Type, and Pool Compatibility
To determine the correct band length, you must measure the distance from your intended anchor point to your starting swimming position. The band must have enough unstretched length to allow you to swim comfortably without immediately bottoming out against the anchor, yet remain short enough that you do not collide with the opposite wall of your pool.
For standard lap pools, longer cords are generally preferred because they provide a more gradual increase in resistance and allow for a more natural stroke cycle. In smaller home pools, hotel pools, or backyard swim spas, a shorter cord or an adjustable tether system is necessary to keep you centered in the deep section of the water. Using a cord that is too long in a small pool risks pulling you into the shallow steps or walls.
Material durability is another critical factor, especially in tropical climates like the Philippines, where high humidity, intense sunlight, and warm water accelerate wear. Chlorine, bromine, saltwater, and ultraviolet (UV) radiation can rapidly degrade untreated rubber and latex, leading to dry rot and micro-tears. Look for bands specifically labeled as chlorine-resistant or UV-stabilized, and check the manufacturer’s care instructions to see if the materials are rated for saltwater use if you plan to train in the ocean.
Attachment Mechanisms and Safety
The way the resistance band attaches to your body affects your swimming posture, comfort, and stroke mechanics. The most common attachment is a waist belt, which should be wide, padded, and adjustable. A wide belt distributes the pulling force evenly across your core, preventing the strap from digging into your skin or throwing off your hip rotation during freestyle or backstroke.
Ankle tethers are an alternative option, particularly useful for swimmers who want to isolate their upper body training or improve their kick technique. Ankle straps keep your legs aligned and prevent them from sinking, but they can restrict your natural kicking motion. When choosing between waist belts and ankle tethers, consider your stroke type and how the drag distribution will affect your body roll and kick.
Safety should always be your top priority when tethering yourself to a fixed object in the water. Ensure the belt or harness features a quick-release buckle or a breakaway mechanism that allows you to detach yourself instantly in an emergency. If you experience a sudden cramp, water inhalation, or equipment malfunction, you must be able to free yourself from the tension cord without struggling with complicated knots or stiff clips. Additionally, inspect the anchor attachment—such as a heavy-duty carabiner or a webbed loop—to ensure it can securely grip pool ladders, starting blocks, or deck anchors without slipping.
Matching the Band to Your Fitness Level and Stroke
Your current swimming proficiency and your preferred stroke style should heavily influence the resistance band you choose. A band that is too heavy for a beginner can ruin stroke mechanics, while a band that is too light for an advanced swimmer will fail to provide a meaningful workout.
Beginners should start with lighter tension levels and longer cords. A longer, lighter cord provides a gentle, forgiving pull that allows you to focus on maintaining a high body position in the water, proper head alignment, and a consistent kick. Wide, padded waist belts are ideal for beginners because they offer maximum comfort and stability, helping you get used to the sensation of swimming against a stationary anchor without feeling restricted.
Intermediate and advanced swimmers can transition to higher tension levels and shorter cords to simulate sprint conditions and build power. Advanced training often involves high-intensity interval sets where you swim at maximum effort against a heavy resistance cord for a set number of seconds, followed by a controlled recovery. For these intense workouts, you need robust, heavy-duty anchor points and highly durable cords that can withstand explosive, high-velocity starts.
Your choice of band and harness placement also depends on the specific strokes you practice. Freestyle and backstroke rely heavily on continuous hip rotation, meaning a waist belt must be loose enough to allow your hips to roll naturally but secure enough not to slide up your torso. For butterfly and breaststroke, which involve a more vertical, undulating body wave, you need a tethering system that provides ample clearance behind you. A tether that attaches too low or is too stiff can interfere with the deep dolphin kick or breaststroke kick, potentially pulling your hips downward and disrupting your stroke timing.
Safety Checks and Pool Environment Considerations
Using a swimming resistance band introduces unique safety considerations that do not apply to dry-land training. Because you are working against a high-tension cord in an aquatic environment, a sudden equipment failure can lead to rapid snap-backs, loss of balance, or water inhalation. Establishing a strict pre-workout inspection routine is essential for safe training.
Before every pool session, inspect the entire length of the resistance band for signs of wear. Look closely for micro-tears, cracks, discoloration, dry rot, or areas where the elasticity feels uneven. Pay special attention to the connection points where the cord meets the waist belt and the anchor clip, as these high-stress areas are the most common failure points. If you notice any signs of degradation, do not use the band; replace it immediately according to the manufacturer’s guidelines.
You must also evaluate the structural integrity of your chosen anchor point. The anchor must be able to easily withstand the dynamic, repetitive load of an adult swimming at full strength. Safe anchor points include sturdy pool ladders, starting blocks, or dedicated deck anchors installed by a professional. Never anchor your resistance band to loose pool furniture, light fixtures, plastic pipes, or any structure that could bend, break, or slide under tension. Doing so risks pulling a heavy object into the pool, which can cause severe injury or damage pool infrastructure.
Finally, establish clear stop conditions for your training sessions. Cease use immediately if you feel the band slipping from its anchor, if the waist belt begins to loosen, or if you experience sudden joint strain in your shoulders, lower back, or hips. Swimming against a stationary resistance band alters your natural biomechanics, and pushing through pain or improper form can quickly lead to overuse injuries.
Building Your Shortlist: What to Look for When Buying
When you are ready to purchase a swimming resistance band from an online marketplace or a local sports retailer, start by carefully reading the product specifications. Look for detailed information regarding the maximum stretch length, material composition, and recommended weight or user limits. Avoid products that make vague claims without providing concrete specifications on tension levels or material durability.
Check the user manuals or manufacturer guidelines to ensure the band is compatible with your specific pool type. Some bands are designed strictly for standard lap pools with ladder anchors, while others include versatile door anchors or strap extensions that allow them to be used in home swim spas or above-ground pools. Verifying these details beforehand prevents you from buying a system that you cannot safely anchor in your training space.
Lastly, compare the warranty terms and return policies offered by different brands. Because finding the perfect tension level and cord length can involve some trial and error, a flexible return policy is highly valuable. Look for manufacturers that offer warranties against material defects, especially regarding chlorine degradation or snap-back protection, as this indicates confidence in the product’s durability under real-world pool conditions.
Frequently Asked Questions (FAQ)
Can I use a regular gym resistance band for swimming?
No, you should not use a standard gym resistance band for swimming training. Dry-land fitness bands are not designed to withstand constant exposure to pool chemicals like chlorine or bromine, nor are they rated for saltwater or intense UV exposure. Standard latex will rapidly degrade, dry out, and crack when exposed to these elements, significantly increasing the risk of a sudden snap-back during use. Furthermore, gym bands lack the specialized, water-safe waist belts, ankle tethers, and secure marine-grade anchor clips required to keep you safely positioned and balanced in the water.
How do I clean and store my swimming resistance band?
To maximize the lifespan of your swimming resistance band, rinse it thoroughly with clean, fresh tap water after every use to remove chlorine, salt, and other pool chemicals. Once rinsed, hang the band to air-dry completely in a shaded, well-ventilated area away from direct sunlight, as UV rays can accelerate the breakdown of rubber and latex. Once dry, store the band in a cool, dry place, preferably in a breathable mesh bag. Avoid storing it in airtight plastic containers or high-humidity environments, which can trap moisture and lead to mold growth or material degradation.
Community discussion
Share your experience or ask a question. Comments are reviewed before publication.