
Choosing the right size silicone cover—often listed online as a silicon cover for tumbler—requires matching your tumbler’s bottom diameter, outer body diameter, and height to the inner dimensions of the cover, while accounting for a slight stretch factor. A perfect fit protects your flask or travel mug from dents and scratches during daily commutes, outdoor hikes, or gym sessions. Conversely, an incorrect size can lead to a slipping cover or a damaged tumbler finish. By taking precise measurements and understanding how silicone behaves, you can easily find a cover that fits like a second skin.
Why the Right Size Matters for Your Silicon Cover for Tumbler
Using an improperly sized silicon cover for tumbler compromises both the protection of your drinkware and your overall user experience. If a cover is too loose, it will constantly slip off during use, failing to provide the necessary impact resistance when you set the cup down. A loose sleeve also creates a small gap that traps dust, sand, and sweat. In the humid climate of the Philippines, this trapped moisture can quickly become a breeding ground for mold and mildew, potentially ruining the exterior of your tumbler and creating hygiene issues.
On the other hand, an overly tight cover presents its own set of challenges. Forcing a small sleeve onto a larger tumbler requires excessive stretching, which thins the silicone material and significantly reduces its shock-absorbing capabilities. This extreme tension can also make installation incredibly difficult and may even scrape, peel, or discolor powder-coated or custom-painted finishes. Over time, a highly stressed silicone cover is far more susceptible to tearing along the edges or seam lines.
Products mentioned in this guide
Prices are valid at publication and may change. Please refer to the product page for the latest price.
When you select the correct size, the cover acts as an effective protective barrier. It absorbs the shock of accidental drops, dampens the metallic clinking noise on hard surfaces, and provides a secure, non-slip grip. A well-fitted cover maintains the sleek look of your tumbler without adding unnecessary bulk, ensuring it remains fully functional and easy to carry.
Step 1: Measure Your Tumbler Accurately
To find a cover that fits perfectly, you must obtain precise physical measurements of your tumbler rather than relying solely on the advertised fluid ounce capacity. Different brands design their 20-ounce or 30-ounce cups with unique shapes, heights, and base widths, meaning a generic size label is rarely enough. Gather a flexible sewing measuring tape, or a non-stretchy piece of string paired with a rigid ruler, to begin the process.

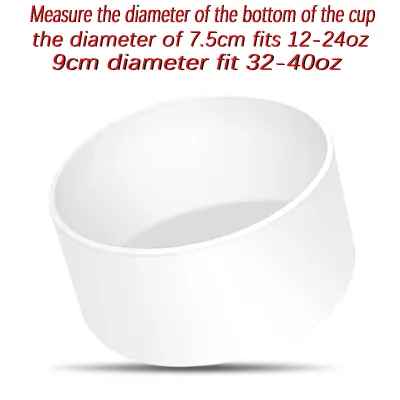
First, measure the bottom diameter of your tumbler. This measurement is crucial if you are purchasing a base-only bumper or boot. Place the tumbler flat on a level surface, position your measuring tool across the very center of the circular base, and record the distance from one outer edge to the opposite outer edge. If you plan to use the tumbler in standard car cup holders, keep in mind that most local cup holders accommodate bases between 70 to 80 millimeters; adding an excessively thick boot might prevent a snug fit.
Second, measure the outer diameter of the widest part of the tumbler’s body. If you are using a string or a strip of paper, wrap it snugly around the widest section of the cup, mark the exact point where the end overlaps, and lay the string flat against a ruler to find the circumference. Divide this circumference measurement by 3.1416 (pi) to calculate the outer diameter. For tapered tumblers, it is essential to measure both the narrow base and the wider upper body to ensure a full-sleeve cover can accommodate the transition.
Third, measure the vertical height of the area you want the silicone to cover. If you are looking for a full-body sleeve, measure from the bottom base up to the point where the tumbler begins to flare or where the lid threads start. Keep your measuring tape perfectly straight and parallel to the tumbler’s body to avoid overestimating the height.
Finally, record all of your measurements in both millimeters and inches. Most product listings on Philippine e-commerce platforms use millimeters for technical specifications, while some imported tumbler brands list their dimensions in inches. Having both units written down prevents conversion errors and simplifies your shopping experience.
Step 2: Understand Size Charts and Silicone Stretch
When browsing online marketplaces, you will often encounter size charts that list both the dimensions of the silicone cover and the compatible tumbler models. To interpret these charts correctly, you must distinguish between the outer diameter of your tumbler and the inner diameter of the silicone cover. Because silicone is highly elastic, the inner diameter of the cover will almost always be slightly smaller than the outer diameter of the corresponding tumbler.
Silicone covers are manufactured with this built-in size difference to ensure they stretch slightly and grip the tumbler securely. Typically, a high-quality cover is designed to be 2 to 5 millimeters smaller than the tumbler it is meant to protect. This slight tension creates a vacuum-like seal that prevents the cover from sliding off when wet with condensation or sweat. If you purchase a cover with an inner diameter that matches your tumbler’s outer diameter exactly, the cover will likely slip off during daily use.
Additionally, pay close attention to the vertical height of the cover. A sleeve that is too tall can interfere with the tumbler’s lid threads, preventing a tight seal and causing leaks. If your tumbler features a handle, the cover must stop safely below the lower handle attachment point. Check the product specifications to confirm the sleeve’s height will not overlap with these functional areas.
Before making a final purchase, read through the customer reviews on the product page. Look for feedback from buyers who own the same tumbler brand and model as you. These real-world reviews often provide valuable insights into whether a specific seller’s sizing runs true to size, runs small, or stretches more than expected, helping you make a more informed decision.
Step 3: Match the Cover to Your Tumbler's Shape
Beyond basic width and height measurements, the physical silhouette of your tumbler plays a significant role in determining compatibility. Tumblers generally fall into two design categories: straight-walled cylinders and tapered cups. A straight-walled tumbler is highly compatible with full-body sleeves because the uniform shape allows the silicone to apply equal pressure along the entire length of the cup.
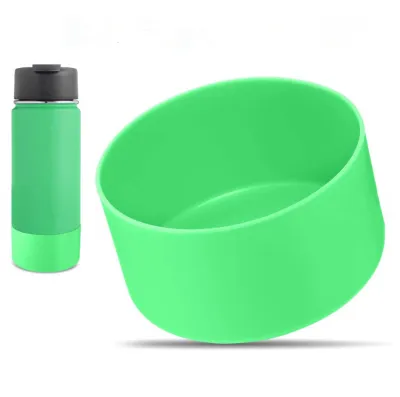
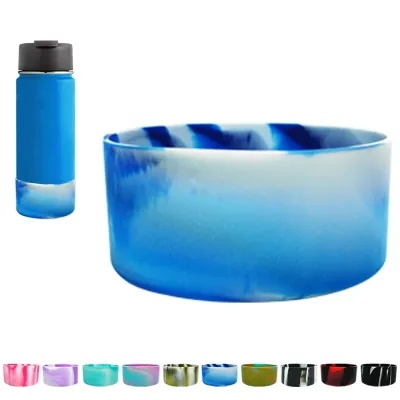
In contrast, tapered tumblers require careful consideration. A full-body sleeve applied to a tapered cup has a natural tendency to bunch up near the narrower bottom or slowly slide downward due to gravity and handling. If you own a highly tapered travel mug, a bottom-only bumper or boot is often a much more practical and secure option than a full sleeve, as it protects the high-impact base without slipping down the sloped sides.
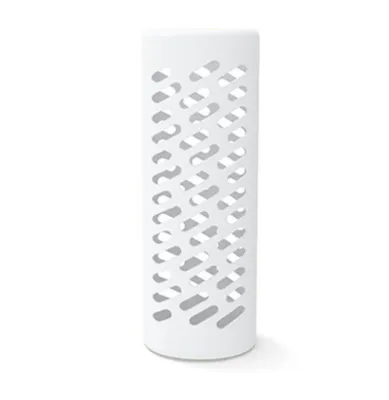
Handle clearance is another critical factor. If your travel mug has a built-in handle, a standard full sleeve will not fit unless it is specifically designed with a corresponding cutout. Forcing a solid sleeve underneath or around a handle weld creates localized stress points in the silicone, which will eventually lead to tearing. For handled mugs, look for specialized half-boots that protect only the lower portion of the cup below the handle.
Furthermore, consider the thickness of the cover’s base. Thick silicone boots offer excellent drop protection, but they also add weight and can slightly tilt the tumbler’s center of gravity. If you frequently use shallow cup holders on gym equipment, bicycles, or cars, a thick-bottomed boot might make the tumbler sit unevenly, increasing the risk of it tipping over. A thinner, low-profile boot is often better for active, on-the-go use.
Lastly, take the surface texture of your tumbler into account. Heavily textured, powder-coated, or rubberized finishes provide natural resistance that helps hold a silicone sleeve in place, but they also make sliding the sleeve on more difficult. Smooth, polished stainless steel finishes allow the sleeve to slide on easily, but they may require a slightly tighter cover to prevent slipping when condensation builds up from ice-cold drinks.
Step 4: Install the Cover and Verify the Fit
Proper installation is essential to ensure your silicone cover performs well and does not damage your tumbler. Before attempting to put the cover on, make sure both the tumbler’s exterior and the inside of the silicone cover are completely clean and dry. In the Philippines’ warm and humid environment, trapping even a tiny amount of moisture between the silicone and the tumbler can lead to mold growth and unpleasant odors in a matter of days.
To install the cover without tearing it, avoid pulling or stretching it from one side only. Instead, use the rolling method: turn the silicone cover halfway inside out, align the bottom of the cover with the base of your tumbler, and gently roll the remaining portion upward and over the sides of the cup. If the fit is very snug, you can apply a single drop of water to the inside of the sleeve to act as a temporary lubricant; the water will dry naturally within a few hours, leaving a secure grip.
Once the cover is in place, complete a quick verification check. Look for any air pockets, uneven gaps, or twisted sections along the body of the sleeve. Ensure that the top edge of the cover does not interfere with the threads of the lid and that the tumbler stands perfectly flat on a table without wobbling. Test the grip by holding the tumbler and ensuring the sleeve does not shift or slide under moderate hand pressure.
Always pay attention to clear stop conditions. If the silicone material turns white or translucent during installation, it is severely overstretched and is highly likely to split or tear soon. If you detect a strong, sharp chemical odor, the cover may be made of low-grade industrial silicone rather than food-grade material. Finally, if the cover is so tight that it begins to peel, scratch, or lift the powder coating on your tumbler, remove it immediately and size up to protect your investment.
Frequently Asked Questions (FAQ)
How do I clean a silicone tumbler cover?
To clean your silicone cover, wash it by hand using warm water and a mild dish soap. Gently rub the surface with your fingers or a soft sponge to remove dirt, sweat, and beverage spills. Avoid using harsh chemical solvents, bleach, or highly abrasive scrubbing pads, as these can degrade the silicone polymer, making the surface sticky, weak, and prone to tearing.
Will a silicone cover trap moisture against my tumbler?
Yes, moisture can become trapped if the cover is installed while either surface is damp, or if condensation from cold drinks seeps underneath the edges. To prevent mold, mildew, and potential finish damage, remove the silicone cover at least once a week. Wash both the tumbler and the cover thoroughly, and allow them to air-dry completely before reassembling them.
Can I use one silicone cover for multiple different tumblers?
You can only reuse a silicone cover across different tumblers if the cups share the exact same outer diameter, shape, and height. Do not assume that a cover designed for one brand’s 20-ounce tumbler will automatically fit another brand’s 20-ounce model, as dimensions vary widely. Always measure each tumbler individually before attempting to swap covers.
Community discussion
Share your experience or ask a question. Comments are reviewed before publication.