
Building a dedicated home gym requires equipment that matches your training intensity, and few tools are as fundamental to upper-body development as a heavy-duty pull-up bar. While doorway bars can slip and damage wooden frames, and freestanding power towers consume massive amounts of floor space, a wall-mounted system anchors directly into your home’s structural bones. This creates an unyielding, rock-solid platform that supports advanced, high-velocity movements and heavy weighted training.
However, selecting the right equipment involves more than just picking the first steel bar you find online. To ensure your safety and protect your home’s structural integrity, you must evaluate several critical engineering specifications, wall material requirements, and spatial dimensions. This guide will walk you through the essential factors to analyze so you can choose a safe, durable, and highly functional addition to your training space.
Quick Answer: Core Specs to Evaluate Before Buying
When shopping for a wall-mounted pull-up bar, prioritizing structural safety and exercise compatibility will save you from costly installation mistakes or equipment failure. Before making a purchase, verify these four non-negotiable specifications:
Products mentioned in this guide
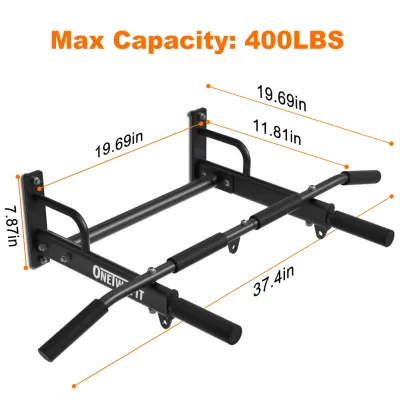
![[In Stock] N-Power Enhanced Edition Heavy Duty Pull Up Bar Wall Mounted Chin Up Bar for Home Gym Fitness Exercise](https://img.lazcdn.com/g/p/4df786dfdfcc2fa97d3b26a75cae54aa.jpg_400x400q80.jpg_.webp)
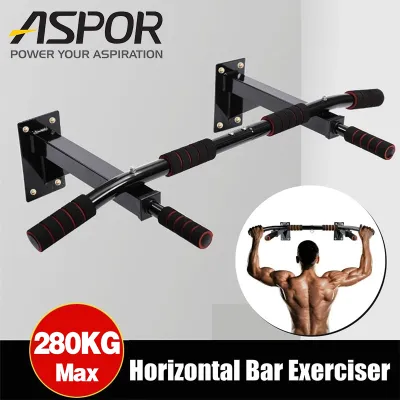
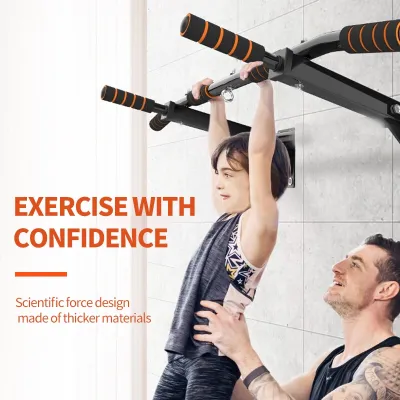
![[Local Stock+COD] Enhanced Heavy-duty Bar Wall Mounted Pull Up Bar Chin Up Bar Suitable For Home Gym Exercises](https://img.lazcdn.com/g/p/151e4afd2ac631d858a2797e857ca554.jpg_400x400q80.jpg_.webp)
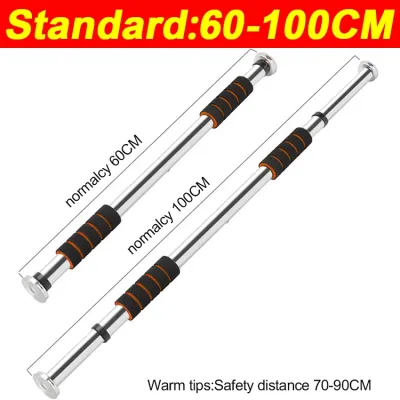
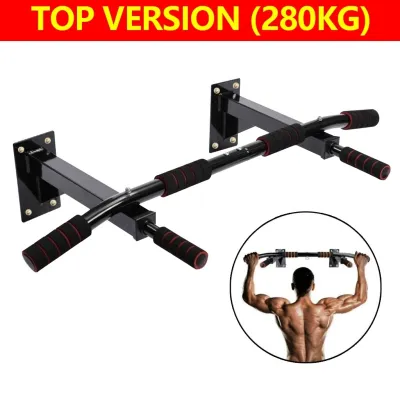
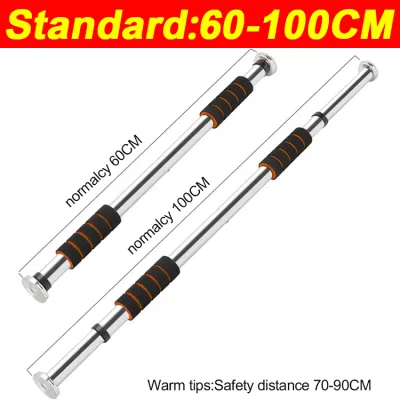
Prices are valid at publication and may change. Please refer to the product page for the latest price.
- Dynamic Weight Capacity: Ensure the bar is rated for at least 150 kg to 200 kg (330 lbs to 440 lbs) to safely absorb the kinetic forces generated during active training.
- Wall Compatibility: Your mounting surface must be solid concrete, solid brick, or structural wood studs. Standard drywall, plaster, and hollow concrete blocks cannot support these loads without specialized structural backing.
- Grip Variety and Ergonomics: Decide between a classic straight bar for gymnastics movements or a multi-grip system to target different muscle groups while protecting your joints.
- Spatial Clearance: You need a minimum of 30 to 45 cm (12 to 18 inches) of headroom above the bar, and a wall offset of at least 35 to 50 cm (14 to 20 inches) to prevent your body from colliding with the wall.
Wall-mounted units offer superior structural stability compared to doorway or freestanding alternatives because they distribute the load directly into your home’s load-bearing infrastructure. This rigid connection eliminates the flexing, shaking, and sliding common in temporary setups, allowing you to focus entirely on your form and performance.
Selecting a Pull Up Bar Wall Mounted System: Weight Capacity and Build Quality
Evaluating the build quality of a wall-mounted pull-up bar requires looking past marketing claims and focusing on raw material specifications. The structural integrity of the bar determines not only how much weight it can hold, but also how it behaves under the intense, shifting forces of a workout.

Static vs. Dynamic Weight Limits
Manufacturers always list a maximum weight capacity, but you must understand the difference between static and dynamic loads. A static weight limit refers to the maximum weight the bar can hold when a load is completely still. A dynamic weight limit accounts for the kinetic energy and acceleration of a human body in motion.
When you pull yourself up rapidly, drop down to a dead hang, or wear a weighted vest, the force exerted on the bar can easily double or triple your actual body weight. For example, an 80 kg athlete performing explosive pull-ups can momentarily exert over 150 kg of downward force on the mounting brackets. Always select a bar with a rated capacity that provides a comfortable safety margin—ideally at least double your current body weight plus any external load you plan to carry.
Material Thickness and Construction
The strength of a pull-up bar is dictated by the gauge of the steel tubing and how the individual pieces are joined together.
- Steel Gauge: Steel thickness is measured in gauges; a lower gauge number indicates thicker, stronger steel. Look for commercial-grade 11-gauge (approximately 3.0 mm thick) or high-quality residential 14-gauge (approximately 2.0 mm thick) steel. Avoid thin-walled 16-gauge or 18-gauge steel, as these are prone to bending and flexing under heavy dynamic loads.
- Welded Joints vs. Bolted Assemblies: Fully welded side frames offer the highest level of rigidity because they eliminate moving parts. If you choose a bolted assembly, ensure the kit uses high-tensile steel bolts (look for grade 8.8 markings or higher) and nylon-insert lock nuts (Nyloc nuts) that will not back out due to the vibrations of daily training.
- Reinforcement Gussets: High-quality brackets feature triangular steel plates (gussets) welded into the corners. These gussets distribute the downward and outward leverage forces across a larger surface area on the wall, preventing the brackets from bending downward over time.
Grip Options and Bar Dimensions
The physical shape, diameter, and width of the bar directly influence your biomechanics, comfort, and the specific muscle groups you target during your workouts.
Standard vs. Multi-Grip Designs
Choosing between a straight bar and a multi-grip configuration depends on your training style, joint health, and fitness goals.
+-------------------------------------------------------------------------+
|                         GRIP CONFIGURATIONS                             |
+-----------------------+-----------------------+-------------------------+
| Straight Bar          | Neutral Grip          | Angled / Wide Grip      |
| - Classic design      | - Palms face inward   | - Angled outer bars     |
| - Best for kipping    | - Low shoulder strain | - Focuses on outer lats |
| - Develops grip       | - Wrist-friendly      | - Reduces wrist strain  |
+-----------------------+-----------------------+-------------------------+
Straight bars are the traditional standard for gymnastics, calisthenics, and cross-training. They provide an uninterrupted surface that allows you to slide your hands freely, which is essential for movements like muscle-ups, kipping pull-ups, and clean hand transitions. However, performing high volumes of strict pull-ups on a straight bar can sometimes cause wrist, elbow, or shoulder discomfort due to the forced pronation of the forearms.
Multi-grip bars feature auxiliary handles welded to the main frame, offering neutral (palms facing each other), pronated (overhand), supinated (underhand), and angled positions. Neutral grips are highly recommended for individuals with pre-existing shoulder issues or rotator cuff sensitivity. By placing the shoulders in a neutral, externally rotated position, you open up the subacromial space, significantly reducing the risk of joint impingement. Angled grips offer a middle ground, allowing you to perform wide-grip pull-ups to target the latissimus dorsi while relieving the harsh wrist angles associated with flat, wide bars.
Bar Diameter and Overall Length
Bar thickness plays a massive role in grip fatigue and forearm activation. Most standard pull-up bars have a outer diameter of 32 mm (1.25 inches). This is the industry standard for a reason: it is thin enough for a secure, wrapped grip (where your thumb can comfortably overlap your fingers) but thick enough to prevent the steel from digging painfully into your palms during high-rep sets.
If your primary goal is to develop grip strength and forearm hypertrophy, you may want to look for a fat bar with a diameter of 38 mm to 50 mm (1.5 to 2.0 inches). Keep in mind that thicker bars will significantly reduce the number of repetitions you can perform, shifting the bottleneck of your exercise from your back muscles to your hands.
For overall length, look for a bar that is at least 96 to 120 cm (38 to 47 inches) wide. This width ensures you can perform wide-grip variations with proper elbow alignment. Additionally, check that the mounting brackets are spaced to match standard wall studs (typically 16 or 24 inches apart in timber-frame construction) if you are not mounting directly to a solid masonry wall.
Wall Requirements and Mounting Hardware
No matter how strong your pull-up bar is, its safety is entirely dependent on the wall it is attached to. Mounting a heavy, load-bearing piece of fitness equipment requires a solid, structural foundation.
Identifying Suitable and Unsuitable Wall Types
Before purchasing any hardware, you must verify the exact composition of the wall where you plan to install the bar.
- Solid Concrete and Solid Brick: These are the gold standards for wall mounting. They offer uniform density and exceptional holding power for expansion anchors. Poured concrete walls (often found in structural columns or modern condo buildings in the Philippines) can easily handle the dynamic forces of training.
- Wood Studs: In timber-frame construction, you must anchor the mounting brackets directly into the center of structural wood studs (minimum 2×4 inch studs). Never mount a pull-up bar to wood studs using drywall screws; you must use heavy-duty lag bolts.
- Concrete Hollow Blocks (CHB): Extremely common in residential construction across the Philippines, CHBs present a major safety hazard for standard installations. The outer walls of these blocks are thin and brittle, and the interiors are hollow. Standard expansion sleeve anchors will crack the block walls and pull out under dynamic loads. If you must mount to a CHB wall, you cannot use standard anchors. You must either mount directly into the solid poured concrete structural beams (buhos) or use specialized chemical anchors and threaded rods that pass completely through the wall, backed by steel plates on the opposite side.
- Drywall, Plaster, and Gypsum Board: These materials have virtually zero structural load-bearing capacity. Never attempt to mount a pull-up bar directly onto drywall, even with heavy-duty toggle bolts or drywall anchors. The bar will tear out of the wall, causing severe structural damage and potential injury.
Evaluating and Upgrading Mounting Hardware
Many pull-up bars ship with cheap, low-grade mounting hardware that is prone to shearing under stress. Inspect the included bolts before installation. For wood studs, you need high-quality steel lag bolts that are at least 7.5 cm (3 inches) long to penetrate deep into the center of the stud. For solid concrete, heavy-duty steel sleeve anchors or wedge anchors are required.
If the included hardware feels lightweight, has rough threads, or lacks clear strength markings, do not use it. Visit a local hardware store and purchase high-tensile, zinc-plated steel anchors or lag screws. This minor investment ensures your safety and prevents the bolts from shearing off inside your wall.
Essential Tools and Safety Checks
To complete a safe installation, you will need a reliable stud finder (for wood stud walls), a spirit level to ensure the bar is perfectly horizontal, a heavy-duty impact drill, and high-quality masonry or wood drill bits that match the exact diameter specified by your anchor manufacturer.
Mandatory Safety Rule: If you drill into your wall and encounter unexpected hollow cavities, crumbling concrete, or if your drill bit slips easily without resistance, stop the installation immediately. Do not mount the bar. These are signs of compromised structural integrity or unsuitable wall composition. Consult a licensed structural contractor or professional installer to evaluate the wall before proceeding.
Space Planning and Clearance
Proper space planning ensures you can perform your exercises through a full range of motion without hitting your head, knees, or the surrounding walls.
               [ CEILING ]
                    |
                    |  <-- Headroom (30-45 cm minimum)
                    |
             ===============  <-- Pull-Up Bar
            /|             |
           / |             |
  [ WALL ]   |             |  <-- Wall Offset (35-50 cm minimum)
             |             |
             |
             |
             |  <-- Floor Clearance (Sufficient for full hang)
             |
             v
          [ FLOOR ]
Calculating Headroom
Measure the distance from the top of the bar to your ceiling. For standard, strict pull-ups, you need a minimum of 30 to 45 cm (12 to 18 inches) of clearance. This space allows your head to clear the bar at the peak of the movement without the risk of striking the ceiling. If you plan to perform advanced movements like muscle-ups, where your entire upper body rises above the bar, you will need a minimum of 90 to 100 cm (36 to 40 inches) of headroom.
Determining Wall Offset
Wall offset is the horizontal distance between the wall and the bar.
- Strict Training (12 to 20 inches / 30 to 50 cm): A shorter offset keeps your center of mass close to the wall, which is excellent for space-saving setups and strict, controlled movements.
- Dynamic Training (30 inches / 76 cm or more): If you perform kipping pull-ups, toes-to-bar, or gymnastics work, you need a larger offset. This prevents your knees, feet, or hips from colliding with the wall during the swinging phase of the movement.
Floor Clearance and Safety Zones
Ideally, the bar should be mounted high enough so that you can hang with fully extended arms and legs without your feet touching the floor. Hanging with bent knees is acceptable if space is tight, but a full-body extension allows for better pelvic alignment and core engagement.
Ensure the floor area directly beneath and around the bar is clear of furniture, weights, and sharp corners. If you are mounting the bar high, place a high-density foam crash mat or rubber gym tiles underneath to cushion your landings and protect your joints over time.
Recommended Wall-Mounted Pull-Up Bar Categories by Training Goal
To narrow down your search, match the design and specifications of the bar to your primary training style and spatial constraints.
Best for Heavy-Duty and Cross-Training
If your workouts involve high-intensity, dynamic movements like kipping, butterfly pull-ups, or weighted carries, you need a commercial-grade, single-piece straight bar.
- Key Specs to Look For: 11-gauge steel construction, fully welded side brackets, and a generous wall offset of at least 75 to 90 cm (30 to 36 inches).
- Design Features: Look for a bar that uses a simple, solid steel tube locked into place with heavy-duty set screws or pins. The mounting plates should be large and feature at least four to six anchor points per bracket to distribute the massive lateral and vertical forces generated during explosive movements.
Best for Multi-Grip and Bodybuilding
For those focused on hypertrophy, strict strength development, and joint longevity, a multi-grip bar is the ideal choice.
- Key Specs to Look For: A heavy-duty bolted or welded frame with a moderate wall offset of 40 to 60 cm (16 to 24 inches).
- Design Features: Look for a system that offers at least three distinct grip positions: a wide angled grip, a narrow neutral grip, and a standard straight bar run. Ensure the grip surfaces feature high-quality, diamond-pattern knurling or a textured powder coat. Avoid cheap foam handles, as they degrade rapidly under sweat and friction, compromising your grip safety.
Best for Compact Spaces and Minimalist Setups
If you are setting up a gym in a tight corridor, a small bedroom, or a shared living space, look for a low-profile or folding design.
- Key Specs to Look For: Foldable brackets or a highly compact frame with a short wall offset of 30 to 35 cm (12 to 14 inches).
- Design Features: Some space-saving models allow you to pull a quick-release pin and fold the bar flat against the wall when not in use, reducing its projection to just a few inches. When evaluating these models, pay close attention to the hinge mechanism. The hinges must be constructed from thick steel and fit tightly to ensure there is no wobble or play when the bar is locked into the training position.
Installation Safety and Ongoing Maintenance
Your safety doesn’t end once the bar is bolted to the wall. Regular inspections and proper maintenance are essential to keep your equipment secure, especially in challenging environments.
When to Halt Installation
Do not force an installation if you encounter any of the following warning signs:
- The mounting brackets do not sit completely flat against the wall surface.
- A bolt spins freely without tightening, indicating that the wood stud has stripped or the concrete anchor has failed to expand.
- You notice hairline cracks forming in the concrete or brick surrounding your drill holes.
In any of these scenarios, remove the hardware, select a different mounting location, or hire a professional contractor to reinforce the wall.
Maintenance Checklist for Humid Environments
In tropical climates with high relative humidity, rust and corrosion are the primary threats to steel fitness equipment. Sweat from your hands contains corrosive salts that can quickly degrade powder coatings and eat into raw steel. Implement this routine maintenance checklist to extend the life of your equipment:
- Wipe Down After Use: Keep a dry microfiber cloth handy and wipe sweat off the bar after every workout session.
- Clean the Knurling: Every few months, use a stiff nylon brush to clean chalk, dead skin, and dust out of the knurling. If you notice light surface rust, scrub it gently with a wire brush, apply a thin coat of rust-inhibiting oil (like 3-in-One oil), let it sit for a few minutes, and wipe it completely dry.
- Check Bolt Torque: Use a wrench to check the tightness of all mounting bolts and frame assembly screws every three to six months. Dynamic vibrations from your workouts can slowly loosen bolts over time.
- Inspect Welds and Brackets: Periodically shine a flashlight on the welded joints and mounting plates. Look for paint flaking, hairline cracks, or structural bending. If you spot any structural deformation, retire the bar immediately.
Frequently Asked Questions (FAQ)
Can I mount a pull-up bar on drywall or hollow concrete blocks?
No, you cannot mount a load-bearing pull-up bar directly onto standard drywall or hollow concrete blocks (CHB) using standard anchors. Drywall has no structural strength and will immediately fail. Hollow concrete blocks have thin, brittle walls that will crack under dynamic leverage. To safely install a bar, you must anchor it directly into solid wood studs, solid poured concrete, or solid brick. If you must use a CHB wall, you must consult a professional to install a structural backing plate or use specialized chemical anchoring systems.
How far should the pull-up bar be from the ceiling?
For standard strict pull-ups and chin-ups, you should leave a minimum of 30 to 45 cm (12 to 18 inches) of space between the top of the bar and your ceiling. This provides enough headroom to complete your repetitions without striking your head. If you plan to perform advanced movements like muscle-ups or high-velocity kipping, you will need a minimum of 90 to 100 cm (36 to 40 inches) of ceiling clearance.
Community discussion
Share your experience or ask a question. Comments are reviewed before publication.