
Properly cleaning and drying your fishing nets after every outing is the single most effective way to protect your gear from premature wear, rot, and structural failure. Whether you are landing lapu-lapu in saltwater or targeting tilapia in freshwater lakes, your net accumulates salt, organic slime, scales, and abrasive debris with every dip. In tropical environments like the Philippines, high humidity and intense heat can accelerate the growth of mold and mildew, while salt crystals can dry and slice through synthetic fibers like tiny blades. Taking a few systematic steps to wash, dry, inspect, and store your net ensures it remains strong, supple, and ready for your next catch.
Preparing Your Cleaning Station and Tools
Setting up a dedicated cleaning area before you begin prevents unnecessary mess and protects your gear from accidental damage. Choose a shaded, well-ventilated outdoor workspace, such as a covered patio, carport, or a grassy spot in your yard. This area must have easy access to a clean, running freshwater source and proper drainage to wash away organic waste and soapy runoff without pooling. Avoid working on rough concrete surfaces or gravel, which can snag and fray delicate mesh fibers if the net drags.
Gather your cleaning supplies beforehand to streamline the process. You will need one or two large plastic utility buckets, a soft-bristled brush, and a standard garden hose equipped with a gentle spray nozzle. Avoid high-pressure washers, as the intense force can easily tear mesh cells or strip protective coatings. Finally, check any manufacturer labels or care instructions attached to your net’s handle or frame. Different materials—such as monofilament, nylon, or rubberized mesh—may have specific temperature or chemical restrictions that you must observe to prevent warping or melting.
Products mentioned in this guide
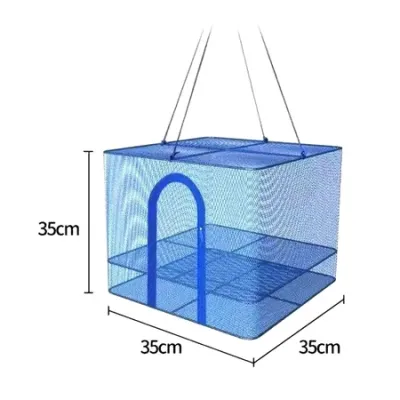
Prices are valid at publication and may change. Please refer to the product page for the latest price.
Step-by-Step Guide to Washing Fishing Nets
Before wetting the net, perform a thorough manual pre-cleaning. Gently shake the net to loosen dried debris, then carefully pick out trapped leaves, twigs, fish scales, and leftover bait by hand. Removing these organic materials while they are dry is much easier than trying to wash them out once they become soggy and cling to the mesh. This step also prevents large debris from clogging your drainage system or contaminating your cleaning bucket.

Once the large debris is gone, give the net a comprehensive initial rinse with fresh water. Use your garden hose with a gentle spray pattern, working from the top of the hoop down to the bottom of the mesh pocket. This rinse is critical for dissolving salt crystals and washing away the bulk of the fish slime. Salt is highly hygroscopic, meaning it draws moisture from the air, keeping the fibers damp and prone to rot. When the net dries, these salt crystals harden into sharp microscopic edges that slice through synthetic fibers whenever the net flexes under the weight of a fish.
For stubborn organic stains, algae, or persistent fish odors, prepare a mild cleaning solution. Fill your utility bucket with clean, lukewarm fresh water and mix in a small amount of mild, non-toxic, biodegradable soap or specialized gear wash. Submerge the net completely and let it soak for a few minutes to loosen dried grime. Use your soft-bristled brush to gently scrub areas with heavy buildup, paying close attention to the knots, seams, and the weighted lead lines where dirt tends to accumulate. Never use bleach, chlorine, or harsh household detergents; these chemicals strip the UV-protective coatings from synthetic fibers and cause monofilament to become brittle and yellow.
Conclude the washing process with a meticulous final rinse. Hang the net or hold it open while spraying it down with clean fresh water until the runoff is completely clear and free of soap bubbles. Any soap residue left on the mesh can dry into a stiff film that attracts dirt, weakens the fibers over time, and introduces harmful chemicals into the aquatic ecosystems on your next fishing trip.
Proper Drying Techniques to Prevent Mold and UV Damage
Drying your fishing net correctly is just as important as washing it, especially in warm, humid climates where mold and mildew thrive. Hang the net fully extended to promote even airflow across all surfaces. You can drape it over a clean clothesline, hang it from a sturdy hook, or suspend it from a tree branch in a shady spot. Ensuring the net hangs freely allows gravity to pull excess water down and away from the mesh, preventing water from pooling in the bottom of the pocket.
While it may be tempting to leave your net in the direct tropical sun to speed up the drying process, doing so can cause severe, irreversible damage. Ultraviolet radiation from the sun breaks down the molecular bonds in synthetic polymers like nylon, polyester, and monofilament. Over time, UV exposure makes the fibers brittle, faded, and prone to sudden snapping under load. Always choose a shaded, breezy location that offers plenty of indirect light and natural wind to dry the net safely.
Before moving your net to storage, verify that it is completely dry to the touch. Feel the entire net, paying extra attention to the thickest sections, such as the knots, the heavy lead lines, the float lines, and the fabric sleeve that attaches the mesh to the metal frame. These dense areas retain moisture long after the thin mesh strands have dried. Storing a net that is even slightly damp in a closed space will inevitably lead to mold growth, rot, and foul odors that are incredibly difficult to remove.
If you must dry your net in a confined space, such as a garage, utility room, or basement, you will need to take extra precautions to prevent damp spots. Set up a portable electric fan to keep the air circulating around the net. Periodically rotate or adjust the position of the net to ensure that folds, creases, and overlapping layers receive adequate airflow.
Inspecting for Wear and Performing Minor Repairs
Once your fishing net is completely dry, take a few minutes to conduct a thorough physical inspection. Lay the net flat on a clean, smooth surface or hang it up where you can examine it under good lighting. Run your hands gently along the mesh, feeling for any rough spots, fraying, or weakened areas. Inspect the lead lines, float lines, and the stitching around the hoop frame to ensure everything is secure and intact.
Addressing minor wear immediately prevents small issues from turning into catastrophic failures on the water. Use a pair of sharp scissors to carefully trim any loose, frayed threads to prevent them from snagging and unraveling further during your next trip. If you discover a small hole or a broken strand, you can perform a simple DIY repair using matching nylon thread, monofilament line, or specialized net mending twine. Tie off the broken ends securely using a double overhand knot or a sheet bend knot to restore the structural integrity of the mesh cell.
However, you must recognize when the damage is too severe for a simple home fix. If you find large tears spanning multiple mesh cells, widespread dry rot where the fibers feel brittle and dusty, or a cracked and warped frame, DIY repairs are no longer safe. Attempting to mend extensive damage can compromise the net’s weight capacity, leading to a broken net and a lost catch when landing a heavy fish. In these situations, it is best to seek professional mending services or replace the net entirely.
Best Practices for Storing Clean Fishing Nets
Proper storage keeps your clean, dry fishing net in peak condition and prevents accidental damage between fishing trips. Fold or coil the net loosely, following its natural drape. Avoid folding it too tightly, twisting the mesh, or forcing it into cramped spaces, as this can create permanent creases, weaken the fibers at the fold points, and warp rubberized coatings.
Store the folded net in a breathable container, such as a mesh gear bag or a ventilated plastic bin. Keep the storage container in a cool, dry, and dark location away from direct sunlight, sharp tools, heavy outdoor gear, and chemical fumes like gasoline or oil. Avoid storing your net in unventilated metal sheds or car trunks, where tropical heat can build up to extreme temperatures and degrade synthetic materials.
Finally, ensure your storage area is secure against pests. Mice, rats, and insects are attracted to the organic scents that may linger on fishing gear, and they can easily chew through nylon or monofilament mesh to gather nesting material. Keep your storage space clean, dry, and elevated off the ground. Hanging your bagged net from a wall hook is an excellent way to keep it out of reach of rodents and crawling pests.
Frequently Asked Questions (FAQ)
Can I use a washing machine to clean my fishing net?
No, you should never clean a fishing net in a washing machine. The aggressive agitation, spinning cycles, and tumbling action of a washing machine can easily tangle, stretch, or tear delicate mesh fibers. Furthermore, the heavy metal frames, handles, or weighted lead lines of the net can scratch the machine’s drum, damage the agitator, or throw the appliance out of balance. Hand-washing in a bucket or tub is the only safe way to clean your net without risking damage to your gear or your home appliances.
How often should I wash my fishing net if I only fish in freshwater?
Even if you only fish in freshwater lakes and rivers, you should still rinse your fishing net with clean fresh water after every single outing. Freshwater environments contain algae, mud, organic microbes, and fish slime that can cause foul odors and rot if left to dry on the mesh. While you do not need to use soap after every trip, you should perform a deep soap wash periodically—or whenever you notice visible dirt buildup, staining, or a persistent swampy smell—to keep the fibers supple and clean.
Community discussion
Share your experience or ask a question. Comments are reviewed before publication.