
Filling a heavy bag with sand requires a systematic approach to prevent the filling from settling into a rock-hard mass at the bottom. By using the “bag-within-a-bag” method, you isolate the sand in secure inner liners, ensuring the bag retains its shape and provides consistent resistance. Setting up the bag at home also demands careful structural evaluation to handle the dynamic forces of your strikes, especially in residential spaces where ceiling and wall compositions vary.
In humid tropical environments like the Philippines, moisture control is critical. Damp sand can clump, mold, and rapidly degrade the inner lining or the outer shell of your heavy bag. Ensuring all materials are completely dry and using moisture-resistant barriers will protect your investment and your hands.
Before starting, understand your training needs and physical limits. A bag that is too heavy or hard can lead to joint strain or wrist hyperextension. Matching the final weight of your bag to your body weight—typically aiming for about half of your body weight—is a safe starting point for most home practitioners.
Products mentioned in this guide
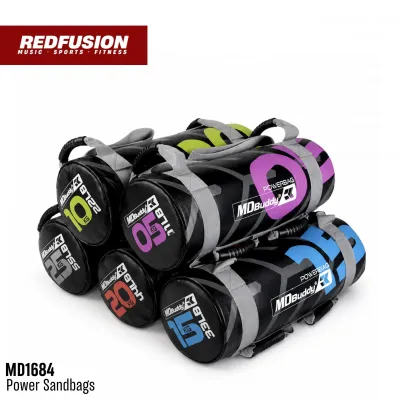
Prices are valid at publication and may change. Please refer to the product page for the latest price.
Tools and Materials Needed for Filling
To begin, you need heavy-duty inner liners. Thick contractor bags (at least 3 mils thick) or dedicated heavy-bag bladder inserts work best. These prevent sand from leaking through the outer shell’s seams or zippers. Using multiple layers of these bags provides an extra layer of security against high-impact strikes.
The choice of sand is equally important. Opt for washed and dried play sand or masonry sand, which you can find at local hardware stores. Avoid raw construction sand or beach sand, as they often contain moisture, salt, and sharp debris that can puncture the liner or accelerate mold growth in humid climates. If the sand feels even slightly damp, spread it out on a clean tarp under the sun to dry completely before filling.
Gather a tamping tool (such as a clean wooden dowel or a piece of 2×4 lumber), a reliable measuring scale to track the total weight, a wide-mouth funnel, and a protective dust mask. The dust mask is crucial for safety, as pouring dry sand releases fine silica dust that can irritate your respiratory system. You may also want heavy-duty duct tape to seal the inner bags securely.
Step-by-Step Guide to Filling a Sand Heavy Bag
Filling a heavy bag is a physical process that requires patience and a clean workspace. Plan to complete this task in a well-ventilated area, such as a garage, carport, or outdoor patio, to keep dust out of your main living areas. Having an assistant can make the process much easier, especially when holding the bag upright or securing the liners.

Protect your flooring by laying down a heavy tarp or thick cardboard. This is especially important if you are working on tiled or polished concrete floors common in local homes, as spilled sand can easily scratch these surfaces. Keep a broom and dustpan nearby to clean up any spills immediately, preventing slipping hazards.
Preparing the Inner Liner (Bag-within-a-Bag Method)
Open your empty heavy bag shell and lay it flat on your protected work surface. Inspect the interior of the shell for any loose threads, exposed metal rivets, or rough seams that could potentially puncture your inner liners. If you find any sharp points, cover them with a layer of heavy-duty duct tape.
Insert the first heavy-duty contractor bag or liner inside the shell, ensuring it reaches all the way to the bottom corners without twisting or bunching. Use your hands to smooth out the liner against the inner walls of the shell. If your heavy bag has internal straps or a central alignment ring, secure the liner to these points to keep it centered.
Before adding any sand, inspect the liner thoroughly for punctures, thin spots, or weak seams. If you find any defects, double-bag the liner by placing a second contractor bag inside the first one. This “bag-within-a-bag” method creates a redundant barrier that prevents sand from migrating into the outer shell’s zipper teeth or stitching, which can cause structural failure during training.
Layering and Compacting the Sand
Do not dump all the sand into the bag at once. This creates massive air pockets and causes the bottom of the bag to bulge excessively, putting immense strain on the lower seams. It also leads to uneven density, making some parts of the bag feel like concrete while others remain completely hollow.
Instead, add the sand in small, manageable layers of about 5 to 10 centimeters at a time. Use your funnel to guide the sand directly into the center of the inner liner. If you do not have a funnel, you can cut the top off a plastic bottle to create a makeshift guide.
After each layer, use your tamping tool to gently compress the sand toward the outer edges. Avoid pounding the sand with extreme force; the goal is to eliminate voids and ensure a uniform density throughout the bag’s diameter. Pay special attention to the bottom corners, as these areas are highly prone to leaving empty pockets.
Stop periodically to lift the bag slightly, check its overall shape, and feel the outer shell tension. The bag should feel firm but resilient, with no lumpy or hollow spots along its length. Once you reach the desired weight or height, twist the top of the inner liner tightly, fold it over, and seal it completely with multiple wraps of duct tape.
Preventing Sand Settling and Hardening
Over time, gravity and repeated impacts will cause sand to migrate downward, turning the bottom of your heavy bag into a solid, concrete-like mass that can injure your hands and wrists. To prevent this, consider using a core insert. This is a highly recommended technique for home gyms where professional maintenance is less frequent.
A central core made of a thick PVC pipe wrapped in closed-cell foam or a dense foam cylinder provides structural support. You fill the space “around” this core with sand or a sand-and-rag mixture, keeping the center stable and the outer striking surface cushioned. This setup mimics the construction of professional-grade heavy bags.
Avoid over-compacting the sand at the very base of the bag during the initial fill. The natural weight of the upper layers will compress the bottom over time, so leaving the base slightly less packed helps mitigate extreme hardening. You can also place a thick layer of compressed rags or foam at the very bottom of the bag before starting the sand layers to act as a shock absorber.
Establish a maintenance schedule to check your bag’s density. In high-humidity regions, the sand can absorb ambient moisture and pack down faster, requiring you to roll, massage, or even temporarily unhang and invert the bag to redistribute the contents. Checking the bag every few months ensures a consistent striking surface and protects your joints from unexpected hard spots.
Safe Setup and Mounting in a Home Gym
Hanging a heavy bag is not just about supporting its static weight (e.g., 30 to 50 kilograms). When you strike the bag, the swinging motion generates dynamic forces that can easily double or triple the load on your mounting point. Failing to account for these dynamic forces can result in severe damage to your home’s ceiling or walls.
Ensure you have at least 1.5 to 2 meters of clear space in all directions around the bag. This clearance prevents the bag from swinging into walls, furniture, or glass windows during intense training sessions. It also allows you to move around the bag naturally, practicing footwork and angles just as you would in a professional gym.
Evaluating Ceiling and Structural Support
Before drilling any holes, identify the structural composition of your ceiling. In many modern homes, ceilings are made of plasterboard or drywall suspended from light metal frames, which cannot support a heavy bag. Attempting to hang a bag from these materials will inevitably lead to a collapsed ceiling.
Look for solid wooden ceiling joists or, in many concrete-built homes in the Philippines, solid concrete beams. If mounting to wood, always use a stud finder to locate the exact center of the joist and secure the mount with heavy-duty lag bolts. Ensure the bolts penetrate at least 5 centimeters into the solid wood.
For concrete ceilings or beams, use high-quality steel expansion bolts (anchor bolts) rated for dynamic loads. Always check the weight rating of your mounting hardware, chains, and swivels to ensure they exceed the total filled weight of your bag. Budgeting a few hundred ₱ for high-quality, certified hardware is a small price to pay for safety.
If you notice any cracking in the plaster, excessive ceiling vibration, or if you are unsure of your home’s structural integrity, stop immediately. Consult a qualified local contractor or structural engineer to install a dedicated support beam. Equipment cannot replace professional judgment when it comes to structural safety.
Using Freestanding Stands and Floor Anchors
If ceiling mounting is not permitted by your landlord, or if your ceiling structure is unverified, a heavy-duty freestanding bag stand is an excellent alternative. These stands eliminate the need for drilling and can be placed in garages, patios, or spare rooms.
Select a stand with a wide, stable base designed specifically for dynamic boxing loads. To prevent the stand from sliding or tipping over during hard strikes, you must weigh down the base anchors. Most stands come with built-in pegs designed to hold weight plates or specialized sandbags.
Use heavy sandbags or standard weight plates placed on the stand’s peg anchors. A good rule of thumb is to add base weight equal to or greater than the weight of the heavy bag itself. Ensure the stand’s footprint fits comfortably within your designated training area without blocking pathways, and check that the frame does not flex excessively during use.
Testing and Adjusting Your Filled Bag
Once your bag is filled and mounted, perform a series of light strikes using hand wraps and boxing gloves. Do not hit a newly filled bag with bare hands, as the initial density can be deceptive and cause immediate injury to your knuckles or wrists.
Feel for any hard spots, hollow areas, or shifting sand. If you hear sand shifting excessively or notice the bag sagging, you may need to add more filler or adjust the compaction of the upper layers. A well-filled bag should have a consistent, firm feel from top to bottom.
Inspect all mounting hardware, chains, and swivels after your first few workouts. Look for signs of metal fatigue, loosening bolts, or unusual noise. Tighten or replace components as necessary to ensure long-term safety, and consider adding a heavy bag spring to absorb vibrations and reduce noise transmission through your home’s structure.
Frequently Asked Questions (FAQ)
Can I mix sand with other materials to soften the bag?
Mixing dry materials of different densities, such as sand and fabric scraps, often leads to separation over time. The heavier sand particles will inevitably sift through the gaps and settle at the bottom, while the lighter fabric rises to the top, resulting in an extremely hard base and a hollow upper section.
To adjust the surface hardness safely, consider wrapping the exterior of the bag with a dedicated heavy bag gel wrap or a layer of closed-cell foam before putting on the outer cover. Always check the manufacturer’s guidelines before altering the internal fill composition, as some bags are designed only for specific materials and altering them may void the warranty.
How do I fix a heavy bag that has already settled at the bottom?
If your bag has turned rock-hard at the bottom, unhang it and lay it flat on a clean floor. You can attempt to break up the compacted sand by rolling the bag back and forth, or gently massaging the hard areas with your feet or a rubber mallet, taking care not to puncture the outer shell.
If the sand remains solidly compacted, you will need to unzip the bag, remove the inner liners, and completely empty the sand. This is also the perfect time to inspect the inner liners for any tears or moisture damage.
If you find any dampness or mold inside the liner, discard the affected sand and liner immediately. Replace them with fresh, dry materials to prevent structural damage to the outer heavy bag shell and to maintain a safe, hygienic training environment in your home.
Community discussion
Share your experience or ask a question. Comments are reviewed before publication.