
Installing a heavy punching bag wall mount transforms a spare room, garage, or outdoor patio into a dedicated training space. However, hanging a heavy, swinging object that weighs anywhere from 30 to over 70 kilograms requires more than just driving a few screws into the nearest wall. The constant vibration and dynamic impact of your punches exert immense force on the mounting bracket and the wall behind it. To prevent structural damage to your home and avoid serious injury, you must approach the installation process with a clear plan, the right tools, and a strict focus on structural safety.
In tropical environments like the Philippines, home construction materials vary widely, ranging from solid poured concrete to hollow concrete blocks and lightweight partition walls. Understanding how to securely anchor your bracket to these specific materials is the foundation of a safe home gym. By carefully assessing your wall structure, selecting the correct heavy-duty hardware, and following a methodical step-by-step installation process, you can ensure your punching bag remains firmly anchored through your most intense training sessions.
Assessing Your Wall Structure and Hardware Requirements
Before purchasing a punching bag wall mount, you must determine whether your chosen wall can handle both the static weight of the bag and the dynamic load generated during a workout. A heavy bag does not simply hang; when struck, it swings, creating a leverage effect that multiplies the force exerted on the wall bracket.
Products mentioned in this guide
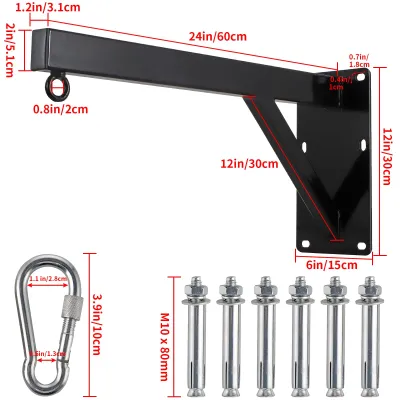
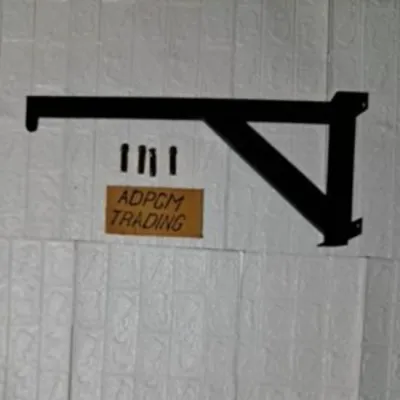
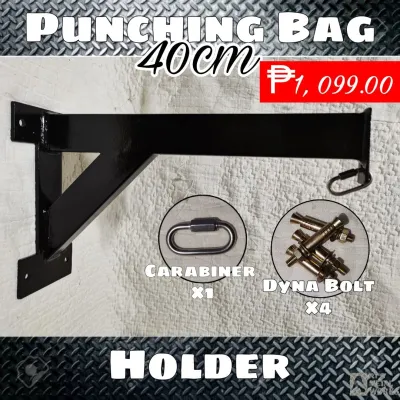
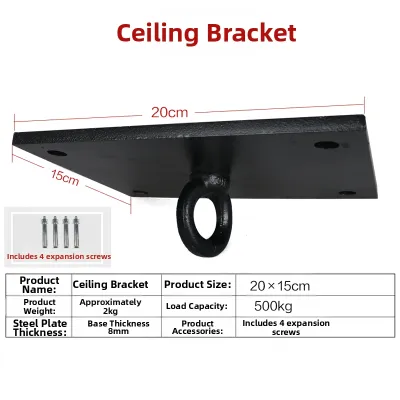
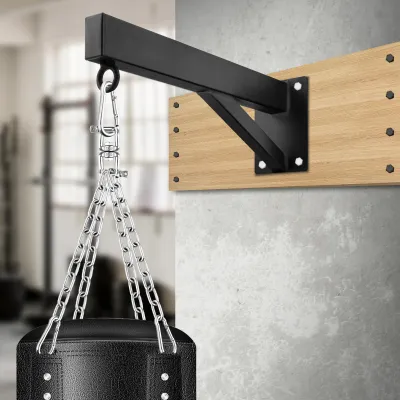
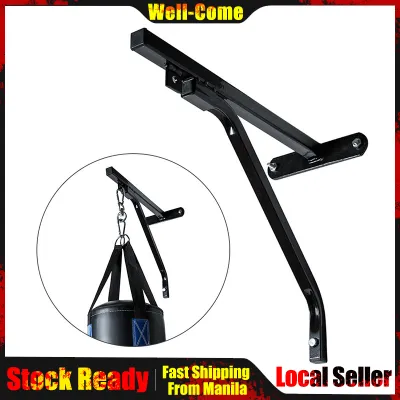
Prices are valid at publication and may change. Please refer to the product page for the latest price.
Load-bearing walls are the only suitable surfaces for direct wall mounting. In many residential structures, these are made of solid poured concrete, solid brick, or reinforced concrete columns. In the Philippines, concrete hollow blocks are widely used for both exterior and interior walls. While these walls appear sturdy, they often have hollow cores and thin outer shells. Mounting a heavy bag directly onto a hollow block without proper reinforcement can cause the blocks to crack or the anchors to pull out under stress. If you are mounting to a concrete hollow block wall, you must locate the solid concrete columns or use specialized sleeve anchors designed for hollow masonry, though anchoring into solid concrete or structural wood studs remains the safest approach.
Non-load-bearing partitions, such as standard drywall, plasterboard, or thin wooden plywood panels, must never be used as the primary support for a heavy bag wall mount. These materials lack the structural density to hold heavy lag bolts under dynamic tension. If you attempt to mount a bracket directly to drywall, the vibration will quickly enlarge the bolt holes, leading to a catastrophic failure where the bracket rips out of the wall, taking a large chunk of drywall with it.
Always consult the wall mount manufacturer’s specifications to verify the maximum weight capacity and the recommended anchor types. Most high-quality mounts require heavy-duty sleeve anchors for concrete or thick lag bolts for wooden studs. Establish a strict stop condition: if you cannot verify the composition of your wall, if the material feels crumbly or fragile, or if you suspect the wall cannot support the combined weight and dynamic force of your training, do not proceed with the installation. In these cases, consult a structural professional or builder to assess the wall or consider a free-standing bag stand instead.
Essential Tools and Materials for the Job
Having the correct tools on hand prevents installation errors and ensures the bracket is mounted level and secure. Using makeshift tools or incorrect drill bits can damage your wall and compromise the holding power of your fasteners.

Gather the following standard tools before starting:
- A reliable stud finder (if mounting to wood studs behind plaster or drywall).
- A high-torque power drill (a hammer drill is highly recommended for concrete or masonry walls).
- Masonry drill bits or wood drill bits that precisely match the diameter of your anchors or lag bolts.
- A bubble level to ensure the bracket is perfectly vertical.
- A tape measure and a pencil for precise marking.
- A socket wrench or spanner to tighten the heavy-duty bolts.
Do not use generic screws or plastic wall plugs. You must use the exact heavy-duty sleeve anchors, wedge anchors, or lag bolts specified by the wall mount manufacturer. If you are mounting to solid concrete, high-quality steel sleeve anchors are essential. For wooden studs, heavy-duty steel lag bolts with a minimum depth specified by the manufacturer are required.
Safety must be a priority during the installation process. Always wear safety glasses to protect your eyes from flying concrete dust or wood splinters. A dust mask is also essential, especially when drilling into concrete or masonry in enclosed indoor spaces, as inhaling fine silica dust can pose health risks.
Step-by-Step Wall Mount Installation
Installing the bracket requires a systematic approach to ensure the mount is level, the holes are drilled to the correct depth, and the fasteners are secured with maximum grip. Rushing through the measurements or drilling phase can result in a crooked mount or weakened anchor points that will fail over time. Follow this structured workflow to mount your bracket and hang your bag safely.
Measuring, Marking, and Drilling
Begin by selecting the exact location for your mount. If you are installing on a wood-studded wall, use a stud finder to locate the center of the stud. Marking only the edge of a stud can cause the lag bolt to splinter the wood, severely reducing its load capacity. For concrete or masonry walls, ensure the area is free of visible cracks, moisture damage, or electrical conduits.
Hold the wall mount bracket against the wall at your desired height. Place a bubble level against the side of the bracket to ensure it is perfectly plumb. While holding the bracket steady, use a pencil to mark the exact center of each mounting hole onto the wall. Double-check your marks by removing the bracket and measuring the distance between the marks to ensure they align perfectly with the holes on the bracket.
When drilling, select a drill bit that matches the diameter specified by the anchor manufacturer. For concrete, set your hammer drill to the hammer setting and hold the drill perpendicular to the wall. Drilling at an angle will prevent the anchor from seating flat against the bracket, reducing its holding power. Drill slightly deeper than the length of the anchor to allow room for any remaining dust. Once the hole is drilled, use a hand pump, vacuum, or a small brush to clear all dust and debris from the hole. Leftover dust acts as a lubricant, which can cause sleeve anchors to slip when tension is applied.
Securing the Bracket and Hanging the Bag
With the holes prepared, align the bracket with the drilled holes. If you are mounting on concrete, insert the sleeve anchors through the bracket holes and tap them gently into the wall using a hammer until the bolt heads are flush with the bracket. If mounting on wood studs, align the bracket and insert the lag bolts with washers.
Use a socket wrench to tighten the bolts. Tighten them in a cross-pattern to distribute the pressure evenly across the bracket. Tighten the bolts firmly, but avoid over-tightening. Over-tightening lag bolts in wood can strip the threads in the stud, while over-tightening concrete anchors can crack the surrounding masonry or snap the bolt head. Ensure the bracket is completely flush against the wall with zero play or movement when you pull on it.
Once the bracket is securely fastened, prepare to hang the punching bag. Inspect the bag’s chains, swivel, and straps to ensure they are in good condition. Attach the chains to the heavy-duty carabiner or D-shackle provided with your wall mount. Ensure all locking gates on the carabiners are fully closed and threaded shut. Because heavy bags are awkward and difficult to lift alone, always have a second person assist you. One person should lift and support the weight of the bag while the other guides the chain onto the mount’s hanging ring and secures the safety locks. This prevents muscle strain and eliminates the risk of dropping the bag on your feet or damaging your floor.
Load Testing and Safety Verification
Before throwing your first full-power combination, you must perform a rigorous safety check to verify the structural integrity of your installation. Dynamic forces from punches can expose hidden weaknesses in the mount or the wall that static weight alone might not reveal.
Begin with a static load test. Gently pull down on the hanging chain or the bag itself, gradually applying your body weight. Listen closely for any creaking, cracking, or popping sounds coming from the wall or the bracket. Next, give the bag a gentle push to initiate a slow swing. Observe the bracket where it meets the wall; there should be absolutely no movement, flexing, or separation between the metal bracket and the wall surface.
If the static and swing tests are successful, proceed to light striking. Put on your hand wraps and gloves, and deliver a series of light jabs and straight punches. Watch the bolt heads and the surrounding wall area. Look for fine concrete dust falling from the holes, which indicates that the anchors are shifting or grinding against the masonry.
Be alert for clear signs of installation failure:
- Visible cracks forming in the concrete or plaster around the mounting bolts.
- The bracket pulling away from the wall, even by a millimeter, when the bag swings.
- Rattling or loose bolts that can be turned by hand.
- Excessive vibration traveling through the wall into adjacent rooms.
If you observe any of these warning signs, stop training immediately. Remove the heavy bag from the mount to relieve the tension on the wall. Do not attempt to use the bag until you have reassessed the wall structure, checked the hardware specifications, or consulted a professional builder to reinforce the mounting area.
Optimizing Height and Clearance for Effective Training
A secure mount is only half the equation; the bag must also be positioned correctly to facilitate proper boxing technique and prevent injury. Hanging the bag too high or too low can force you to punch at awkward angles, putting unnecessary strain on your wrists, shoulders, and lower back.
As a general rule, the target area of the punching bag should align with your natural stance. For a standard heavy bag, the top third of the bag should be level with your forehead or eye level. This setup simulates the head height of an opponent and allows you to practice both head and body shots realistically. If the bag hangs too low, adjust the height by adding or removing chain links, or use a heavy-duty nylon strap adjuster designed for boxing equipment.
Clearance around the bag is equally critical. A heavy bag requires a clear swing radius of at least 1 to 1.5 meters in all directions. If the bag is mounted too close to a wall, furniture, or glass windows, a powerful kick or hook will send the bag crashing into these objects, causing property damage or rebounding unpredictably and injuring you. Ensure there are no low-hanging light fixtures or ceiling fans within the swing path.
Finally, consider the flooring beneath your training area. Intense boxing workouts generate significant sweat, which can make tile or polished wood floors dangerously slick. Placing high-density rubber floor mats under and around the bag provides essential slip resistance for your footwork. Additionally, these mats protect your home’s flooring from scuffs, impact scratches, and sweat drops, while helping to dampen some of the vibrations transmitted through the floor during your workouts.
Frequently Asked Questions (FAQ)
Can I install a punching bag wall mount on drywall?
Standard drywall, plasterboard, or thin wood paneling cannot support the heavy, dynamic load of a swinging punching bag. Attempting to mount a bracket directly onto drywall will result in the fasteners pulling out and damaging the wall. If your training area only has drywall partitions, you must anchor the mounting bracket directly into the structural wooden studs behind the drywall, or mount the bracket to a heavy-duty wooden backing board (such as a 2×12 timber) that is securely fastened across multiple studs. Always verify that the studs and the overall wall frame are rated to handle the weight and vibration of your specific bag.
How often should I check the wall mount bolts?
The constant vibration and impact from boxing workouts will naturally cause hardware to loosen over time. Establish a routine maintenance schedule to inspect your wall mount at least once a month, or more frequently if you train daily. Visually inspect the bracket for any signs of shifting, and use a wrench to check that all bolts remain tight. In humid tropical climates, check the metal bracket, chains, and bolts for signs of rust or corrosion. Replace any rusted, bent, or deformed hardware immediately with manufacturer-approved replacements to maintain a safe training environment.
Community discussion
Share your experience or ask a question. Comments are reviewed before publication.