
Finding a hydration bladder that fits seamlessly inside your running vest requires more than just matching the volume label. Because running vests are designed to minimize bounce and chafing, their hydration compartments have strict dimensional limits and specific routing channels. When running in tropical climates like the Philippines, where high heat and humidity accelerate sweat loss, carrying adequate water is a safety priority. However, a poorly fitted hydro pack can quickly turn a long training run into a painful experience of chafing, bouncing, and restricted breathing. Selecting the right hydration system requires a clear understanding of your vest’s physical dimensions, bladder shapes, and hose routing paths before making a purchase.
Assessing Your Running Vest's Hydration Compartment
To get an accurate measurement of your vest’s hydration capacity, lay the garment completely flat on a clean surface. Use a flexible sewing tape measure to measure the vertical distance from the top attachment point—usually a small fabric loop, a plastic clip, or a hook-and-loop strap—down to the lowest seam of the rear pocket. This vertical measurement represents your absolute height limit. Next, measure the width of the compartment at three distinct points: the top opening, the middle section, and the bottom base. Running vests often taper significantly toward the waist to match the natural shape of your torso, meaning a bladder that fits at the top might pinch or bunch at the bottom.
Understanding the difference between internal back-panel sleeves and external stretch-mesh pockets is equally critical. Internal sleeves are typically positioned closest to your spine, often lined with a water-resistant or sweat-proof barrier to prevent body heat from warming your water and to protect your back from condensation. These compartments have rigid boundaries; they do not stretch outward easily because doing so would press directly into your back, causing discomfort and restricting your breathing. On the other hand, external stretch-mesh pockets expand outward away from your body. While they offer more flexibility in terms of bladder thickness, overloading an external stretch pocket can shift the center of gravity backward, leading to excessive vertical bounce and premature wear on the mesh seams during high-intensity runs.
Products mentioned in this guide
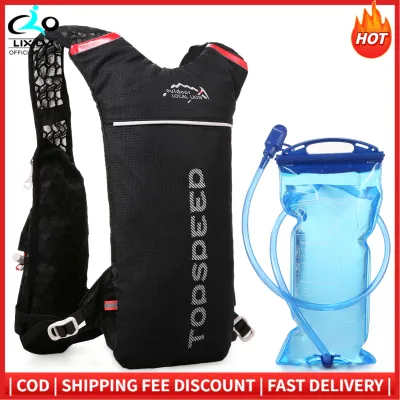
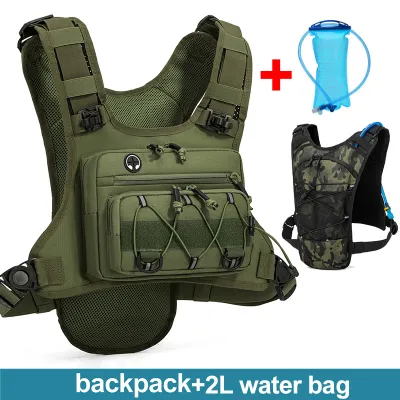
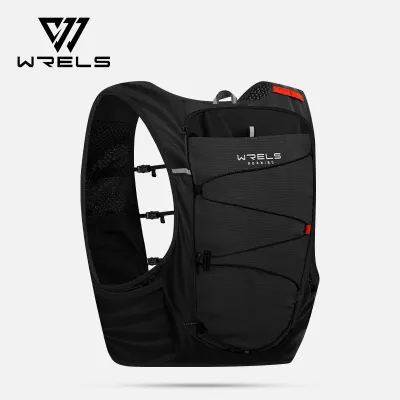
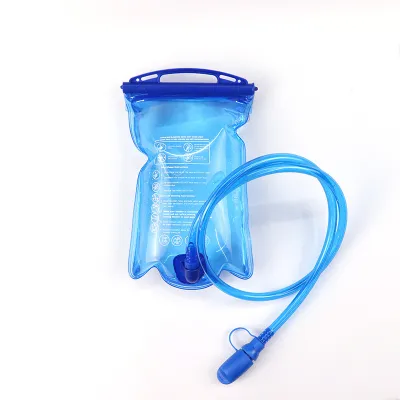
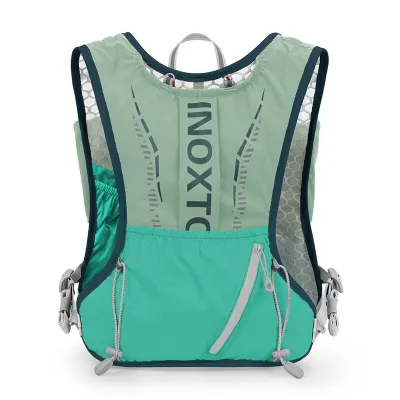
Prices are valid at publication and may change. Please refer to the product page for the latest price.
You must also inspect the interior of the hydration compartment for structural elements that might restrict expansion. Run your hand inside to check for zipper tracks, internal seams, utility pockets, or integrated foam panels. Some advanced running vests feature built-in insulation sleeves or vertical dividers designed to keep soft flasks separated. These internal features reduce the actual usable volume of the compartment. When a hydration bladder is filled to capacity, it naturally transforms from a flat sheet into a cylindrical shape, pulling the sides inward and reducing its overall height. If your vest’s compartment lacks depth or has restrictive internal seams, a fully inflated bladder will bulge outward, compressing the main gear compartment and making it nearly impossible to pack your windbreaker, trail snacks, or emergency first-aid kit.
Comparing Hydro Pack Shapes and Capacity Profiles
Hydration bladders are not engineered equally, and their physical profiles vary dramatically across different brands and designs. The two primary shapes you will encounter are rectangular and tapered profiles. Rectangular bladders maintain a consistent width from top to bottom, making them ideal for wide-cut running vests or larger-capacity fastpacking packs. However, if you place a wide rectangular bladder into a modern, race-fit vest with a narrow, V-shaped back panel, the corners of the bladder will fold over themselves, creating pressure points against your shoulder blades and causing uneven water distribution. Tapered bladders, which narrow toward the bottom, are specifically designed to mimic the contour of a runner’s back, allowing the vest to wrap snugly around your ribcage without bulk.

Another critical design feature to look for is an internal baffle. A baffle is a central plastic wall or strip inside the bladder that joins the front and back faces together. This structural element prevents the water from pooling at the bottom and stops the bladder from ballooning outward when filled. Instead of expanding into a round, sausage-like shape that rolls against your spine, a baffled bladder maintains a flat, low-profile shape. This flat profile ensures that the weight of the water remains distributed evenly across your upper back, minimizing lateral shifting and vertical bounce as you navigate technical trail descents. If your running vest has a very slim profile, choosing a baffled bladder is practically mandatory to preserve the vest’s intended ergonomic fit.
When shopping for a hydro pack, you must look past the nominal volume rating—such as 1 liter, 1.5 liters, or 2 liters—and focus entirely on the manufacturer’s physical dimension specifications. A 1.5-liter bladder from a brand specializing in hiking gear might be short and wide, while a 1.5-liter bladder designed specifically for running might be exceptionally long and narrow. If you rely solely on the volume label, you risk purchasing a bladder that is physically too wide to slide into your vest’s sleeve, or so tall that it protrudes from the top, interfering with your neck movement. Always compare the measured height and width of your vest’s compartment against the fully inflated dimensions listed on the bladder’s spec sheet, keeping in mind that a filled bladder will shrink slightly in height and width as it expands in depth.
Verifying Hose Routing and Bite Valve Clearance
A perfectly fitting bladder is useless if you cannot route the drinking tube comfortably from the back compartment to your mouth. Running vests feature highly specialized hose routing systems, and you must identify how your specific vest is designed to manage the tube. Some vests utilize over-the-shoulder routing, where the hose exits a central port at the top of the back panel and runs down either the left or right shoulder strap through elastic guide loops. Other designs favor under-the-arm routing, where the hose exits from the bottom of the back compartment and wraps around your ribcage. Under-the-arm routing keeps the tube out of your field of vision and reduces bounce, but it requires a longer hose and a bladder with a bottom-exiting hose connection that does not kink when bent at a sharp angle.
The diameter and flexibility of the hydration tube must match your vest’s routing channels. Standard hydration tubes typically come in outer diameters of one-quarter inch or five-sixteenths inch. While this difference seems minuscule, a thicker, insulated hose designed for cold-weather hiking may not slide through the narrow elastic loops or fabric tunnels of a lightweight running vest. Additionally, evaluate the length of the hose. A hose that is too long will loop outward, bouncing rhythmically against your chest or chin with every stride, which quickly becomes a major distraction on long runs. Conversely, a hose that is too short will pull tightly against your shoulder, making it difficult to reach the bite valve without awkwardly bending your neck. Many high-quality polyurethane hoses can be customized by carefully cutting the tube to your preferred length and reattaching the connector or bite valve, but you must verify that the hose is detachable before attempting this modification.
Finally, examine the bite valve and its compatibility with your vest’s front harness. Most running vests include dedicated features to secure the bite valve when it is not in use, such as magnetic sternum clips, elastic loops, or small mesh pockets on the shoulder straps. The bite valve must fit securely into these retention systems to prevent it from swinging freely. If you plan to run on dusty trails, sandy paths, or in muddy conditions common during the rainy season in tropical climates, using a bite valve cover is highly recommended to keep the mouthpiece clean. However, a protective cap adds significant bulk to the end of the hose. You must ensure that the covered bite valve can still pass through the vest’s internal routing ports, or choose a system where the bite valve can be easily unplugged from the hose during the initial setup process.
Your Pre-Purchase Compatibility Checklist
Before finalizing your purchase of a new hydro pack for your vest, executing a systematic compatibility check will save you from the hassle of dealing with ill-fitting gear. Start by conducting a thorough digital cross-reference. Gather the exact physical dimensions of your running vest’s hydration sleeve—which you measured earlier—and compare them directly with the official specifications of the bladder you intend to buy. Do not assume that because a bladder is marketed as “universal” it will fit your specific vest model. Pay close attention to the connection point at the bottom of the bladder; some models feature quick-disconnect valves that protrude outward, adding extra width or height at the base that might not be accounted for in the standard dimension listings.
Once you have selected a promising model, perform a physical dry-fit test at home before removing any retail tags or filling the bladder with water. Slide the empty bladder into your vest’s compartment to check how the attachment systems align. Most running vests rely on a small loop or strap at the top of the compartment to suspend the bladder, preventing it from sagging to the bottom as it empties. Verify if your vest uses a hook-and-loop strap, a plastic toggle, or a clip, and ensure the bladder’s top handle or hanging slot is compatible with this system. A mismatched hanger system will allow the bladder to bunch up at the bottom of your pack, shifting the weight distribution and causing severe lower-back chafing during your run.
Next, simulate a realistic load by filling the bladder with clean water and sealing it tightly. Insert the filled bladder into the vest and put the vest on, adjusting all the front sternum straps to your standard running fit. Take a few test strides, jump up and down, and twist your torso to evaluate how the weight feels against your back. Check if the filled bladder creates a rounded bulge that presses uncomfortably into your spine or restricts your chest expansion when you breathe deeply. Ensure that the hose routes smoothly through the shoulder straps without kinking, and that the bite valve is easily accessible and secure. If the vest feels excessively tight, or if the bladder distorts the shape of the vest so much that your front pockets become unusable, the bladder is too thick for your gear setup.
Lastly, always verify the return and exchange policies of your chosen online marketplace or local outdoor retailer before completing your transaction. Because hydration gear is considered a personal hygiene item, many retailers have strict policies regarding returns once a bladder has been filled with water or used on a run. To protect your investment, perform your initial fit tests using clean, room-temperature water at home, keeping all packaging intact. If the physical fit is not absolutely seamless, do not hesitate to return the bladder and try a different shape or a smaller capacity. Investing the time to find a perfect match ensures your hydration system remains a silent, comfortable partner on your longest training runs.
Frequently Asked Questions (FAQ)
Can I use a standard hiking hydration bladder in a running vest?
While it is technically possible to slide a hiking hydration bladder into some larger running vests, it is generally not recommended due to significant differences in design and weight distribution. Hiking bladders are typically constructed from thicker, heavier materials and feature wide, stout profiles designed to fit inside the rigid, structured frames of large backpacking packs. Running vests, by contrast, are made of lightweight, stretchy fabrics and require highly flexible, elongated bladders that contour closely to the natural curve of your spine. Using a wide hiking bladder in a running vest often causes the bladder to bunch up, creating uncomfortable pressure points, restricting your range of motion, and causing the vest to bounce excessively as you run.
Does a 2-liter hydro pack fit inside all standard running vests?
No, a 2-liter hydro pack does not fit inside all standard running vests. While 2 liters is a common maximum capacity for larger trail running vests designed for ultra-marathons or self-supported long runs, many minimalist race vests and smaller-capacity packs (typically under 5 liters of total gear storage) are physically too short or narrow to accommodate a 2-liter bladder. Some lightweight race vests are designed exclusively for front-mounted soft flasks and do not feature a rear hydration sleeve or hose routing ports at all. Always consult your specific vest’s user manual or product specifications to determine its maximum recommended bladder capacity, and measure the sleeve dimensions directly rather than assuming a 2-liter volume will fit.
How do I prevent the hydro pack from bouncing or shifting inside the vest?
To eliminate bounce and shifting, always secure the top of the bladder to the vest’s internal hanger loop or velcro tab to keep it suspended vertically. Before sealing your filled bladder, turn it upside down and gently suck out any excess air through the drinking tube until the water reaches the bite valve; removing this air pocket prevents the water from sloshing loudly and shifting weight as you move. Additionally, route the hydration hose tightly through the designated shoulder strap loops to keep it flush against your body, and avoid overfilling the bladder beyond the natural expansion limits of your vest’s sleeve to maintain a stable, low center of gravity.
Community discussion
Share your experience or ask a question. Comments are reviewed before publication.