
Finding the perfect balance of control, comfort, and power on a mountain bike often comes down to millimeters, yet many riders struggle with a cockpit that feels either too stretched out or uncomfortably cramped. To choose the right MTB stem, you must measure your current stem’s length, rise, handlebar clamp diameter, and steerer tube diameter, and then adjust these dimensions based on your riding style, body proportions, and frame geometry to achieve your desired handling characteristics. The stem acts as the critical link between your body’s steering inputs and the front wheel, meaning even a minor adjustment can dramatically alter how your bike climbs, descends, and corners. By systematically evaluating your current setup, you can make an informed upgrade that enhances trail performance and prevents common fit-related aches.
What dimensions do you need to measure on your current MTB stem?
To establish a baseline for your new cockpit setup, you must accurately measure four key dimensions: the stem length, the rise angle, the handlebar clamp diameter, and the steerer tube clamp diameter. Guessing these measurements often leads to purchasing incompatible parts, which can delay your upgrade or compromise your safety on the trail.
Measuring Stem Length Correctly
Stem length is not measured from end to end. Instead, you must measure the distance from the center of the fork steerer tube to the center of the handlebar clamp. Place a ruler or digital caliper flat against the side of the stem, aligning the starting point with the middle of the top cap bolt and measuring to the middle of the handlebar faceplate. This measurement is typically expressed in millimeters, ranging from ultra-short 35mm enduro stems to 80mm or longer cross-country options.
Products mentioned in this guide
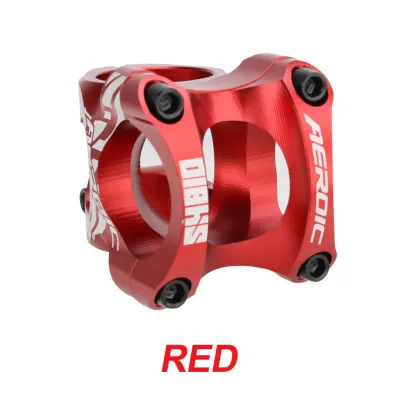
3 Lazada user ratings
🔨Durability: very good
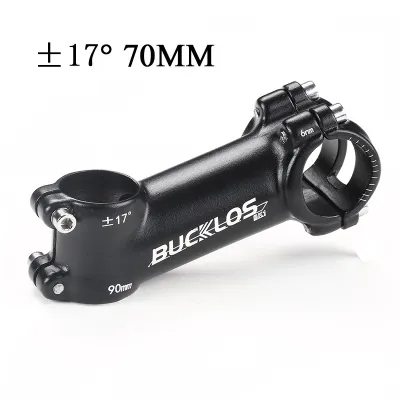
118 Lazada user ratings
Goods na pero medyo gasgas na siya second hand na pero I say na goods na siya sa price niya hnd nmn ganon ka laspag so goods nato para makat…Read full reviewShow less
Goods na pero medyo gasgas na siya second hand na pero I say na goods na siya sa price niya hnd nmn ganon ka laspag so goods nato para makatipid.
thank you seller item received na po kaso naiba -+23 order ko pero -+22 ang dumating okay nadin kesa walang dumating
thank you seller item received na po medyo may dent lang kahit maayos ang balot kumpleto naman ang bolts
thank you seller item received na po , maayos naman walang damage at walang kulang na bolt keep it up
Durable and lightweight aluminum alloy,
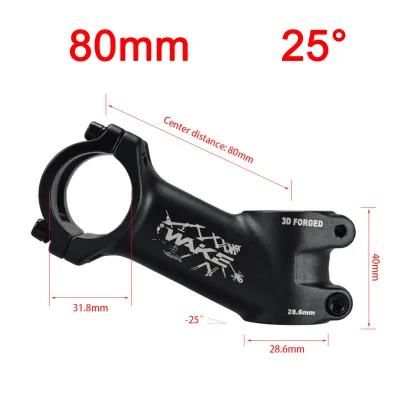
239 Lazada user ratings
Quality:excellent Appearance:superb Performance:exceptional very good quality.Will order again. 👌 Hello! Please double-check items thoroughl…Read full reviewShow less
Quality:excellent Appearance:superb Performance:exceptional very good quality.Will order again. 👌 Hello! Please double-check items thoroughly for any missing parts, defects, and/or damages to ensure the best condition and quality before ship-out. Thank you very much! 😊Excellent value for the price, Lightweight and sturdy stem, Enhanced control and stability, Sleek and stylish appearance,
Sleek and stylish appearance, Lightweight and sturdy stem, Lightweight and sturdy stem, Improved my riding experience, Improved my riding ex…Read full reviewShow less
Sleek and stylish appearance, Lightweight and sturdy stem, Lightweight and sturdy stem, Improved my riding experience, Improved my riding experience, Great design and build quality,
🔨Durability:Goods 🔌Compatibility:Goods 🛠️Ease of Installation:Goods Okay naman sya .. maganda . sana tumagal sya at mukha namang matibay .. s…Read full reviewShow less
🔨Durability:Goods 🔌Compatibility:Goods 🛠️Ease of Installation:Goods Okay naman sya .. maganda . sana tumagal sya at mukha namang matibay .. salamat po seller at kay kuya rider ..
Improved my riding experience, Easy to install and adjust, Perfect fit for my bike,
slmt seller sa tama ung order ko maganda packaging nya ,. slmt din sa rider
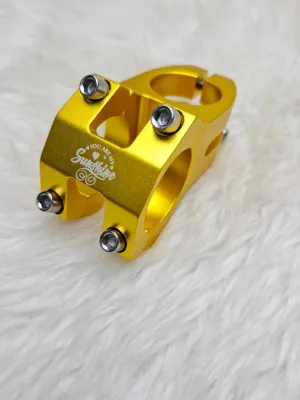
372 Lazada user ratings
🔨Durability:Durable alloy material, built to last 🔌Compatibility:Perfect fit for my mountain bike!, Highly recommended for all mountain bike…Read full reviewShow less
🔨Durability:Durable alloy material, built to last 🔌Compatibility:Perfect fit for my mountain bike!, Highly recommended for all mountain bikers!, Great design, looks stylish!, 🛠️Ease of Installation:Easy to install, hassle-free!, Excellent value for money!, ganda ngquality ng stem bilis din ng shipping naka secure din ng bubble wrap.highly recommended
Excellent value for money!, Love the color options available!, Love the color options available!, Great design, looks stylish!, Durable allo…Read full reviewShow less
Excellent value for money!, Love the color options available!, Love the color options available!, Great design, looks stylish!, Durable alloy material, built to last!, Perfect fit for my mountain bike!,
thank seller sobrang Ganda love it nakabit kona bike swakto wla Ako masabe 5star Kasin thank you din sa suki Kong rider sya lagi nag deliver…Read full reviewShow less
thank seller sobrang Ganda love it nakabit kona bike swakto wla Ako masabe 5star Kasin thank you din sa suki Kong rider sya lagi nag deliver Ng parcel ko thank Lazada Ako Ang suki mo
Fast shipping, arrived earlier than expected!, Perfect fit for my mountain bike!, Easy to install, hassle-free!, Lightweight yet sturdy!,
yes maganda bumagay sa bakie ko angas salamat selllleeerrr ssakkkaa lllaaaazzzzaaadddda
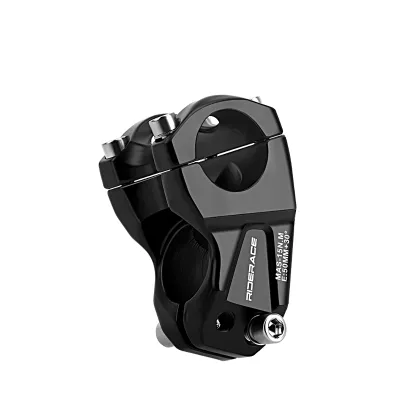
9 Lazada user ratings
It has a rugged look, with a strong build that makes it seem very durable.
It's sturdy and reliable.
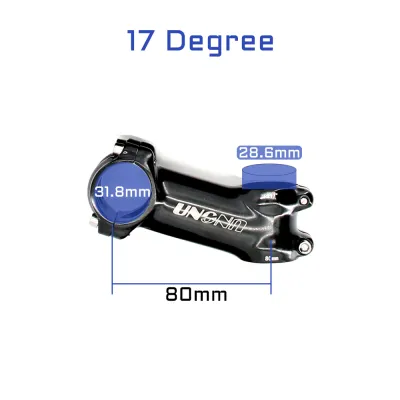
244 Lazada user ratings
Excellent value for money, Lightweight and durable, Enhances bike handling,
Fits well for my handlebar and size. I like it.
10/10 gwapo sya pre like me ay jowk lang
The item is a bit thin. Easy to install.
Ganda sakto lang haba
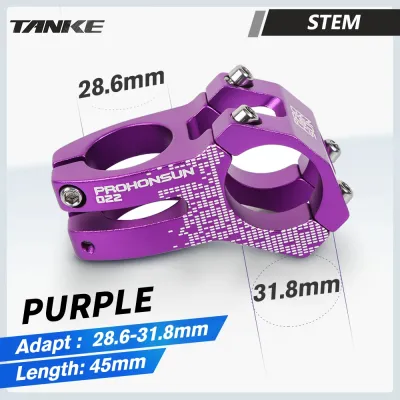
7 Lazada user ratings
sorry late review d pa kasi nbuksan.pero 5star parin kau sakin.
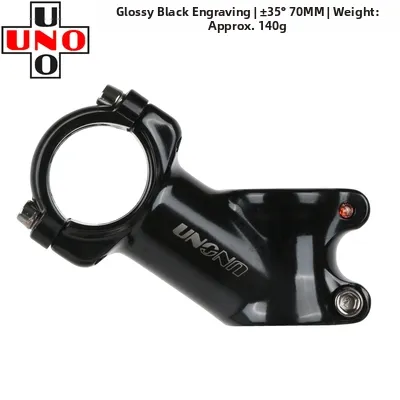
51 Lazada user ratings
🔨Durability:good 🔌Compatibility:good 🛠️Ease of Installation:all goods legit product. all goods with the shipment and bubble wrap well
🔨Durability:good 🔌Compatibility:good 🛠️Ease of Installation:all goods legit product. all goods with the shipment and bubble wrap
Thanks seller. Great item, wonderful experience. Amazing deal from an amazing seller. Thanks Lazada! More power and more deals
Prices are valid at publication and may change. Please refer to the product page for the latest price.
Identifying Stem Rise or Angle
Stem rise refers to the angle of the stem body relative to the steerer clamp, which determines your handlebar height. This angle is measured in degrees and can be positive (pointing upward to raise the bars) or negative (pointing downward to lower them). Many manufacturers print the rise angle directly on the stem body (such as +/- 6°). If the graphics have worn off, you can use a smartphone angle-finder app or a protractor placed along the center axis of the stem while the bike is on level ground to estimate the angle.
Checking Handlebar and Steerer Tube Clamp Diameters
You must verify the diameters of both clamping areas to ensure physical compatibility. The handlebar clamp diameter is the thickness of the handlebar at its center point. Modern mountain bikes typically use either 31.8mm or 35mm diameters. The steerer tube clamp diameter is the outer diameter of your fork’s steerer tube, with 1 1/8 inches (28.6mm) being the modern standard, though some older or proprietary systems use 1 1/4 inches or 1.5 inches. Use a digital caliper for these measurements, as a visual estimate can easily mistake a 31.8mm bar for a 35mm bar.
Recording the Spacer Stack Height
Before removing your current stem, measure the total height of the headset spacers located both above and below the stem body. Also, measure the stack height of the stem’s steerer clamp itself, which is usually between 35mm and 45mm. This total height must match the available length of your fork’s steerer tube. If your new stem has a taller stack height than your old one, you may need to remove a spacer; if it is shorter, you will need to add a spacer to ensure the top cap can properly preload the headset bearings.
How do stem length and rise affect your mountain bike handling and fit?
Stem length and rise directly dictate your weight distribution over the front wheel and the speed of your steering input, making them the primary tools for tuning your bike’s handling and your riding posture. Adjusting these dimensions allows you to customize how the bike responds to trail obstacles and how comfortable you remain during long hours in the saddle.

The Handling Dynamics of Shorter Stems
Shorter stems, typically ranging from 35mm to 50mm, place the handlebars closer to the steering axis of the fork. This position quickens steering response, allowing you to make rapid line corrections on technical trails. By pulling your hands back, a shorter stem shifts your center of gravity rearward, which significantly improves your confidence and stability on steep descents and makes it easier to lift the front wheel over obstacles. However, this rearward weight shift can make the front wheel feel light and prone to wandering on steep climbs if you do not actively lean forward.
The Stability and Traction of Longer Stems
Longer stems, spanning from 60mm to 90mm, stretch your torso forward and lower your upper body. This position places more of your body weight over the front tire, which increases front-wheel traction and prevents the front end from lifting during steep, technical climbs. Longer stems also slow down steering input, providing a more stable and predictable feel at high speeds on open fire roads or smooth singletrack. The trade-off is that they can make steering feel sluggish in tight switchbacks and increase the risk of pitching forward over the handlebars on steep drops.
The Biomechanical Impact of Rise
Stem rise directly influences the vertical position of your hands relative to your saddle. A positive rise raises the handlebars, creating an upright riding posture that reduces strain on your lower back, neck, and wrists. This is highly beneficial for trail riders who prioritize comfort or descend steep terrain frequently. A negative rise lowers the handlebars, creating an aggressive, aerodynamic position that optimizes power transfer and climbing efficiency, though it increases the physical load on your core and upper body.
Balancing Stem Changes with Bike Geometry
You must balance any stem modification with your bike’s overall geometry, particularly the frame reach and handlebar width. Modern mountain bikes are designed with longer frame reaches and are optimized for shorter stems. If you install a long stem on a modern frame, you may overstretch your cockpit, leading to shoulder fatigue. Additionally, wider handlebars naturally shorten your reach; if you install wider bars, you may need a slightly shorter stem to maintain the same comfortable arm extension.
How can you determine the ideal MTB stem specs for your riding style?
Finding your ideal stem specifications requires matching your physical proportions and current comfort issues with the specific handling demands of your preferred mountain biking discipline. There is no universal “best” stem size, as the perfect fit depends entirely on how your body interacts with your specific bike frame on your local trails.
Assessing Body Proportions and Fit Pain Points
Your physical proportions should guide your initial adjustments. If you have a long torso or long arms relative to your bike’s frame size, you may feel cramped, which can be resolved by a slightly longer stem. If you experience persistent lower back pain, neck stiffness, or hand numbness, these are common indicators that your handlebars are too far away or too low. In this case, choosing a shorter stem or one with a higher rise can bring the controls closer to your body, allowing a more natural, upright spine alignment.
Matching Specs to Riding Disciplines
Your primary riding discipline dictates the performance characteristics you should prioritize. For cross-country (XC) riding, where climbing speed and aerodynamic efficiency are paramount, a longer stem (60mm to 80mm) with a flat or negative rise helps maintain a powerful pedaling position. For trail, enduro, and all-mountain riding, where descending control and technical maneuverability are critical, a short stem (35mm to 50mm) with a 0° to 6° rise is the standard choice to maximize steering authority. Downhill riders utilizing dual-crown forks typically use direct-mount stems that bolt directly to the upper triple clamp, offering ultra-short lengths of 40mm to 50mm for maximum stiffness and steering precision.
Modeling Changes and Testing Adjustments
Before purchasing a new stem, you can simulate fit changes using your existing components. To test if a higher handlebar position resolves your discomfort, try moving headset spacers from above your stem to below it, which raises the cockpit without changing the stem itself. You can also rotate your handlebars slightly in the clamp to alter the rise and sweep. While online bike fit calculators and manufacturer geometry charts are excellent tools for modeling how a new stem’s length and rise will alter your bike’s effective reach and stack, these physical tests provide invaluable real-world feedback before you spend money on a replacement. Remember that equipment cannot replace proper training, skills, and trail judgment, but a correctly fitted stem ensures your bike responds predictably to your inputs.
What compatibility and safety factors must you verify before purchasing?
Before buying a new stem, you must verify that its clamp diameters precisely match your handlebar and fork steerer tube, and ensure the component is rated for your specific riding style and weight. Mountain bike cockpits are subjected to extreme leverage and impact forces on the trail, making absolute compatibility a matter of basic safety.
Matching Clamp Diameters and Avoiding Shims
You must ensure that the stem’s handlebar clamp diameter matches your handlebar’s center diameter exactly. A 31.8mm handlebar will slip inside a 35mm stem, which can cause a sudden loss of control, while attempting to force a 35mm handlebar into a 31.8mm stem will damage the components. Similarly, the steerer clamp must match your fork’s steerer tube diameter. While aftermarket shims exist to adapt smaller handlebars to larger stems, they introduce additional slip points and are generally not recommended for aggressive trail or downhill riding.
Verifying Intended Use and Weight Limits
Stems are engineered for specific riding categories, often defined by ASTM standards. A lightweight alloy stem designed for cross-country racing is not structurally reinforced to handle the heavy impacts of dirt jumping, freeride, or enduro riding. Always check the manufacturer’s specifications to ensure the stem is rated for your riding style. Additionally, some ultra-lightweight carbon or CNC-machined alloy stems have strict rider weight limits that you must verify to prevent structural fatigue and sudden failure.
Reviewing Torque Specifications and Tool Requirements
Proper installation requires a calibrated torque wrench. Most high-quality stems have their torque limits (typically between 4 Nm and 6 Nm) printed directly on the faceplate and steerer clamp. Over-tightening these bolts can crush carbon handlebars, strip the threads in alloy stems, or pinch the fork steerer tube, while under-tightening can lead to the handlebars twisting unexpectedly when you land a jump. If you do not own a torque wrench capable of measuring these low values, you must acquire one or have the stem installed by a professional.
Sourcing Authentic Components in the Philippines
When purchasing a new MTB stem from local bike shops or online marketplaces in the Philippines, prioritize authenticity over low prices. Counterfeit bicycle components are a significant safety hazard, as they often bypass structural testing and use inferior alloys that can snap under load. Buy from authorized dealers, check for official manufacturer packaging and serial numbers, and verify the store’s return policy. This ensures that if the stem does not fit your spacer stack or handlebar clamp as expected, you can exchange it safely.
How do you safely install and adjust a new MTB stem?
Safely installing a mountain bike stem requires clean preparation, precise alignment, and strict adherence to the manufacturer’s torque specifications to prevent component slippage or structural damage. Proper installation is just as critical as choosing the correct size, as an improperly secured cockpit can lead to catastrophic failure on the trail.
Preparing the Clamping Surfaces
Begin by thoroughly cleaning the fork steerer tube and the handlebar clamping area with isopropyl alcohol to remove any dirt, grease, or manufacturing residue. If you are installing a carbon handlebar or mounting the stem to a carbon steerer tube, apply a thin layer of carbon assembly paste to the contact surfaces. This paste contains fine grit that increases friction, allowing you to secure the components safely without exceeding torque limits. For alloy-on-alloy interfaces, apply a light coat of waterproof bicycle grease to the stem bolt threads to prevent seizing and ensure accurate torque readings.
Executing the Tightening Sequence
Slide the stem onto the fork steerer tube, reinstall your headset spacers, and install the top cap. Tighten the top cap bolt first; this bolt preloads the headset bearings and should only be tightened until there is no play in the fork, but not so tight that the steering feels stiff or binds. Once the headset is preloaded, align the stem perfectly with your front wheel. Tighten the steerer clamp bolts in an alternating pattern, turning each bolt a quarter-turn at a time until they are secure. When mounting the handlebar, tighten the faceplate bolts in a cross-pattern (X-pattern) to distribute clamping pressure evenly, ensuring the gap between the faceplate and the stem body is identical at both the top and bottom.
Using a Torque Wrench for Final Adjustments
Use a calibrated torque wrench to tighten all bolts to the exact Newton-meter (Nm) specification printed on the stem. Never rely on hand feel or standard hex keys for final tightening, as it is incredibly easy to over-torque small bolts. Work your way around the faceplate bolts in a cross-pattern multiple times, as tightening one bolt will slightly loosen the others. Repeat this process for the steerer clamp bolts until the torque wrench clicks at the specified limit on every bolt.
Performing the Pre-Ride Safety Check
Before riding, perform a rigorous static safety check to verify the integrity of your installation. Stand over the front of the bike, pinch the front wheel firmly between your knees, and attempt to twist the handlebars with moderate force; the handlebars and stem must remain perfectly aligned with the wheel. Next, squeeze the front brake and rock the bike forward and backward while placing your fingers around the headset spacers to feel for any play or knocking. Finally, lift the front end and rotate the handlebars from side to side to ensure the steering is smooth and free of friction. If you detect any play, creaking, or slippage, do not ride the bike. Stop immediately, re-evaluate your installation steps, or take your bike to a qualified professional mechanic to ensure it is safe for trail use.
Community discussion
Share your experience or ask a question. Comments are reviewed before publication.