
To perform basic yoga ball exercises correctly, you must match the ball to your body size, maintain a neutral spine with a braced core, and execute controlled, slow movements that resist the ball’s natural instability. Integrating a yoga ball for workout routines targets your deep stabilizing muscles, improves balance, and enhances functional strength. However, because the ball is inherently unstable, safety and proper form must always take precedence over the number of repetitions.
Setting Up Your Yoga Ball and Workspace for Safety
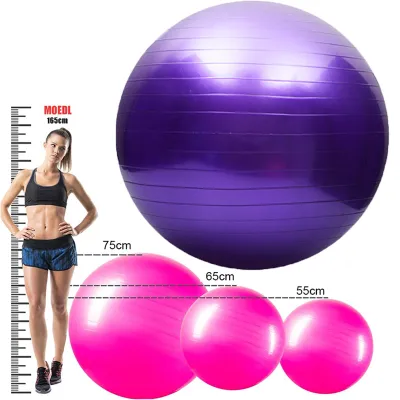
Choosing the right ball diameter based on your height is the first step to a safe and effective workout. When you sit upright on the ball with your feet flat on the floor, your hips and knees should bend at a clean 90-degree angle, keeping your thighs parallel to the ground. If your knees are higher than your hips, the ball is too small; if your feet cannot rest flat, the ball is too large. Typically, a 55 cm ball suits individuals under 5’4″ (163 cm), a 65 cm ball fits those between 5’5″ and 5’11” (165 to 180 cm), and a 75 cm ball is designed for taller users.
Proper inflation directly impacts both safety and exercise difficulty. To test the inflation level, press down on the top of the ball; it should have a slight give of about 2 to 3 inches (5 to 7 cm) rather than feeling rock-hard or completely squishy. A ball that is under-inflated will bottom out when you sit on it, failing to support your weight and limiting your range of motion. Conversely, an over-inflated ball becomes highly rigid and rolls unpredictably, significantly increasing your risk of falling.
Products mentioned in this guide


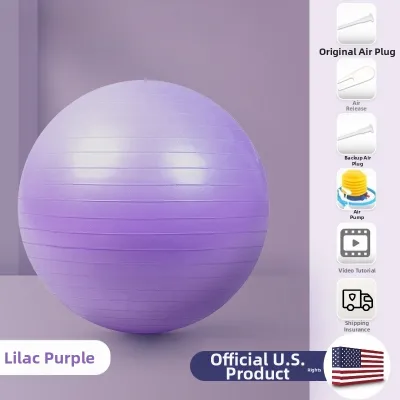
Prices are valid at publication and may change. Please refer to the product page for the latest price.
Before every workout session, conduct a quick visual inspection of your equipment. Look for any visible scratches, scuffs, or small punctures that could compromise the material’s integrity under pressure. Always check the manufacturer’s label to verify the maximum weight capacity and ensure the ball has an explicit “anti-burst” or “slow-deflate” rating. This safety feature ensures that if the ball is punctured during use, it will deflate slowly and safely rather than popping suddenly like a balloon.
The environment where you perform your exercises plays a critical role in preventing slips and falls. In warm, humid environments like the Philippines, sweat can quickly make tiled or wooden floors incredibly slick. Always place a high-grip, non-slip yoga mat underneath your workspace to stabilize both your feet and the ball. Clear the surrounding area of any sharp objects, toys, or hard furniture corners, leaving at least two meters of open space in all directions to allow for a full, unobstructed range of motion. Standard anti-burst yoga balls typically range from ₱300 to ₱1,200 depending on the brand and size, making them an accessible addition to your home gym setup.
Core Rules for Balance and Injury Prevention
Exercising on an unstable surface requires continuous, active stabilization from your deep core muscles. To stabilize your pelvis and lower back, you must brace your core as if you are preparing to receive a light tap to the stomach. This bracing action should engage your entire midsection—including your abdominals, obliques, and lower back—without causing you to hold your breath. Keep your breathing steady and deep, allowing your diaphragm to expand while maintaining tension in your abdominal wall.

Maintaining a neutral spine is your primary defense against back strain and joint injury. Whether you are sitting, lying, or planking on the ball, avoid hyperextending your lower back or letting your hips sag excessively. Keep your ears, shoulders, and hips in a straight, aligned path, and ensure your neck remains in a neutral position by looking at a fixed point on the floor or wall rather than straining upward.
Proper breathing coordination reinforces your intra-abdominal pressure, which acts as a natural weight-lifting belt for your spine. As a general rule, inhale deeply during the preparation or lowering phase of an exercise, and exhale forcefully through your mouth during the exertion or lifting phase. This structured exhalation helps lock in your core stability at the precise moment your muscles experience the highest amount of physical stress.
While muscle fatigue and a mild burning sensation in the target muscles are normal signs of a productive workout, pain is not. You must immediately halt your exercise if you experience sharp or shooting joint pain, sudden dizziness, or an inability to recover your basic balance. If you feel your form slipping or find yourself shaking uncontrollably, safely roll off the ball, rest, and reset your position rather than forcing yourself to complete a compromised repetition.
Step-by-Step Guide to Fundamental Yoga Ball Exercises
Integrating a yoga ball for workout sessions allows you to convert standard bodyweight movements into highly dynamic, multi-planar challenges. By forcing your body to constantly adjust to a rolling surface, you activate smaller stabilizing muscles that are often neglected during traditional machine-based workouts. The following step-by-step movements are categorized by muscle group to help you build a balanced, full-body routine.
Core and Abdominal Movements
To perform a correct yoga ball crunch, begin by sitting upright on the ball with your feet flat on your non-slip mat, spaced about hip-width apart. Slowly walk your feet forward while sliding your torso down until your lower back is fully supported by the curve of the ball, and your thighs are parallel to the floor. Place your hands lightly behind your head or cross them over your chest, then exhale as you contract your abdominals to lift your upper shoulders off the ball. Keep your neck relaxed and avoid pulling on your head; focus on curling your ribcage toward your pelvis using only your abdominal strength.
For the ball dead bug, lie flat on your back on your yoga mat, lifting your knees to a 90-degree angle and extending your arms straight up toward the ceiling. Place the yoga ball between your knees and your palms, squeezing it gently to keep it suspended in the air. Slowly lower your right arm behind your head while simultaneously extending your left leg straight out, keeping them both a few inches off the floor. Return to the starting position, pressing your lower back firmly into the mat throughout the movement, and repeat on the opposite side.
The most frequent mistake during core exercises is relying on momentum or straining the neck to complete the movement. Pulling on your neck during crunches transfers the workload away from your abdominals and can lead to cervical strain. Additionally, allowing your lower back to arch excessively off the ball or mat during dead bugs strips away core engagement and places dangerous pressure on your lumbar spine. Always prioritize slow, controlled tempos over fast repetitions to ensure your muscles are doing the work rather than momentum.
Lower Body and Glute Movements
To perform wall squats with the ball, stand with your feet shoulder-width apart, placing the yoga ball between the small of your lower back and a flat wall. Walk your feet forward about 12 to 18 inches (30 to 45 cm) so that your body leans slightly back against the ball. Slowly bend your knees and lower your hips toward the floor, allowing the ball to roll smoothly up your spine until your thighs are parallel to the ground. Press firmly through your heels to return to the starting upright position, squeezing your glutes at the top of the movement.
For hamstring curls, lie flat on your back on your mat with your arms resting by your sides for stability, and place your heels and lower calves on top of the yoga ball. Engage your glutes and core to lift your hips off the floor, creating a straight line from your shoulders to your heels. Keeping your hips elevated, bend your knees and pull the ball toward your glutes using your heels. Pause for a second at the peak of the contraction, then slowly extend your legs back out to the starting bridge position without letting your hips sag toward the mat.
During wall squats, always monitor your knee alignment to ensure your knees track directly over your toes and do not cave inward. If your knees push past your toes as you lower down, walk your feet slightly further out from the wall. During hamstring curls, the primary challenge is preventing your hips from dropping as you roll the ball inward; focus on keeping your glutes squeezed tight to maintain a high, stable bridge. If you struggle to maintain your balance, start by practicing a simple hip bridge with your feet flat on the ball before attempting the full curl.
Upper Body and Full-Body Stability
To perform a yoga ball plank, place your forearms on the center of the yoga ball, clasping your hands together to form a stable base. Extend your legs straight behind you, resting your toes on the floor with your feet set hip-width apart for balance. Push your elbows into the ball to keep your chest from collapsing, and hold a rigid, straight line from your head to your heels. Focus on resisting the natural wobble of the ball by actively squeezing your quadriceps, glutes, and abdominal muscles.
To perform a modified push-up, place your hands shoulder-width apart on the yoga ball and extend your feet back onto the floor, keeping your body in a straight plank line. Lower your chest toward the ball by bending your elbows, then press back up to the starting position. For a more advanced variation, place your hands flat on the floor and elevate your shins or toes on top of the ball, performing the push-up while maintaining absolute core rigidity.
Keep your wrists in a neutral, straight alignment to prevent joint strain, especially when placing your hands directly on the ball. Avoid shrugging your shoulders toward your ears, which can cause neck tension and reduce shoulder blade stability. If you notice your lower back sagging or feel a pinching sensation in your lumbar spine, immediately drop your knees to the floor and modify the exercise to a shorter duration or a more stable angle. You can also wear high-grip fitness gloves to prevent your hands from slipping on the ball’s surface during sweaty, humid workouts.
How to Check Your Form and Safely Increase Difficulty
Developing a strong mind-muscle connection is essential for verifying that your form is correct. You should feel a deep, burning sensation in the target muscles—such as your abdominals during crunches or your hamstrings during curls—which indicates healthy muscular fatigue. If you instead experience a dull ache, pinching, or sharp discomfort in your lower back, knees, or shoulders, your stabilizing muscles have likely fatigued, causing your joints to take on the physical load.
As your neuromuscular control and core strength improve, you will naturally notice a significant reduction in wobbling and shaking during your exercises. Transitions between movements will feel smoother, and you will require fewer micro-adjustments to stay centered on the ball. Tracking these subtle improvements in stability is an excellent way to gauge your progress, even before you decide to add external weight or increase your repetitions.
Once you can perform three sets of an exercise with perfect form, you can safely increase the difficulty using structured progression methods. One highly effective approach is to narrow your base of support, such as bringing your feet closer together during planks or crunches to minimize your lateral stability. You can also integrate light external resistance, such as holding a pair of light dumbbells or anchoring resistance bands under your feet. Another option is to slightly deflate the ball to change its firmness and increase surface instability, forcing your deep stabilizing muscles to work harder to maintain balance.
Frequently Asked Questions (FAQ)
How often should I include yoga ball exercises in my routine?
For most fitness levels, integrating a yoga ball for workout sessions 2 to 3 times per week is highly effective for building core stability and balance. Because stabilizing exercises place a unique, continuous demand on your nervous system and deep core muscles, your body requires adequate rest to repair and rebuild. Avoid performing intense stability workouts on consecutive days; instead, alternate them with dedicated rest days or low-impact activities like walking to ensure proper muscular recovery.
Is it safe to use a yoga ball if I have lower back pain?
If you are currently experiencing lower back pain, you must consult a healthcare professional or physical therapist before starting any new exercise routine. While a yoga ball is a valuable tool frequently used in physical rehabilitation, performing movements with incorrect form or premature loading can easily aggravate existing spinal conditions. A professional can help you identify specific, low-impact modifications that safely support your lumbar spine without risking further irritation.
Can I use a yoga ball as a desk chair to improve my posture?
Using a yoga ball as a full-time desk chair is generally not recommended as a direct replacement for an ergonomic office chair. While sitting on an unstable surface forces active core engagement, your stabilizing muscles will eventually fatigue over prolonged periods, leading to slouching, rounded shoulders, and increased lower back strain. If you wish to use a yoga ball at your desk, limit its use to short, active intervals of 15 to 30 minutes a day to gently stimulate your core without overtaxing your posture.
Community discussion
Share your experience or ask a question. Comments are reviewed before publication.