
Achieving crisp, reliable gear shifts on your mountain bike or commuter ride depends on a properly tuned rear derailleur. The Shimano Deore drivetrain is a workhorse known for its durability under harsh trail conditions, but cable stretch, trail vibrations, and general wear can gradually throw your shifting out of alignment.
Adjusting your Shimano Deore derailleur involves a systematic process of setting the high and low limit screws, securing the correct cable tension, fine-tuning the indexing with the barrel adjuster, and optimizing the B-tension gap. By following these steps in order, you can eliminate annoying chain skips, slow shifts, and drivetrain noise, restoring that smooth, satisfying click to every gear change.
Tools and Preparation Before You Start
Before turning any adjustment screws, gathering the correct tools and preparing your workspace will prevent stripped bolt heads and inaccurate tuning. You will need a high-quality Phillips screwdriver or a JIS (Japanese Industrial Standard) screwdriver, which fits Shimano’s limit screws much more securely than a standard Phillips and prevents stripping. Additionally, keep a set of metric hex keys (specifically 4mm and 5mm sizes) nearby for the cable anchor bolt, and a clean rag to wipe away grease.
Products mentioned in this guide

60 Lazada user ratings
10-speed smooth shifting performance, 11-46T wide-range cassette, Precise front derailleur shifting, Mountain bike groupset package,
Seller offered a gift for the next purchase, but as a consumer, I would rather good condition product.
good item yun nga lng yung iba made in malaysia at indo pero ok naman kompleto ok rin packaging nya
100 percent legit SHIMANO JAPAN NO DAMAGE WELL PACK HIGHLY RECOMMENDED WILL PURCHASE AGAIN 👍👍👍
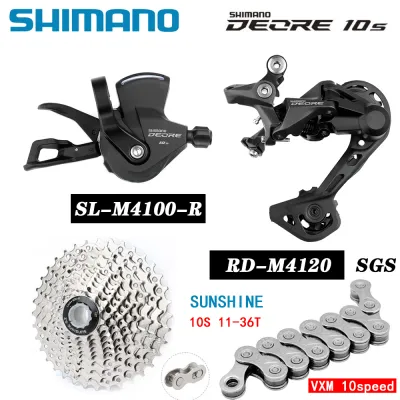
91 Lazada user ratings
High-quality construction and materials., Versatile gear ratios for various terrains., Reliable and consistent shifting.,
Excellent durability and longevity., Smooth shifting performance maayos ang walng sira paldo hahah
Super Legit at sulit to...Solid ang bilis din dumating. Thank you seller..
good quality, nagustuhan ko sya and smooth transaction to the seller..
nice graeth job sana tamagal ganda salamat saller at k rider
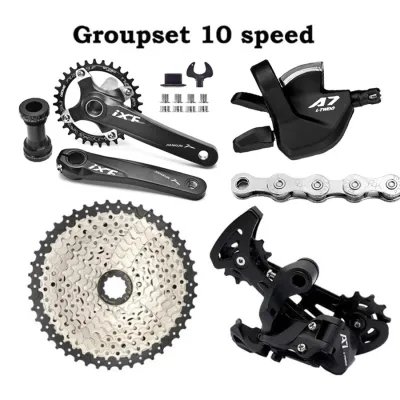
556 Lazada user ratings
Quality:100/100 for quality Appearance:100/100 no damages Performance:original 100/100 24 hours delivery sobrang bilis salamat po Ng Marami …Read full reviewShow less
Quality:100/100 for quality Appearance:100/100 no damages Performance:original 100/100 24 hours delivery sobrang bilis salamat po Ng Marami at naka mura Ako🥹
Durable and reliable components, Enhanced durability for long-lasting use, Reliable and consistent performance, Optimal chain engagement,
nareceive ko n in good condition,,, packaging, quality item, delivery all good namn... thank you seller
Quality:very good Appearance:no scratches, good Performance:not yet installed, but looking good 👍
Complete all the items, salamat sa mabilisang delivery 💪 Quality:Very Good sana tumagal
Prices are valid at publication and may change. Please refer to the product page for the latest price.
Working on a dedicated bike repair stand is highly recommended, as it keeps the rear wheel off the ground and allows you to spin the pedals freely while making adjustments. If you do not have a repair stand, you can carefully hang the bike by its saddle from a sturdy hook or tree branch, ensuring the drivetrain remains completely unobstructed.
It is important to clarify that this guide applies strictly to mechanical Shimano Deore derailleurs, which rely on physical steel cables to actuate gear changes. If your bicycle is equipped with an electronic Shimano Di2 system, the adjustment process is entirely digital and requires electronic calibration through a smartphone app or system display rather than manual screw adjustments. Attempting to manually force electronic components can cause permanent damage to the internal servo motors.
Before making any mechanical adjustments, perform a thorough pre-check of your drivetrain’s physical condition. Inspect the rear derailleur hanger—the small metal piece connecting the derailleur to your frame—to ensure it is perfectly straight, as even a slightly bent hanger makes accurate indexing impossible.
Clean any accumulated mud, grit, or old grease off the cassette, chain, and derailleur jockey wheels using a bike-specific degreaser. Finally, apply a fresh drop of chain lubricant and wipe off the excess, as a dry or dirty chain will mimic shifting problems even on a perfectly adjusted derailleur.
Step 1: Setting the High and Low Limit Screws
The high (H) and low (L) limit screws act as physical barriers that restrict the lateral movement of the derailleur cage. Their primary purpose is safety: they prevent the chain from shifting past the smallest cog into the bicycle frame, or past the largest cog into the rear wheel spokes, which could cause a sudden crash or severe wheel damage. These screws do not control the indexing or shifting speed between gears; they simply define the outer boundaries of the derailleur’s travel.

To begin, locate the two screws on the derailleur body, which are typically stamped with the letters “H” and “L”. Shift your chain down to the smallest cog (the highest gear) and release the tension on the shift cable. Stand directly behind the bicycle and look at the alignment of the upper jockey wheel relative to the smallest cog.
The center of the upper jockey wheel should align perfectly with the outer edge of the smallest cog when viewed from behind. If the jockey wheel sits too far outward toward the frame, turn the H-limit screw clockwise to push the derailleur inward. If the chain is hesitant to drop onto the smallest cog or sits too far inward, turn the H-limit screw counter-clockwise to let the derailleur move outward.
Stop turning the screw when the upper jockey wheel aligns directly under the target cog without the chain rubbing against the next gear or attempting to jump off the cassette. Once this is set, manually push the derailleur cage inward toward the largest cog (the lowest gear) while rotating the pedals, or use the shifter if the cable is connected, to check the L-limit.
The upper jockey wheel must align directly with the center of the largest cog. If the derailleur moves too far inward, threatening to throw the chain into the spokes, turn the L-limit screw clockwise to restrict its travel. If it cannot reach the largest cog, turn the L-limit screw counter-clockwise until the chain climbs smoothly onto the cog without any grinding noise.
Step 2: Adjusting Cable Tension for Indexing
Once the physical boundaries are set, you must establish the baseline cable tension required for the derailleur to move accurately between gears. Start by shifting your handlebar shifter all the way to the highest gear setting (corresponding to the smallest cog on your cassette). Turn the barrel adjuster on your shifter or derailleur fully clockwise to reset it, then back it out counter-clockwise two full turns to allow room for future micro-adjustments.
Locate the cable anchor bolt on the derailleur body and loosen it using a 5mm hex key. Inspect the inner steel cable where it meets the bolt; if it is frayed, rusted, or kinked, replace it before proceeding, as damaged cables will not hold tension consistently. Pull the cable taut by hand to remove any slack from the housing runs along the frame, but avoid using excessive force or pliers that could stretch or deform the wire.
While holding the cable taut, tighten the cable anchor bolt securely to the manufacturer’s recommended torque, typically around 5 to 7 Newton-meters. Ensure the cable sits correctly in the designated groove under the washer of the anchor bolt, as routing it on the wrong side of the bolt will alter the leverage ratio and ruin the shifting indexing.
Verify the initial shift response by lifting the rear wheel, pedaling the bike forward, and clicking the shifter once to move up to the next larger cog. If the chain hesitates or fails to climb to the second cog, the cable is still too loose. If it jumps up two gears immediately, the cable is too tight. This initial test confirms that your baseline tension is close enough for fine-tuning.
Step 3: Fine-Tuning with the Barrel Adjuster
With the baseline cable tension secured, you can now eliminate minor chain noise, skipping, or hesitation during gear changes by micro-adjusting the cable tension using the barrel adjuster. The barrel adjuster is a plastic or metal sleeve located where the shift housing enters the shifter pod or the rear derailleur. Turning this adjuster changes the effective length of the housing, which increases or decreases the tension on the inner wire.
A simple rule of thumb governs this process: turn the barrel adjuster counter-clockwise to increase cable tension, and turn it clockwise to decrease cable tension. If the chain is slow or hesitant to shift up to a larger cog (toward the spokes), you need more tension, so turn the adjuster counter-clockwise. If the chain is slow to drop down to a smaller cog (toward the frame), or if it rubs against the larger cog next to it, you have too much tension, so turn the adjuster clockwise.
Make these adjustments in small increments of a half-turn or quarter-turn at a time while continuously pedaling the bike on the stand. After each adjustment, shift up and down through three or four gears to visually observe how the chain engages with the teeth of the cogs. Look closely at how the chain transitions; it should jump quickly and cleanly to the next gear without riding on top of the teeth or making a dry, metallic rattling sound.
The stopping point is reached when the shifts are crisp, immediate, and quiet in both directions across the middle of the cassette. If you find yourself turning the barrel adjuster more than three full rotations in either direction, your initial cable tension at the anchor bolt was likely too loose or too tight, and you should reset the process from Step 2.
Step 4: Setting the B-Tension Screw
The B-tension screw controls the angle of the derailleur body, which directly determines the vertical gap between the upper jockey wheel and the cassette cogs. If this gap is too small, the jockey wheel will physically bump against the cassette teeth, causing loud grinding noises and rough shifting, especially in the easiest gears. If the gap is too large, the chain will have too much unsupported length between the jockey wheel and the cog, resulting in slow, sloppy gear changes.
Locate the B-tension screw on the rear of the derailleur body, resting against the lip of the derailleur hanger. Shift the chain onto the largest cog (the easiest gear) and observe the vertical clearance between the tips of the teeth on the upper jockey wheel and the tips of the teeth on the largest cog.
Adjust the B-tension screw to achieve the recommended clearance, which for most modern Shimano Deore systems is approximately 5 to 6 millimeters, though you should verify the exact measurement in your specific model’s user manual. Turning the screw clockwise increases the gap by pushing the derailleur body further away from the cassette, while turning it counter-clockwise decreases the gap.
If you are riding a full-suspension mountain bike, keep in mind that rear suspension compression changes the distance between the bottom bracket and the rear axle, which alters chain tension and derailleur angle. For these bikes, it is best to check and adjust the B-tension while the rear shock is compressed to your typical riding sag point, which may require the assistance of a friend to hold the bike or measure the gap.
Testing and Troubleshooting Common Shifting Issues
After completing all the adjustments on the repair stand, it is time to perform a comprehensive test sequence to validate your work. Shift through every single gear combination under a light pedaling load, moving both up and down the cassette. Pay close attention to the extreme ends of the cassette as well as the middle gears, ensuring there is no hesitation, chain rub, or unexpected jumping.
If you encounter persistent chain skipping during your test, it is often caused by cable stretch, which is common with newly installed cables, or friction inside dirty, contaminated shift housing. In tropical environments with high humidity or frequent rain, moisture can easily enter the housing runs, causing internal corrosion that binds the cable. Replacing the inner cable and outer housing is a cheap and highly effective way to restore smooth shifting.
Ghost shifting—where the chain jumps between gears on its own without you touching the shifter—is almost always a sign of a bent derailleur hanger or loose frame pivots. Even a tiny bend of a few millimeters, which might be invisible to the eye, will cause the derailleur to guide the chain at an angle, disrupting the indexing across the cassette.
If your shifting remains inconsistent or noisy after carefully following these tuning steps, stop adjusting and consult a professional bike mechanic. They can use specialized tools, such as a derailleur hanger alignment gauge, to check for frame alignment issues, or use a chain wear indicator to inspect your drivetrain for worn-out components that can no longer hold a clean gear mesh.
Frequently Asked Questions (FAQ)
Why is my Shimano Deore derailleur still skipping gears after adjustment?
If your derailleur is perfectly aligned but the chain still skips under load, the most likely culprit is a worn-out chain or cassette. Over time, the metal rollers of a chain wear down, causing the chain to stretch and no longer sit perfectly in the valleys of the cassette teeth. Frayed inner cables or contaminated shift housing can also cause the cable to stick, preventing the derailleur spring from pulling the cage back down to smaller cogs. Additionally, check for a bent derailleur hanger using a dedicated alignment tool, as visual inspection alone cannot always detect minor twists that ruin indexing.
How often should I readjust my rear derailleur?
Under normal riding conditions, a mechanical derailleur only needs a minor barrel adjuster tweak every few months to compensate for natural cable stretch and housing compression. However, if you frequently ride in harsh, muddy, or wet tropical conditions, grit and moisture will accelerate wear and contaminate your cables, requiring more frequent maintenance. It is a good habit to inspect your shifting performance before every long ride, and perform a full cleaning and cable tension check immediately after riding through deep mud or heavy downpours.
Community discussion
Share your experience or ask a question. Comments are reviewed before publication.