
Setting up a home tennis court brings the fast-paced excitement of racket sports directly to your backyard or driveway. However, the performance of your court relies heavily on the correct installation and tensioning of the tennis net. A net that is too loose alters the trajectory of low shots, while an over-tensioned net can warp your posts or snap the internal cable, creating a safety hazard.
Achieving the perfect balance of height, tension, and stability requires a methodical approach. By understanding the structural demands of your specific net system and adjusting it to withstand local environmental factors, you can create a safe, durable, and regulation-compliant playing area. This guide walks you through the entire process, from initial court measurements to long-term maintenance.
Preparing Your Space and Gathering Tools
Before unpacking your tennis net, you must verify that your court space is properly configured to accommodate the tension of a fully installed system. Standard doubles tennis courts require a post-to-post distance of 42 feet (12.8 meters) from the inside faces of the posts, while singles-only courts require 33 feet (10.06 meters). Ensure you have at least 3 to 12 feet of clear space behind the baseline and at least 3 to 6 feet of clearance on the sides to allow for safe movement during intense rallies.
Products mentioned in this guide


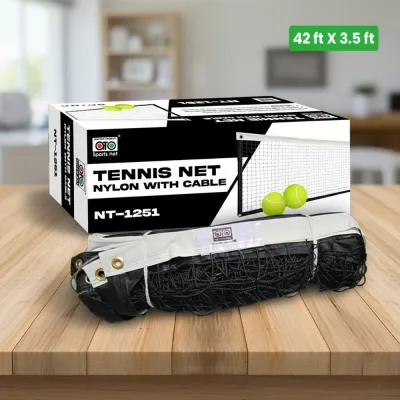

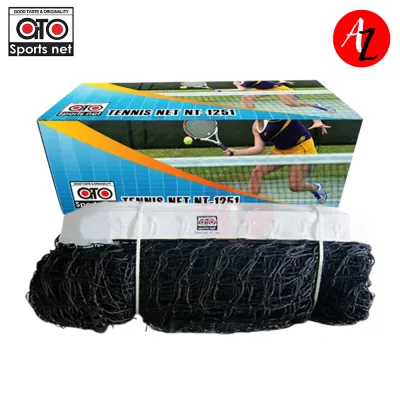
Prices are valid at publication and may change. Please refer to the product page for the latest price.
Next, identify the specific type of net system you are installing. Permanent systems utilize heavy steel or aluminum posts inserted into ground sleeves that are permanently embedded in concrete footings. Portable systems rely on interlocking metal frames with weighted end bases, which are ideal for multi-purpose driveways or temporary setups. Surface-mounted systems feature metal plates welded to the bottom of the posts, which are bolted directly into an existing concrete pad using heavy-duty masonry anchors.
Gathering the correct tools beforehand prevents interruptions and ensures a secure installation. You will need a high-quality steel measuring tape of at least 50 feet, an adjustable wrench or a socket set matching your post hardware, a spirit level, and heavy-duty work gloves to protect your hands when handling steel cables. If you are setting up a portable system on a hard surface, ensure you have the recommended weight materials, such as dry sand or water containers, to stabilize the base frames.
Installing and Securing the Net Posts
The stability of your net posts dictates the safety of the entire court. For portable systems, begin by assembling the base frame on a flat, level surface. Carefully position the weighted bases at the designated post locations, ensuring they are aligned parallel to the court’s baseline. Fill the bases completely with water or sand according to the manufacturer’s instructions; an under-weighted base can easily tip over once the net is tensioned, risking injury to players and damage to the court surface.

If you are using a permanent system with ground sleeves, start by clearing any debris, dirt, or standing water from inside the sleeves. Slide the net posts into the sleeves slowly, ensuring they seat fully at the bottom. If the posts do not sit flush, check for obstructions inside the sleeve or use a shop vacuum to clear out accumulated silt.
Once the posts are in position, use a spirit level to check their vertical alignment. Hold the level against the side of the post, checking both the front-to-back and side-to-side axes. The posts must stand perfectly vertical, or “plumb.” If a post leans inward even slightly before tensioning, the immense lateral force of the tightened cable will pull it further out of alignment, potentially cracking the surrounding concrete or bending the metal post permanently.
Perform a final stability check before moving on to the net itself. Grasp each post near the top and apply moderate pressure; there should be no noticeable wobbling, shifting, or loose connections at the base. If you detect any movement in a permanent sleeve system, verify that the concrete footings are intact and have not developed structural cracks.
Attaching and Tensioning the Tennis Net
With your posts securely anchored, unroll the tennis net along the center line of the court between the two posts. Inspect the top headband to ensure the internal steel or vinyl-coated cable is straight and free of kinks, loops, or twists. Laying the net flat first prevents uneven tension distribution and makes the hoisting process significantly easier.
Attach the loop on one end of the top cable to the hook or dead-end fixture on the first post. Walk to the opposite post, which houses the active tensioning mechanism—typically an external brass winch, an internal gear system, or a heavy-duty ratchet strap. Thread the free end of the cable over the pulley or guide groove at the top of this active post, then secure it tightly to the winch drum or ratchet spool.
Begin tensioning the net by slowly turning the hand crank or operating the ratchet mechanism. Do not rush this step or use power tools to speed up the winding, as rapid tensioning can cause the cable to bind or snap. As you crank, watch the net rise off the ground, ensuring the mesh hangs freely and does not catch on the court surface or the posts.
Recognizing the physical limits of your equipment is critical for safety. Stop cranking immediately if you observe the posts bowing inward, if the winch handle becomes exceptionally difficult to turn, or if you hear creaking sounds from the cable or hardware. Over-tensioning can cause the steel cable to snap under high tension, which can result in severe lashing injuries. Once the top cable is taut and straight, secure the side dowels into the net’s side pockets and lace them tightly to the posts using the provided nylon cords to keep the net flat and stable.
Setting the Center Strap and Verifying Net Height
A properly tensioned top cable will naturally sit too high in the middle, which is why a center strap is required to pull the net down to its regulation height. Locate the center anchor point on your court surface, which should be positioned exactly halfway between the two net posts. For permanent courts, this is a brass or steel anchor casing flush with the concrete; for temporary setups, you may need to secure a heavy weighted anchor plate.
Attach the snap hook of the center strap to the ground anchor, ensuring the connection is secure and free of rust. Loop the strap over the top of the net headband, centering it precisely between the two posts. The strap should wrap cleanly around the headband without twisting or pinching the vinyl material.
Thread the loose end of the strap through its adjustment buckle and pull downward to lower the center of the net. This adjustment creates the characteristic “sag” required for standard play. Use your measuring tape to check the height at the absolute center of the court. According to international tennis standards, the net must measure exactly 3 feet (36 inches or 0.914 meters) at the center.
After setting the center height, measure the height of the net at the inside face of both posts. The net must measure exactly 3.5 feet (42 inches or 1.07 meters) at the posts. If the heights do not match these specifications, slightly loosen or tighten the main winch and readjust the center strap iteratively until both the center and post measurements are perfectly aligned.
Routine Maintenance and Weather Considerations
Maintaining a tennis net in tropical climates, such as the Philippines, requires diligent care due to intense heat, high humidity, and heavy seasonal rainfall. The combination of strong UV rays and moisture can rapidly degrade nylon netting and cause steel cables to rust. Inspect your net system weekly, looking for frayed mesh, cracked vinyl headbands, or signs of corrosion on the winch gears and cable. Replacing a worn-out center strap is an inexpensive fix, typically costing around ₱400 to ₱1,200, and it prevents unnecessary strain on the more expensive top cable.
Temperature fluctuations cause materials to expand and contract, which directly affects net tension. During hot afternoons, the metal cable may expand slightly, causing the net to sag, while cooler evening temperatures can cause it to contract, increasing the tension on your posts. Periodically check and adjust the winch to maintain the correct playing height without over-stressing the hardware.
When severe weather, heavy rain, or strong winds are expected, never leave your tennis net fully tensioned. High winds can turn a tennis net into a giant sail, transferring immense lateral force to your posts, which can bend the metal or crack the concrete bases. Before a storm, loosen the winch completely to let the net hang loose, or remove the net entirely and store it in a dry, covered space to prolong its lifespan.
Frequently Asked Questions (FAQ)
Why does my tennis net keep sagging in the middle?
A sagging net is usually caused by a slipping center strap buckle or a top cable that has permanently stretched over time. Inspect the center strap buckle for wear or slippage, and replace it if the fabric slides through the teeth under tension. If the main cable has stretched beyond its adjustment limits, you may need to loosen the winch, pull the excess cable through the drum, and re-secure it, or replace the cable entirely if it shows signs of fraying.
Can I leave a portable tennis net outside all year?
While many portable nets feature UV-resistant netting and powder-coated steel frames, continuous exposure to tropical sun and rain will eventually cause rust and material degradation. To maximize the lifespan of your equipment, it is highly recommended to disassemble and store portable nets in a dry storage bag when not in use for extended periods. If you must leave it outdoors, use a weather-resistant cover and regularly apply a rust-inhibiting spray to the metal joints and hardware.
Community discussion
Share your experience or ask a question. Comments are reviewed before publication.