
A torn, stretched-out, or brittle strap is the most common reason kids’ swimming goggles fail, but a damaged strap does not mean you need to discard an otherwise perfect pair of goggles. Performing a quick goggle strap replacement is a highly cost-effective DIY task that takes less than ten minutes. By replacing only the worn component, you preserve the intact, leak-proof frame, keep functional gear out of the landfill, and save money. While the process is straightforward, handling the fragile plastic frame incorrectly can lead to cracks or permanent lens damage.
Before beginning, it is vital to address water safety. While a properly fitted strap keeps goggles secure and ensures clear visibility, swimming goggles are comfort and visibility aids, not safety devices. A secure strap cannot replace active adult supervision, proper swimming lessons, and water safety training. Always ensure your child is swimming in an environment suited to their skill level, and perform a quick equipment check before they enter the water.
When to Replace Your Child's Goggle Strap
Identifying the warning signs of a failing strap prevents mid-swim failures that can disrupt swim lessons or cause sudden water leakage. In hot, humid tropical climates, silicone and rubber materials degrade much faster than in cooler regions. Exposure to intense UV rays, pool chlorine, and ocean saltwater accelerates the breakdown of these polymers, making regular inspections essential.
Products mentioned in this guide


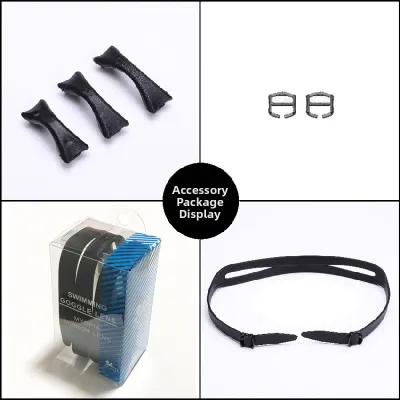
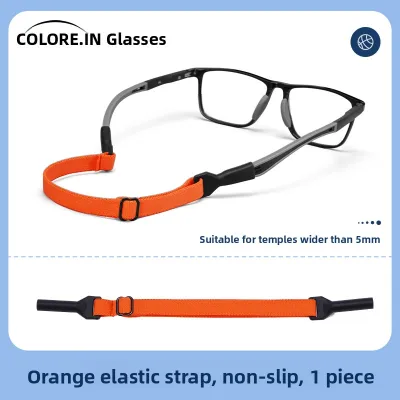
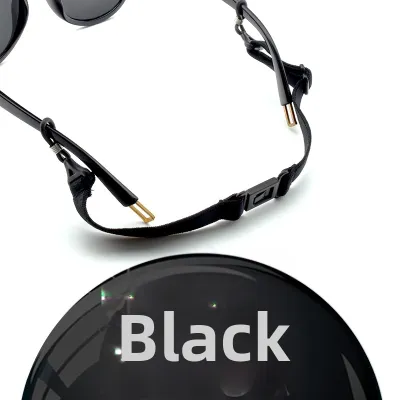
Prices are valid at publication and may change. Please refer to the product page for the latest price.
Begin by inspecting the strap for visible wear and tear. Look closely for tiny cracks, fraying edges, or areas where the silicone has thinned out. If the material feels sticky, gummy, or unusually stiff and brittle, the polymer has degraded chemically and is highly likely to snap under tension during their next swim.
Check for a loss of elasticity by stretching the strap gently. If the material stretches out easily but fails to snap back to its original shape, it has lost its structural integrity. A stretched-out strap will not hold the goggles snugly against your child’s face, leading to constant slipping, water entry, and frustration.
Examine the mechanical components of the strap system. Look for torn adjustment holes, cracked plastic adjusters, or damaged side buckles that can no longer hold the strap securely. If the strap slips through the buckle when you apply light tension, the fastening mechanism or the strap’s teeth are worn out.
Pay close attention to your child’s feedback. If they complain of skin irritation, chafing, or hair pulling, the strap material may have calcified or degraded. Worn silicone loses its smooth, protective finish and begins to grip and pull fine hair, turning a fun swim session into a painful experience.
What You Need Before Starting
Gathering the correct materials beforehand ensures a smooth process and protects the delicate parts of the goggles from accidental damage. Setting up a clean, dry, and well-lit workspace prevents small clips or adjusters from getting lost.

First, secure a compatible replacement strap. You can choose a brand-specific replacement strap or a highly versatile universal silicone or bungee strap. In the Philippines, high-quality replacement straps are widely available online or at local sporting goods stores, typically ranging from ₱150 to ₱400. Ensure the width of the new strap matches the attachment slots on your child’s goggle frame.
Prepare a small bowl of lukewarm water mixed with a few drops of mild soap or baby shampoo. This solution serves two purposes: it cleans away accumulated grime and acts as a safe lubricant to help slide the new strap through tight plastic slots without tearing the material.
Keep a soft microfiber cloth nearby. This is essential for drying the frame and handling the goggles safely. Using rough towels or paper napkins can easily scratch the delicate anti-fog coating on the inside of the lenses.
For goggles with tight clip-in mechanisms, an optional plastic pry tool—such as a guitar pick or a plastic opening card—can be incredibly helpful. Never use metal screwdrivers, metal tweezers, or scissors to pry open clips or force straps through slots. Hard metal tools can easily slip, permanently scratching the lenses or cracking the plastic frame. Always check the manufacturer’s care instructions for your specific goggle model before applying any pressure.
How to Remove the Old Strap Without Cracking the Frame
Removing the worn strap requires patience and gentle handling. Because the plastic frames of kids’ goggles are thin and lightweight, applying force at the wrong angle can easily snap the attachment points, ruining the entire pair.
Start by identifying the specific attachment mechanism used by your child’s goggles. Most kids’ goggles utilize one of three designs: loop-through pegs, clip-in side buckles, or integrated screw-in mechanisms. Knowing which style you have determines how you should apply pressure.
For loop-through designs, the strap is threaded through a slot and hooked over a small plastic peg molded directly onto the frame. To remove it, gently stretch the silicone around the peg to loosen its grip, then slide it off. Always pull the strap parallel to the frame rather than pulling it upward at a sharp angle. Pulling upward creates a lever effect that can easily snap the delicate plastic peg off the frame.
For clip-in or buckle designs, locate the small, flexible release tabs on the sides of the buckle. Press these tabs carefully using your fingertips or a plastic pry tool. While holding the tabs down, gently slide the strap backward out of the locking channel. Avoid forcing the strap if it does not slide out easily, as the locking tab may not be fully disengaged.
If the old strap is stuck, brittle, or calcified from dried chlorine, salt, and body oils, do not try to pull it off with force. Instead, soak the attachment points in your bowl of lukewarm water for five to ten minutes. The water will soften the mineral deposits and make the old silicone pliable enough to slide off safely. Never use a sharp utility knife or scissors to cut the strap off right next to the frame, as a single slip can slice the plastic attachment loop or gouge the lens.
Once the old strap is detached, use the mild soapy water and your microfiber cloth to clean the exposed pegs, slots, and frame edges. Removing built-up sunscreen, salt, and chlorine residue ensures the new strap will sit flat and secure. Rinse the frame with clean water and dry it thoroughly before proceeding to the installation.
Attaching the New Strap Securely
Installing the new strap correctly ensures it maintains its elasticity, provides a balanced hold, and does not slip loose while your child is swimming.
Before threading, align the new strap with the frame. Most swimming goggle straps have a smooth side and a textured or grooved side. Orient the strap so that the textured side faces inward, toward your child’s head. This textured surface is designed to grip the hair and swim cap, preventing the goggles from shifting during active play.
For loop-through designs, fold the end of the new strap lengthwise to create a narrow, pointed profile. Dip the folded tip into your mild soapy water solution to lubricate it. Thread the tip through the frame’s slot or over the peg, and pull it through gently until the strap sits flat. Visually inspect the slot to ensure the strap is not twisted inside the opening, as twisted silicone creates uneven tension and uncomfortable pressure points.
For clip-in designs, slide the end of the strap into the buckle channel in the direction indicated by the manufacturer’s instructions. Push the strap forward until you hear or feel a distinct click, which indicates the locking tab has engaged. Give the strap a gentle backward tug to verify that the lock is secure and will not slip under tension.
Pay close attention to tension during the installation process. Avoid overstretching the new silicone strap as you pull it through tight slots. Forcing a highly stretched strap through a narrow plastic opening can cause microscopic tears in the silicone, which will expand rapidly under tension and cause the strap to snap prematurely during use.
Never use sharp household tools, such as sewing needles, metal keys, or small scissors, to poke or pull the strap through tight frame openings. Even a tiny puncture in a silicone strap will act as a stress concentration point, causing the strap to tear completely the first time it is stretched over your child’s head.
Adjusting the Fit and Testing the Leak-Proof Seal
Once the new strap is securely attached, you must adjust the tension and verify that the goggles provide a comfortable, leak-proof seal before your child gets into the water.
Place the goggles on your child’s face and use the side buckles or the rear adjuster to customize the fit. The strap should sit flat and straight against the back of the head, resting comfortably just above the ears. Avoid tightening the strap excessively; a common misconception is that a tighter strap prevents leaks, but over-tightening actually warps the soft silicone eye cups, causing water to seep in.
Perform a quick “suction test” to check the integrity of the seal. Gently press the goggle lenses against your child’s eye sockets without pulling the strap over their head. Instruct your child to let go of the goggles. If the eye cups are sealing correctly, the goggles should stick to their face via light suction for a second or two before falling. If they fall off instantly, adjust the nose bridge (if adjustable) or check if the frame is warped.
Once the suction is verified, pull the strap over your child’s head to secure the goggles. Check for deep red marks or pressure rings around their eyes after a few minutes of wear. The strap should hold the goggles securely without digging into their skin or causing discomfort. If your child complains of pain or tightness, loosen the strap slightly and retest.
If you are using a split-strap design, ensure the two bands are separated and positioned evenly around the crown of the head. Position one band slightly higher on the head and the other slightly lower. This dual-band setup distributes pressure evenly across the skull, preventing the goggles from sliding down during dives, underwater turns, or active surface swimming.
Maintaining the Strap in Humid and Sunny Conditions
Establishing a simple post-swim care routine is the best way to prevent premature degradation of your newly installed goggle strap, especially in hot, humid, and coastal environments.
Always rinse the goggles thoroughly in fresh, cool tap water immediately after every swim. Whether your child has been swimming in a chlorinated pool in Manila or playing in the salty waves of Batangas, fresh water is essential to wash away corrosive chlorine, salt, sand, and body oils before they can chemically attack the silicone.
Air-dry the goggles in a shaded, well-ventilated indoor area. Never leave swimming goggles in direct tropical sunlight or inside a hot car parked outdoors. Extreme heat and UV exposure rapidly break down the chemical bonds in silicone and rubber, making the new strap sticky, brittle, and highly prone to snapping.
Once dry, store the goggles in a hard protective case. Tossing loose goggles into a crowded swim bag exposes the strap to being crushed, tangled, or stretched out of shape by heavy towels, water bottles, and toys. A hard case also protects the outer lenses from scratches and shields the inner lenses from dust.
Keep the strap away from harsh chemicals, including aerosol sunscreens, tanning lotions, and insect repellents. The solvents and oils in these products can chemically react with silicone, causing it to swell, lose its elasticity, or become permanently tacky. To protect both your child’s skin and their gear, apply sunscreen first, allow it to dry completely, and then put on their swimming goggles.
Community discussion
Share your experience or ask a question. Comments are reviewed before publication.