
Storing a handgun securely while keeping it accessible requires a reliable mounting system. To safely install a pistol gun wall mount, you must match the mounting hardware to your specific wall material, locate structural supports, and verify the weight capacity of both the mount and the wall. Properly securing your firearm protects your investment, prevents accidental drops, and ensures the weapon remains exactly where you expect it. In the Philippines, where residential construction often utilizes solid concrete or concrete hollow blocks alongside modern drywall partitions, understanding how to adapt your installation to different wall types is critical for safety.
While mounting a firearm is a straightforward DIY project, it carries significant safety and structural responsibilities. A poorly installed mount can fail under the weight of a loaded handgun, leading to physical damage, accidental discharge, or unauthorized access. By following proper installation techniques, using the correct tools, and conducting thorough post-installation load tests, you can ensure your firearm remains safely stored and ready for use.
Pre-Installation Planning and Firearm Safety Boundaries
Before handling any tools or unboxing your new mounting hardware, you must establish strict safety protocols. Firearm safety is an absolute priority that cannot be bypassed. The very first step of any installation process is to ensure the pistol is completely unloaded. Remove the magazine, pull back the slide, and visually and physically inspect the chamber to confirm that no ammunition remains inside. Once verified, place all ammunition in a separate room or a locked container far from your work area to eliminate any risk of accidental loading during the installation and fitting process.
Products mentioned in this guide
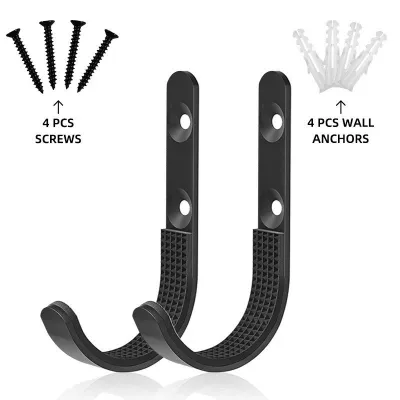
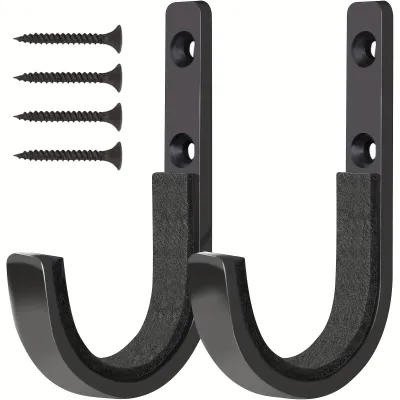
![[Fast Shipping] 2Pcs Stainless Steel J Shape Wall Mount Storage Rack for Ri-fle Shot G-un Ri-fle Shot g-un Hangers for Outdoor Hunting Accessories](https://img.lazcdn.com/g/p/fbe660e969d2661b996fb699b02f94e3.jpg_400x400q80.jpg_.webp)
Prices are valid at publication and may change. Please refer to the product page for the latest price.
It is equally important to understand the functional limits of a pistol gun wall mount. These mounts are designed for convenient storage, quick access, or displaying a firearm in a controlled environment; they are not a replacement for a heavy-duty, rated gun safe. A wall mount does not offer high-security protection against determined theft or prolonged attempts at unauthorized access. If your primary goal is absolute security against burglary, a bolted-down safe is the correct choice. The wall mount should be viewed as an organizational tool rather than a primary security barrier.
Responsible gun ownership also requires strict compliance with local laws and household safety needs. In the Philippines, Republic Act 10591 governs the ownership, carrying, and safe storage of firearms. Gun owners must take proactive measures to prevent unauthorized individuals—particularly children, domestic staff, or visitors—from handling their firearms. This means the mount must be installed at a height and in a location that is completely out of reach of children. If the room where the mount is located is not continuously locked, the mount must be paired with a secondary locking mechanism.
Finally, you must perform a structural weight assessment before drilling any holes. Review the manufacturer’s specifications for both your pistol and the wall mount. Calculate the total weight of your firearm, including a fully loaded magazine and any mounted accessories such as weapon lights, lasers, or red dot optics. Compare this total weight against the maximum load capacity certified by the mount manufacturer. Always maintain a conservative safety margin; if your fully equipped pistol weighs 1.2 kilograms, choose a mount rated for at least 5 kilograms to account for the dynamic forces applied when placing or removing the weapon.
Essential Tools and Hardware Selection by Wall Material
Using the correct fasteners and tools is the difference between a rock-solid installation and a catastrophic mount failure. A standard tool kit for this project should include a high-quality power drill, a reliable stud finder, a spirit level, a measuring tape, a pencil, and safety glasses. Depending on your wall material, you will also need specific drill bits: standard twist bits for wood, multi-purpose bits for drywall, or carbide-tipped masonry bits for concrete and brick surfaces.

When mounting directly into wood studs or solid wood paneling, heavy-duty wood screws are the gold standard. These screws must be long enough to pass through any outer wall layers—such as 1/2-inch or 5/8-inch drywall—and penetrate at least 1 to 1.5 inches into the solid wood stud beneath. Standard drywall screws are brittle and lack the shear strength required to support a firearm safely over time; always use dedicated wood screws or lag bolts with a thick shank.
Drywall installations require extreme caution because hollow gypsum board has very little structural strength. You must never use standard plastic expansion plugs or tapered wall anchors in hollow drywall for a firearm mount. These anchors are designed for light, static loads like picture frames and can easily pull out under the dynamic force of drawing a pistol. Instead, opt for heavy-duty toggle bolts, snap-toggles, or zinc self-drilling threaded drywall anchors. Toggle bolts expand behind the drywall sheet, distributing the weight across a much larger surface area to prevent pull-out failures.
For concrete, brick, or concrete hollow block (CHB) walls—which are incredibly common in Philippine homes—you must use specialized masonry anchors. Sleeve anchors, wedge anchors, or high-quality concrete screws (such as Tapcon anchors) are required to grip the dense, abrasive material. Installing these fasteners requires a hammer drill, as a standard rotary drill will struggle to penetrate cured concrete and can overheat your drill bits. The hammer action pulverizes the concrete, allowing the carbide tip to cut a clean, precise hole.
Step-by-Step Installation for Wood, Drywall, and Concrete
Securing the Mount to Wood Studs or Solid Wood
Installing your pistol gun wall mount directly into a wood stud provides the highest level of structural integrity. To begin, use a stud finder to locate the vertical edges of the stud behind your drywall. Mark both edges with a pencil, then mark the exact center point between them. Wood studs in residential construction are typically spaced 16 or 24 inches apart on center, so you can map out adjacent studs if needed to find the ideal placement.
Hold the wall mount against the wall, aligning its mounting holes with the pencil mark indicating the center of the stud. Place a spirit level on top of the mount to ensure it is perfectly horizontal or aligned to your preferred mounting angle. Once leveled, use a pencil to mark the precise drilling points through the mount’s screw holes onto the wall surface.
Before driving the screws, you must drill pilot holes. Select a drill bit with a diameter slightly smaller than the inner shank of your wood screws (excluding the threads). Drill straight into the marked points, keeping the drill perpendicular to the wall. Drilling pilot holes prevents the wood stud from splitting, which would severely compromise its holding power. Align the mount over the pilot holes and drive the heavy-duty wood screws using your power drill or a hand screwdriver until they are flush and tight against the mount. Verify the alignment one last time with your spirit level.
Installing on Drywall (Stud vs. Hollow Anchors)
Whenever you are mounting a firearm on a drywall partition, locating a wood or metal stud is always the safest and most secure path. If a stud is available in your desired location, follow the wood stud installation steps. However, if your ideal mounting location falls between studs, you must rely on heavy-duty hollow-wall anchors to prevent the mount from tearing out of the gypsum board.
To install the mount using toggle bolts, start by holding the mount against the drywall at your desired height. Use a spirit level to ensure the mount is straight, then mark the mounting holes with a pencil. Put the mount aside and select a drill bit that matches the diameter specified on your toggle bolt packaging. Because the folded metal wings of a toggle bolt must pass completely through the drywall, the hole will be significantly larger than the bolt itself.
Drill the holes through the drywall at your marked points. Next, assemble the hardware: insert the machine screw through the face of the wall mount, then thread the spring-loaded toggle wing onto the screw from the back. Ensure the wings fold inward toward the wall mount. Fold the wings flat and push them completely through the drilled hole in the drywall. Once the wings clear the back of the drywall, you will hear or feel them spring open. Pull back gently on the wall mount to create tension, keeping the wings pressed flat against the inside of the drywall, and tighten the bolt with a manual screwdriver until the mount is secured firmly against the wall.
Stop Conditions: Stop immediately and relocate the mount if the drywall crumbles during drilling, if the anchor spins freely without tightening, or if the wall surface bows outward. These are signs of compromised drywall that cannot support the weight of a firearm.
Drilling and Anchoring into Concrete or Masonry
Concrete and concrete hollow block (CHB) walls provide an exceptionally secure foundation for a firearm mount, but they require precise drilling techniques to avoid damaging the wall or the hardware. Begin by placing the mount against the concrete wall, leveling it carefully, and marking the drilling locations through the mounting holes with a pencil.
Fit your hammer drill with a carbide-tipped masonry drill bit that matches the exact outer diameter of your masonry anchors. Set the drill to hammer mode and hold it firmly with both hands, keeping it perfectly perpendicular to the wall. Drill to a depth slightly deeper than the length of the anchor sleeve. If your drill has a depth stop, set it beforehand; otherwise, wrap a piece of electrical tape around the drill bit to mark the required depth.
Once the holes are drilled, you must clear all concrete dust and debris from the inside of the holes. Use a hand pump, a vacuum cleaner with a narrow nozzle, or compressed air to blow out the dust. Leftover concrete dust acts as a lubricant, preventing the anchor from expanding and gripping the concrete walls properly, which can lead to premature failure.
Insert the masonry sleeve anchors into the clean holes. If the fit is snug, tap them gently with a hammer until the top of the sleeve is completely flush with the concrete surface. Place the wall mount over the protruding anchor studs, thread on the washers and nuts (or drive the concrete screws), and tighten them securely.
Stop Conditions: Stop drilling immediately if the drill bit hits steel rebar. You will feel the drill suddenly stop advancing, and the sound will change to a high-pitched metallic ring. Forcing the drill will destroy your masonry bit. If you hit rebar, you must patch the hole and relocate the mount at least two inches away from the original spot.
Post-Installation Verification and Load Testing
Never assume an installation is safe until you have thoroughly tested its structural integrity. Once the mount is secured to the wall, begin with a detailed visual inspection. Look closely at the interface between the back of the mount and the wall surface. There should be no visible gaps, tilting, or uneven spacing. Check that all screws, bolts, or nuts are fully seated, straight, and have not stripped the mount’s pre-drilled holes or damaged the surrounding wall material.
Next, perform a manual pull test. Before introducing your firearm to the mount, apply downward and outward manual force to the mounting bracket. Gradually increase the pressure, simulating a load that is significantly heavier than your actual pistol. Pull from different angles to mimic the dynamic forces of grabbing, holstering, or accidentally bumping into the mount. This physical test ensures that any hidden structural weaknesses or loose anchors are identified safely without risking damage to your firearm.
Evaluate the results of your pull test carefully. If you notice any shifting in the mount, if the surrounding drywall or concrete cracks, or if the anchors begin to creep outward, the installation has failed. Do not attempt to use the mount in this state. You must remove the hardware, inspect the wall for damage, patch the holes, and restart the installation process in a more structurally sound location or with stronger anchoring hardware.
Only after the mount has successfully passed the manual load test should you introduce your firearm. Place your completely unloaded pistol onto the mount to verify the overall fit. Check that the retention mechanism, magnetic grip, or cradle holds the frame securely without wobbling. Ensure there is adequate physical clearance for the barrel, trigger guard, and grip, allowing you to place and remove the weapon smoothly without scraping the wall or the mount.
Positioning for Safe Access and Environmental Protection
Selecting the right location for your pistol gun wall mount involves balancing rapid accessibility with long-term firearm preservation. Position the mount at an ergonomic height that allows for a natural, unobstructed draw. Ensure there is ample physical clearance below, above, and to the sides of the mount so your hand can fully grip the pistol frame without striking the wall, shelves, or adjacent furniture. The draw path must be completely clear of any obstacles.
Environmental factors are highly critical, especially in the tropical climate of the Philippines. High relative humidity can rapidly degrade a firearm’s finish, leading to rust, pitting, and the breakdown of protective gun lubricants. To prevent environmental damage, follow these guidelines:
- Avoid Exterior Walls: Do not mount your firearm on exterior-facing walls, which experience significant temperature fluctuations that cause moisture condensation on metal parts.
- Keep Away from AC Vents: Avoid placing the mount directly in the airflow path of air conditioning units, as cold air hitting a warm firearm can cause condensation when the AC is turned off.
- Avoid Direct Sunlight: Keep the mount away from windows where direct UV rays can degrade polymer frames, wooden grips, and optic seals.
- Control the Environment: Install the mount in a well-ventilated room, and consider using a dehumidifier or placing silica gel packets near the storage area to manage moisture levels.
Finally, integrate secondary security measures to prevent unauthorized handling. If your wall mount is located in a room that is not continuously locked, use a cable lock threaded through the pistol’s action and secured to an independent wall anchor, or choose a wall mount that features an integrated mechanical trigger lock or biometric scanner. These secondary layers of security ensure that even if an unauthorized person manages to reach the firearm, they cannot easily remove or operate it, maintaining a safe and responsible household environment.
Community discussion
Share your experience or ask a question. Comments are reviewed before publication.