
Replacing the recoil spring plug on a 1911 pistol is a fundamental maintenance task that ensures your firearm continues to cycle smoothly and reliably. While the process is mechanically straightforward, working with highly compressed springs carries inherent risks of parts launching or causing minor injuries. Proper training, patience, and strict adherence to safety protocols are essential before attempting any disassembly. If you ever feel uncertain about your mechanical ability or the specific configuration of your firearm, stop immediately and consult a qualified gunsmith.
Equipment and guides cannot replace professional instruction and hands-on experience. Before beginning, ensure you understand the mechanical limits of your firearm and have a clear, distraction-free environment to perform the work. Taking your time during each step prevents damage to both the firearm’s finish and its internal components.
Essential Safety Precautions and Workspace Setup
Before touching any tools, you must establish a safe environment. The absolute first step is to point the firearm in a safe direction, drop the magazine, pull the slide back, and lock it in place. Visually and physically inspect the chamber, magazine well, and breech face to verify that the firearm is completely empty. Never assume a firearm is unloaded simply because the magazine has been removed.
Products mentioned in this guide
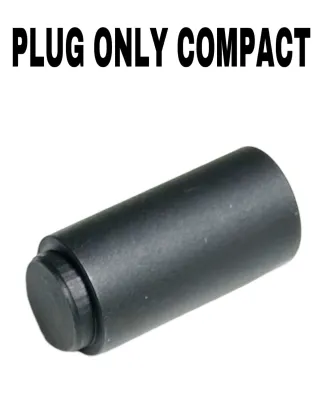
Prices are valid at publication and may change. Please refer to the product page for the latest price.
Because the recoil spring is kept under significant tension, always wear ANSI-rated safety glasses throughout this entire procedure. A slipping spring can launch the metal recoil spring plug with enough force to cause serious eye injury. Protecting your vision is a non-negotiable safety requirement when working on any spring-loaded firearm component.
Set up your workspace on a clean, flat, and well-lit table. Use a soft neoprene or rubber gun mat to protect the pistol’s finish from scratches and to prevent small parts from rolling off the table. In humid tropical environments, sweat and moisture from your hands can quickly transfer to bare steel components during disassembly. Keeping a dry microfiber cloth nearby allows you to wipe down components immediately, minimizing the risk of flash rust forming on non-treated surfaces.
If you encounter unexpected resistance, or if you are unsure about any step of the disassembly, stop immediately. Forcing components can cause permanent damage to the slide or frame. When in doubt, seek the assistance of a certified gunsmith to ensure the firearm remains safe to operate.
Tools and Materials Required for the Job
To complete this task safely and without marring your firearm, gather the correct tools before you begin. You will need a clean microfiber cloth, a small container or magnetic tray to secure loose parts, and a soft punch or nylon hammer to assist with the slide stop pin if it is tightly fitted.

While some standard Government Model (GI) bushings can be turned by hand when spring tension is relieved, using a dedicated polymer barrel bushing wrench is highly recommended. These inexpensive tools, widely available at local gun shops and online marketplaces, provide a secure grip and prevent the wrench from slipping and scratching the slide’s finish. Always check your manufacturer’s manual to see if a specific wrench style is recommended for your model.
Verify that your replacement recoil spring plug matches your specific 1911 configuration. A standard GI setup uses a short guide rod and a solid plug, whereas a full-length guide rod (FLGR) setup requires a hollow plug that allows the rod to pass through. Ensure the replacement part is compatible with both your guide rod style and your pistol’s caliber specifications.
Using a small magnetic tray or plastic container is an excellent way to keep your workspace organized. Placing the slide stop pin, barrel bushing, and old plug in a designated spot ensures that no critical components are misplaced or knocked off the table during the installation process.
Step-by-Step Disassembly: Removing the Old Plug
To remove the old recoil spring plug, you must first field-strip the slide from the frame. With the firearm verified empty, pull the slide back until the disassembly notch aligns with the rear tab of the slide stop. Push the slide stop pin from the right side of the frame and pull it completely out from the left side. Carefully slide the entire slide assembly forward and off the frame rails.
Turn the slide upside down on your work mat to access the recoil spring assembly. To safely manage the spring tension, place your thumb firmly over the rear of the recoil spring plug. Push the plug slightly rearward into the slide tunnel to relieve the physical pressure it exerts against the barrel bushing.
While maintaining constant downward pressure on the plug with your thumb, use your other hand (or a bushing wrench) to rotate the barrel bushing clockwise. Once the bushing is rotated clear of the plug’s path, slowly and carefully ease your thumb forward, allowing the recoil spring and plug to expand outward in a controlled manner.
Never release your grip on the plug suddenly. If your thumb slips before the spring tension is fully relieved, the plug can launch violently across the room. Keep your hand aligned with the slide tunnel to guide the spring straight out, preventing it from kinking or jumping sideways during decompression.
Inspecting Components and Preparing for Installation
With the recoil spring assembly removed, take the opportunity to inspect the condition of your parts. Examine the old recoil spring for physical kinks, flattening of the coils, or a noticeable loss of overall length compared to a new spring. If the spring shows signs of excessive wear, replace it with a new one that matches the manufacturer’s specified weight for your caliber.
Inspect the old recoil spring plug for hairline cracks, deformation around the rim, or deep gouges on the contact surfaces. A damaged plug can bind inside the slide tunnel, leading to cycling failures or potential damage to the slide itself. If you notice any structural compromises, discard the old plug immediately.
Clean the inside of the slide, the guide rod channel, and the barrel bushing threads using a clean microfiber cloth and a quality firearm solvent. Removing accumulated carbon buildup, grit, and old grease ensures that the new plug can seat fully and move without restriction. In humid climates, keeping these internal channels clean is vital to preventing moisture from trapping corrosive carbon residue.
Before installing the new parts, apply a very light coat of high-quality gun oil or grease to the new recoil spring and the outer friction surfaces of the plug. Refer to your firearm manufacturer’s manual for specific lubrication points. Proper lubrication reduces wear on contact surfaces and ensures smooth mechanical movement during cycling.
Reassembly: Installing the New Recoil Spring Plug
To install the new plug, first insert the recoil spring and guide rod back into the slide tunnel, ensuring they are oriented correctly according to your pistol’s design. Place the new recoil spring plug over the exposed end of the spring, making sure the closed end (or open end for full-length guide rods) is facing in the correct direction.
Using your thumb, compress the spring by pushing the plug straight back into the slide tunnel. Keep your thumb centered on the plug to prevent the spring from buckling sideways. While holding the plug fully depressed and flush with the front of the slide, use your other hand to rotate the barrel bushing counterclockwise over the plug to capture it.
Be extremely careful not to cross-thread the barrel bushing as you rotate it back into position. The bushing should turn smoothly with minimal resistance. If you feel the bushing binding or sticking, stop immediately, release the spring tension slowly, and check the alignment of the plug and bushing before trying again.
Once the bushing is aligned correctly, perform the final rotation to lock the plug securely in place. The plug should sit flush or slightly recessed, depending on your specific 1911 model, and the bushing tab must be fully engaged in its locking notch. Double-check that the assembly is secure before proceeding.
Function Check and Final Verification
After securing the new plug, slide the reassembled slide back onto the frame rails. Align the disassembly notch on the slide with the frame hole, insert the slide stop pin, and push it firmly until it clicks into place. Ensure the slide stop is fully seated against the frame without scratching the receiver.
Perform a manual slide rack several times to verify that the action moves smoothly. The slide should travel fully to the rear without any gritty feeling, binding, or unusual resistance, and it must return fully to battery under its own spring tension when released.
Next, perform a dry-fire function check to verify that the internal safety mechanisms are working correctly. Ensure the chamber is completely empty, point the firearm in a safe direction, and test the trigger pull, disconnector function, and grip safety. The hammer should only fall when the grip safety is fully depressed and the trigger is pulled.
If the slide feels gritty, fails to return to battery, or if any safety mechanism fails to operate as expected, do not attempt to load or fire the weapon. Disassemble the slide again to check for spring binding or parts misalignment. If the issue persists, take the firearm to a qualified gunsmith for a professional evaluation.
Troubleshooting Common Installation Issues
If the barrel bushing refuses to turn during reassembly, the recoil spring plug is likely not depressed far enough into the slide tunnel, or the spring itself is binding inside. Release the pressure slowly, remove the plug, and verify that the spring is seated flat against the guide rod base before attempting to compress it again.
If the slide fails to return fully to battery after reassembly, check to see if the recoil spring is kinked or if the plug is seated crookedly. Additionally, ensure that the barrel link did not flip forward out of position during slide installation, which can prevent the slide stop pin from aligning correctly and bind the entire action.
Never use excessive force, metal hammers, or heavy pliers to force the bushing or plug into place. Doing so can permanently deform the slide threads, mar the finish, or bend the recoil spring. If the parts do not fit together with reasonable hand pressure, there is an alignment issue or a parts mismatch.
Persistent assembly issues often indicate that the replacement plug is not fully compatible with your specific slide or guide rod configuration. If you verify that the parts are correct but still experience binding, stop and seek a professional gunsmith to inspect the components for out-of-tolerance dimensions or underlying wear.
Frequently Asked Questions (FAQ)
Do I need a special bushing wrench for a standard 1911 recoil spring plug?
While many standard GI-style barrel bushings can be rotated by hand when the spring tension is relieved, using a dedicated polymer bushing wrench is highly recommended. A wrench provides a much better grip, especially if your hands are oily or if the bushing has a tight, match-grade fit. Using a polymer wrench also prevents your fingers from slipping, which can cause the spring to launch unexpectedly, and protects the slide’s finish from accidental scratches.
How often should the recoil spring and plug be replaced?
Recoil spring replacement intervals depend on your specific caliber, ammunition power factor, and how frequently you shoot, rather than a set calendar date. Generally, springs should be inspected regularly and replaced if they show physical signs of wear, such as kinking, significant shortening, or if the firearm begins experiencing failures to return to battery. The solid metal recoil spring plug rarely needs replacement unless it shows physical cracks, deformation, or severe wear on its contact surfaces.
Community discussion
Share your experience or ask a question. Comments are reviewed before publication.