
Dry fire practice is one of the most effective ways to build muscle memory, improve trigger control, and refine your sight picture without spending a fortune on ammunition. By integrating a laser target into your home training routine, you transform abstract trigger pulls into highly visual, actionable data. Setting up a laser target system requires careful preparation, precise calibration, and strict adherence to safety protocols to ensure your practice is both productive and safe.
Using a laser target system allows you to practice shooting fundamentals in the comfort of your own home. Instead of guessing where your shots would have landed, the momentary flash of a laser cartridge provides immediate visual feedback. This guide will walk you through the entire process, from setting up a secure practice environment to executing highly focused training drills.
Essential Safety Checks Before Dry Firing
Dry fire training is incredibly beneficial, but handling a real firearm indoors carries inherent risks. You must establish a non-negotiable safety routine before every single session. Safety is not a checklist you run through once and forget; it is an active state of awareness that governs your entire practice.
Products mentioned in this guide

Prices are valid at publication and may change. Please refer to the product page for the latest price.
First, treat every firearm as if it is loaded at all times, even when you are certain it is empty. Before you begin, remove the magazine and clear the chamber of your firearm. Perform a thorough visual and physical inspection of both the chamber and the magazine well to ensure no ammunition remains inside. Look directly into the chamber, and insert a finger to physically verify that the space is clear.
Next, remove all live ammunition from your designated practice room. Take any loaded magazines, loose cartridges, or spare boxes of ammunition and store them in a completely separate room or a secure safe. This eliminates the risk of accidentally loading a live round during your training session. There should be absolutely zero live ammunition within your reach while you practice.
Establish a safe backstop and a designated safe direction within your practice area. A safe backstop is an object or wall capable of stopping a bullet in the highly unlikely event of an accidental discharge. In many homes in the Philippines, solid concrete or hollow-block walls serve as excellent physical barriers. Ensure your laser target is mounted against this safe backstop, away from windows, doors, or interior drywall partitions where family members might pass by.
The Golden Rule of Dry Fire Safety
- Never point the firearm at anything you are not willing to destroy, even during dry fire.
- Verify, then verify again. If you are interrupted by a phone call, a knock at the door, or a delivery rider at your gate, you must pause your session.
- Re-verify upon return. When you return to your practice space, you must repeat the entire physical and visual inspection process from the beginning before resuming your training.
What You Need for a Laser Target Setup
To build a functional home training range, you need a few essential pieces of equipment. While high-end systems can cost a premium, a basic, reliable setup is highly accessible and can be customized to fit your budget.

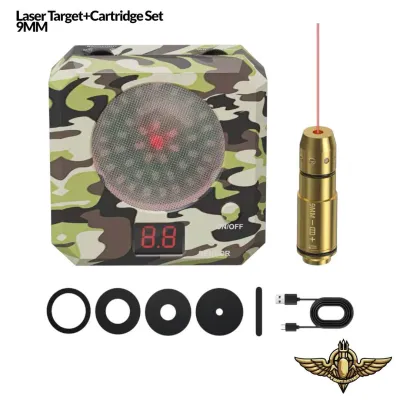
- A Firearm and Compatible Laser Cartridge: You will need your personal firearm and a high-quality laser training cartridge designed for your specific caliber (such as 9mm, .45 ACP, or .380 ACP). Alternatively, you can use a dedicated laser training pistol or a snap cap fitted with a built-in laser module. Ensure the cartridge features a rubber primer pad to cushion the firing pin strike.
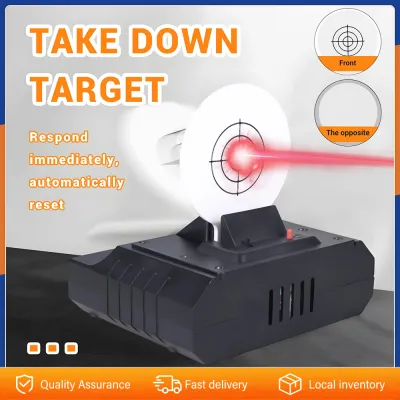
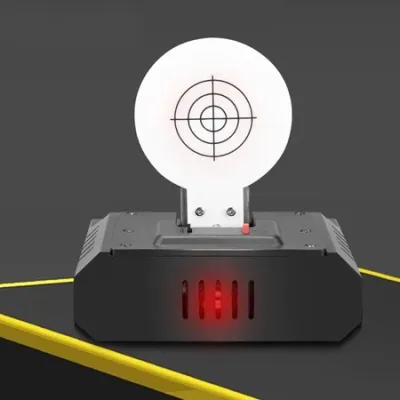
- A Laser Target Unit: This can range from a simple reactive physical target that flashes or beeps when struck to a specialized electronic target board. Many modern systems utilize printed paper target sheets designed to pair with a smartphone application.
- A Smartphone or Tablet: If you are using an app-based system, you will need a mobile device with a working rear-facing camera. The companion app will monitor the target and record where the laser strikes.
- A Stable Surface or Tripod: A reliable tripod or phone mount is critical. Any movement of your smartphone camera during a session will disrupt the app's calibration and lead to inaccurate shot tracking.
- Manufacturer User Manuals: Always keep the user manuals for both your firearm and your laser target system nearby. Refer to them to verify compatibility, operational limits, and battery installation guidelines.
In the local market, basic laser cartridges typically range from ₱1,500 to ₱4,000, while complete electronic target systems can range from ₱5,000 to over ₱15,000. Invest in a system that matches your current skill level and training goals.
Step-by-Step Guide to Setting Up Your Laser Target
Setting up your laser target correctly ensures that the feedback you receive is accurate and reliable. Proper physical placement and environmental adjustments prevent technical glitches and mimic real-world shooting conditions.
Target Placement and Distance
Begin by mounting your laser target or target sheet on your designated safe backstop. Position the center of the target so that it aligns directly with your eye level when you are standing in your natural shooting stance. This prevents you from developing a habit of tilting your head or muzzle unnaturally during practice.
Set your shooting distance based on the manufacturer’s recommendations, which typically range from 3 to 10 meters. For typical indoor residential spaces in the Philippines, a distance of 3 to 5 meters is highly practical and provides an excellent simulation of close-quarters defensive scenarios. Mark your shooting position on the floor with a piece of tape to ensure consistency across your training sessions.
Ambient Lighting Adjustments
Laser target sensors and smartphone cameras rely on optical contrast to detect the rapid, momentary pulse of the laser. Bright, direct sunlight streaming through a window can easily wash out the sensor, causing the system to miss shots. Conversely, an overly dark room can make it difficult for a smartphone camera to resolve the target boundaries.
To optimize your setup, draw your curtains or blinds to block direct sunlight. Use indirect, steady indoor lighting to illuminate the room evenly. Avoid placing lamps directly behind the target or pointing lights directly at the camera lens, as this creates glare.
If you are training in an air-conditioned room during a hot, humid day, allow your equipment to sit in the room for a few minutes before starting. Rapid temperature changes can cause condensation to form on your smartphone camera lens or the laser cartridge lens, which will blur the laser dot and disrupt detection.
Device Pairing and Calibration
If your system uses a companion app, mount your smartphone securely on a tripod and position it directly facing the target. Open the app and follow the on-screen prompts to pair any Bluetooth-enabled target hardware. Ensure your phone’s battery is well-charged, as real-time camera tracking consumes significant power.
Initiate the calibration process within the app. Most applications will display a live camera feed and ask you to align a digital bounding box with the physical edges of your target. Ensure the camera frame is completely still and free of any moving objects, such as a spinning ceiling fan or a fluttering curtain, which can trigger false shot registrations.
Laser Cartridge Installation
Before installing your laser cartridge, inspect the rubber O-rings on the body of the cartridge. Applying a microscopic amount of silicone lubricant to these rings can help the cartridge slide smoothly into the chamber and prevent it from becoming stuck. Do not use petroleum-based gun oils, as they can degrade the rubber over time.
Point your firearm in your designated safe direction, lock the slide back, and insert the laser cartridge directly into the chamber. Gently release the slide to let it go into battery. Point the firearm at your target and pull the trigger to perform a test activation. You should see a bright, momentary red or green dot appear on the target, and your companion app or electronic target should immediately register the hit.
How to Run an Effective Dry Fire Practice Session
Simply pulling the trigger repeatedly will not make you a better shooter. To maximize the value of your laser target, you must approach your practice sessions with structure, discipline, and a focus on fundamental mechanics.
Warm-Up and Stance
Begin every session with a brief warm-up. Spend two to three minutes establishing a consistent, balanced stance. Keep your feet shoulder-width apart, your knees slightly bent, and your weight distributed slightly forward.
Practice presenting your firearm from a ready position or drawing from your holster if your skill level and local safety rules permit. Focus entirely on bringing the sights directly to your eye line without moving your head. Do not pull the trigger during this warm-up phase; simply focus on achieving a perfect sight picture quickly and consistently.
Trigger Control and Break
Once you are warmed up, transition to trigger control drills. Place your finger on the trigger shoe and apply smooth, continuous rearward pressure. Your goal is to break the shot without disturbing the alignment of your front and rear sights.
Use the laser target to diagnose your trigger press. Because the laser emits a pulse at the exact moment of the trigger break, it acts as an uncompromising diagnostic tool. If you see a clean, perfectly round dot on the target, your trigger press was smooth. If the dot appears as a streak, a dash, or a comma, your muzzle moved during the trigger break, indicating that you are jerking the trigger or anticipating the shot.
Follow-Through
Follow-through is the act of maintaining your shooting fundamentals immediately after the shot breaks. In live fire, this helps you manage recoil and prepare for subsequent shots. In dry fire, proper follow-through prevents you from developing the bad habit of dropping your muzzle to look at your target.
When the trigger breaks and the laser pulses, keep your eyes focused on the front sight or red dot. Hold the trigger completely to the rear for at least one full second before releasing it to the reset point. This discipline ensures that your physical platform remains completely stable throughout the entire firing sequence.
Analyzing Feedback
After completing a string of five to ten shots, step back and analyze your shot group on your companion app or electronic target. Look for patterns rather than individual misses, as recurring groups point directly to specific mechanical habits.
- Low and Left Groups (for right-handed shooters): This is the most common pattern and typically indicates that you are slapping the trigger or anticipating the recoil by pushing the muzzle down.
- High or Low Vertical Spreads: This often suggests inconsistent grip pressure or that you are looking over the gun to see the target rather than keeping your eyes locked on the front sight.
- Horizontal Spreads: This usually points to inconsistent lateral pressure from your support hand or an improper finger position on the trigger shoe.
Make conscious, deliberate adjustments to your grip and finger placement on your next string to correct these patterns.
Pacing and Fatigue Management
Dry fire training requires intense mental concentration. Because there is no physical recoil or loud report to keep you alert, mental fatigue can set in quickly. Limit your dry fire sessions to 10 or 15 minutes of high-quality, focused practice.
If you notice your grip loosening, your focus drifting, or your shot groups expanding, stop the session immediately. Practicing while tired or distracted only reinforces poor mechanics and builds bad habits. Short, daily sessions of high-quality practice are far more beneficial than long, sporadic sessions of sloppy shooting.
Troubleshooting Common Laser Target Issues
Technical issues can disrupt your training flow, but most common problems are easy to diagnose and resolve without requiring professional repair or replacement.
Laser Not Registering
If your target or companion app fails to register your shots, first check the batteries in your laser cartridge. These small button-cell batteries drain relatively quickly with frequent use. If the batteries are fresh, inspect the laser lens for any dust, lint, or oil from your fingers. Clean the lens gently using a dry cotton swab.
Additionally, ensure the firing pin is striking the rubber primer pad squarely. If your firearm features an adjustable trigger or a modified firing pin, it may not be making sufficient contact to activate the internal switch of the laser cartridge.
App Disconnects or Lag
High-resolution camera tracking and real-time shot analysis place a heavy demand on your smartphone’s processor. If you experience lag or frequent app crashes, close all other background applications to free up system memory.
If your target system connects via Bluetooth, ensure your phone is within the recommended range (usually under 5 meters) and that there are no major obstacles between the devices. Turn off nearby Bluetooth devices that might cause signal interference.
Inconsistent Dot Detection
Inconsistent detection is almost always caused by environmental lighting issues. If the app misses some shots while registering others, look for shadows falling across the target face or bright glare reflecting off the target surface. Adjust your indoor lighting or draw your curtains tighter to create a more uniform environment.
Finally, wipe your smartphone’s camera lens with a clean microfiber cloth. Dust, smudges, or fingerprints on the lens can blur the camera’s view of the laser pulse, making it difficult for the software to identify and record your hits accurately.
Frequently Asked Questions (FAQ)
Can dry firing damage my firearm?
Most modern centerfire firearms (such as striker-fired or hammer-fired pistols) can be dry fired safely without any risk of damage. However, repeated dry firing on an empty chamber can place stress on the firing pin and breech face over time. Rimfire firearms (such as .22 LR pistols or rifles) should never be dry fired without a protective dummy round, as the firing pin can strike the hard steel edge of the chamber mouth, damaging both the pin and the barrel.
Using a laser training cartridge completely mitigates this risk. The rubber primer pad on the back of the cartridge acts as a built-in snap cap, absorbing the impact of the firing pin and protecting your firearm’s internal components from unnecessary wear. Always consult your firearm manufacturer’s manual for definitive guidance on dry firing.
Do I need a physical backstop for a laser target?
Yes, a safe physical backstop is strictly required for all dry fire practice. Even though you have verified that your firearm is completely unloaded and contains only a training laser, you must always adhere to the fundamental rules of firearm safety.
Preparing for the worst-case scenario of a negligent discharge is a non-negotiable aspect of responsible firearm ownership. A solid physical backstop, such as a concrete wall, ensures that any accidental live round is safely contained. Never point or dry fire your firearm toward windows, thin interior drywall partitions where family members might be present, or doors leading to common areas.
Community discussion
Share your experience or ask a question. Comments are reviewed before publication.