
A color-coded pushup board targets different muscle groups by changing the angle, distance, and orientation of your hands during a pushup. By inserting the removable handles into pre-molded slots, you alter the mechanical load distributed across your chest, shoulders, triceps, and back. This simple mechanical shift allows you to emphasize specific muscle fibers that are difficult to isolate with standard flat-floor pushups.
Using a pushup board effectively requires understanding how these different angles impact your joints and muscles. While the board is an excellent tool for home workouts, especially in compact living spaces, proper form and safety checks are essential to prevent acute joint strain. By mastering the color zones and maintaining strict alignment, you can build a highly effective upper-body routine without the need for bulky gym equipment.
Decoding the Colors: What Each Zone Targets
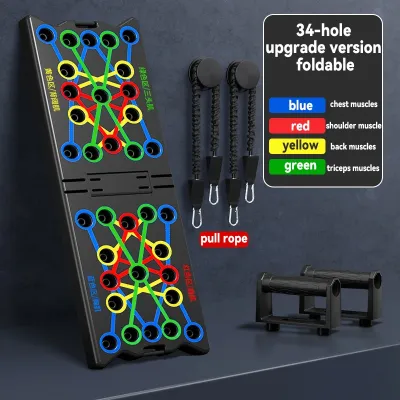
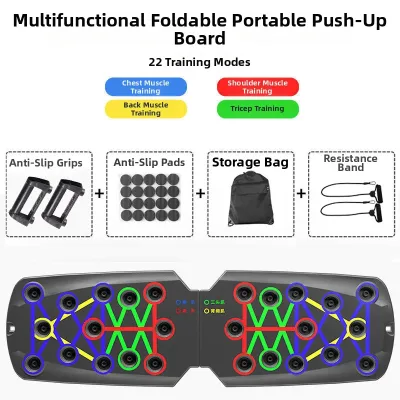
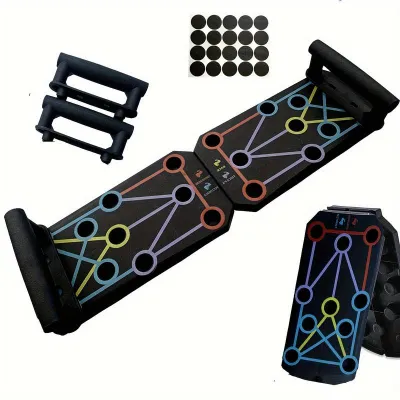
Color-coded pushup boards use a visual mapping system to guide your hand placement. By placing the handles into specific colored pathways, you automatically adjust the width and angle of your grip. This structural variation changes the leverage of the exercise, shifting the primary workload from one upper-body muscle group to another.
Products mentioned in this guide
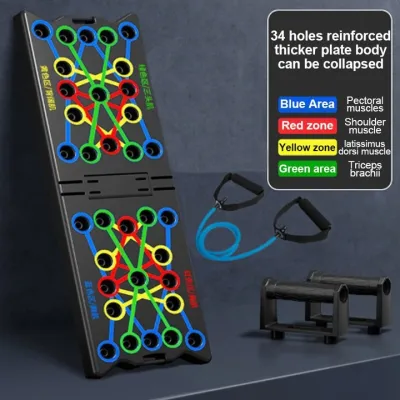
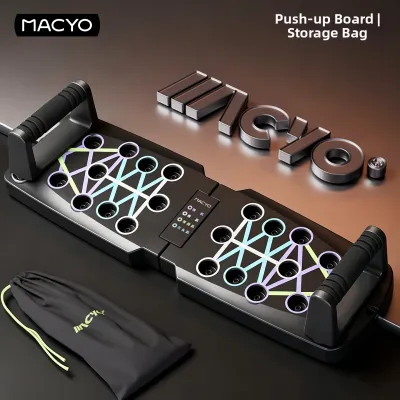
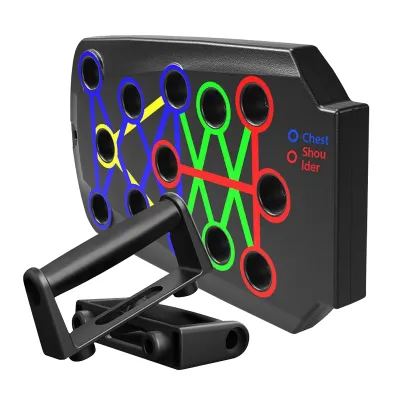
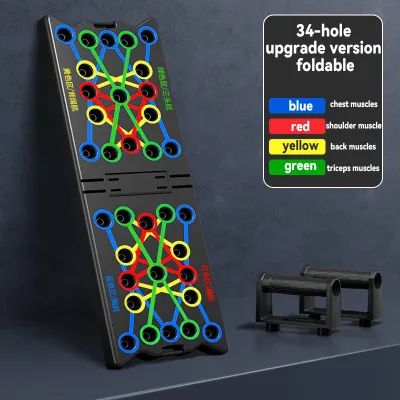

Prices are valid at publication and may change. Please refer to the product page for the latest price.
Before you begin inserting the handles, always check the product manual, packaging, or the legend printed on the bottom of your specific board. Color coding is not universally standardized across all fitness brands. While many manufacturers follow a similar design template, assuming your board matches a generic online guide can lead to incorrect hand placement, poor muscle activation, or unnecessary joint stress.
As a general reference, the most common industry color mapping utilizes four distinct zones:
- Red Zones: Typically designated for targeting the chest (pectoralis major and minor).
- Blue Zones: Generally positioned to emphasize the shoulders (anterior and medial deltoids).
- Yellow Zones: Usually placed to isolate the triceps brachii on the back of the arms.
- Green Zones: Often designated for the back muscles (latissimus dorsi) and biceps stabilization.
Changing the width and angle of your grip alters the moment arm of the joints involved in the pushup. A wider grip increases the horizontal adduction demands on your chest, while a narrower grip forces your elbows to flex and extend through a greater range of motion, placing more demand on your triceps. Angled grips change the rotation of your shoulders, allowing you to target different heads of the shoulder and back muscles safely, provided you follow the designated paths.
Mastering the Base: Setup and Safety Checks
Before attempting any advanced variations on your pushup board, you must establish a stable foundation. Start by inserting the handles firmly into your chosen color slots, ensuring they click or sit completely flush within the board. Grip the handles with your fingers wrapped fully around them, keeping your wrists in a neutral, straight line.

Maintaining a neutral wrist position is one of the primary benefits of using a pushup board. Unlike standard floor pushups, which force your wrists into extreme hyperextension, the elevated handles allow you to push through your knuckles without bending the wrist joint back. This reduction in joint stress is particularly beneficial for those recovering from minor wrist strain or looking to avoid repetitive use injuries.
Once your hands are positioned, align your body into a straight line from your head to your heels. Brace your core muscles tightly, squeeze your glutes, and ensure your hips do not sag toward the floor or rise too high in the air. Your feet should be placed hip-width apart to provide a stable base of support.
In warm, humid climates like the Philippines, sweat can quickly accumulate on your hands, the handles, and the floor. Always place your pushup board on a completely flat, dry, and stable surface. If you are working out on smooth ceramic tiles, polished wood, or smooth concrete, ensure you have installed the manufacturer’s provided non-slip rubber pads on the bottom of the board. If the board slides during a heavy repetition, it can cause sudden joint hyperextension or a fall.
Equipment cannot replace physical training, core strength, or personal judgment. You must listen to your body and recognize your physical limits. Stop the exercise immediately if you feel sharp, pinching pain in your wrists, elbows, or shoulders, or if your lower back begins to sag due to fatigue. Continuing to push through poor alignment significantly increases your risk of injury.
Execution Guide: Hand Placement for Each Muscle Group
To get the most out of your pushup board, you must execute each variation with control and precision. Moving too quickly or using momentum reduces muscle engagement and increases the risk of joint strain.
Chest Focus (Wide Grip)
To target your pectoral muscles, place the handles in the widest designated slots, which are commonly color-coded red. This wide positioning reduces the range of motion at the elbow joint while maximizing the horizontal stretch and contraction of the chest fibers.
Begin the movement by lowering your body slowly toward the board. Keep your elbows at roughly a 45-degree angle relative to your torso. Letting your elbows flare out to a 90-degree angle puts excessive pressure on the anterior shoulder capsule and can lead to rotator cuff irritation over time.
Lower yourself until your chest is just above the level of the handles, feeling a deep stretch across your pectorals. The elevation of the handles allows you to descend slightly lower than you would on a flat floor, increasing the active range of motion. Push back up dynamically, squeezing your chest muscles at the top of the movement without locking out your elbows.
Shoulder Focus (Medium/Angled Grip)
To shift the emphasis to your shoulders, particularly the anterior (front) and medial (side) deltoids, move the handles to the designated shoulder zones, which are commonly color-coded blue. These slots are typically narrower than the chest slots and are often angled outward or placed slightly forward.
As you lower your body in this position, you will need to adjust your elbow path slightly. Keep your elbows tucked closer to your body than you would during a wide chest pushup. This angle forces the shoulders to perform more shoulder flexion, shifting the mechanical load away from the chest and onto the deltoids.
Be highly cautious of shoulder impingement when using these angles. If the handles are placed too far forward or if you allow your shoulders to shrug up toward your ears, you can pinch the tendons in your shoulder joint. Keep your shoulders depressed (pulled away from your ears) and your shoulder blades retracted throughout the entire movement.
Triceps Focus (Narrow Grip)
For triceps isolation, place the handles in the narrowest slots, which are commonly color-coded yellow. These slots position your hands close together, often parallel to your torso or slightly angled inward.
To execute this variation correctly, you must keep your elbows tucked tightly against your ribs as you lower your body. Do not allow your elbows to flare outward even slightly. This narrow path forces the elbow joint to undergo a deep flexion, which heavily recruits the triceps brachii to push the body back up.
Because of the narrow base of support, this variation requires significant core stability and upper-body strength. If you find that your hips sag, your back arches, or you cannot complete a full range of motion, modify the exercise. Dropping to your knees allows you to practice the correct elbow-tucked form without overloading your joints before your triceps are strong enough to support your full body weight.
Back and Biceps Variations (Angled/Reverse Grip)
Many color-coded boards feature a green zone designated for the back and biceps. However, it is crucial to understand a fundamental biomechanical fact: pushups are a “pushing” exercise. True back and biceps development requires “pulling” movements, such as pull-ups, chin-ups, or rows, which contract the muscles against gravity in the opposite direction.
On a pushup board, the back and biceps zones work by altering your hand angles—often turning the handles inward or using a reverse (supinated) grip where your palms face forward. This reverse positioning increases the activation of the biceps brachii as a stabilizer during the pushup. It also forces you to tuck your elbows deeply, which recruits the latissimus dorsi (lats) and lower trapezius to stabilize your shoulder blades.
Manage your expectations when using the green zone. Treat these variations as supplementary stabilization exercises to improve your shoulder health and core control, rather than your primary tool for building a wider back. For complete upper-body development, always pair your pushup board routine with dedicated pulling exercises using resistance bands, pull-up bars, or suspension trainers.
Form Check: Common Mistakes to Avoid
Even with the visual guidance of a color-coded board, poor form can stall your progress and lead to chronic joint discomfort. Watch out for these common errors during your workouts:
- Elbow Flaring: Allowing your elbows to point straight out to the sides (forming a "T" shape with your body) is the most common mistake in pushups. This position places extreme stress on the rotator cuff and shoulder joints. Keep your elbows tucked at a 45-degree angle or less for almost all variations.
- Sagging Hips: A weak or unbraced core causes your pelvis to sag toward the floor, transferring the physical load to your lumbar spine. To correct this, squeeze your glutes tightly and brace your abdominal muscles as if you are preparing to absorb a light blow to the stomach. Your body must remain as rigid as a wooden plank.
- Half Reps: Many users avoid lowering themselves completely to save energy or make the exercise feel easier. This habit deprives your muscles of the strength-building benefits of a full range of motion. Use the elevation of the board's handles to lower your chest until it is level with the grips, then push all the way up to a soft lockout.
- Gripping Too Tightly: "White-knuckling" the handles by squeezing them with excessive force causes premature forearm fatigue and can cause a temporary spike in blood pressure. Maintain a firm, secure grip to ensure safety, but keep your hands relaxed enough to prevent unnecessary tension in your forearms and wrists.
Scaling Your Workout: Modifications for All Levels
Whether you are a beginner struggling to complete a single standard pushup or an advanced athlete looking for a new challenge, you can easily scale the difficulty of a pushup board workout.
To make the exercises easier (regression), try these modifications:
- Knee Pushups: Perform any of the color-coded variations with your knees resting on a soft mat or towel. This reduces the amount of body weight you have to lift by roughly 30 to 40 percent, allowing you to focus purely on hand placement and shoulder alignment.
- Incline Pushups: Place the pushup board on a sturdy, elevated, non-slip platform, such as a secure workout bench or a low, solid table. Elevating your hands reduces the gravitational pull on your body, making the movement much more manageable as you build baseline strength.
To make the exercises more challenging (progression), try these advanced techniques:
- Decline Pushups: Place your feet on an elevated surface, such as a sturdy chair, sofa, or fitness step, while keeping your hands on the pushup board handles. This angle shifts more of your body weight toward your upper chest and anterior shoulders, significantly increasing the difficulty.
- Tempo Adjustments: Slow down the movement to increase muscle tension. Try lowering your body over a slow, controlled count of three seconds, pausing for one second at the bottom with your chest hovering just above the board, and then pushing up explosively.
- Weighted Resistance: Wear a well-fitting weighted vest or place a secure resistance band across your upper back, holding the ends under the pushup board handles, to add external resistance to your repetitions.
To build a comprehensive upper-body workout, you can combine different color zones into a single training circuit. For example, perform a set of wide-grip chest pushups (red), rest for 30 seconds, transition the handles to the narrow triceps slots (yellow) for another set, and finish with the angled shoulder slots (blue). This circuit style keeps your heart rate elevated while systematically targeting every major muscle group in your upper body.
Frequently Asked Questions (FAQ)
Can I use the pushup board every day?
No, it is generally not recommended to use the pushup board for intense strength or muscle-building workouts every day. Your muscle fibers experience microscopic tears during resistance training and require 24 to 48 hours of rest to recover, repair, and grow stronger. Training the same muscle groups daily without adequate rest can lead to overtraining, chronic joint inflammation, and decreased performance. For optimal results, schedule your pushup board workouts 2 to 3 non-consecutive days per week. Light, low-volume movement is acceptable daily, but intense training sessions require dedicated recovery time.
Why do my wrists still hurt when using the board?
While a pushup board is designed to keep your wrists in a safer, neutral position, persistent pain can still occur due to several factors. You may be gripping the handles at an awkward, twisted angle, leaning your body weight too far forward over your hands, or squeezing the grips with excessive force. Additionally, if you have a pre-existing wrist injury or lack basic mobility in your forearm muscles, the pressure of supporting your body weight can still cause discomfort. Check your hand alignment to ensure your wrists are perfectly straight, distribute your weight evenly, and consult a physical therapist or medical professional if the pain persists.
Community discussion
Share your experience or ask a question. Comments are reviewed before publication.