
Using a massage ball is one of the most accessible and effective ways to relieve muscle tightness, improve flexibility, and accelerate your post-workout recovery. By applying targeted pressure to specific areas of tension, you can release tight muscle fibers and restore optimal movement patterns without needing a professional massage therapist. Whether you are an athlete recovering from intense training or someone dealing with daily postural strain, learning how to use this simple tool safely can transform your physical well-being.
Understanding Myofascial Release and Massage Ball Benefits
To understand how a massage ball aids recovery, it is helpful to understand myofascial release. Fascia is a continuous, web-like sheet of connective tissue that wraps around every muscle, bone, nerve, and organ in your body. Under normal conditions, healthy fascia is flexible, elastic, and slides smoothly as you move. However, repetitive training, poor posture, stress, or dehydration can cause the fascia to become thick, sticky, and adhered to surrounding tissues, forming what are commonly known as muscle knots or trigger points.
A massage ball acts as a targeted pressure tool to perform self-myofascial release. When you position the ball against a tight spot and apply your body weight, you perform what is known as ischemic compression. This direct pressure temporarily restricts blood flow to the localized area. Once you release the pressure, a fresh wave of oxygenated, nutrient-rich blood rushes back into the tissue, flushing out accumulated metabolic waste products and promoting cellular repair.
Products mentioned in this guide
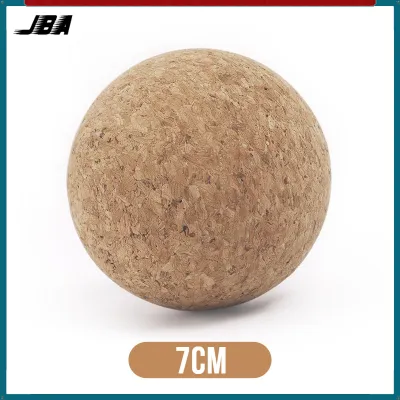
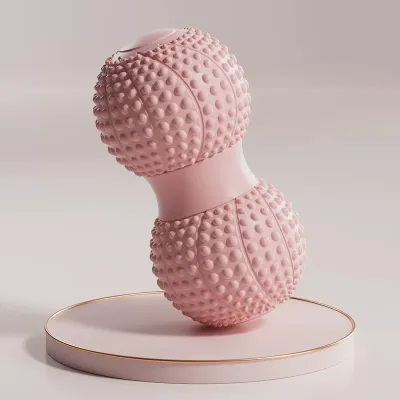
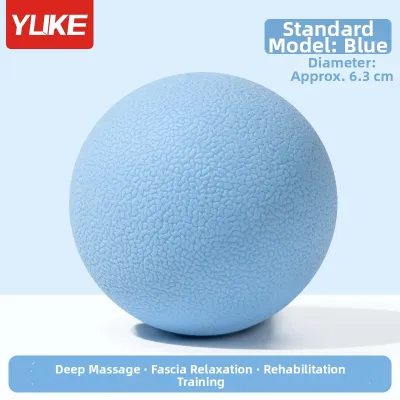
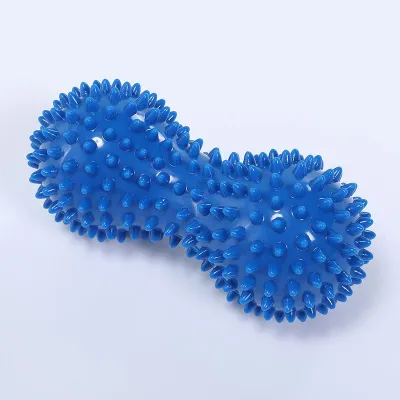
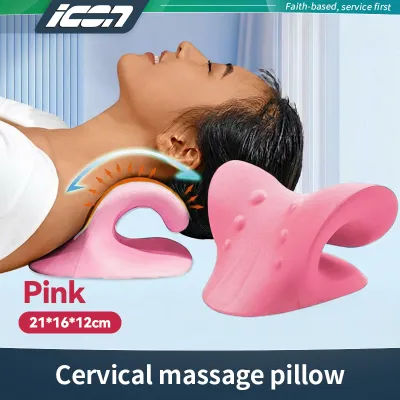
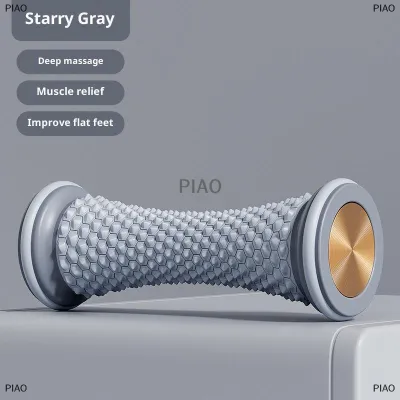
Prices are valid at publication and may change. Please refer to the product page for the latest price.
Using a massage ball also stimulates sensory receptors within the muscles and fascia, signaling your nervous system to reduce muscle tension and lower pain signals. This process helps restore the muscle’s natural length, improves your range of motion, and reduces overall post-exercise soreness.
When starting out, you must learn to distinguish between therapeutic discomfort and harmful injury pain. Effective myofascial release often comes with a dull, aching sensation—frequently described as a “good hurt”—that gradually dissipates as the muscle relaxes. In contrast, sharp, stabbing, pinching, or radiating pain indicates that you are compressing a nerve, joint, or injured tissue. If you experience any sharp or sudden pain, immediately stop the movement and adjust your positioning.
Choosing the Right Massage Ball for Your Recovery Needs
Selecting the right massage ball depends on your specific activity level, muscle sensitivity, and the areas of your body you need to target. No single ball is perfect for every muscle group or recovery scenario, so understanding the differences in material, size, and texture will help you make an informed decision.

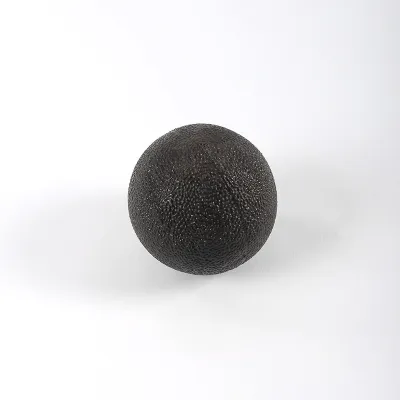
- Solid Rubber or Lacrosse Balls: These balls are highly dense and have virtually no give. They provide deep, intense pressure, making them excellent for thick, heavy muscle groups such as the glutes, hamstrings, and calves. They are best suited for experienced users or those with high pain tolerance.
- Tennis Balls: Featuring a hollow core and a felt cover, tennis balls offer significant give and a softer touch. They are the ideal starting point for beginners, highly sensitive areas, or working near bony structures like the shoulder blades.
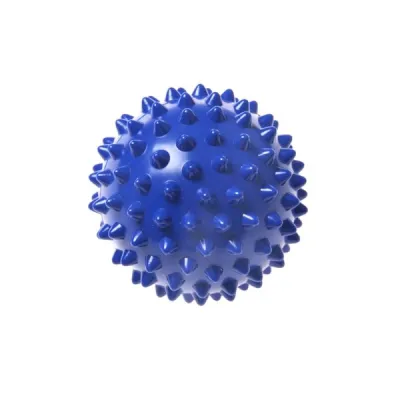
- Spiky or Textured Balls: These are covered in raised nodules that stimulate the superficial layers of fascia and skin. They are highly effective for increasing local blood circulation and are commonly used to roll out the arches of the feet or warm up muscles before training.
- Double Massage Balls (Peanut Balls): Composed of two spheres joined together, this design is specifically engineered to cradle the spine. It allows you to roll the muscles running parallel to your backbone without putting direct, dangerous pressure on the vertebrae themselves.
The size of the ball dictates how concentrated the pressure will be. Smaller options, such as those the size of a golf ball, focus the pressure onto tiny, highly specific areas like the arches of the feet or the deep muscles of the shoulder. Larger balls, like a softball-sized foam or rubber ball, distribute your body weight over a wider surface area, making them more comfortable for broader muscle groups like the quadriceps or chest.
Environmental factors also play a role in your choice. In warm, humid climates like the Philippines, sweat and moisture can quickly build up during a recovery session, making smooth balls slippery and prone to harboring bacteria. Choosing a textured rubber or washable silicone massage ball ensures you maintain a secure grip against walls or floors. Always verify the manufacturer’s care instructions, and clean your equipment regularly with mild soap and warm water, allowing it to air-dry completely in a well-ventilated, shaded area to preserve its durability.
Step-by-Step Massage Ball Techniques for Key Muscle Groups
To get the most out of your recovery session, you must use proper positioning and controlled movements. Rushing through the process or using incorrect form can cause your muscles to tense up defensively, defeating the purpose of the massage. Focus on slow, deliberate actions and mindful breathing to encourage deep tissue relaxation.
Relieving Neck, Shoulder, and Upper Back Tension
The muscles of the upper back and shoulders frequently carry tension from heavy lifting, throwing sports, or long hours spent sitting at a desk. Because the neck and upper spine are highly sensitive, using a wall-based setup is the safest and most controllable way for beginners to start.
To target the upper trapezius and rhomboids, stand with your back to a flat wall. Place the massage ball between the wall and the muscle tissue located between your shoulder blade and your spine. Gently lean your body weight back against the ball to apply pressure. Slowly bend and straighten your knees to roll the ball up and down, or shift your weight side to side to move the ball horizontally across the muscle fibers.
Once you locate a particularly tender spot, stop rolling and hold static pressure on that point. Take slow, deep diaphragmatic breaths—inhaling deeply through your nose for four seconds, and exhaling slowly through your mouth for six seconds. Deep breathing activates your parasympathetic nervous system, which helps the muscle release under the pressure of the ball.
For a deeper release, you can transition to a floor-based setup. Lie on your back with your knees bent and feet flat on the floor, placing the ball under the target shoulder muscle. Use the weight of your torso to control the depth of the pressure. Throughout these movements, observe a strict safety rule: never place the massage ball directly on your cervical spine (the neck bones) or on the bony ridge of your shoulder blade. Keep the ball strictly on the soft, fleshy muscle tissue.
Targeting the Lower Back, Hips, and Glutes
The gluteal complex and the deep hip rotators, such as the piriformis, can become incredibly tight from running, squatting, or prolonged sitting. Releasing these deep muscles requires a firmer ball and strategic body positioning to navigate around the bones of the pelvis.
To target your glutes, sit on the floor with your knees bent and hands resting on the floor behind you for support. Place the massage ball under one of your buttocks. To open up the hip joint and expose the deeper rotator muscles, cross the ankle of the targeted side over the opposite knee. Gently tilt your pelvis toward the side with the ball, shifting your body weight to find the tight areas.
Use your hands and your opposite foot to support and leverage your body weight. By pushing off the floor, you can easily reduce the pressure if the sensation becomes too intense, or lower your hips closer to the floor to deepen the release. Slowly roll in small circles, covering the outer hip and the main body of the glute muscle.
When working in this region, you must respect critical safety boundaries. Do not roll the ball onto your lumbar spine (lower back vertebrae) or your tailbone, as these areas lack the thick muscle cushioning needed to absorb concentrated pressure. Additionally, avoid placing the ball near your lower rib cage on your back, which protects your kidneys, and stay away from the hard, bony prominences of your hip joints.
Recovering the Legs, Calves, and Feet
Your lower extremities endure significant repetitive impact, making them prime candidates for regular massage ball recovery. This is especially true for runners, hikers, or anyone who spends long hours standing on hard surfaces.
For your calves, sit on the floor with your legs extended straight in front of you. Place the massage ball under the thickest part of one calf muscle. Place your hands on the floor behind your hips, and gently lift your pelvis slightly off the ground to roll your calf forward and backward over the ball. If you need more pressure, you can cross your opposite leg over the shin of the targeted leg. To target different angles of the calf, slowly rotate your leg inward and outward as you roll.
To roll out the arches of your feet, use a standing setup. Place the massage ball on the floor and step onto it with one foot, keeping your other foot firmly planted on the ground for balance. Gently roll the ball from the base of your heel to the ball of your foot, applying downward pressure. This technique is highly effective for stretching and releasing the plantar fascia, which can become stiff and painful from daily activity.
As you work through your lower limbs, pay close attention to your body’s signals. You should feel a deep, satisfying ache as tight muscle fibers release. However, if you feel a sharp, electrical sensation, numbness, or tingling traveling down your leg or into your toes, you have likely compressed a nerve, such as the sciatic nerve. Immediately shift your position to remove the ball from that specific path.
Safety Rules, Common Mistakes, and When to Stop
While using a massage ball is generally safe, it is a powerful tool that can cause tissue damage or bruising if used incorrectly. Prioritizing safety and proper technique will help you avoid injury and ensure your recovery sessions remain beneficial.
You must immediately stop your session if you experience any of the following warning signs:
- Sharp, stabbing, or pinching pain
- Numbness, tingling, or an "electric shock" sensation
- Radiating pain that travels to other parts of your body
- The sudden appearance of bruising or swelling in the targeted area
One of the most common mistakes beginners make is rolling too quickly over the muscles. Rapid rolling mimics a superficial massage, which can cause your muscles to contract defensively rather than relax. Instead, move the ball at a slow, meditative pace of about one inch per second. Another mistake is applying excessive pressure too soon. Bruising your muscle tissue does not speed up recovery; it actually creates more inflammation that your body must work to heal.
Never use a massage ball directly on any joint, including your knees, elbows, ankles, or wrists. Joints lack the muscular padding to protect the underlying ligaments and nerves from concentrated pressure. Additionally, never use the ball on the front of your neck, where major blood vessels like the carotid artery are located, or on your abdomen, which houses sensitive internal organs.
Always remember that a massage ball is a self-care recovery tool designed for mild muscle tension, not a substitute for professional medical treatment or physical therapy. If you are dealing with chronic, unresolved pain, an acute injury like a muscle tear, or if you have underlying conditions such as deep vein thrombosis, varicose veins, or peripheral neuropathy, do not use a massage ball without consulting a qualified healthcare professional or physical therapist first.
Integrating the Massage Ball into Your Post-Workout Routine
To build a sustainable recovery habit, consistency and moderation are far more effective than occasional, intense sessions. Integrating the massage ball into your existing post-workout routine helps maintain muscle elasticity and keeps you moving freely.
When targeting a specific muscle group, aim to hold static pressure on a trigger point for 20 to 60 seconds. This is typically enough time for the nervous system to signal the muscle to relax. For general rolling, spend about one to two minutes per muscle group, moving slowly and breathing deeply. Limit your total session time to 10 to 15 minutes to avoid overworking your tissues.
For optimal recovery, combine your massage ball work with other active recovery strategies. Use the ball immediately after your workout while your muscles are still warm, and follow it up with gentle, active stretching to help lengthen the newly relaxed muscle fibers. Staying well-hydrated is also crucial, especially in warm climates, as hydrated muscles are more pliable and recover much faster from localized pressure.
Keep track of how your body responds over time. Note any changes in your muscle soreness, joint mobility, and overall flexibility. If you find that a certain muscle group is consistently tight, you can gradually increase the frequency of your sessions to two or three times a week. Always listen to your body’s feedback, and adjust the pressure, duration, and frequency of your routine to match your daily physical needs.
Frequently Asked Questions (FAQ)
How long should I use a massage ball on one spot?
You should hold static pressure on a single trigger point for 20 to 60 seconds. This timeframe is generally sufficient to encourage myofascial release without causing damage to the underlying tissues. If the muscle knot does not release within a minute, move the ball to an adjacent area and return to the stubborn spot later. Avoid staying on one precise spot for longer than two minutes, as prolonged compression can lead to localized bruising, tissue irritation, or nerve inflammation.
Can I use a massage ball every day?
Yes, you can use a massage ball daily, provided you keep the sessions brief and focus on different muscle groups. Daily use is highly beneficial for low-intensity maintenance, such as rolling out the arches of your feet or gently releasing shoulder tension after a long workday. However, if you are performing deep, intense tissue release on sore muscles after heavy workouts, allow those specific areas 24 to 48 hours of recovery time before targeting them again. Always pay attention to your body’s feedback and reduce the frequency if you feel chronically tender.
Is it normal to feel sore after using a massage ball?
It is common to experience mild, residual muscle soreness for 24 to 48 hours after a deep tissue release session, similar to the feeling of mild delayed onset muscle soreness (DOMS). This sensitivity should feel like a dull ache when you touch or stretch the muscle. However, if you experience sharp, lingering pain, visible bruising, or swelling, you have likely applied too much pressure or worked on an injured area. If this occurs, rest the affected muscles, avoid using the ball on that area, and consult a healthcare professional if the pain persists.
Community discussion
Share your experience or ask a question. Comments are reviewed before publication.