
Using a muscle roller wheel is an exceptionally practical way to relieve muscle tension, improve flexibility, and accelerate recovery after intense physical activity. To use it properly, you hold the handles, apply moderate pressure, and glide the textured rollers slowly along your muscle fibers for 30 to 60 seconds per target zone. By focusing on specific trigger points, you can perform self-myofascial release (SMR) effectively at home. This guide outlines the proper techniques, safety boundaries, and routines to help you maximize the benefits of your recovery sessions.
Understanding the Benefits and Limitations of Muscle Rolling
Self-myofascial release using a muscle roller wheel works by applying targeted mechanical pressure to your muscles and the surrounding connective tissue, known as fascia. When you exercise, micro-tears and localized inflammation can cause these tissues to feel stiff, tight, or restricted. Rolling stimulates local blood circulation, delivering fresh oxygen and nutrients to the affected areas while helping to clear metabolic waste products accumulated during physical exertion.
This increased circulation temporarily reduces muscle stiffness and enhances your overall joint range of motion, making it an excellent tool for post-workout cool-downs. However, it is essential to maintain realistic expectations about what a handheld roller can do. While it is highly effective for temporary pain relief and muscle relaxation, it does not permanently alter your muscle structure or break down deep, dense scar tissue.
Products mentioned in this guide
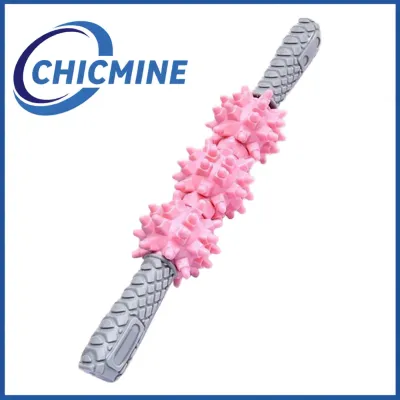
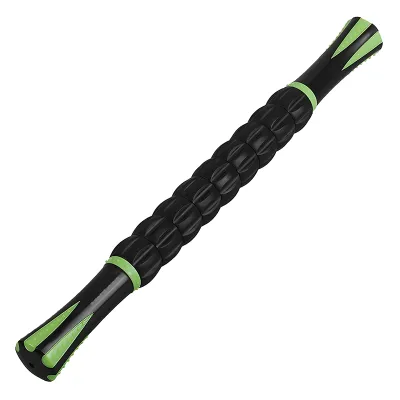
Prices are valid at publication and may change. Please refer to the product page for the latest price.
Furthermore, a muscle roller wheel is a wellness maintenance tool rather than a medical treatment. It cannot cure structural injuries such as torn ligaments, muscle strains, or tendonitis. Understanding these boundaries ensures you use the tool safely as a complement to, rather than a replacement for, professional medical advice or physical therapy.
Setting Up for a Safe and Effective Session
Before you begin rolling, finding the right environment is crucial for maintaining stability and control. It is highly recommended to use a non-slip yoga mat on a flat, level floor. In the tropical climate of the Philippines, high humidity can make tiled or wooden floors slick with sweat, which increases the risk of slipping while you are positioning your body. A dedicated mat provides the necessary grip and a clean, hygienic surface.

Your physical state also plays a significant role in how your muscles respond to SMR. It is best to roll when your muscles are slightly warm, such as immediately following a workout or after a brief five-minute dynamic warm-up consisting of light calisthenics. Rolling completely cold, stiff muscles can trigger a protective contraction, making the session uncomfortable and potentially increasing the risk of minor strains.
Finally, perform a quick safety inspection of your muscle roller wheel before each use. Ensure that the handles are firmly attached, the central rod is straight, and the individual gears or rollers spin smoothly without catching. If you are rolling directly on bare skin, wipe the roller down with a damp cloth beforehand to prevent sweat buildup, which can cause the plastic gears to pinch or slip during your routine.
Step-by-Step Rolling Techniques for Key Muscle Groups
To get the most out of your muscle roller wheel, you must master the correct rhythm and movement patterns. Always roll slowly, moving at a pace of about one inch per second along the muscle belly. Avoid rapid, aggressive back-and-forth sawing motions, which can irritate the tissue and cause your muscles to contract defensively. Remember to breathe deeply and continuously, allowing your body to relax into the pressure.
Lower Legs: Calves and Shins
Your lower legs endure significant impact, whether you are running on concrete roads, hiking local trails, or standing for long hours. To target your calves, sit on your yoga mat with your legs extended straight in front of you. Hold the muscle roller wheel firmly by both handles and place the textured gears on the lower portion of your calf muscle, just above the ankle.
Slowly glide the roller upward toward your knee, applying steady, moderate downward pressure. When you find a tender spot or a localized “knot,” pause the rolling motion for 10 to 15 seconds, letting the pressure penetrate the muscle fibers before continuing. Always stop the rolling motion just below the back of your knee to protect the delicate nerves and blood vessels located in that joint crease.
Never roll directly over your shin bone (tibia) or the Achilles tendon. These anatomical structures lack protective muscle padding, and applying hard pressure directly to the bone or a major tendon can cause severe bruising, pain, and inflammation. Keep the roller focused strictly on the fleshy, muscular outer and inner portions of the calf.
Upper Legs: Hamstrings, Quads, and IT Band
The large muscle groups of your thighs carry the brunt of lower-body workouts, squats, and daily movement. To target your hamstrings, remain in a seated position on the floor. Place the roller under the back of your thigh, starting just above the knee crease, and roll slowly upward toward the glute fold, angling the roller slightly inward or outward to address all three hamstring muscles.
For your quadriceps, you can roll while seated, or transition to a kneeling position for better leverage. Place the roller on the front of your thigh, starting just above the kneecap, and roll slowly upward toward your hip crease. If you encounter a particularly tight spot, you can gently rock the roller side-to-side to apply cross-friction to the muscle fibers.
The iliotibial (IT) band runs down the outside of your thigh from the hip to the knee. Because the IT band is a thick, fibrous band of connective tissue rather than a pliable muscle, rolling it directly can be incredibly painful and is generally not recommended. Instead, tilt your body slightly to target the vastus lateralis (the outer quadriceps muscle) and the hip muscles surrounding the IT band, applying light, cautious pressure.
Upper Body: Back and Shoulders
The upper back and shoulders frequently hold tension from poor posture, desk work, or heavy lifting. You can roll these areas while seated, or by standing and pressing the roller against a wall for finer control over the pressure. Place the roller horizontally across your upper back, near your shoulder blades.
Engage your core muscles to keep your spine stable and prevent your lower back from arching excessively. Slowly roll the wheel vertically up and down the muscles surrounding your shoulder blades, or angle the tool slightly to follow the natural curve of your upper back. This helps release tension in the trapezius and rhomboid muscles.
Under no circumstances should you roll directly over your spine, neck, or lower back (lumbar region). The vertebrae in your neck and lower back are highly vulnerable to injury when subjected to direct, concentrated pressure from a narrow roller wheel. Keep the pressure strictly on the thick muscle tissue of the upper back and shoulders.
Crucial Safety Rules and Areas to Avoid
While self-myofascial release is generally safe, failing to respect basic anatomical boundaries can lead to injury. You must completely avoid rolling over joints, such as the front and sides of your knees, elbows, and ankles. Bones, including the collarbone, spine, and hip bones, should never be subjected to direct rolling. Additionally, avoid rolling over areas with varicose veins, active bruising, skin rashes, or open wounds, as the pressure can worsen these conditions.
A common misconception is that more pain equals more gain. In reality, rolling should feel like a “good hurt” or a deep, satisfying pressure—typically a 5 to 7 on a scale of 10. If you find yourself grimacing, holding your breath, or tensing your entire body, the pressure is too intense. Excessive pressure can bruise muscle tissue, damage superficial nerves, and cause your muscles to tighten up defensively, defeating the entire purpose of the recovery session.
You must establish clear stop conditions for your rolling sessions. If you experience sharp, shooting, or radiating pain, numbness, tingling, or sudden dizziness, stop rolling immediately. These symptoms indicate nerve compression or vascular restriction. If the discomfort or numbness persists after you stop, consult a healthcare professional or physical therapist for a proper assessment.
Finally, resist the urge to rush through your routine. Rapid, aggressive rolling back and forth acts as a stressor to your nervous system. Slow, controlled movements combined with deep, rhythmic diaphragmatic breathing signal your brain that it is safe to relax, allowing the muscle fibers to truly release tension.
Building a Sustainable Recovery Routine
To reap the long-term benefits of a muscle roller wheel, consistency is far more important than occasional high-intensity sessions. For post-workout recovery, aim to use the roller for 5 to 10 minutes during your cool-down phase. This helps kickstart the recovery process by promoting circulation and reducing immediate post-exercise stiffness.
Alternatively, you can use the muscle roller wheel as part of your pre-workout warm-up. Spend just 1 to 2 minutes per muscle group using light, brisk strokes. This temporary stimulation increases local blood flow and joint range of motion, preparing your body for dynamic movement without fatiguing the muscles.
For a truly holistic recovery routine, pair your rolling sessions with other wellness habits. Follow your rolling with gentle, static stretching to help elongate the newly relaxed muscle fibers. In the hot and humid climate of the Philippines, proper hydration is paramount; drink plenty of water or electrolyte-rich coconut water after rolling to help flush out metabolic waste and keep your muscle tissues hydrated. Combine this with balanced nutrition and adequate sleep to give your body the raw materials it needs to repair and rebuild.
Frequently Asked Questions (FAQ)
How much pressure should I apply when rolling?
You should apply moderate pressure that registers around a 5 to 7 on a discomfort scale of 10. It should feel like a deep, therapeutic massage rather than sharp pain. If you cannot breathe naturally or find yourself tensing up, reduce the pressure immediately.
Should I use the muscle roller wheel before or after a workout?
You can use it for both, but with different techniques. Before a workout, use light, rapid strokes for 1 to 2 minutes per muscle group to stimulate blood flow and improve mobility. After a workout, use slow, deep, and controlled pressure to relieve tension and support recovery.
What is the difference between a muscle roller wheel and a foam roller?
A muscle roller wheel is a handheld tool that allows you to manually apply and adjust pressure using your arms, making it highly portable and excellent for targeting specific, smaller muscle groups. A traditional foam roller requires you to use your body weight on the floor, providing broader compression over larger muscle areas.
Community discussion
Share your experience or ask a question. Comments are reviewed before publication.