
Checking your scuba regulator with a regulator tester is one of the most effective ways to verify your life-support equipment is functioning correctly before you step onto a dive boat. In tropical diving destinations like the Philippines, where high humidity, warm saltwater, and fine sand are constant factors, dive gear faces demanding conditions. Regular diagnostic checks help you identify subtle performance shifts before they turn into equipment failures underwater. However, because this process involves high-pressure compressed gas, you must follow a disciplined, safety-first approach to protect both yourself and your equipment.
While a regulator tester is an invaluable diagnostic tool, it is not a substitute for professional training or regular authorized servicing. Understanding the limits of what you can safely test at home—and when you must hand your gear over to a certified technician—is the foundation of responsible dive gear maintenance.
Understanding Your Regulator Tester and Safety Boundaries
Before beginning, you must distinguish between the two primary types of testing equipment available. Portable intermediate pressure (IP) gauges are compact, user-friendly tools designed for quick field checks. These gauges typically plug into a low-pressure inflator hose and allow divers to monitor the pressure delivered from the first stage to the second stage. In contrast, comprehensive bench testers are complex diagnostic stations featuring multiple gauges, flow meters, and inhalation resistance indicators. These advanced systems are intended strictly for certified repair technicians who have undergone specialized training.
Products mentioned in this guide
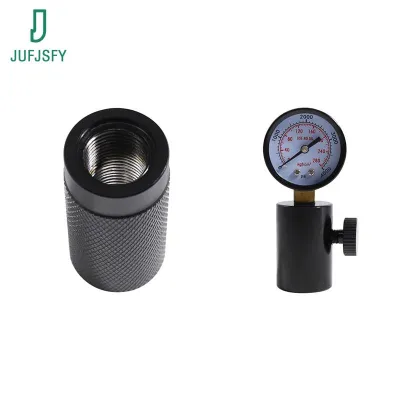
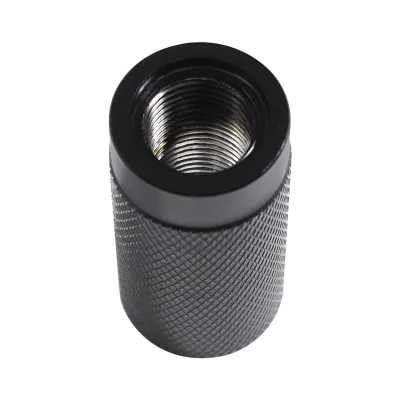
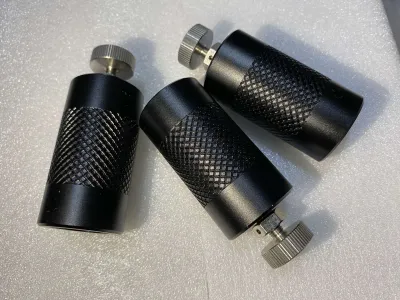
Prices are valid at publication and may change. Please refer to the product page for the latest price.
Handling high-pressure scuba cylinders and regulators carries inherent risks. Compressed gas stores immense potential energy, and improper handling can lead to component failure, rapid gas expansion, or physical injury. Utilizing a regulator tester requires a clear understanding of pneumatic systems and a commitment to safety protocols. No testing device can replace formal dive training, equipment-specific knowledge, and sound personal judgment.
Your primary safety boundary is documentation. If you do not have access to the tester’s official user manual or your specific regulator’s service manual, do not proceed with pressurized testing. Different regulator designs operate within distinct pressure parameters, and guessing these values can lead to incorrect conclusions or damage to your gear.
Pre-Test Preparation and Equipment Inspection
Every test must begin with a thorough visual inspection of both your scuba regulator and the testing equipment. In warm, humid climates, rubber components can degrade rapidly, and salt crystals can accumulate in hard-to-see areas. Carefully examine all O-rings, hoses, and fittings on your regulator for visible cracks, dry rot, stiffness, or debris. Pay close attention to the hose protectors, sliding them back to inspect the crimped metal fittings underneath for signs of corrosion or bubbling.

Next, inspect the regulator tester itself. Verify that the gauge glass is completely intact, free of cracks, and securely seated in the casing. The outer casing should show no signs of impact damage or structural weakness. Most importantly, ensure that the gauge needle rests precisely at the zero mark before you connect it to any pressurized source. A needle that does not return to zero indicates a calibration error, meaning any readings you take will be inaccurate and unreliable.
Finally, prepare your testing environment. Choose a clean, dry, well-ventilated workspace that is completely free from direct sunlight, moisture, and potential contaminants. Ensure there are no oils, grease, or hydrocarbons near your testing area, as these substances can react violently when exposed to high-pressure oxygen or compressed air. Secure your scuba cylinder on a flat, stable surface so it cannot tip over during the procedure.
Step-by-Step Guide to Connecting and Pressurizing
To connect and pressurize your system safely, you must follow a strict logical sequence. If you are using a portable intermediate pressure gauge, slide back the quick-disconnect collar on your low-pressure inflator hose and press it firmly onto the tester’s male fitting. Ensure the collar snaps forward completely, locking the gauge in place. For bench-mounted testers, mount the regulator’s first stage to the tester’s high-pressure supply port using the appropriate yoke or DIN adapter, ensuring the connection is hand-tight and properly aligned to prevent cross-threading.
Once the physical connections are secure, you must introduce pressure to the system with extreme care. Locate the cylinder valve and open it incredibly slowly. Turning the valve too quickly causes a rapid spike in pressure known as adiabatic compression, which generates intense localized heat and can damage the internal seats of your regulator or shock the tester’s delicate gauge mechanism. Slowly rotate the valve handwheel until you hear the system pressurize, then open it fully before backing it off a quarter-turn.
Immediately after pressurizing, perform a mandatory leak check at all connection points. Apply a small amount of approved, non-oil-based leak detection solution or clean soapy water to the fittings and watch closely for growing bubbles. If you detect a leak, do not attempt to tighten the connections while the system is under pressure. Close the cylinder valve, bleed the system completely, and only then adjust the fittings before attempting to pressurize the system again.
Reading the Gauges and Verifying Performance
With the system fully pressurized and stable, you can now read the gauges to evaluate your regulator’s performance. Focus your attention on the intermediate pressure (IP) gauge. This gauge measures the pressure of the air delivered from the first stage to the second stage, which is the critical metric for ensuring smooth breathing underwater. Note the exact position of the needle once it settles.
Compare this stabilized reading directly with the acceptable range specified in your regulator’s official user manual. Do not rely on generic ranges or advice from unverified sources, as different manufacturers design their systems to operate at highly specific pressures. A reading that falls even slightly outside the manufacturer’s specified range indicates that the regulator’s first-stage seat or spring requires professional attention.
To verify the dynamic performance of the regulator, perform a basic flow test. While watching the gauge, depress the second-stage purge button briefly or take a controlled breath if you are using a bench tester. The gauge needle will drop momentarily as air flows through the system. Watch the needle’s recovery behavior carefully. In a healthy, well-tuned regulator, the needle will snap back to its original stabilized pressure almost instantly. A sluggish, slow climb back to the target pressure indicates a restriction in gas flow, a clogged filter, or a failing internal component.
Post-Test Depressurization and Storage
Safely shutting down and disconnecting your equipment is just as critical as the setup process. Begin by closing the cylinder valve completely to stop the flow of high-pressure air. Even with the valve closed, a significant amount of high-pressure gas remains trapped inside the regulator hoses and the tester itself. Attempting to disconnect components while they are pressurized can damage threads, destroy O-rings, or cause hoses to whip violently.
To safely release this trapped gas, depress the second-stage purge button or open the bleed valve on your tester. Watch the gauge needle slowly descend all the way back to the zero mark. Only when the needle rests completely at zero and you can no longer hear any air escaping should you attempt to disconnect the tester. Gently slide back the quick-disconnect collar or unscrew the adapters, taking care not to drop or jar the testing equipment.
Proper storage is essential to maintain the accuracy of your regulator tester over time. Store the tester in a padded, shock-resistant case to protect the delicate internal gears of the gauge from physical impacts. In humid environments, store the equipment with a food-grade silica gel packet in a sealed container to prevent moisture buildup and corrosion. Keep the tester away from extreme temperatures, direct sunlight, and chemical vapors.
When to Stop and Seek Professional Service
Using a regulator tester is a diagnostic exercise designed to help you identify when your gear requires professional care. There are several clear, observable red flags that indicate you must stop testing and seek authorized service immediately. The most common warning sign is a “creeping” intermediate pressure, where the gauge needle slowly but continuously rises after the initial pressurization. This indicates that the high-pressure seat in the first stage is failing to seal completely, which can lead to a dangerous second-stage free-flow underwater.
Other critical red flags include a sluggish needle recovery during the flow test, persistent leaks at the hose crimps or swivel joints, or an unusually high breathing resistance. If you notice any of these anomalies, do not attempt to adjust the regulator yourself. Adjusting internal valves, springs, or seats without certified technician training and specialized calibration tools voids your manufacturer warranty and creates severe life-support risks.
When any test result falls outside the manufacturer’s specified limits, take your regulator to an authorized service center. Professional technicians have the training, specialized tools, and genuine replacement parts required to safely disassemble, clean, and rebuild your regulator. Regular professional servicing ensures your gear remains reliable, keeping you safe on every dive.
Frequently Asked Questions (FAQ)
Can I use a regulator tester without professional certification?
Yes, you can use a basic portable intermediate pressure gauge without professional certification to perform simple, non-invasive diagnostic checks. This is a highly recommended practice for divers who want to monitor their gear’s health before a dive trip. However, you must never attempt to disassemble, tune, or repair the internal components of your regulator without formal manufacturer certification, as doing so can compromise your life-support system.
How often should I test my scuba regulator with a tester?
It is best practice to perform a basic visual and breathing check before every dive. Using a regulator tester to verify intermediate pressure is highly beneficial before major dive travel, after long periods of storage, or if you suspect a performance issue. This diagnostic check should complement, rather than replace, the professional annual service interval recommended by your regulator’s manufacturer.
Community discussion
Share your experience or ask a question. Comments are reviewed before publication.