
Using a sensory ball for muscle recovery involves applying targeted, controlled pressure to tight muscle fibers and connective tissues to stimulate blood flow and release tension. By placing the textured ball between your body and a hard surface, you can perform self-myofascial release to alleviate post-workout soreness and improve mobility. This simple tool uses its unique raised nodules to provide localized sensory feedback, helping you pinpoint areas of tightness and manage physical stress effectively.
Preparing for Your Sensory Ball Session
Before starting, inspect your sensory ball for any surface damage, splits, or embedded debris like sand that could scratch your skin. Because these textured balls easily pick up dust and hair from the floor, a quick wipe with a damp cloth is always recommended.
Next, choose your rolling surface carefully. In tropical climates, high humidity and sweat can make tiled or wooden floors slippery. To prevent the ball from shooting out from under you, always perform your exercises on a stable, non-slip surface like a high-grip yoga mat or a firm carpet. Avoid overly soft surfaces like mattresses, which absorb too much pressure and reduce the tool’s effectiveness.
Products mentioned in this guide
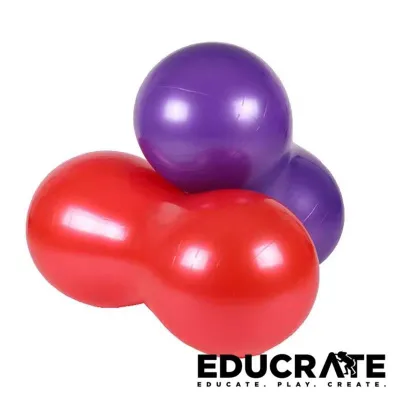
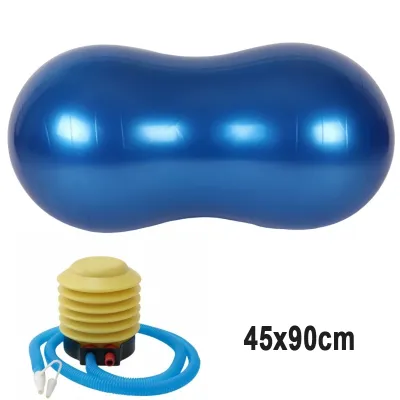
Prices are valid at publication and may change. Please refer to the product page for the latest price.
Finally, prepare your body with a brief dynamic warm-up. Applying deep pressure to cold, stiff muscles can cause unnecessary discomfort. Spend five minutes doing light movements like gentle bodyweight squats or arm circles to increase local blood flow and prepare your nervous system for the session.
Locating Trigger Points and Target Muscles
Identifying the exact areas that need attention requires a mindful, systematic approach. Place the sensory ball under a general target area, such as your upper back or glutes, and use slow, controlled rolling motions to scan the muscle. Move at a pace of about one inch per second, paying close attention to how your tissues feel. You are searching for trigger points, which are localized, highly sensitive spots within a tight band of muscle.

It is crucial to distinguish between productive discomfort and harmful pain. A beneficial release often feels like a dull, deep ache—sometimes called “good pain”—which gradually dissipates as you hold the position and breathe. In contrast, “bad pain” is sharp, shooting, hot, or accompanied by numbness and tingling. If you experience any of these sensations, it indicates that you are pressing on a nerve or blood vessel, and you must shift the ball immediately.
To ensure safety, always avoid placing direct pressure on bony areas, joints, the spine, or the front of the neck. The sensory ball is designed strictly for soft muscle tissue and fascia. Pressing hard nodules directly against bones like the kneecap or spinal vertebrae can cause bruising or joint inflammation. Keep the ball centered on the fleshy belly of the muscle to distribute the pressure safely.
Step-by-Step Techniques for Key Muscle Groups
Using a sensory ball effectively requires smooth transitions and precise body positioning to keep the ball from slipping. Instead of rushing from one muscle group to another, take a moment to reset your posture and catch your breath between areas. Adjusting your body weight gradually ensures you can manage the intensity without tensing up your entire body.
Upper Back and Shoulders
The thoracic spine and the muscles surrounding the shoulder blades are common areas for holding tension, especially after heavy lifting or long hours at a desk. To target this region, you can use either a wall or the floor. Using a wall is excellent for beginners because it allows you to easily control the amount of pressure you apply. Stand with your back to the wall, place the sensory ball between your shoulder blade and your spine, and lean back gently.
Once the ball is in position, use your legs to slowly bend and straighten your knees, moving your body up and down. You can also shift side to side to let the textured nodules massage the rhomboids and middle trapezius muscles. To increase the intensity, lie down on your back on your yoga mat and place the ball in the same spot, using your body weight to sink into the tissue. Take deep, slow diaphragmatic breaths, letting your chest rise and fall, which helps your nervous system relax and allows the ball to penetrate deeper.
If you find a particularly tender spot, stop moving and hold the position for 20 to 30 seconds while focusing on your breathing. To add a dynamic stretch, slowly sweep your arm across your chest or raise it overhead while keeping pressure on the ball. This pins the muscle in place while stretching the surrounding fascia, enhancing the release. Always ensure the ball remains on the muscle tissue and does not roll directly onto the spine or the shoulder blade bone itself.
Glutes and Hips
The gluteal muscles and outer hips carry a significant amount of load during running, squatting, and daily movement, making them prime candidates for sensory ball therapy. To begin, sit on your exercise mat with your knees bent and your feet flat on the floor. Place the sensory ball under the fleshy part of one buttock, leaning slightly back onto your hands for support and balance.
Slowly roll your hips in small circles to map out the area and locate any tight spots. Because the gluteus maximus is a thick muscle, you may need to adjust your angle to reach deeper layers like the piriformis. To expose these deeper muscle fibers, cross the ankle of the targeted side over the opposite knee, forming a “figure four” shape. This opens up the hip joint and puts the gluteal muscles on a slight stretch, allowing the textured ball to target deeper tension points.
As you find areas of tightness, pause and let your body weight sink into the ball. Use your hands and your opposite foot to regulate how much weight you press down. If the pressure is too intense, shift more weight into your hands and supporting foot. Keep your breathing steady and avoid tensing your jaw or shoulders, as physical tension in other parts of the body can prevent the target muscles from releasing.
Legs and Calves
Your calves and hamstrings endure constant repetitive stress, which can lead to tightness and reduced ankle mobility. To target the calves, sit on the floor with your legs extended straight in front of you. Place the sensory ball under the thickest part of your calf muscle. Place your hands on the floor behind your hips to support your weight.
Slowly slide your hips forward and backward to roll the ball along the length of the calf muscle, from just below the knee down to the upper Achilles tendon. To increase the pressure, cross your opposite leg over the shin of the leg being rolled. This adds extra weight and helps the textured nodules penetrate deeper into the gastrocnemius and soleus muscles. If this feels too intense, simply keep the opposite foot flat on the floor to support your weight.
To actively engage the muscle and release the surrounding fascia, perform active ankle movements while resting your calf on the ball. Flex your foot by pulling your toes toward your shin, then point your toes away from you. You can also rotate your ankle in slow circles. This movement forces the muscle fibers to slide underneath the pressurized nodules of the ball, providing a highly effective dynamic release. Repeat this process on your hamstrings by moving the ball to the back of your thighs.
Safety Guidelines and When to Stop
While self-myofascial release is highly beneficial, it must be practiced with caution to avoid injury. The most important rule is to listen to your body and stop immediately if you experience any abnormal sensations. Numbness, tingling, a “pins and needles” feeling, or sharp, radiating pain are clear signs that you are compressing a nerve or restricting blood flow. If you feel these sensations, immediately release the pressure and reposition the ball.
Unlike static stretching, which often follows strict timing, the duration of sensory ball pressure should be guided by your comfort and tissue response. Avoid keeping intense, static pressure on a single spot for more than 60 to 90 seconds. Overworking a single area can lead to localized bruising, tissue inflammation, and increased muscle guarding, which defeats the purpose of recovery. If a knot does not release within a minute, move on to surrounding areas and return to it later.
Additionally, there are times when you should avoid using a sensory ball altogether. Do not use the ball on acute injuries, such as recent muscle strains, ligament sprains, open wounds, or areas with active inflammation and swelling. If you have underlying medical conditions such as deep vein thrombosis, severe osteoporosis, or circulatory disorders, consult a physical therapist or doctor before starting. Equipment and self-treatment cannot replace professional medical diagnosis or structured rehabilitation programs.
Integrating the Sensory Ball into Your Recovery Routine
To maximize the benefits of your sensory ball sessions, integrate them logically into your broader recovery routine. After targeting specific tight spots with the ball, follow up with gentle static stretching. The sensory ball helps release localized knots, while static stretching helps lengthen the newly relaxed muscle fibers, restoring full range of motion. For example, after rolling your calves, perform a gentle wall calf stretch to lock in the mobility gains.
Hydration is another critical component of post-rolling recovery. Applying pressure to muscle tissue temporarily squeezes out fluids, much like squeezing a sponge. Drinking clean water after your session helps rehydrate the fascia and muscle fibers, supporting cellular recovery and assisting in the clearance of metabolic waste products. In hot and humid environments, staying hydrated is even more vital to prevent muscle cramping and support overall physical performance.
Finally, schedule your sensory ball sessions based on your training volume and muscle soreness. For intense training weeks, you might perform short, 10-minute sessions daily to manage accumulating tension. During lighter weeks, two to three longer, more focused sessions may be sufficient. Always pay attention to how your body recovers over the following 24 hours; if you feel excessively sore or bruised the next day, reduce the pressure or frequency of your sessions to allow your tissues adequate time to adapt and rebuild.
Frequently Asked Questions (FAQ)
Can I use a sensory ball every day?
Yes, you can use a sensory ball daily, provided you adjust the intensity and focus of your sessions. Light rolling and gentle sensory stimulation are excellent for daily maintenance, helping to promote blood flow and relieve minor tension from sitting or light exercise. However, deep, intense trigger point therapy should not be performed on the same muscle group every day. Deep tissue work creates micro-stimuli in the muscles that require 24 to 48 hours of rest to heal and adapt, so it is best to rotate the muscle groups you target or take rest days between intense sessions.
What is the difference between a sensory ball and a standard massage ball?
The primary difference lies in the surface texture and how it interacts with your nervous system and fascia. A sensory ball features raised nodules, spikes, or ridges that provide varied sensory input, which can help desensitize painful areas and improve grip against both your skin and the floor. This texture is particularly useful for gripping and pulling the superficial fascial layers. A standard massage ball is typically smooth, offering uniform, direct pressure that penetrates deeply into a single point. Choosing between them depends on your personal sensitivity and whether you prefer broad sensory stimulation or highly concentrated pressure.
Should I use the sensory ball before or after a workout?
You can use a sensory ball both before and after exercise, but your technique should match your goal. Before a workout, use the ball for quick, light, and dynamic rolling to stimulate blood circulation, wake up the nervous system, and temporarily improve joint range of motion without relaxing the muscles too much. Keep this pre-workout session to under five minutes per area. After a workout or on rest days, use the ball for slower, deeper, and more targeted trigger point pressure to help release deep-seated tension, calm the nervous system, and support long-term muscle recovery.
Community discussion
Share your experience or ask a question. Comments are reviewed before publication.